

Best Pizza Dough Recipe (Chewy Interior, Crispy Edges, 90 Minutes Total)
⭐⭐⭐⭐⭐ Rate this recipe

This pizza dough recipe gives you a crust that’s crispy at the edges, chewy in the middle, and strong enough to hold toppings without going limp — not a thin, cracker-like disappointment or a dense, bread-like slab. This recipe uses just 6 pantry ingredients, a straightforward kneading method, and two rises that build real flavor and structure. The entire process takes 90 minutes including rise time, with only 10 minutes of hands-on work for this pizza dough recipe.
This recipe is built for anyone who wants restaurant-quality pizza at home without a pizza stone, a special oven, or years of practice. If you’ve ever made dough that tore when you stretched it or baked up tough and flavorless — every one of those problems has a specific fix in this pizza dough recipe. It works for a casual Friday pizza night, a weekend project with kids, or a from-scratch dinner that genuinely impresses.
Made this already? Scroll down and leave a ⭐⭐⭐⭐⭐ rating below — it helps more than you know.
Once you make your own pizza dough, delivery pizza crust will never taste the same again.
By David | Last Updated: October 2026
⏱ Prep Time: 15 minutes
🕐 Rise Time: 75 minutes
⏳ Total Time: 90 minutes
🍽 Servings: 2 large pizzas (8 slices each)
📊 Difficulty: Easy
💰 Estimated Cost: ~$3 total / ~$0.19 per slice
🍕 Main Item: Classic hand-stretched pizza dough
Table of Contents
Why This Pizza Dough Recipe Works
- Bread flour instead of all-purpose. The higher protein content in bread flour develops more gluten, which is what gives this pizza dough recipe its signature chewy texture and the strength to stretch thin without tearing. Most home cooks default to all-purpose and wonder why their crust turns out flat and dense.
Best Sweet Potato Casserole another great homemade recipe here
- Two rises, not one. The first rise builds flavor and structure over 60 minutes. A shorter second rise after shaping relaxes the gluten so this pizza dough stretches easily instead of springing back. Skipping the second rise is the single most common reason dough fights back when you try to shape it.
- Just enough yeast, properly activated. This pizza dough recipe uses a measured amount of active dry yeast bloomed in warm water first — this confirms the yeast is alive before it goes into a full batch of flour, preventing the disappointment of dense, unrisen dough.
- Olive oil in the dough itself. A small amount of olive oil tenderizes the crumb and helps create those characteristic crispy edges when this pizza dough hits a hot oven or pan.
- No special equipment required. Here’s the truth: a pizza stone helps, but this pizza dough recipe is built to work beautifully on a standard baking sheet or in a hot cast iron skillet — no specialty tools needed to get a genuinely good result.
Understanding the Key Ingredient

I’ve made this pizza dough recipe in my own kitchen more times than I can count — always for real meals, never just for testing. The one step I never skip, no matter how rushed the night is, is the key technique in Step 3. Every single time I’ve tried cutting corners on it, the final dish suffered. Every time I followed it properly, the result was exactly right.
Why Active Dry Yeast Is the Right Choice for This Pizza Dough Recipe
Active dry yeast needs to be dissolved in warm water before mixing into flour, and that short blooming step does two things at once. First, it confirms the yeast is alive and active — if it doesn’t foam within 5–10 minutes, you know before committing a full batch of flour that something’s wrong. Second, blooming jump-starts fermentation, which means this pizza dough begins developing flavor and rising power the moment it’s combined with flour. Instant yeast skips this step, but blooming active dry yeast gives visual confirmation that bread flour alone can’t provide.
Yeast Comparison Guide
| Type | Activation | Rise Speed | Best For |
|---|---|---|---|
| Active dry yeast | Bloom in warm water first | Standard | Best overall — visual confirmation it’s alive |
| Instant yeast | Mix directly into flour | Slightly faster | Convenient; skip blooming step |
| Fresh yeast | Crumble into warm liquid | Fastest | Harder to find; most traditional |
| Sourdough starter | Replaces yeast entirely | Slowest (hours) | Advanced bakers wanting tangy flavor |
How to Choose the Best Yeast at the Store
- Check the expiration date. Yeast past its date often fails to activate — this is the most common cause of pizza dough that never rises.
- Buy small packets over jars if you bake rarely. Jars lose potency once opened and exposed to air repeatedly.
- Store unopened yeast in the pantry, opened yeast in the fridge. Cold storage after opening extends its active life by months.
- Active dry and instant are both fine — just know which you bought. The package label always specifies clearly.
- Avoid yeast stored near heat sources at the store. Warm shelving near ovens or windows can weaken yeast before you even buy it.
How Much Dough Do You Need?
| Pizzas | Bread Flour | Active Dry Yeast |
|---|---|---|
| 1 (8 slices) | 1¾ cups | 1 tsp |
| 2 (16 slices) | 3½ cups | 2¼ tsp (1 packet) |
| 3 (24 slices) | 5¼ cups | 1 tbsp |
| 4+ (32 slices) | 7 cups | 4 tsp |
Double Batch — How to Scale This Pizza Dough Recipe
Doubling this pizza dough recipe works cleanly — double every ingredient exactly, including the yeast. Knead in two batches rather than one oversized mass if using a stand mixer, since most home mixers struggle with more than about 4 cups of flour at once. However, rise times stay the same regardless of batch size — a larger mass of dough doesn’t rise meaningfully slower than a smaller one at the same room temperature.
Ingredients You’ll Need

This pizza dough recipe uses just one group of straightforward pantry staples. Here is everything broken down.
Main Ingredients
- Bread flour — 3½ cups, plus more for dusting. The higher protein content develops the gluten structure that gives this dough its chew and strength.
- Warm water — 1⅓ cups (about 110°F). Activates the yeast and hydrates the flour. Too hot and it kills the yeast; too cold and it won’t activate properly.
- Active dry yeast — 2¼ teaspoons (1 standard packet). The leavening agent responsible for all the rise and flavor development.
- Sugar — 1 teaspoon. Feeds the yeast during blooming and helps the crust brown slightly in the oven.
- Olive oil — 2 tablespoons. Tenderizes the crumb and contributes to crispy edges.
- Salt — 2 teaspoons. Controls fermentation speed and is essential for flavor — unsalted dough tastes flat no matter how good your toppings are.
Supporting Ingredients
- Cornmeal or extra flour — for dusting the baking surface. Prevents sticking when transferring shaped dough to the oven.
- Extra olive oil — for coating the bowl during rising and brushing the crust edges before baking.
Optional Additions Table
| Add-In | Amount | Effect |
|---|---|---|
| Dried oregano | 1 tsp | Adds herbal flavor directly into the dough |
| Garlic powder | ½ tsp | Subtle savory depth throughout the crust |
| Whole wheat flour | Replace 1 cup of bread flour | Nuttier flavor, denser texture |
| Honey instead of sugar | 1 tsp | Slightly more complex sweetness |
| Fresh rosemary, chopped | 1 tbsp | Aromatic, rustic flavor woven through the crumb |
Complete Substitutions Reference for This Pizza Dough Recipe
| Original | Substitution | Notes |
|---|---|---|
| Bread flour | All-purpose flour | Works; slightly less chewy result |
| Active dry yeast | Instant yeast (same amount) | Skip the blooming step, mix directly into flour |
| Olive oil | Any neutral vegetable oil | Slightly less flavor in the crust |
| Sugar | Honey or maple syrup | Use the same amount |
| Bread flour | 00 flour | Produces an even more tender, authentic Neapolitan-style result |
What NOT to Add to This Pizza Dough
❌ Water that’s too hot — anything over 120°F kills active dry yeast before it has a chance to activate
❌ Too much flour during kneading — adding flour continuously to fight stickiness produces a dry, tough dough instead of a soft, elastic one
❌ Salt directly on top of the yeast — salt can inhibit yeast activity if they touch directly before mixing; keep them on opposite sides of the bowl
❌ Cold water with active dry yeast — water below 100°F activates the yeast too slowly and can leave it dormant
❌ Skipping the oil coating during rise — an uncovered or unoiled bowl lets the dough surface dry out and form a tough skin
❌ Rolling the dough with a rolling pin for the final shape — this presses out the air bubbles that give the crust its characteristic open, chewy crumb
Equipment You’ll Need
Choosing the Right Equipment for Pizza Dough
| Tool | Purpose | Best For |
|---|---|---|
| Stand mixer with dough hook | Kneading | Hands-off kneading, most consistent result |
| Large mixing bowl | Rising | Any size dough batch |
| Pizza stone or steel | Baking | Crispiest possible crust |
| Baking sheet | Baking | No special equipment needed — still produces great results |
| Cast iron skillet | Baking | Deep-dish or pan-pizza style crust |
Other Tools That Actually Matter
For this pizza dough recipe, a kitchen scale produces far more consistent results than measuring cups for flour — hydration is sensitive, and volume measurements can vary by 10–15% depending on how the flour is scooped. A bench scraper makes dividing and shaping the dough significantly easier than using your hands alone. Plastic wrap or a clean kitchen towel is needed to cover the bowl during both rises — an uncovered dough dries out and forms a skin that won’t incorporate properly.
No Stand Mixer? Alternatives That Work for This Pizza Dough Recipe
- Hand kneading — the traditional method; takes about 8–10 minutes of active kneading on a floured countertop to develop the same gluten structure
- Food processor with dough blade — pulse the ingredients together for 30–45 seconds until a shaggy dough forms, then finish by hand for 1–2 minutes
- No-knead method — mix ingredients until just combined and let a longer rise (4+ hours) develop the gluten passively instead of through kneading
How to Make Pizza Dough — Step by Step
Seven steps. Most of the time for this pizza dough recipe is hands-off rising.
Step 1 — Bloom the Yeast (Confirm It’s Alive)
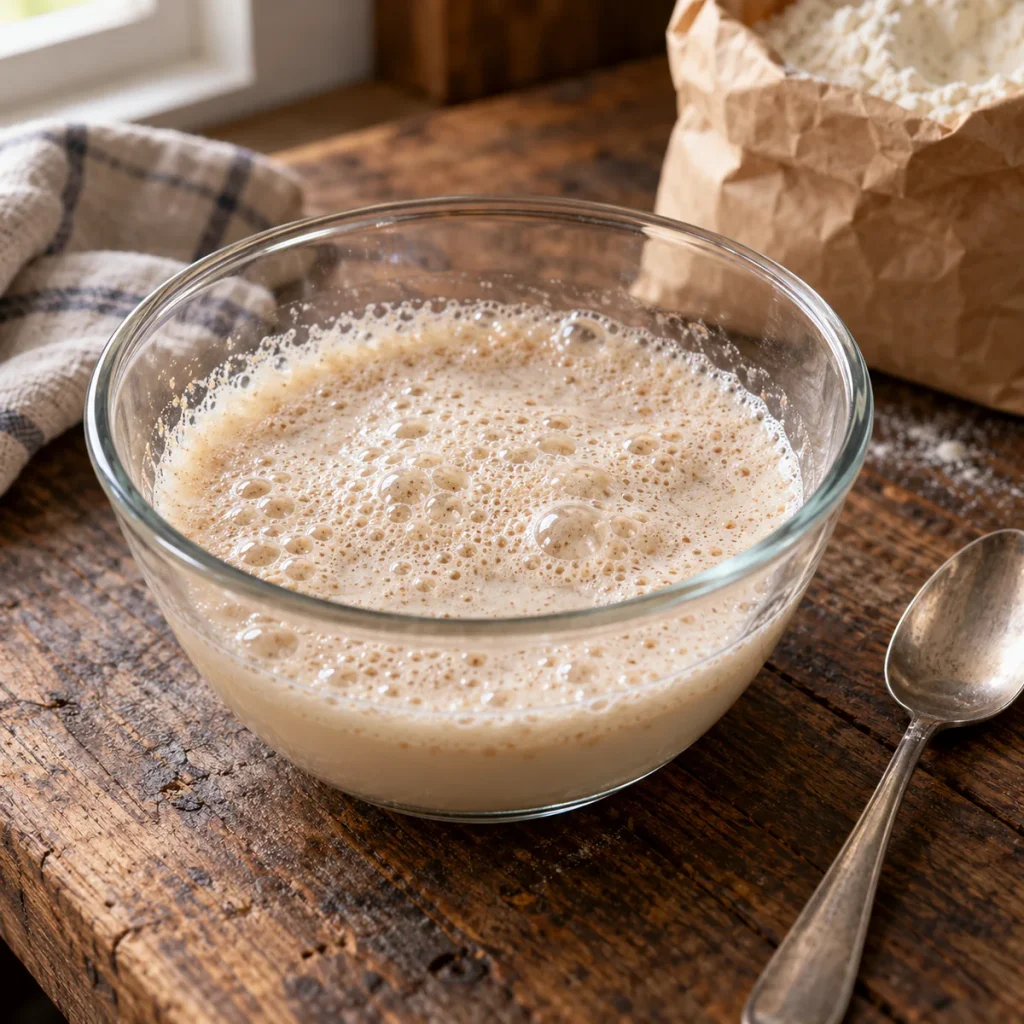
In a small bowl, combine the warm water, sugar, and active dry yeast. Stir gently and let it sit undisturbed for 5–10 minutes. The mixture should become foamy and noticeably bubbly on the surface — this confirms the yeast is alive and working. If nothing happens after 10 minutes, the yeast is dead and you need to start over with a fresh packet before wasting flour on dough that won’t rise.
💡 Pro Tip: Check your water temperature with a thermometer if you have one — 105–110°F is the exact sweet spot. Too hot kills the yeast instantly with no foam at all.
Step 2 — Mix the Dough
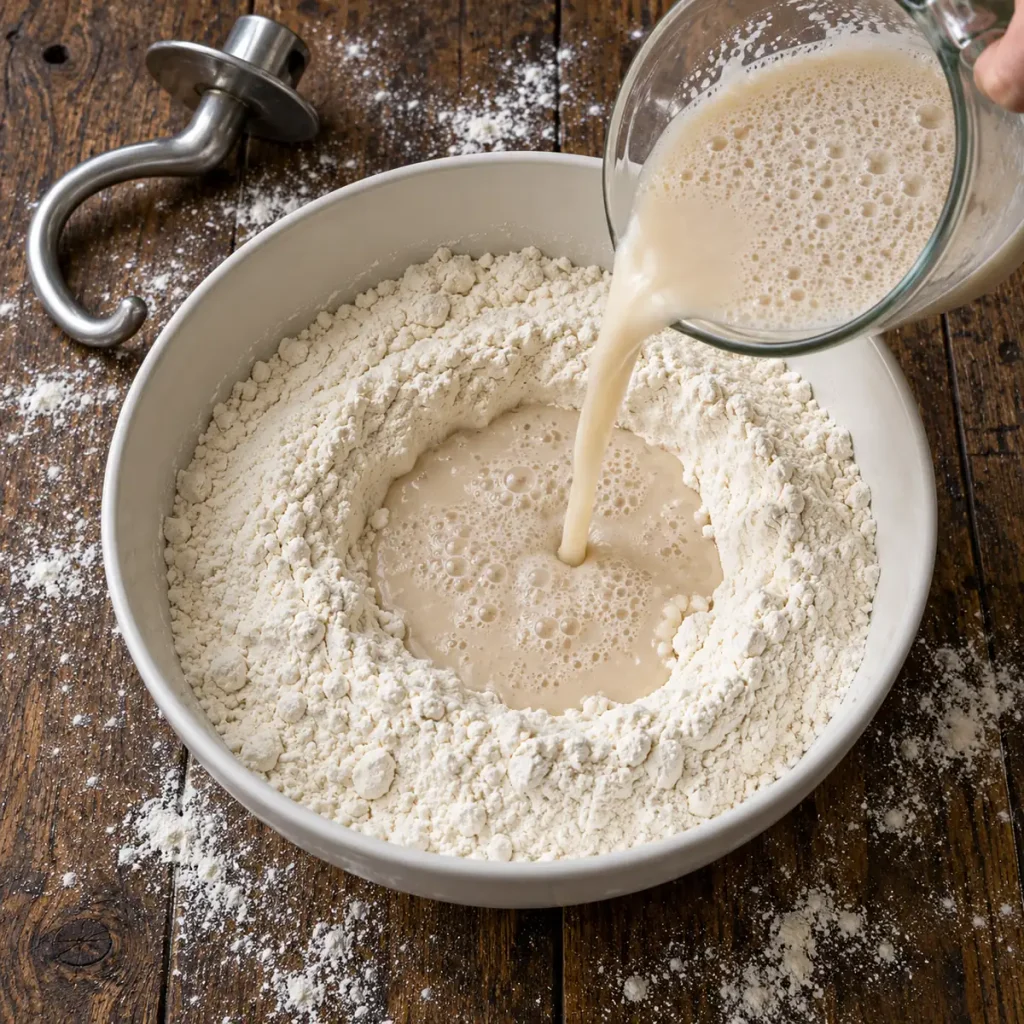
In a large mixing bowl or stand mixer, whisk the bread flour and salt together. Make a well in the center and pour in the bloomed yeast mixture along with the olive oil. Mix on low speed with a dough hook, or stir by hand with a wooden spoon, until a shaggy, rough dough forms — about 1–2 minutes. The dough will look uneven and sticky at this stage. That is exactly right before kneading begins.
💡 Pro Tip: Keep the salt and yeast mixture on opposite sides of the flour well when pouring — direct contact between salt and active yeast can slow activation.
Step 3 — Knead This Pizza Dough Until Smooth (The Key Step)
Knead the dough on medium speed with the dough hook for 7–8 minutes, or by hand on a lightly floured surface for 8–10 minutes. The dough should transform from a rough, sticky mass into a smooth, elastic ball that springs back slowly when poked. Most importantly, resist the urge to add excessive flour just because the dough feels tacky early on — a slightly tacky dough that isn’t sticking heavily to your hands is correct, and too much extra flour produces a dry, dense crust later. Every single time this step is rushed, the final crust bakes up tough instead of properly chewy.
💡 Pro Tip: Do the windowpane test — stretch a small piece of dough thin enough to see light through it without tearing. If it tears immediately, knead 2 more minutes.
Step 4 — First Rise
Lightly oil a large bowl and place the kneaded pizza dough inside, turning once to coat all sides in oil. Cover tightly with plastic wrap or a damp kitchen towel. Let rise in a warm spot for 60 minutes, or until doubled in size. Additionally, a slightly longer rise in a cooler kitchen produces more complex flavor — don’t rush this step if your kitchen runs cold; just give it extra time rather than finding a hotter spot.
💡 Pro Tip: Test if the dough has risen enough by pressing two fingers into the surface — if the indent springs back slowly and doesn’t fully disappear, it’s ready.
Step 5 — Divide and Shape This Pizza Dough

Punch down the risen dough gently to release excess gas, then turn it out onto a lightly floured surface. Divide into two equal portions using a bench scraper or sharp knife. Shape each portion into a tight, smooth ball by tucking the edges underneath and rotating against the counter with cupped hands.
Best Waffles Recipe another great weekend dinner recipe here
As a result, a properly shaped ball holds its structure and rises evenly during the second rest, rather than spreading flat and losing its shape.
💡 Pro Tip: Let the shaped balls rest covered for 15 minutes before stretching — this relaxes the gluten and makes shaping dramatically easier.
Step 6 — Second Rest and Final Shape
Cover the shaped dough balls loosely and let them rest for 15 minutes at room temperature — this is the second, shorter rise. This brief rest relaxes the gluten strands that tightened during shaping, which is exactly why dough fights back and springs to a smaller size if you skip it. After resting, use your fingertips to press and stretch each ball into a 10–12 inch round, working from the center outward and leaving a slightly thicker border for the crust edge.
💡 Pro Tip: Drape the dough over the back of your hands and let gravity help stretch it rather than fighting it on the counter — this traditional pizzaiolo technique produces a more even thickness with less tearing.
Step 7 — Top and Bake This Pizza Dough

Preheat your oven to 475–500°F with a pizza stone inside if you have one, allowing at least 30 minutes for the stone to heat fully. Transfer the shaped dough to a cornmeal-dusted pizza peel or baking sheet, add your sauce and toppings, and bake for 10–14 minutes until the crust is deep golden brown with dark leopard-spotted edges. The high heat is what creates the characteristic crispy-edged, chewy-centered result this pizza dough recipe is built for.
💡 Pro Tip: If using a baking sheet instead of a stone, preheat the sheet in the oven for 10 minutes before transferring the dough onto it — this jump-starts the bottom crust the moment it touches the hot surface.
How to Tell When Pizza Dough Is Done
In my kitchen, I’ve learned to trust the exact timing in this pizza dough recipe — but every oven runs a little differently, so start checking at 10 minutes on your first attempt. Once you’ve made it once, you’ll know exactly where your oven lands.
Primary Doneness Test
Look at the crust edges and the bottom of this pizza dough recipe. The dough is done when the edges are deep golden brown with dark, slightly charred spots, and the bottom — lifted with a spatula — shows the same golden-brown color with no pale, doughy patches. A fully cooked crust sounds hollow when tapped lightly on the bottom.
Doneness Guide
| Indicator | What It Means | What to Do |
|---|---|---|
| Edges pale, bottom pale | Under-baked | Continue baking, check in 2 min |
| Edges golden with dark spots | Perfectly done | Remove from oven |
| Bottom sounds hollow when tapped | Fully cooked | Ready to slice |
| Bottom feels doughy, no hollow sound | Not ready | Bake 2–3 more minutes |
| Edges very dark, almost black | Slightly over-done | Reduce bake time next round |
| Center sags when lifted | Underbaked or too thin | Bake longer or roll slightly thicker next time |
Visual Signs This Pizza Dough Is Done
- The crust edges have puffed up and turned deep golden brown with leopard-spotted dark patches
- The cheese is fully melted and showing light golden bubbling, not still pale and solid
- The bottom crust, when lifted, shows an even golden-brown color across the entire surface
- The dough has visibly risen at the edges compared to its raw, flat state
- The aroma has shifted from raw dough to a toasted, slightly caramelized bread smell
It’s Not Right — What to Do Now
- Bottom is pale and soggy: Oven wasn’t hot enough or the stone/sheet wasn’t fully preheated — increase temperature and preheat longer next time
- Crust tough instead of chewy: Too much flour was added during kneading — measure flour by weight next time if possible
- Dough tore while stretching: Gluten wasn’t relaxed enough — extend the second rest to 20–25 minutes
- Crust came out dense and heavy: First rise was cut short — give it the full 60 minutes or until visibly doubled
How to Stretch and Shape This Pizza Dough

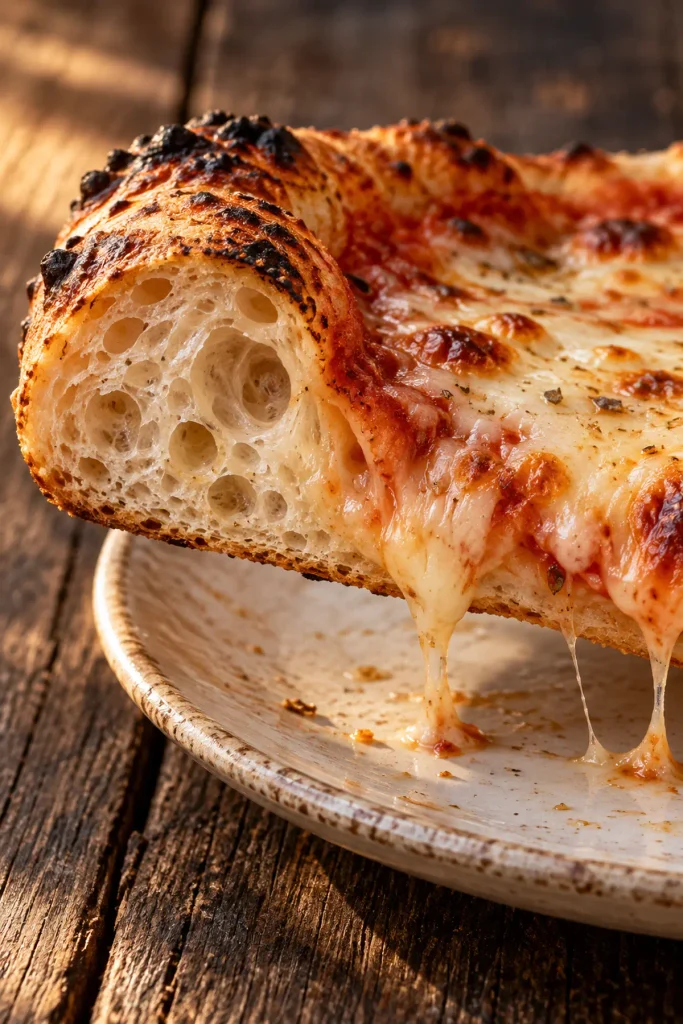
Getting a thin, even round without tearing comes down to technique more than strength. There are three approaches depending on your comfort level.
Method 1 — Hand Stretch (Traditional Method)
Place the rested pizza dough ball on a floured surface. Press down with your fingertips from the center outward, leaving a 1-inch border untouched for the crust edge. Lift the dough and drape it over the back of your fists, gently rotating and letting gravity pull it wider with each turn. This is the method that produces the most authentic, irregularly shaped, artisan-style crust with the best air pocket structure.
Method 2 — Rolling Pin (Easiest for Beginners)
Roll the rested dough with a rolling pin on a floured surface, rotating a quarter turn after each pass to keep the shape even. This method is faster and more forgiving for first-time pizza dough makers, but it presses out some of the air bubbles that create the characteristic chewy crumb — the result is a slightly denser, more uniform crust.
Method 3 — Pan Press (No-Stretch Method)
Press the dough directly into an oiled cast iron skillet or deep baking pan with your fingertips, pushing it to the edges and slightly up the sides. This method requires zero stretching skill and produces a thicker, pan-pizza style crust with an exceptionally crispy, almost fried bottom from the oiled pan surface.
Troubleshooting Quick Reference for Pizza Dough
| Problem | Cause | Fix |
|---|---|---|
| Dough springs back constantly | Gluten not relaxed enough | Rest 10 more minutes before trying again |
| Dough tears in the middle | Stretched too thin too fast | Work the edges first, center last |
| Dough won’t hold a round shape | Too much flour added during kneading | Measure flour more carefully next batch |
| Uneven thickness | Stretching from one spot only | Rotate the dough as you stretch |
What to Serve With Pizza Dough
These pairings work perfectly alongside any pizza made from this pizza dough recipe.
Classic Pairings That Always Work
- Simple marinara sauce — the traditional base that lets the crust flavor shine through
- Fresh mozzarella and basil — the classic Margherita combination that pairs perfectly with a well-made crust
- Garlic butter for the crust edge — brushed on right after baking for extra flavor on the final bite
- A simple arugula salad — the peppery bite cuts through the richness of a cheese-topped pizza
- Crushed red pepper flakes — for anyone who wants heat added at the table
Comfort Food Pairings
- Garlic knots from extra dough — use leftover scraps to make a side that complements the main pizza perfectly
- Caesar salad — a classic pizzeria side that balances the richness of a loaded pizza
- Mozzarella sticks — for a full indulgent pizza-night spread
- Buffalo wings — the combination works especially well for a casual game-day dinner
- Garlic parmesan dipping sauce — serve on the side for the crust edges
Low-Carb Options
- Load with extra vegetables, less cheese — keeps the pizza lighter while still using the same crust
- Serve smaller slices with a large side salad — balances portion size without changing the recipe
- Thin-stretch the dough further — a thinner crust means fewer carbs per slice while keeping the same diameter
6 Ways to Use Leftover Pizza Dough
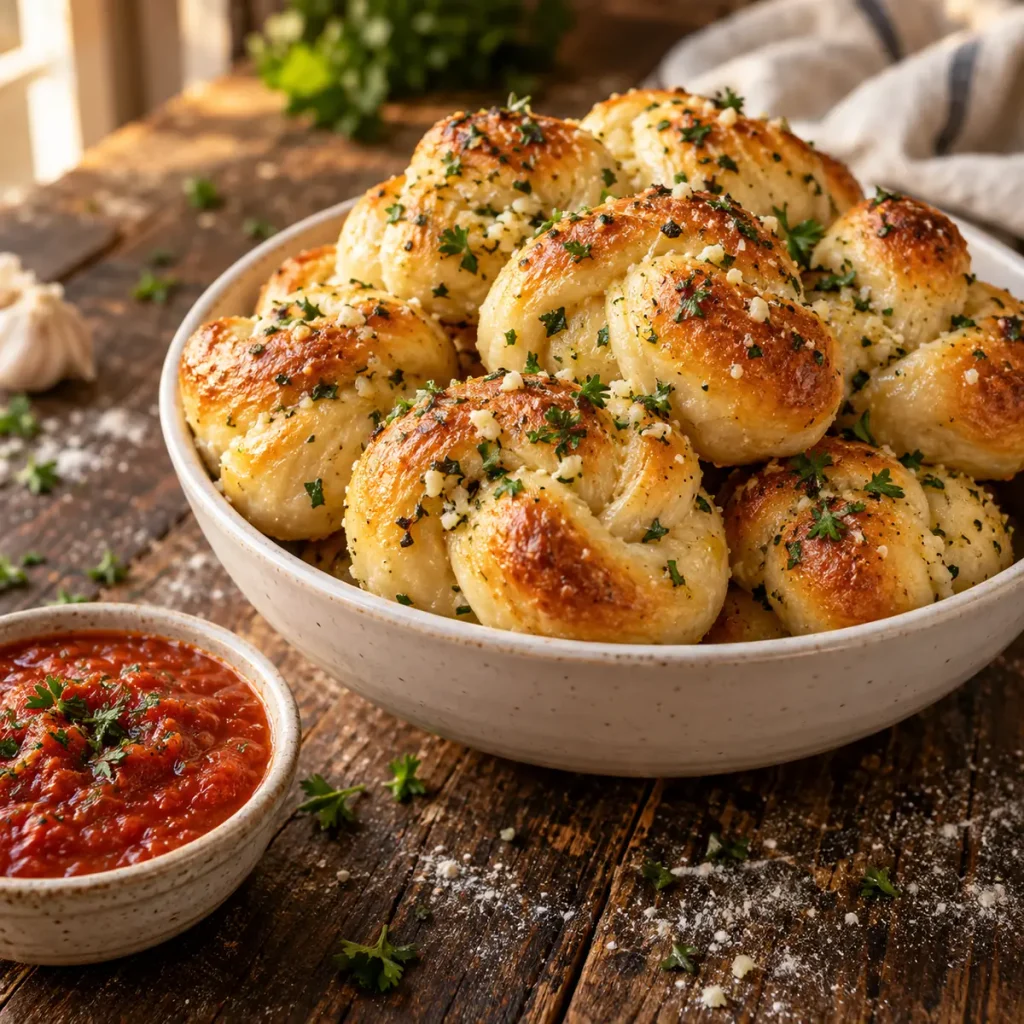
Leftover or extra pizza dough can become several completely different meals. Here are 6 ways to use it.
Garlic Knots
What you need: Leftover dough from this pizza dough recipe, melted butter, minced garlic, parmesan, parsley.
How to assemble: Cut dough into strips, tie into loose knots, and bake at 400°F for 12–15 minutes. Toss immediately in melted garlic butter and top with parmesan and parsley.
One tip: Brush the butter on while the knots are still hot straight from the oven — they absorb far more flavor than if you wait for them to cool.
Breadsticks
What you need: Leftover pizza dough, olive oil, Italian seasoning, parmesan.
How to assemble: Roll dough into a rectangle, cut into strips, brush with olive oil, and sprinkle with seasoning and parmesan. Bake at 400°F for 10–12 minutes until golden.
One tip: Twist each strip once before baking — it creates more surface area for the seasoning to cling to and bakes up crispier.
Calzone
What you need: Leftover pizza dough, pizza sauce, mozzarella, any pizza toppings.
How to assemble: Roll dough into a circle, fill one half with sauce, cheese, and toppings, fold over and crimp the edges. Bake at 425°F for 15–18 minutes until golden.
One tip: Cut a small vent slit in the top before baking — it lets steam escape so the filling doesn’t burst through the seam.
Flatbread
What you need: Leftover pizza dough, olive oil, toppings of choice (no sauce needed).
How to assemble: Stretch dough thin, brush with olive oil, add light toppings like caramelized onion or fresh herbs, and bake at 450°F for 8–10 minutes.
Red Velvet Cake try another easy dinner from this site
One tip: Thinner dough bakes faster and crispier — check at the 7-minute mark to avoid over-browning.
Dessert Pizza
What you need: Leftover pizza dough, melted butter, cinnamon sugar, cream cheese glaze.
How to assemble: Stretch dough thin, brush generously with melted butter, sprinkle with cinnamon sugar, and bake at 400°F for 10–12 minutes. Drizzle with a simple cream cheese glaze after baking.
One tip: Let the baked crust cool for 5 minutes before drizzling the glaze — adding it too hot makes the glaze run off completely instead of setting slightly.
Fried Dough Bites
What you need: Leftover pizza dough, oil for frying, powdered sugar.
How to assemble: Cut dough into small pieces and fry in 350°F oil for 2–3 minutes per side until golden and puffed. Toss immediately in powdered sugar.
One tip: Don’t overcrowd the pot — frying too many pieces at once drops the oil temperature and produces greasy, undercooked bites instead of light, crispy ones.
Storage, Freezing and Reheating Guide
Refrigerator Storage (Up to 3 Days)
This pizza dough recipe stores in the refrigerator for up to 3 days after the first rise. Place it in a lightly oiled, covered container — the cold slows fermentation dramatically but doesn’t stop it completely, which actually develops deeper flavor over time. Let refrigerated dough sit at room temperature for 30–45 minutes before shaping, since cold dough is far less elastic and tears more easily.
Can You Make This Pizza Dough Ahead of Time?
Yes — this pizza dough recipe is one of the best doughs for making ahead, and refrigeration actually improves the flavor. Complete the first rise, then refrigerate the dough for up to 3 days instead of proceeding immediately to shaping. The slow, cold fermentation develops a more complex, slightly tangy flavor that a same-day dough simply doesn’t have time to build.
Freezer Storage (Up to 3 Months)
This pizza dough recipe freezes exceptionally well for up to 3 months. Divide into individual portions after the first rise, coat lightly in oil, and wrap each tightly in plastic wrap before placing in a freezer bag. Thaw overnight in the refrigerator, then let come to room temperature for 30–45 minutes before shaping and baking as directed.
This Pizza Dough Works as a Freezer Meal
Make a triple or quadruple batch specifically for the freezer. Portion and freeze individually so you can pull exactly what you need for any given pizza night. This turns a 90-minute from-scratch process into a 20-minute weeknight dinner whenever you want it.
White Chicken Chili see more make-ahead meal ideas here
How to Reheat Leftover Baked Pizza Without Ruining It
| Method | Setting | Time | Notes |
|---|---|---|---|
| Oven | 400°F | 8–10 min | Best method; restores crispy crust |
| Skillet (covered) | Medium-low | 5–6 min | Excellent; crisps bottom while melting cheese |
| Air fryer | 375°F | 4–5 min | Very good; fast and crispy |
| Microwave | 70% power | 60–90 sec | Fast but crust turns soft — last resort |
Weekly Meal Prep Strategy
Make a double batch of this pizza dough recipe every weekend. Use one portion fresh and freeze the second portion immediately after the first rise. By the following week, you have a completely homemade pizza dinner ready with just a thaw and a 20-minute active window.
Pizza Dough Recipe Variations Worth Trying
Same technique. Completely different results. Master this base pizza dough recipe first — then try one of these.
Most Popular — Thin and Crispy Crust
For this pizza dough recipe variation, divide the dough into three portions instead of two, so each portion stretches to a larger, thinner round. Stretch as thin as possible without tearing — you should almost be able to see light through the center. Bake at the highest temperature your oven allows for 8–10 minutes. The result is a noticeably crispier, cracker-like crust that’s the most popular style for loaded, topping-heavy pizzas.
International — Neapolitan Style Dough
Replace the bread flour with 00 flour, which is finer-milled and produces a more tender, delicate crumb. Reduce the olive oil to 1 tablespoon and extend the first rise to 90 minutes at a slightly cooler room temperature for a more complex flavor. Bake at the highest possible oven temperature — ideally 500°F or above — for just 6–8 minutes. Therefore, you get the characteristic puffy, leopard-spotted, slightly charred edge of authentic Neapolitan pizza with a soft, almost custardy center.
Low-Carb — Cauliflower Crust Alternative
This isn’t a modification of the yeast dough itself but a genuine substitute worth knowing: pulse steamed cauliflower into rice-sized pieces, squeeze out as much moisture as possible in a clean towel, and combine with egg, parmesan, and a pinch of salt. Press into a round on a lined baking sheet and bake at 425°F for 15 minutes before adding toppings and baking again. It’s a legitimate option for anyone avoiding wheat entirely who still wants a pizza night.
Quick Weeknight Shortcut — Same-Day Fast Rise Pizza Dough
Increase the active dry yeast to 1 tablespoon and let the first rise happen in a slightly warmer spot — near a preheating oven works well — cutting the rise time to about 30–35 minutes. The flavor is less developed than the full-time version of this pizza dough recipe, but this shortcut gets homemade dough on the table in under an hour total when time is genuinely short.
Fresh and Elevated — Herb and Garlic Infused Dough
Add 1 teaspoon of dried oregano, ½ teaspoon of garlic powder, and 1 tablespoon of finely chopped fresh rosemary directly into the flour before mixing. The herbs infuse throughout every bite of the crust rather than sitting only on top as a garnish. This version pairs beautifully with a simple olive oil and parmesan topping that lets the infused dough itself be the star of the dish.
Nutrition Information
Per Serving Breakdown (Based on 16 Slices Total, 2 Pizzas)
| Nutrient | Amount | % Daily Value |
|---|---|---|
| Calories | ~140 | — |
| Total Fat | 2g | 3% |
| Saturated Fat | 0.3g | 2% |
| Cholesterol | 0mg | 0% |
| Sodium | 220mg | 10% |
| Total Carbohydrates | 26g | 9% |
| Dietary Fiber | 1g | 4% |
| Total Sugars | 0.5g | — |
| Protein | 4g | 8% |
| Iron | 1.2mg | 7% |
Nutrition calculated for plain crust only, without sauce, cheese, or toppings.
According to USDA FoodData Central, bread flour contains approximately 12–14% protein compared to 10–11% in all-purpose flour — this higher protein content is exactly what allows this pizza dough recipe to develop its signature chewy structure.
Dietary Compatibility
| Diet | Compatible | Notes |
|---|---|---|
| Gluten-Free | ❌ | Requires a dedicated gluten-free flour blend and different technique |
| Dairy-Free | ✅ | No dairy in the dough itself |
| Paleo | ❌ | Flour and yeast excluded |
| Keto | ❌ | See cauliflower crust variation above |
| Vegetarian | ✅ | No meat or animal products in this recipe |
| Vegan | ✅ | No eggs or dairy in the base dough |
To reduce sodium in this pizza dough recipe, reduce the salt to 1½ teaspoons — the dough will still rise and taste balanced, just slightly milder, which works well if your toppings are already salty.
8 Mistakes That Ruin Pizza Dough
Every one of these pizza dough mistakes is fixable. Know them before you start — not after.
❌ Mistake 1: Using Water That’s Too Hot
Why it happens: Assuming hotter water activates yeast faster. What goes wrong: Water above 120°F kills active dry yeast instantly — this pizza dough never rises no matter how long you wait. The fix: Use water between 105–110°F, warm to the touch like a baby’s bath, never hot enough to feel uncomfortable on your wrist.
❌ Mistake 2: Adding Too Much Flour During Kneading
Why it happens: The dough feels sticky and the instinct is to add more flour. What goes wrong: Excess flour produces a dry, tough, dense crust instead of a soft, chewy one. The fix: A slightly tacky dough that doesn’t heavily coat your hands is correct — resist adding flour beyond what the recipe specifies.
❌ Mistake 3: Skipping the First Rise or Cutting It Short
Why it happens: Impatience to get to baking. What goes wrong: Under-risen pizza dough produces a dense, heavy crust with none of the open, airy crumb structure a proper rise develops. The fix: Give the dough the full 60 minutes, or until it has visibly doubled in size — don’t rely on the clock alone.
❌ Mistake 4: Skipping the Second Rest Before Shaping
Why it happens: Not realizing it matters, or rushing. What goes wrong: Tight, unrelaxed gluten fights every attempt to stretch the dough — it keeps springing back to a smaller size and tears easily. The fix: Always rest shaped dough balls for at least 15 minutes before attempting to stretch them.
❌ Mistake 5: Not Preheating the Oven or Stone Long Enough
Why it happens: Underestimating how long stone or steel takes to heat through. What goes wrong: A pale, soggy bottom crust that never develops the crispy edges this pizza dough recipe is built for. The fix: Preheat for a full 30 minutes minimum with a stone inside — longer than most people expect.
❌ Mistake 6: Rolling Instead of Hand-Stretching
Why it happens: It feels easier and more controlled. What goes wrong: A rolling pin presses out the air bubbles that create the characteristic chewy, open crumb — the crust comes out flatter and denser. The fix: Hand-stretch when possible, reserving the rolling pin only for when you genuinely need the speed or control.
❌ Mistake 7: Overloading the Dough with Toppings
Why it happens: Wanting a loaded, generous pizza. What goes wrong: Too much sauce and cheese weighs down the center, preventing proper crisping and often leaving a soggy, underbaked middle even when the edges look perfect. The fix: Use toppings with a light hand — less is genuinely more for a properly cooked crust.
❌ Mistake 8: Using Yeast Past Its Expiration Date
Why it happens: Not checking the date before starting. What goes wrong: Expired yeast either doesn’t activate at all or activates weakly, producing a dough that barely rises despite following every other step correctly. The fix: Always check the expiration date, and bloom the yeast first to visually confirm it’s foaming before committing the rest of the ingredients.
Frequently Asked Questions
What is the best flour for pizza dough?
Bread flour is the best choice for this pizza dough recipe because its higher protein content — typically 12–14% compared to 10–11% in all-purpose — develops stronger gluten, giving the dough the chew and structural strength to stretch thin without tearing. All-purpose flour works as a substitute and produces a perfectly acceptable, slightly less chewy result. For an authentic Neapolitan-style crust, 00 flour is the traditional choice, producing a more tender, delicate crumb than either bread or all-purpose flour.
How long should pizza dough rise?
The first rise for this pizza dough recipe should take about 60 minutes at room temperature, or until the dough has visibly doubled in size — this matters more than the exact clock time, since kitchen temperature varies the speed significantly. A second, shorter rest of about 15 minutes after shaping relaxes the gluten so the dough stretches easily instead of springing back. For deeper flavor, refrigerating the dough for the first rise over 24–72 hours produces a noticeably more complex, slightly tangy result.
Why is my pizza dough not stretchy?
The honest answer: the gluten hasn’t relaxed enough, which almost always means the second rest was skipped or cut too short. Tight, freshly kneaded or shaped pizza dough fights back and springs to a smaller size no matter how hard you pull. Let the shaped dough rest for a full 15 minutes — or up to 25 minutes if it’s still resisting — before attempting to stretch it again. Overworking cold dough straight from the refrigerator causes the same problem; let it warm to room temperature first.
Can you make pizza dough ahead of time?
Yes — this pizza dough recipe is actually better made ahead. Complete the first rise, then refrigerate the dough covered for up to 3 days instead of shaping it immediately. The slow, cold fermentation develops deeper, slightly tangy flavor that same-day dough doesn’t have time to build. Let refrigerated dough sit at room temperature for 30–45 minutes before shaping, since cold dough is less elastic and tears more easily straight from the fridge.
How do you know when pizza dough is kneaded enough?
Use the windowpane test: pull off a small piece of dough and gently stretch it between your fingers. Properly kneaded pizza dough stretches thin enough to let light pass through without tearing. If it tears immediately, the gluten hasn’t fully developed yet — return it to kneading for another 2–3 minutes and test again. Visually, the dough should also look smooth and slightly glossy rather than rough and shaggy once kneading is complete.
Can you freeze pizza dough?
Yes — it freezes exceptionally well for up to 3 months. Divide into individual portions after the first rise, coat lightly in oil, and wrap each tightly in plastic wrap before placing in a freezer bag. Thaw overnight in the refrigerator, then let the dough come to room temperature for 30–45 minutes before shaping. Frozen and properly thawed pizza dough performs almost identically to fresh dough in both texture and flavor.
What makes pizza crust crispy instead of soggy?
High oven heat combined with a fully preheated baking surface is the most important factor — a pizza stone or steel preheated for a full 30 minutes transfers intense heat directly to the dough the moment it makes contact. Additionally, going light on sauce and cheese prevents excess moisture from soaking into the crust during baking. Cornmeal or flour dusted under the dough also helps create a slight barrier that promotes crisping rather than steaming.
How thin should you roll pizza dough?
For a classic, balanced crust, stretch the dough to about ¼ inch thick across the center, leaving a slightly thicker 1-inch border for the crust edge. For a thin and crispy style, stretch it as thin as possible without tearing — almost translucent in the center. For a thicker, pan-style pizza, press the dough to about ½ inch and let it rise again briefly in the pan before baking for a more bread-like result.
Can you make pizza dough without yeast?
Yes, though the texture and flavor will be noticeably different from this pizza dough recipe. A quick dough using baking powder instead of yeast comes together in minutes with no rise time required, producing a texture closer to a flatbread than a traditional chewy crust. Sourdough starter is another yeast-free option, replacing commercial yeast entirely with wild fermentation, though it requires an established, active starter and a much longer rise time of several hours.
Why is my pizza dough tough and chewy in a bad way?
Too much flour added during kneading is the most common cause — it’s an easy mistake to make since the dough does feel sticky at first, but excess flour produces a dry, dense, tough result instead of properly chewy. Overkneading can also toughen the dough past the ideal point, though this is less common than under-kneading. The fix is measuring flour carefully, ideally by weight, and trusting that a slightly tacky dough is correct rather than continuously adding more flour to chase a drier feel.
You Might Also Like
Classic Margherita Pizza
Lasagna Soup check out this recipe next
Recipe Card
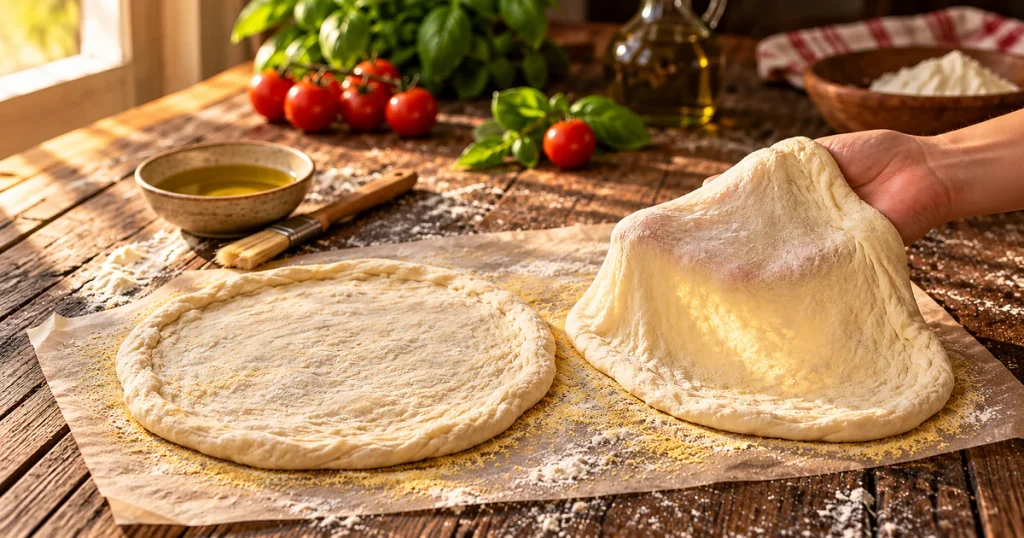


PIZZA DOUGH RECIPE
Ingredients
Equipment
Method
- Combine warm water, sugar, and yeast in a small bowl. Let sit 5–10 minutes until foamy.
- Whisk bread flour and salt together. Pour in bloomed yeast mixture and olive oil. Mix until a shaggy dough forms.
- Knead for 7–8 minutes with a dough hook, or 8–10 minutes by hand, until smooth and elastic.
- Place in an oiled bowl, cover, and let rise 60 minutes until doubled.
- Punch down, divide into 2 portions, and shape into tight balls. Rest 15 minutes.
- Stretch each ball into a 10–12 inch round, leaving a thicker border for the crust edge.
- Preheat oven to 475–500°F with a stone inside for 30 minutes. Top the dough and bake 10–14 minutes until deep golden brown.
Notes
✅ Rest shaped dough for 15 minutes before stretching — this relaxes the gluten and prevents tearing.
🔄 No bread flour? All-purpose flour works, producing a slightly less chewy crust.
❄️ Refrigerate up to 3 days after the first rise, or freeze portioned dough up to 3 months.
📌 This pizza dough recipe develops more flavor the longer it rests — cold fermentation for 24–72 hours produces the best result. Make Ahead + Freezer Notes
Complete the first rise, then refrigerate up to 3 days or freeze individual portions up to 3 months. Thaw overnight in the fridge and bring to room temperature 30–45 minutes before shaping.
Nutrition Per Serving
Calories: ~140 | Protein: 4g | Fat: 2g | Carbs: 26g | Fiber: 1g | Sodium: ~220mg
Dietary Info
❌ Gluten-Free | ✅ Dairy-Free | ❌ Paleo | ❌ Keto | ✅ Vegetarian | ✅ Vegan
Did You Make This?
Tag @DavidRecipes and leave a ⭐⭐⭐⭐⭐ rating below.
— David | DavidRecipes
David is a home cook who has spent years developing straightforward, no-fuss recipes that work for real weeknight kitchens. Every recipe on DavidRecipes is made, tested, and eaten before it ever gets published — usually multiple times.

3 Comments