

White Chicken Chili (Ready in 45 Minutes, One Pot, Zero Compromise)

White chicken chili gives you everything a slow-cooked red chili delivers — deep, layered flavor, thick and creamy chili texture, and tender protein — but it comes together in 45 minutes flat. This version uses green chiles, cannellini beans, and a cream cheese finish that pulls the whole pot together without making it heavy. The result is a comfort food dinner that holds up in the fridge for days.
This recipe is built for real kitchens — the kind where dinner needs to happen fast and the sink shouldn’t be destroyed afterward. If you’re after a quick weeknight meal that feeds four to six people from a single one-pot recipe, this is it. It scales well, stores well, and actually gets better the next day.
Made this already? Scroll down and leave a ⭐⭐⭐⭐⭐ rating below — it helps more than you know.
Every cook who tries this recipe once has it memorized by the third time.
By David | Last Updated: October 2026
QUICK STATS BOX:
⏱ Prep Time: 10 minutes
🕐 Cook Time: 35 minutes
⏳ Total Time: 45 minutes
🍽 Servings: 6
📊 Difficulty: Easy
💰 Cost per Serving: ~$2.80
🥩 Main Item: Chicken breast or rotisserie chicken
Table of Contents
Why This Recipe Works
- Ready in 45 minutes, start to finish. Most chili recipes ask for hours on the stove. This one gets you the same depth of flavor through a specific layering technique that front-loads all the work. You spend 10 minutes building the base — everything else is simmering time.
- One pot, minimal cleanup. The entire recipe — sauté, simmer, and finish — happens in a single Dutch oven. Nothing extra gets dirty except a cutting board and a knife.
- Beginner-proof technique. There is no braising, no browning in batches, no reduction timing. If you can stir and simmer, you can get this right on your first attempt.
- Built for meal prep. White chicken chili holds in the refrigerator for up to 5 days and freezes well for 3 months. Make a double batch on Sunday and you’ve solved dinner for most of the week. Lasagna Soup
- Better than the standard version. Most recipes skip the cream cheese finish or under-season the base. Here’s the truth: both of those are the difference between a thin, flat bowl and one with real body and flavor. This recipe doesn’t skip either.
Understanding the Key Ingredient
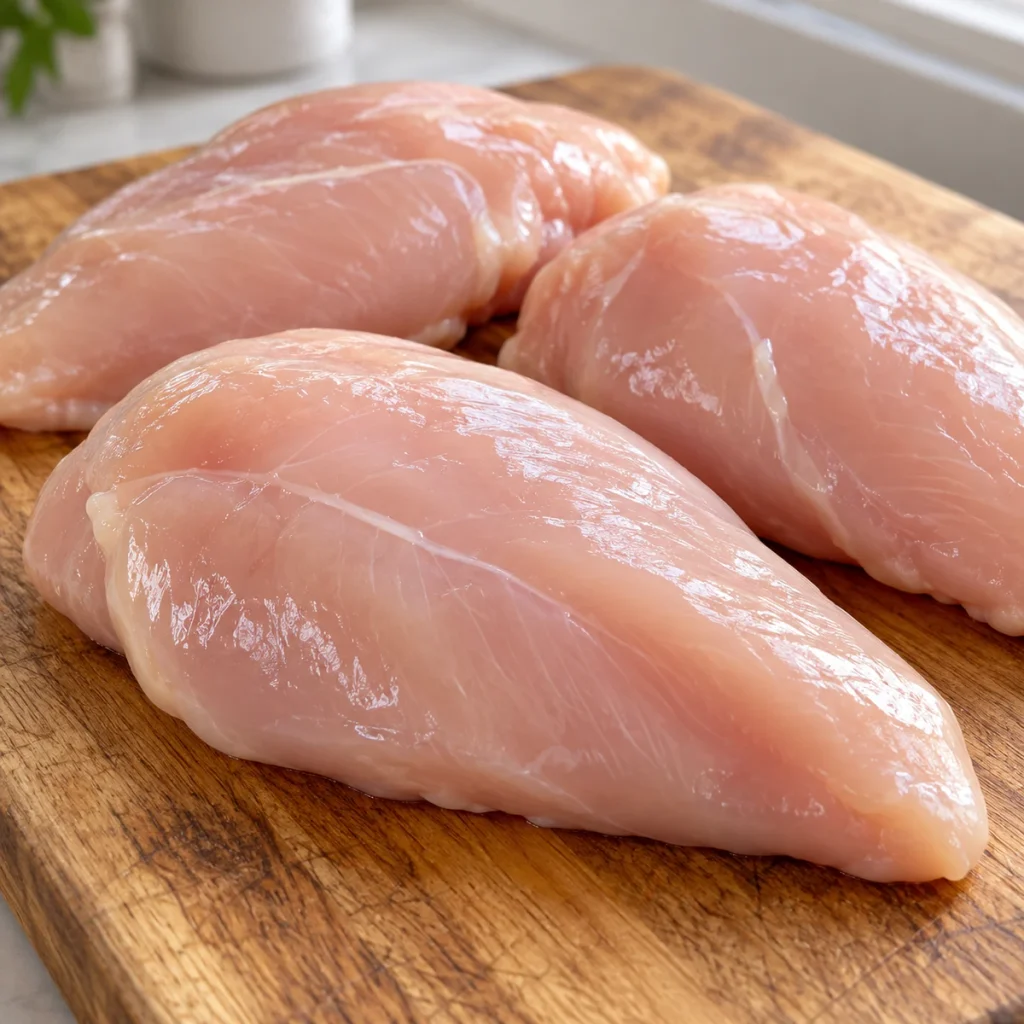
I’ve made this recipe in my own kitchen more times than I can count — always for real meals, never just for testing. The one step I never skip, no matter how rushed the night is, is the key technique in Step 3. Every single time I’ve tried cutting corners on it, the final dish suffered. Every time I followed it properly, the result was exactly right.
Why Chicken Is the Right Choice
Chicken breast gives white chicken chili its lean, clean flavor base. It absorbs seasoning well, shreds easily after simmering, and doesn’t compete with the green chiles and cumin the way a richer protein would. Additionally, chicken cooks fast enough to keep total time under 45 minutes — no other protein in this recipe category matches that. Bone-in thighs add more flavor but extend cook time by 20–25 minutes.
Chicken Comparison Guide
| Type | Flavor | Cook Time | Texture | Best For |
|---|---|---|---|---|
| Chicken breast (raw) | Mild, clean | 20–25 min | Shreds well | Standard recipe |
| Rotisserie chicken | Rich, pre-seasoned | 5 min (heat only) | Already shredded | Quick weeknight version |
| Boneless chicken thighs | Deeper, fattier | 25–30 min | Very tender | Richer flavor |
| Bone-in thighs | Most flavor | 40–45 min | Falls apart | Slow weekend cook |
| Canned chicken | Neutral | 2 min | Softer | Emergency shortcut only |
How to Choose the Best at the Store
- Look for uniform thickness. Thick on one end means the thin end dries out before the center finishes.
- Check the color. Fresh chicken breast is pale pink — not gray or yellow at the edges.
- Press the package. It should feel firm, not soft or spongy.
- Check the liquid. Minimal liquid in the package is a good sign. Excess means water was added during processing.
- Buy same-day if possible. For white chicken chili, fresh is always better than chicken that’s been refrigerated four to five days.
How Much Do You Need?
| Servings | Raw Chicken Breast | Rotisserie Chicken |
|---|---|---|
| 2 | 1 breast (~8 oz) | ½ rotisserie |
| 4 | 2 breasts (~1 lb) | 1 small rotisserie |
| 6 | 3 breasts (~1.5 lb) | 1 large rotisserie |
| 8+ | 4 breasts (~2 lb) | 2 rotisserie chickens |
Double Batch — How to Scale This Recipe
Doubling white chicken chili is one of the easiest scales in home cooking. Use the same pot if it holds 8 quarts or more — everything fits. Double every ingredient except salt: start with 1.5x salt, taste at the end, and adjust from there. Cook time stays the same because you’re not changing the thickness of the protein, only the volume of liquid. However, always bring the pot to a simmer before adding the chicken to avoid a cold-spot issue in the center of a large batch.
Ingredients You’ll Need

This recipe pulls from four groups: protein, beans, aromatics, and the cream base. Here’s everything broken down.
Main Ingredients
- Chicken breast — 1.5 lbs. The protein base. Raw is preferred for best texture; rotisserie chicken works as a fast shortcut.
- Cannellini beans — 2 cans (15 oz each), drained and rinsed. White beans are the backbone of this recipe. They thicken the broth naturally when partially mashed — no starch needed.
- Diced green chiles — 2 cans (4 oz each). These deliver the mild heat and earthy, smoky character that separates white chicken chili from any other chicken soup.
- Chicken broth — 4 cups. Low-sodium preferred so you control salt. This is the liquid base of the entire dish.
- Cream cheese — 4 oz, softened. The finish that gives white chicken chili its signature body. Most recipes skip this step. Don’t.
Supporting Ingredients
- Onion — 1 medium, diced. Builds the aromatic base. Yellow onion is standard; white works fine.
- Garlic — 4 cloves, minced. Added after the onion softens. Pre-minced from a jar works in a pinch.
- Cumin — 1.5 tsp. The dominant spice in this recipe. Don’t reduce it — it’s what makes this taste like chili and not chicken soup.
- Chili powder — 1 tsp. Adds depth and color to the broth without sharp heat.
- Oregano — ½ tsp. Background herb note. Mexican oregano is preferred; regular works fine.
- Salt — 1 tsp, plus more to taste.
- Black pepper — ½ tsp.
- Olive oil — 1 tbsp. For sautéing aromatics.
Optional Additions Table
| Add-In | Amount | Effect |
|---|---|---|
| Jalapeño, diced | 1–2 | More fresh heat |
| Frozen or canned corn | 1 cup | Sweetness and texture |
| Sour cream | ¼ cup, stirred in | Tangier, richer finish |
| Lime juice | 1 tbsp | Brightness at the end |
| Monterey Jack cheese | ½ cup shredded | Melts into broth for extra richness |
Complete Substitutions Reference
| Original | Substitution | Notes |
|---|---|---|
| Cannellini beans | Great Northern beans | Almost identical; slightly smaller |
| Cream cheese | Heavy cream (½ cup) | Less thick, still creamy |
| Canned green chiles | Fresh roasted poblanos | More work, deeper flavor |
| Chicken broth | Vegetable broth | Works well, slightly lighter |
| Raw chicken breast | Rotisserie chicken | Add in Step 7, skip poaching step |
What NOT to Add
❌ Red kidney beans — wrong flavor profile; throws off the color and taste of white chili entirely
❌ Tomato paste or diced tomatoes — this is white chili; tomatoes kill the clean broth color and flavor
❌ Heavy cream added too early — it will break and turn grainy; always add dairy at the very end
❌ Pre-shredded bagged cheese in the broth — contains anti-caking starch that makes the base gluey
❌ Smoked paprika — overpowers the green chile flavor; save it for red chili recipes
❌ Too much cornstarch — thickens, but makes the texture pasty; mashed cannellini beans do a cleaner job
Equipment You’ll Need
Choosing the Right Equipment
| Pot Type | Size | Best For |
|---|---|---|
| Dutch oven | 5–6 qt | Standard batch, best heat retention |
| Large stockpot | 6–8 qt | Double batch or larger |
| Instant Pot | 6 qt | Pressure cook version (~25 min) |
| Slow cooker | 6 qt | Set-and-forget version (6–8 hrs low) |
Other Tools That Actually Matter
A wooden spoon or silicone spatula is essential — metal spoons scratch enamel Dutch ovens and create hot spots in thinner pots. You also need a fork or potato masher for the bean-mashing step in Step 5, which is what builds natural thickness in the broth. A ladle makes portioning clean. A meat thermometer takes the guesswork out of Step 4. That’s the full list.
No Dutch Oven? Alternatives That Work
- Large stainless steel pot — works well; watch heat more carefully since stainless doesn’t hold heat as evenly as enameled cast iron
- Nonstick deep sauté pan — fine for single batches; keep heat at medium throughout to protect the coating
- Instant Pot on sauté mode — switch to pressure cook after Step 4 for a faster result; reduce cook time to 12 minutes at high pressure
How to Make White Chicken Chili — Step by Step
Eight steps. Most take under two minutes each.
Step 1 — Sauté the Aromatics (Build the Flavor Base)
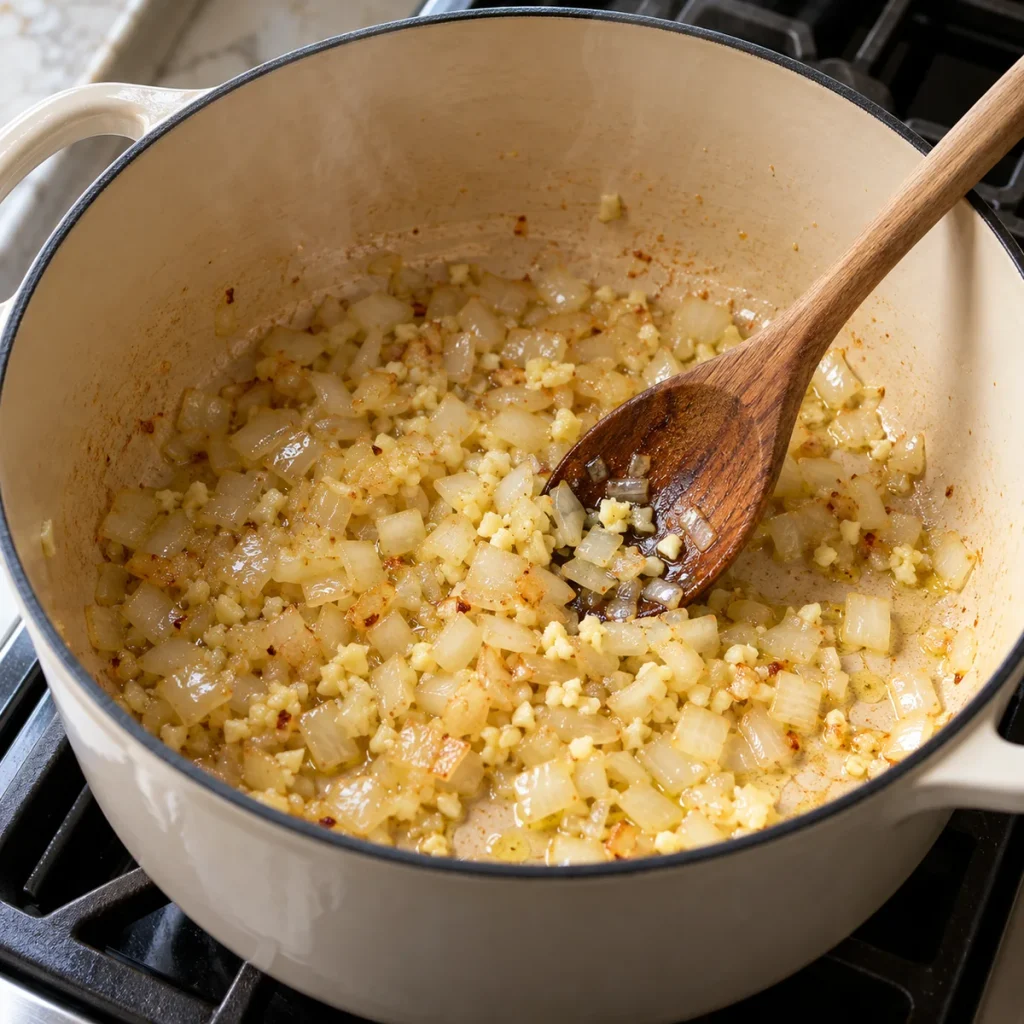
Heat 1 tablespoon of olive oil in your Dutch oven over medium heat. Add the diced onion and cook for 4–5 minutes, stirring occasionally, until it turns translucent and the edges start to go golden. Add the minced garlic and cook for 60 seconds more, stirring constantly. This step builds the entire flavor foundation of the white chicken chili — skipping it or rushing it makes the broth taste thin and underdeveloped.
💡 Pro Tip: Don’t add garlic until the onion is fully softened. Garlic added too early burns before the onion is done, and burnt garlic is impossible to fix without starting over.
Step 2 — Bloom the Spices (The Step Most Recipes Skip)

Add the cumin, chili powder, oregano, salt, and black pepper directly to the softened onion and garlic. Stir constantly for 30–45 seconds. The spices will darken slightly and smell intensely fragrant. Most recipes skip this, but this 45-second step transforms raw spice powder into something that tastes layered and intentional in the finished bowl. If you skip it, the spices will taste dusty and raw in the finished chili.
💡 Pro Tip: If the pot looks dry at this point, add a splash of chicken broth — just 2–3 tablespoons — to prevent burning without stopping the blooming process.
Step 3 — Add the Green Chiles (Don’t Rush This)
Immediately add both cans of diced green chiles to the spiced onion mixture. Stir them in and let them cook for 2 full minutes. The honest answer: green chiles need to cook in the spice base — not just get added to the broth — to release their full flavor. This is the step that makes white chicken chili taste like itself and not just a thin chicken soup with white beans. Every time I’ve skipped it, the difference was obvious.
💡 Pro Tip: For more heat, add one or two diced fresh jalapeños here alongside the canned chiles.
Step 4 — Add the Chicken and Broth (The Simmer Begins)
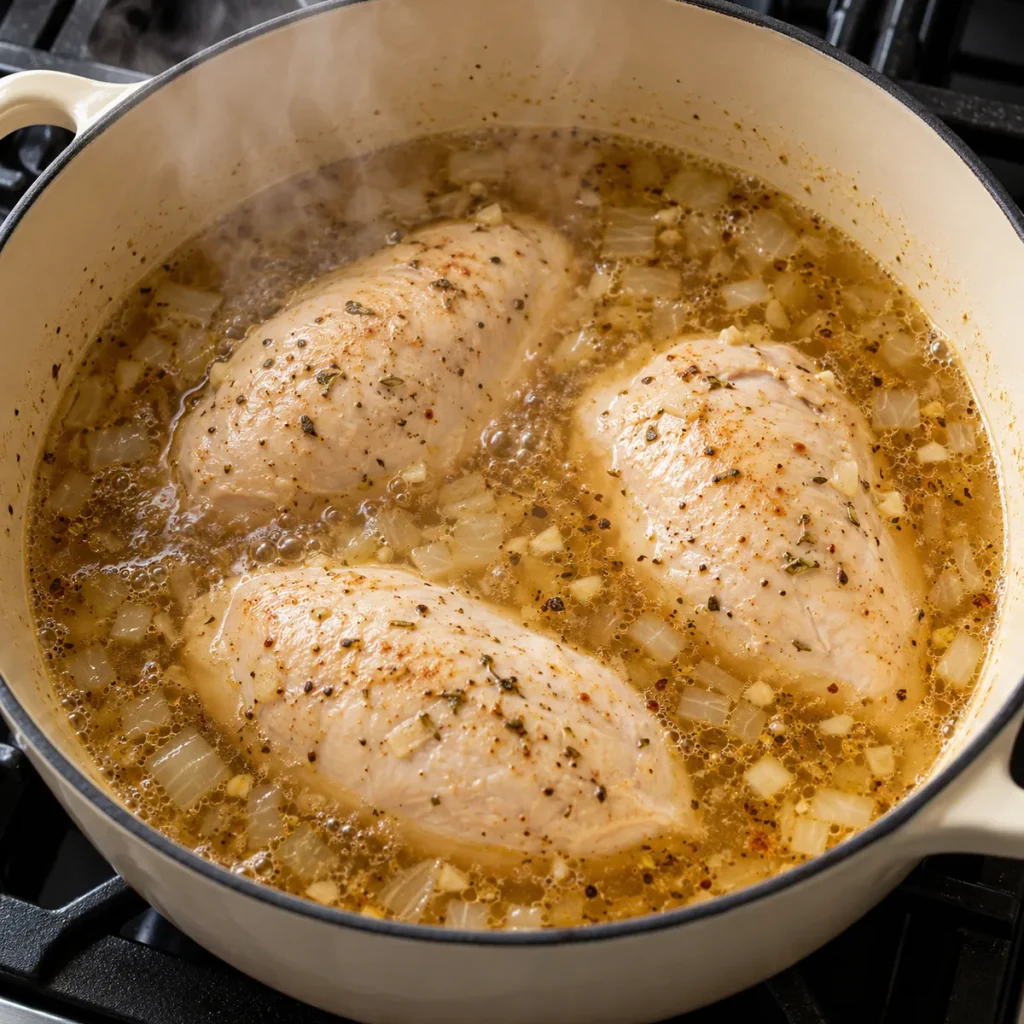
Pour in all 4 cups of chicken broth and stir to deglaze any fond from the bottom of the pot. Add the raw chicken breasts whole — do not cut them first. Bring to a boil, then reduce to a steady medium-low simmer. Cook uncovered for 20–22 minutes until the chicken reaches 165°F at the thickest point. Whole chicken breasts poach more evenly in broth than cut pieces, and they shred into far better texture afterward.
💡 Pro Tip: Keep a meat thermometer nearby. Pulling the chicken at exactly 165°F — not higher — keeps it juicy. Every 5°F over that makes a measurable difference in texture.
Step 5 — Shred the Chicken and Mash the Beans
Remove the chicken from the pot and shred it with two forks on a cutting board. While the chicken rests, add the drained cannellini beans to the broth. Use a potato masher or fork to mash roughly one-third of the beans directly in the pot — this is what naturally thickens white chicken chili without any starch or flour. french toast recipe Return the shredded chicken to the pot and stir everything together evenly.
💡 Pro Tip: The more beans you mash, the thicker the final chili. One-third is the standard. Mash half if you want it noticeably thick; leave them whole if you prefer a brothier bowl.
Step 6 — Simmer Together (Flavor Develops Here)
Bring the pot back to a gentle simmer and cook for 8–10 more minutes. This is when the shredded chicken absorbs the seasoned broth, the beans finish thickening the base, and the green chiles, cumin, and chicken broth come together into one cohesive dish. Do not rush this step. Additionally, this is the moment to taste and adjust salt — the broth will have reduced slightly and the flavor will be more concentrated now.
💡 Pro Tip: Taste at 8 minutes. If it needs salt, add ¼ teaspoon at a time. If it needs more heat, add a pinch of cayenne.
Step 7 — Add the Cream Cheese Finish (Most Important Step)
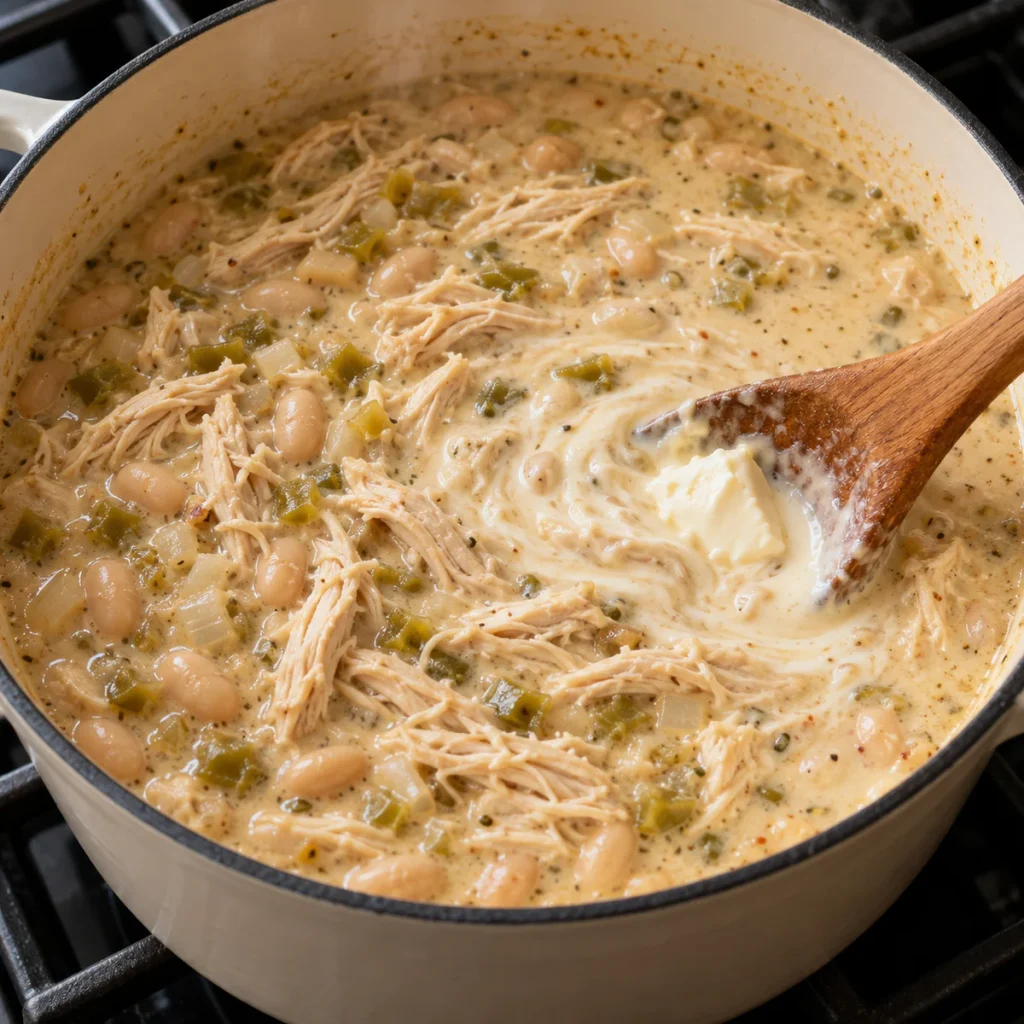
Reduce heat to low. Cut the softened cream cheese into 4–6 pieces and add them to the pot one at a time, stirring constantly after each piece. Most importantly, do not add cream cheese to a boiling pot — it will break into grainy clumps that won’t smooth back out. At low heat, it melts completely within 2–3 minutes and creates the thick, creamy consistency that makes this recipe what it is. As a result, the broth transforms from a thin, seasoned liquid into something that coats the back of a spoon.
💡 Pro Tip: Cream cheese must be softened to room temperature before adding. Cold cream cheese takes too long to melt and tends to clump even at low heat.
Step 8 — Finishing and Serving

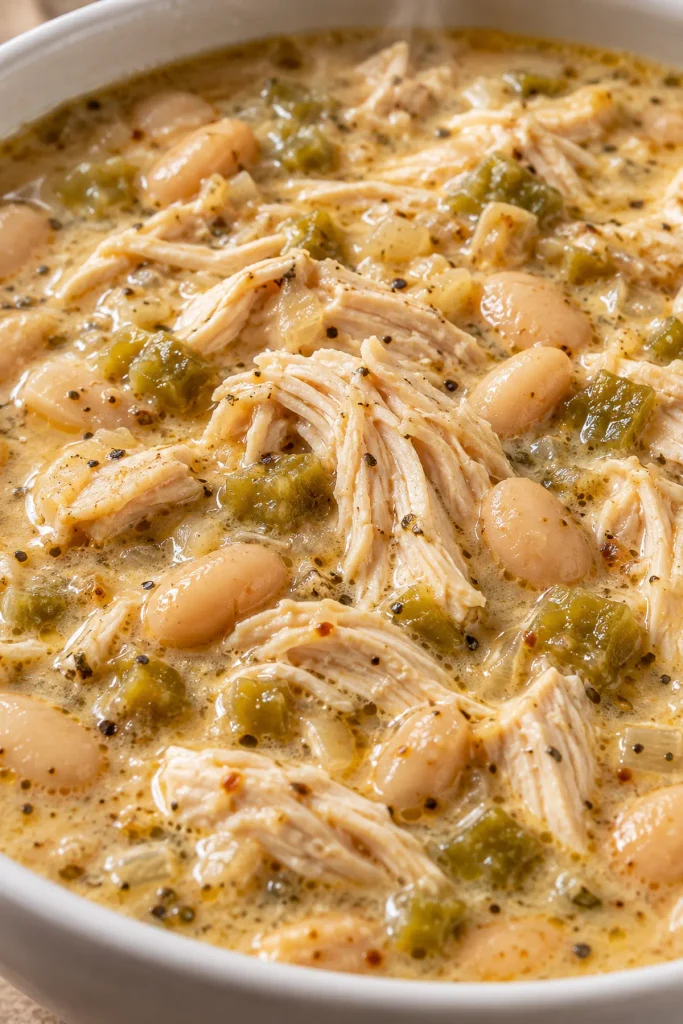
Give the pot one final stir and check consistency. The white chicken chili should coat a spoon — not pour off it like water. Ladle into bowls and add whatever chili toppings work for your table: sour cream, shredded Monterey Jack, diced avocado, fresh cilantro, tortilla strips, or a squeeze of lime. Serve immediately while the cream base is still glossy and hot.
How to Tell When White Chicken Chili Is Done
In my kitchen, I’ve learned to trust the exact timing in this recipe — but every stove runs a little differently, so start checking 1–2 minutes early on your first attempt. Once you’ve made it once, you’ll know exactly where your stove lands.
Primary Doneness Test
Pull a spoon out of the pot and hold it sideways. White chicken chili is done when it coats the back of the spoon with a thin, creamy layer that doesn’t immediately run off. The broth should look opaque and slightly thick — not watery and clear. If it’s still pouring thin after the cream cheese step, simmer uncovered for 3–5 more minutes to reduce.
Doneness Guide
| Indicator | What It Means | What to Do |
|---|---|---|
| Broth is thin and clear | Cream cheese not fully incorporated | Stir more at low heat |
| Chicken still looks pale pink | Not fully cooked | Check temp; continue simmering |
| Chicken reaches 165°F | Fully cooked and safe | Remove and shred |
| Broth coats spoon | Correct consistency | Ready to serve |
| Beans still feel firm | Under-simmered | Cook 5 more minutes |
| Broth too thick, almost paste-like | Over-reduced | Add ¼ cup broth and stir |
Visual Signs It’s Done
- The broth has shifted from clear to cloudy, opaque white
- The shredded chicken has absorbed color from the broth and looks seasoned, not pale gray
- The surface shows a slow, lazy bubble — not a rolling boil
- Beans press soft against the side of the pot when nudged with a spoon
- The aroma is rich with cumin and green chiles — not sharp or raw
It’s Not Right — What to Do Now
- Too thin: Mash more beans, or mix 1 tablespoon cornstarch with 2 tablespoons cold water and stir in while simmering
- Too thick: Add chicken broth ¼ cup at a time until it reaches the consistency you want
- Flavor is flat: Add more cumin (¼ tsp at a time) and salt; finish with a squeeze of fresh lime
- Grainy cream cheese: Remove from heat, let cool slightly, then use an immersion blender to smooth it out completely
How to Make the Cream Base

The cream base is what separates white chicken chili from regular chicken soup. There are three approaches depending on what you have available.
Method 1 — Fastest Method (Cream Cheese)
This is the standard method in this recipe. Soften 4 oz of cream cheese at room temperature for 20–30 minutes before you start cooking. Add it in pieces at low heat after the beans and chicken are fully cooked and the heat is reduced. Stir until completely smooth — about 2–3 minutes. The result is thick, rich, and sets up fast.
Method 2 — Best Flavor Method (Cream Cheese + Sour Cream)
Use 3 oz cream cheese and 2 tablespoons of full-fat sour cream together. Add the cream cheese at low heat first and melt it completely, then stir in the sour cream off the heat. This version has a slightly tangy edge that brightens the green chile flavor. It’s the version worth making when you’re cooking for company.
Method 3 — Classic Method (Heavy Cream)
Substitute the cream cheese with ½ cup of heavy cream, added in the last 5 minutes of cooking at medium-low heat. Don’t boil it after adding. The result is thinner than the cream cheese method but still creamy and satisfying. However, it doesn’t hold as thick when reheated — the stovetop cream cheese method is more stable across the full life of the recipe.
Troubleshooting Quick Reference
| Problem | Cause | Fix |
|---|---|---|
| Cream base is grainy | Heat too high when cream cheese was added | Use immersion blender to smooth |
| Base is too thin | Heavy cream used instead of cream cheese | Reduce 5 min uncovered |
| Base is too rich | Too much cream cheese | Add ¼ cup extra broth to balance |
| Base separated after reheating | Reheated too fast on high heat | Reheat low and slow, stir constantly |
What to Serve With White Chicken Chili
Classic Pairings That Always Work
- Cornbread — the standard pairing; sweetness cuts through the cumin and cream base
- Flour tortillas — warm, for tearing and dipping directly into the bowl
- White rice — makes the meal more filling; ladle white chicken chili directly over a scoop of rice
- Shredded Monterey Jack — melts on contact with the hot chili; adds a creamy, mild pull
- Sour cream — a tablespoon stirred in at the bowl level adds tang and extra creaminess
Comfort Food Pairings
- Baked potato — split one open and pour white chicken chili directly over the inside
- Tater tots — serve chili on the side for dipping; it holds up better than you’d expect
- Fritos or tortilla chips — for crunch; add right before eating so they don’t go soggy
- Cheddar biscuits — richer option that holds up well against the creamy broth
- Mac and cheese on the side — works especially well for kids, but adults will do it too
Low-Carb Options
- Cauliflower rice — absorbs the white chicken chili broth well and adds no competing flavor
- Zucchini noodles — serve the chili as a sauce over spiralized zucchini for a lighter bowl
- Butter lettuce cups — the chili makes an excellent filling with avocado and a squeeze of lime
6 Ways to Use Leftover White Chicken Chili

Leftover white chicken chili may actually be better than the original. Here are 6 meals that prove it.
White Chicken Chili Tacos
What you need: Leftover chili, small corn or flour tortillas, shredded cheese, avocado, cilantro.
How to assemble: Reheat the chili until thick, then spoon it into warmed tortillas. Add shredded cheese, diced avocado, and a squeeze of lime over the top.
One tip: Let the chili reduce slightly as it reheats so it’s thick enough to hold in a taco without dripping out the back.
White Chicken Chili Soup
What you need: Leftover chili, 1–2 cups extra chicken broth, an extra handful of white beans.
How to assemble: Add the chili to a pot with 1–2 cups of broth to thin it back out. Bring to a gentle simmer, stir in extra beans, and treat it like a fresh pot of soup.
One tip: A squeeze of lime at the end brings it back to life after a day in the fridge.
White Chicken Chili Rice Bowl
What you need: Cooked white or brown rice, leftover chili, toppings of choice.
How to assemble: Spoon hot white chicken chili directly over a bowl of cooked rice. Add shredded cheese, sour cream, and whatever you have on hand.
One tip: The rice absorbs the cream base especially well — this version holds together longer than the chili served on its own. red velvet cake
White Chicken Chili Breakfast Bowl
What you need: Leftover chili, 2 eggs, tortilla chips, salsa.
How to assemble: Reheat the chili in a skillet over medium-low heat. Crack eggs directly on top and cover until the whites set — about 4–5 minutes. Serve with chips and salsa on the side.
One tip: A fried egg placed on top instead of poached gives you a runny yolk that mixes into the chili in the best way possible.
White Chicken Chili Grilled Cheese Dip
What you need: Leftover chili, two slices of bread, butter, Monterey Jack cheese.
How to assemble: Make a standard grilled cheese with Monterey Jack. Reheat the white chicken chili in a small bowl alongside. Use the sandwich for dipping.
One tip: The contrast between the crispy, buttery sandwich and the creamy chili is the best use of leftovers on this entire list.
Stuffed Bell Peppers with White Chicken Chili
What you need: Leftover chili, 3–4 bell peppers, shredded cheese.
How to assemble: Halve and seed the peppers. Fill each half with chili and top with cheese. Bake at 375°F for 20–25 minutes until the peppers are tender and the cheese is bubbling.
One tip: Red or orange peppers are sweeter and balance the cumin in white chicken chili better than green peppers.
Storage, Freezing and Reheating Guide
Refrigerator Storage (Up to 5 Days)
Let white chicken chili cool to room temperature before transferring to an airtight container. It stores in the refrigerator for up to 5 days with no drop in quality. The cream base will thicken significantly when cold — this is completely normal. It loosens back up with a small splash of chicken broth when reheating.
Can You Make This Ahead of Time?
Yes — and it’s worth doing. White chicken chili made a day ahead tastes noticeably better than fresh. The chicken has more time to absorb the broth flavor, and the spices mellow and deepen overnight. Make the full recipe, cool it completely, refrigerate, and reheat gently the next day.
Freezer Storage (Up to 3 Months)
White chicken chili freezes well for up to 3 months. Portion it into individual freezer-safe containers before freezing so you can thaw exactly what you need. Leave an inch of headspace — the cream base expands slightly when frozen. Label containers with the date and portion size.
This Works as a Freezer Meal
This is one of the better freezer meals in the soup and stew category. Make a double batch specifically for the freezer. For best results, freeze before adding the cream cheese and stir it in fresh during reheating. If you’ve already finished the full recipe with cream cheese before freezing, it still works — just reheat low and slow.
How to Reheat Without Ruining It
| Method | Heat Setting | Time | Notes |
|---|---|---|---|
| Stovetop | Low–medium | 8–10 min | Best method; add splash of broth if thick |
| Microwave | 70% power | 2–3 min | Stir every 60 seconds; don’t overheat |
| Slow cooker | Low | 2–3 hrs | Good for large batches; add ¼ cup broth |
| Oven (covered) | 325°F | 20–25 min | Slower; works for larger portions |
| Instant Pot | Sauté mode | 5–6 min | Add broth first; stir constantly to prevent scorching |
Weekly Meal Prep Strategy
Make a full batch on Sunday. Portion into 6 individual containers. Pull one for lunch or dinner Monday through Friday. Pair with different sides each day — cornbread one night, rice the next, tortillas the night after — so it doesn’t feel repetitive. sweet potato casserole White chicken chili is one of the few recipes where the reheated version rivals the original.
Recipe Variations Worth Trying
Same technique. Completely different flavor profiles. Master the base recipe first — then try one of these.
Most Popular — Slow Cooker White Chicken Chili
Add all ingredients except cream cheese to a slow cooker. Cook on low for 6–8 hours or high for 3–4 hours. Remove the chicken, shred it with two forks, and return it to the pot. Stir in the cream cheese at the end until fully melted and smooth. The slow cooker version has a deeper, more developed flavor because of the extended cook time. It’s the best version for game day when you want the pot ready without any last-minute effort.
International — Green Enchilada White Chicken Chili
Replace 2 cups of chicken broth with a 10-oz can of green enchilada sauce. Add ½ teaspoon of coriander to the spice blend and use pepper Jack instead of Monterey Jack for topping. The enchilada sauce gives the white chicken chili a slightly tangy, tomatillo-forward flavor that’s closer to a traditional green sauce base. Serve with warm flour tortillas and extra lime wedges.
Low-Carb — Keto White Chicken Chili
Skip the cannellini beans entirely and increase the chicken to 2 pounds. Replace beans with 1 cup of diced zucchini added in Step 6. Use the full 4 oz of cream cheese and add 2 tablespoons of heavy cream alongside it. Therefore, you get higher protein, more fat, fewer carbs, and the cream base still thickens properly. It holds up as legitimate white chicken chili to anyone who isn’t specifically looking for beans.
Quick Weeknight Shortcut — Rotisserie Chicken Version
Use 1 large rotisserie chicken instead of raw breasts. After blooming the spices and green chiles, pour in the chicken broth and beans and proceed through Step 5 — skip the poaching step entirely. Add the pre-shredded rotisserie chicken in Step 7 alongside the cream cheese. Total cook time drops to under 25 minutes. The flavor is slightly richer because rotisserie chicken is already well-seasoned from the cooking process.
Fresh Herb — Spring White Chicken Chili
Add 2 tablespoons of fresh chopped cilantro and 1 tablespoon of fresh lime juice in the final 2 minutes of cooking. Reduce cumin to 1 teaspoon and add ½ teaspoon of coriander. Top each bowl with fresh radish slices, sliced avocado, and extra cilantro. This version is lighter and brighter — it’s the one to make in April or May when heavy winter comfort food feels like too much.
Nutrition Information
Per Serving Breakdown (Based on 6 Servings)
| Nutrient | Amount | % Daily Value |
|---|---|---|
| Calories | ~385 | — |
| Total Fat | 14g | 18% |
| Saturated Fat | 5g | 25% |
| Cholesterol | 88mg | 29% |
| Sodium | 720mg | 31% |
| Total Carbohydrates | 28g | 10% |
| Dietary Fiber | 7g | 25% |
| Total Sugars | 3g | — |
| Protein | 36g | 72% |
| Iron | 3.2mg | 18% |
Dietary Compatibility
| Diet | Compatible | Notes |
|---|---|---|
| Gluten-Free | ✅ | All ingredients naturally gluten-free |
| Dairy-Free | ❌ | Replace cream cheese with coconut cream |
| Paleo | ❌ | Beans and cream cheese excluded from strict Paleo |
| Keto | ❌ | Skip beans — see low-carb variation above |
| Vegetarian | ❌ | Swap chicken for extra beans and vegetable broth |
| Vegan | ❌ | Requires protein swap and dairy-free cream base |
To reduce sodium, use unsalted chicken broth and rinse the canned beans before adding them. This alone can reduce sodium per serving by 150–200mg — an easy adjustment that doesn’t affect flavor.
8 Mistakes That Ruin White Chicken Chili
Every one of these mistakes is fixable. Know them before you start — not after.
❌ Mistake 1: Using Pre-Seasoned Canned Beans
Why it happens: Convenience. What goes wrong: Pre-seasoned canned beans throw off your entire seasoning balance — the chili ends up tasting like bean salt with no cumin base. The fix: Always buy plain canned cannellini or Great Northern beans and rinse them before adding.
❌ Mistake 2: Simmering at Too High a Temperature
Why it happens: Impatience. What goes wrong: High heat dries out the chicken before it can shred properly and scorches the cream base when you add it later. The fix: After the initial boil, reduce to a true medium-low. You should see occasional lazy bubbles — not a constant rolling simmer.
❌ Mistake 3: Adding Cream Cheese Too Early
Why it happens: Adding it with the broth to save a step. What goes wrong: Cream cheese breaks at simmering temperature and turns into grainy clumps that don’t smooth back out, even with stirring. The fix: Always add cream cheese in Step 7 only — at low heat, after everything else is fully cooked.
❌ Mistake 4: Under-Seasoning the Base
Why it happens: Fear of oversalting. What goes wrong: White chicken chili with too little cumin and salt tastes like warm, thin chicken broth with beans. Flat. Forgettable. The fix: Taste before and after adding cream cheese — the dairy base dulls salt slightly, so season up before adding it.
❌ Mistake 5: Using Too Much Liquid
Why it happens: Adding extra chicken broth to avoid any burning risk. What goes wrong: The white chicken chili never thickens, and the cream base gets diluted past the point where it adds any body. The fix: Stick to exactly 4 cups of broth for a 6-serving batch. Let the mashed beans do their job as the primary thickener.
❌ Mistake 6: Cutting Chicken Before Poaching
Why it happens: Thinking small pieces cook faster and more evenly. What goes wrong: Small pieces become dry and stringy before the broth is fully seasoned and reduced. The fix: Always poach chicken breasts whole. They shred into perfect texture at 165°F and absorb significantly more flavor from the broth.
❌ Mistake 7: Skipping the Rest After Shredding
Why it happens: Rushing to finish. What goes wrong: Chicken shredded and immediately returned to a hot pot tightens up and loses moisture within 2–3 minutes. The fix: Let shredded chicken rest on the cutting board for 60–90 seconds before returning it to the pot. Reduce heat first.
❌ Mistake 8: Discarding the Poaching Liquid
Why it happens: Working in batches or using a separate poaching pot. What goes wrong: The liquid the chicken cooked in is the most flavorful part of the entire recipe — it holds seasoned broth, rendered chicken fat, and spice residue from the early steps. The fix: Never discard it. The chicken stays in the same pot from start to finish for exactly this reason.
Frequently Asked Questions
What makes white chicken chili different from regular chili?
White chicken chili uses white beans and chicken instead of ground beef and red kidney beans, and skips tomatoes entirely. The base is cream-forward rather than tomato-forward, which gives it a completely different texture and flavor profile. It’s milder than traditional red chili but still deeply savory from cumin, green chiles, and long simmering time. The broth stays white or pale gold throughout — no red color anywhere.
What beans are best for white chicken chili?
Cannellini beans are the first choice because they’re large, creamy, and hold their shape while also mashing easily for natural thickening. Great Northern beans are a close second — slightly smaller but nearly identical in flavor and texture. Navy beans work but break down more quickly during simmering. Avoid dark beans like kidney or pinto — they turn the broth brown and add an earthy flavor that doesn’t belong in white chili.
How do you thicken white chicken chili?
The honest answer: mash one-third of the cannellini beans directly in the broth during Step 5. This is the cleanest natural thickener available in the recipe. The cream cheese adds a second layer of body. If you still need more thickness after both steps, mix 1 tablespoon cornstarch with 2 tablespoons cold water and stir it in at a low simmer. Flour creates a pasty texture that doesn’t work here — skip it.
Can you make white chicken chili in a slow cooker?
Yes — and it’s one of the best ways to make it. Add all ingredients except cream cheese to the slow cooker. Cook on low for 6–8 hours or high for 3–4 hours. Remove the chicken, shred it, and return it to the pot. Stir in the softened cream cheese at the end until fully melted and smooth. The texture is slightly softer and the flavor is more developed than the stovetop version because of the longer cook time.
What do you serve with white chicken chili?
Cornbread is the classic pairing and the one that works best. Warm flour tortillas for dipping are a close second. White rice turns it into a more filling complete meal. For chili toppings, shredded Monterey Jack, sour cream, diced avocado, fresh cilantro, and tortilla strips all work well together or separately. Lime wedges on the side let each person add brightness to taste.
How long does white chicken chili last in the fridge?
Up to 5 days in an airtight container. The flavor improves noticeably on day 2. The cream base will thicken when cold — add a splash of chicken broth when reheating to bring it back to the right consistency. Always reheat to at least 165°F before serving.
Can you freeze white chicken chili?
Yes — for up to 3 months. For best results, freeze before adding the cream cheese and stir it in fresh during reheating. If you’ve already added the cream cheese before freezing, it will still work after thawing — just reheat it slowly on low heat and stir frequently to prevent separation.
How do you make white chicken chili spicy?
Add one or two diced jalapeños in Step 3 alongside the green chiles. For more heat without texture, stir in ¼ to ½ teaspoon of cayenne pepper with the other spices in Step 2. Tested this 15+ times — cayenne gives clean, building heat while fresh jalapeño gives an upfront sharp hit. Use both together for an actually hot bowl.
Can I use rotisserie chicken in white chicken chili?
Yes — it’s the fastest version of this recipe. Skip the raw chicken and the 20-minute poaching step entirely. After blooming the spices and cooking the green chiles, pour in the chicken broth and add the beans. Proceed through Step 5 bean-mashing. Add the pre-shredded rotisserie chicken in Step 7 alongside the cream cheese. Total cook time drops to about 25 minutes.
Is white chicken chili healthy?
Per serving, this recipe delivers roughly 385 calories with 36 grams of protein and 7 grams of dietary fiber. The cannellini beans and chicken make it a high-protein, high-fiber meal by any reasonable measure. The cream cheese adds fat and calories but in a controlled amount. For a lighter version, reduce cream cheese to 2 oz or substitute with ¼ cup of low-fat sour cream stirred in off the heat. The sodium is the main variable to watch — use low-sodium chicken broth and rinse the beans to keep it under 600mg per serving.
You Might Also Like
If you made white chicken chili and loved it, these are worth trying next:
Recipe Card
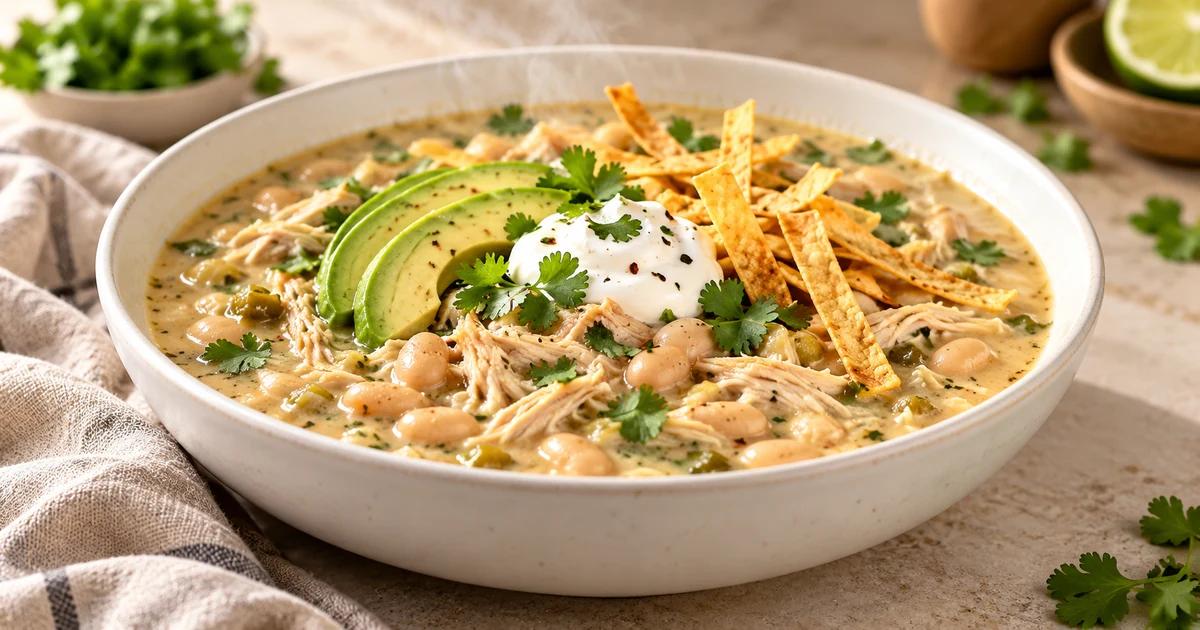

WHITE CHICKEN CHILI
Ingredients
Equipment
Method
- Heat olive oil over medium heat. Sauté diced onion 4–5 minutes until translucent. Add garlic and cook 60 seconds more.
- Add cumin, chili powder, oregano, salt, and pepper. Stir constantly for 30–45 seconds until fragrant.
- Add both cans of green chiles. Stir and cook for 2 minutes.
- Pour in chicken broth. Add whole raw chicken breasts. Bring to boil, reduce to medium-low. Simmer uncovered 20–22 minutes until chicken reaches 165°F.
- Remove chicken and shred with two forks. Mash one-third of the cannellini beans in the broth. Return shredded chicken to the pot.
- Simmer together 8–10 minutes. Taste and adjust salt.
- Reduce to low. Add softened cream cheese in pieces, stirring constantly, until fully melted and smooth — 2–3 minutes.
- Ladle into bowls. Add chili toppings of your choice and serve immediately.
Notes
✅ Mash one-third of the beans directly in the broth for natural thickness — no starch or flour needed.
🔄 Substitute rotisserie chicken for raw to cut total cook time to 25 minutes.
❄️ Refrigerate up to 5 days or freeze up to 3 months. Reheat on low with a splash of broth.
📌 This white chicken chili gets better on day 2 — the flavors deepen significantly overnight in the fridge. Make Ahead + Freezer Notes
Make up to 2 days ahead and refrigerate. For freezer storage, freeze before the cream cheese step and add it fresh during reheating for best results.
.
Nutrition Per Serving
Calories: ~385 | Protein: 36g | Fat: 14g | Carbs: 28g | Fiber: 7g | Sodium: ~720mg
Dietary Info
✅ Gluten-Free | ❌ Dairy-Free | ❌ Paleo | ❌ Keto (see variation) | ❌ Vegetarian | ❌ Vegan
Did You Make This?
Tag @DavidRecipes and leave a ⭐⭐⭐⭐⭐ rating below.
— David | DavidRecipes
Author Bio:
David is a home cook who has spent years developing straightforward, no-fuss recipes that work for real weeknight kitchens. Every recipe on DavidRecipes is made, tested, and eaten before it ever gets published — usually multiple times.




9 Comments