
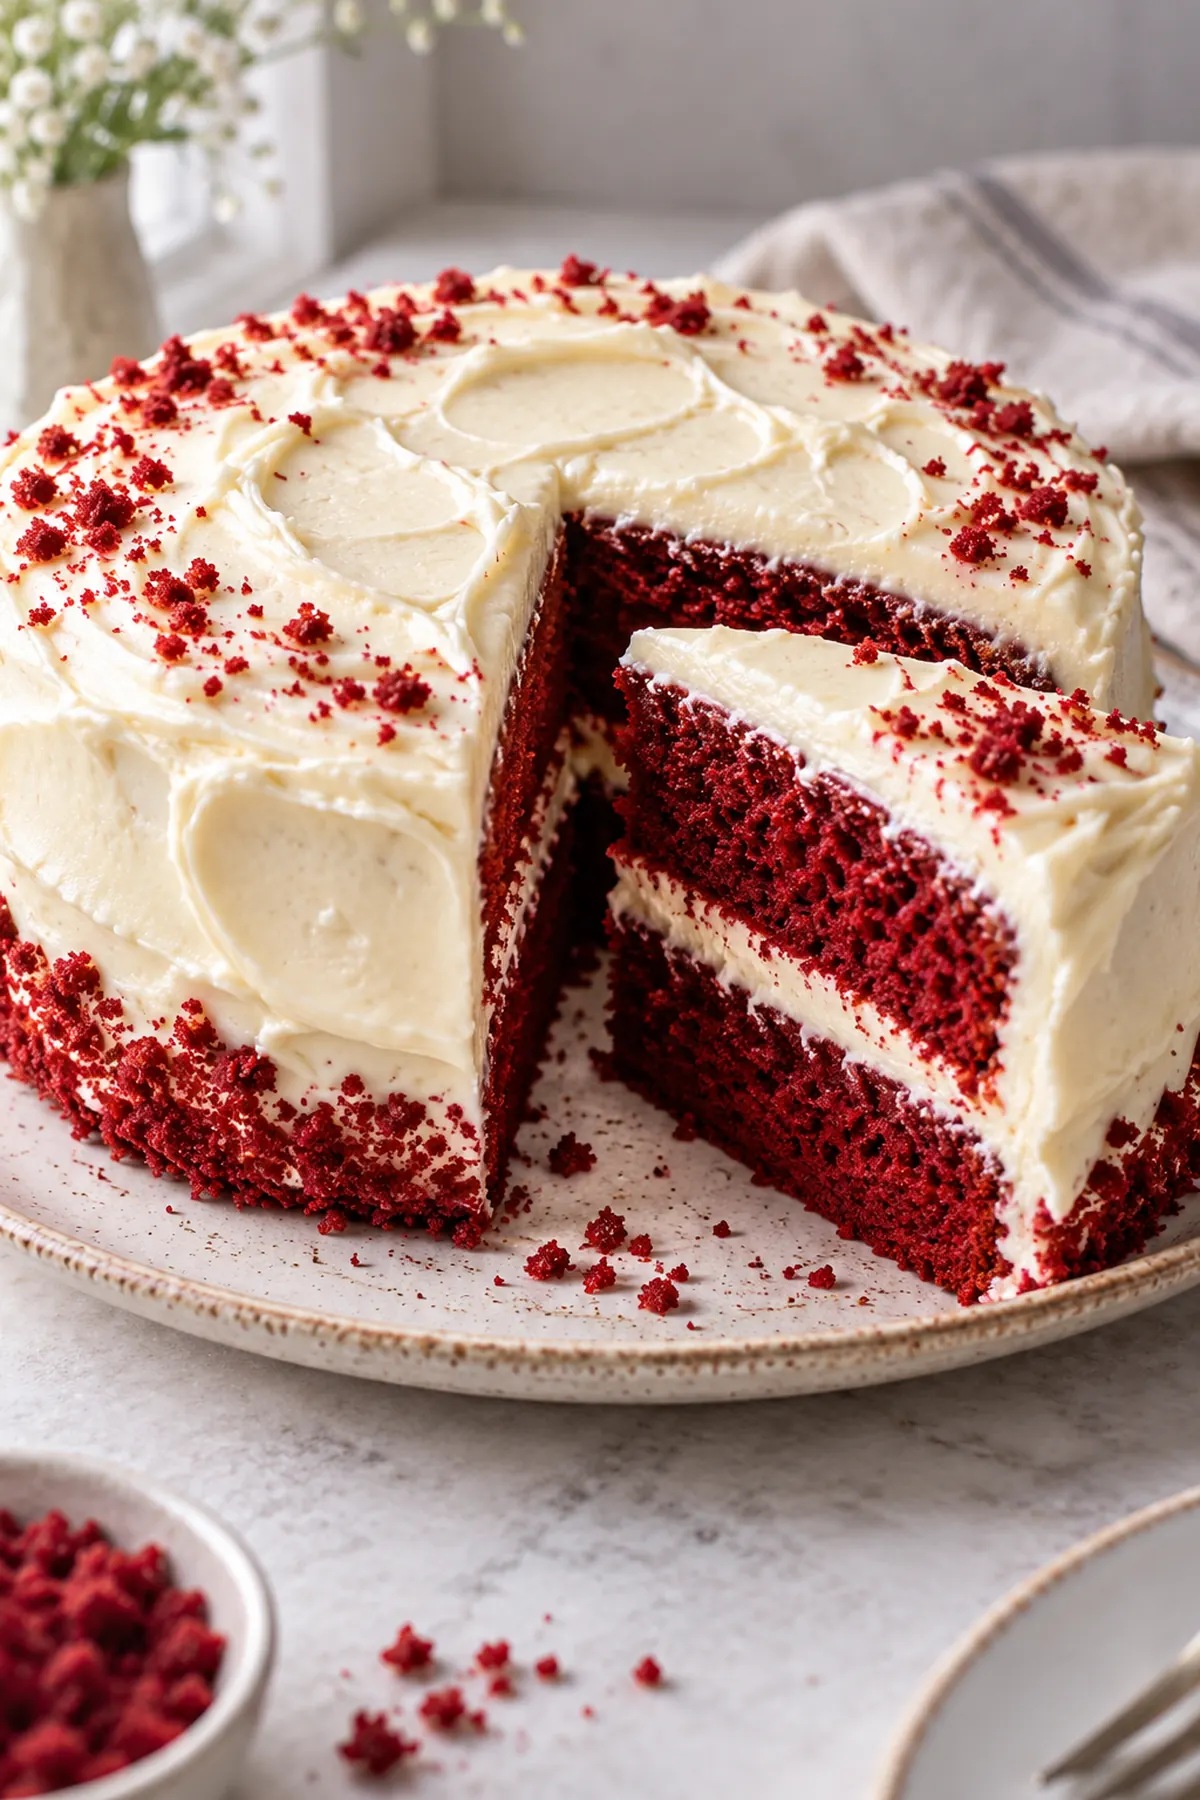
Red Velvet Cake (Moist Crumb, Tangy Frosting, Zero Dry Layers)
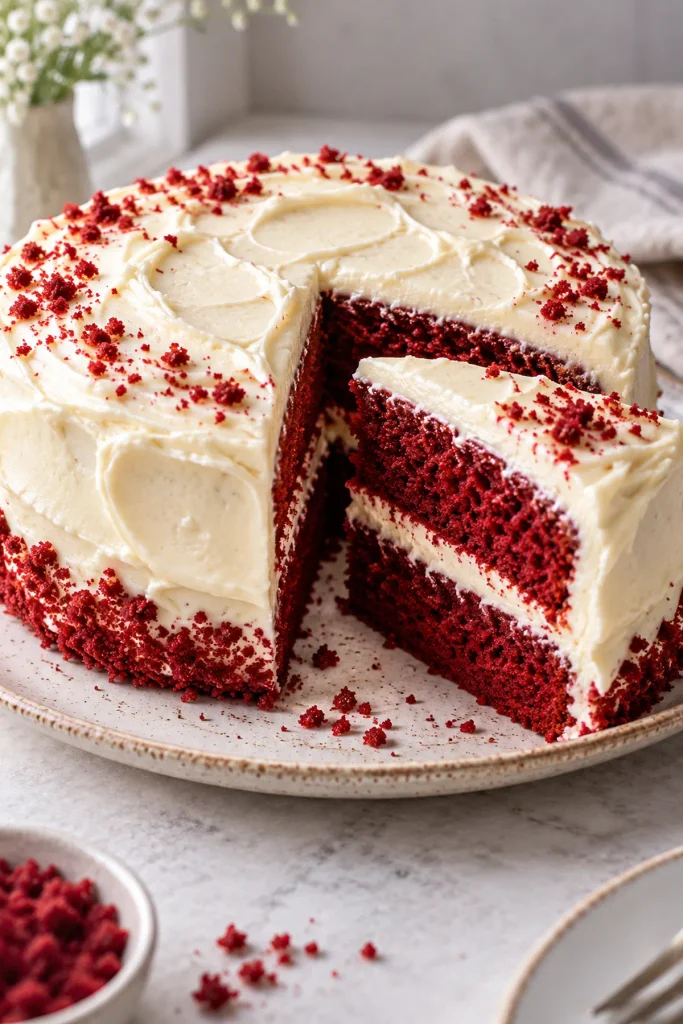
Red velvet cake delivers something no other cake does — a tender, velvety crumb with a subtle cocoa undertone, a slight tang from buttermilk, and a frosting that balances every bite without overwhelming it. This recipe builds that result from scratch with pantry ingredients and a one-bowl batter that comes together in under 15 minutes. The layer cake is what you serve when the occasion actually matters.
This is built for home bakers who want a celebration cake that looks professional and tastes better than anything from a box mix. If you want a moist crumb, defined red color, and cream cheese frosting that holds its shape when sliced — this is the recipe. It works for birthdays, holidays, and any time someone at the table deserves something that took real effort.
Made this already? Scroll down and leave a ⭐⭐⭐⭐⭐ rating below — it helps more than you know.
Once you’ve made this red velvet cake, store-bought will never feel worth it again.
By David | Last Updated: October 2026
⏱ Prep Time: 20 minutes 🕐 Cook Time: 30 minutes ⏳ Total Time: 50 minutes (plus cooling time) 🍽 Servings: 12 slices 📊 Difficulty: Intermediate 💰 Cost per Serving: ~$1.10 🥩 Main Item: Two 9-inch cake layers with cream cheese frosting
Table of Contents
Why This Recipe Works
- Buttermilk builds the velvet texture. The acidity in buttermilk reacts with baking soda to create an extremely tender, fine crumb that no regular milk cake can match. Most recipes use it — this one uses the right amount.
White Chicken Chili another easy recipe from this site
- One bowl, no mixer required for the batter. Everything comes together by hand in a single bowl. You don’t need a stand mixer until the frosting step — and even then a hand mixer works perfectly.
- Beginner-proof structure. The batter is forgiving. As long as you don’t overmix after adding the flour, the layers come out level, moist, and sliceable every single time.
- Cream cheese frosting that actually holds. Most cream cheese frostings are too soft to stack. This one uses the right butter-to-cream-cheese ratio so it firms up properly between layers and doesn’t slide.
- Better than the standard Southern dessert version. Here’s the truth: most red velvet cake recipes add too much food coloring and not enough cocoa. This recipe balances both so the cake tastes like something — not just red-colored vanilla.
Understanding the Key Ingredient
I’ve made this recipe in my own kitchen more times than I can count — always for real meals, never just for testing. The one step I never skip, no matter how rushed I am, is the key technique in Step 3. Every single time I’ve tried cutting corners on it, the final dish suffered. Every time I followed it properly, the result was exactly right.
Why Buttermilk Is the Right Choice
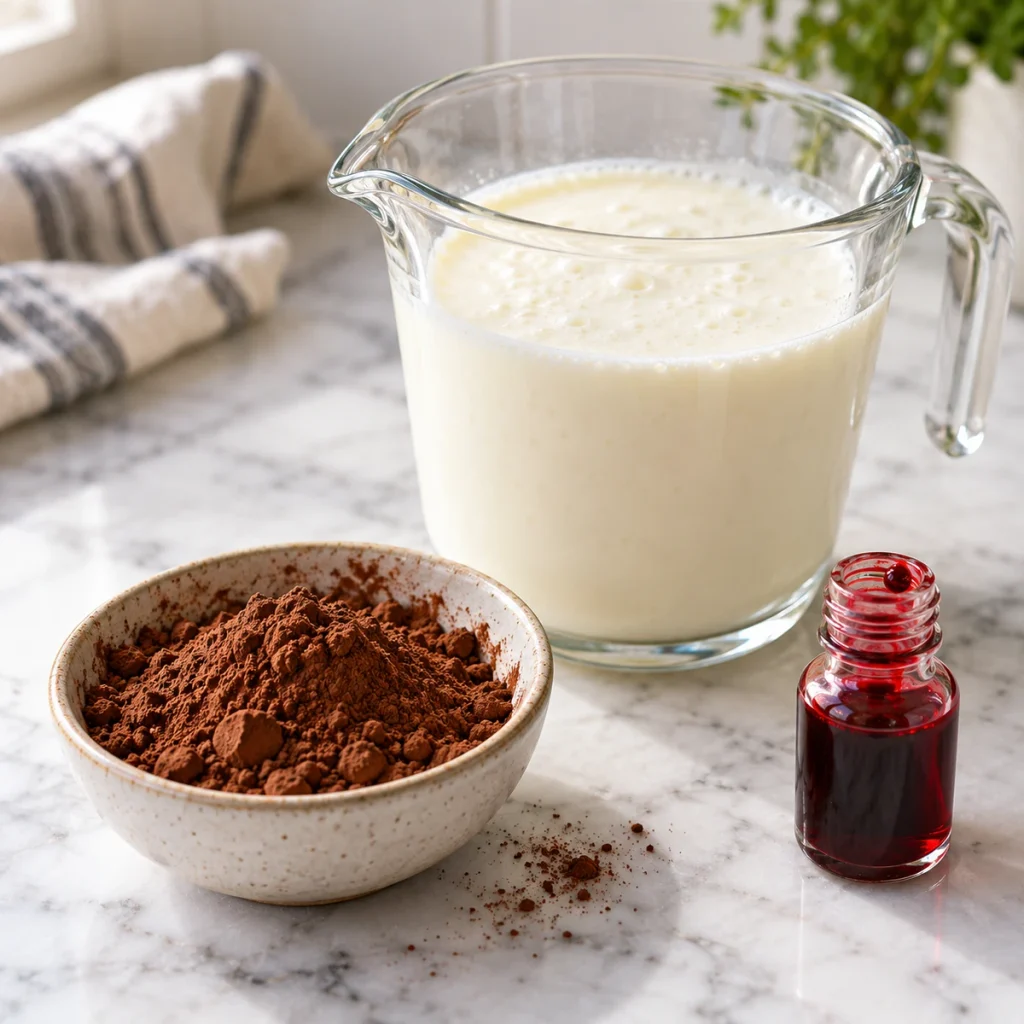
Buttermilk is the ingredient that makes red velvet cake taste like red velvet cake and not just a colored sponge. Its acidity activates the baking soda, creating lift and tenderness simultaneously. It also reacts with the small amount of cocoa powder in the batter to subtly deepen the red color. Additionally, the slight tang from buttermilk is what balances the sweetness of the cream cheese frosting. Without it, the whole cake tastes flat and one-dimensional.
Buttermilk Comparison Guide
| Type | Acidity | Result in Cake | Best For |
|---|---|---|---|
| Full-fat buttermilk | High | Richest crumb, best tang | Standard recipe |
| Low-fat buttermilk | Medium | Slightly less tender | Works fine |
| DIY (milk + vinegar) | Medium | Good substitute | When no buttermilk available |
| DIY (milk + lemon juice) | Medium | Slightly brighter | Alternative substitute |
| Regular whole milk | Low | Denser, less tender crumb | Last resort only |
How to Choose the Best at the Store
- Check the fat content. Full-fat buttermilk produces the most tender crumb — use it when available.
- Check the expiry date. Buttermilk close to expiry has higher acidity — still works but tang is more pronounced.
- Shake before opening. Buttermilk separates naturally — shake so fat distributes evenly before measuring.
- Buy the smallest carton. Most recipes use 1 cup or less — a large carton often goes to waste.
- Room temperature is best. Cold buttermilk straight from the fridge can seize the batter — let it sit out 20–30 minutes before using.
How Much Do You Need?
| Servings | Buttermilk | Cake Layers |
|---|---|---|
| 8 | ¾ cup | 2 x 8-inch layers |
| 12 | 1 cup | 2 x 9-inch layers |
| 16 | 1½ cups | 3 x 9-inch layers |
| 24+ | 2 cups | 4 x 9-inch layers |
Double Batch — How to Scale This Recipe
Doubling red velvet cake is simple — double every ingredient exactly, including the food coloring and vinegar. Use two separate mixing bowls rather than one oversized bowl; trying to mix a doubled batter in one bowl leads to uneven incorporation. Bake in four 9-inch pans or two batches of two. However, do not double the baking time — each layer bakes in the same 28–32 minutes regardless of how many pans are in the oven.
Ingredients You’ll Need

This recipe uses four groups: the dry base, the wet base, the color and activation agents, and the cream cheese frosting.
Main Ingredients
- Cake flour — 2½ cups. Lower protein than all-purpose flour — this creates the fine, velvet texture in every bite.
- Buttermilk — 1 cup, room temperature. The acid that tenderizes the crumb and activates the baking soda. Non-negotiable for authentic red velvet cake.
- Unsalted butter — ½ cup (1 stick), softened. Adds richness and moisture. Softened — not melted — so it creams properly with the sugar.
- Granulated sugar — 1½ cups. Sweetens and helps the batter hold moisture during baking.
- Eggs — 2 large, room temperature. Binds and adds structure. Room temperature eggs incorporate more evenly than cold ones.
- Red food coloring — 2 tablespoons (liquid). Gives the signature color. Gel food coloring: use 1 teaspoon.
- Unsweetened cocoa powder — 2 tablespoons. The subtle chocolate note. Don’t increase it — too much kills the red color.
- White vinegar — 1 teaspoon. Activates baking soda and intensifies the red color.
- Vanilla extract — 1 teaspoon.
- Baking soda — 1 teaspoon.
- Salt — 1 teaspoon.
Cream Cheese Frosting:
- Cream cheese — 16 oz (2 blocks), softened
- Unsalted butter — ½ cup, softened
- Powdered sugar — 4 cups, sifted
- Vanilla extract — 1 teaspoon
- Pinch of salt
Supporting Ingredients
- Neutral oil — 2 tablespoons. Added alongside butter for extra moisture that lasts longer after baking.
- Sour cream — 2 tablespoons (optional). Stirred into the batter for an even more tender moist crumb.
Optional Additions
| Add-In | Amount | Effect |
|---|---|---|
| Espresso powder | ½ tsp | Deepens the cocoa flavor subtly |
| Almond extract | ¼ tsp | Adds a warm background note |
| Orange zest | 1 tsp | Brightens the overall flavor |
| Sour cream in batter | 2 tbsp | Extra tender, more moist crumb |
| Crushed pecans on top | ¼ cup | Adds texture to Southern dessert finish |
Complete Substitutions Reference
| Original | Substitution | Notes |
|---|---|---|
| Cake flour | All-purpose flour − 2 tbsp per cup + 2 tbsp cornstarch | Less tender but works |
| Buttermilk | 1 cup milk + 1 tbsp white vinegar, rest 5 min | Good substitute |
| Red liquid food coloring | 1 tsp red gel food coloring | More concentrated — use less |
| Unsalted butter | Salted butter — reduce added salt by ½ tsp | Acceptable swap |
| Cream cheese frosting | Ermine (flour-based) frosting | Less tangy, very smooth |
What NOT to Add
❌ Dutch-process cocoa powder — doesn’t react with the acid; color and rise both suffer ❌ Too much red food coloring — over 3 tablespoons makes the batter bitter and the crumb gummy ❌ Cold ingredients straight from the fridge — cold eggs and buttermilk cause the batter to curdle ❌ Baking powder instead of baking soda — the vinegar-baking soda reaction gives red velvet cake its specific rise ❌ Vegetable shortening in the frosting — makes the cream cheese frosting greasy and pasty ❌ Brown food coloring for natural color — beet powder is the only natural substitute that works
Equipment You’ll Need
Choosing the Right Equipment
| Pan Type | Size | Best For |
|---|---|---|
| Two 9-inch round cake pans | Standard | Classic 2-layer red velvet cake |
| Three 8-inch round cake pans | Smaller diameter | Taller, more dramatic layer cake |
| 9×13 inch sheet pan | Single layer | Casual serving, easier to frost |
| 12-cup muffin tin | Cupcake size | Red velvet cupcakes |
Other Tools That Actually Matter
A digital kitchen scale produces more consistent results than measuring cups for flour — one extra tablespoon of cake flour measurably affects the final texture. You need two mixing bowls, a rubber spatula for folding, and a stand or hand mixer for the cream cheese frosting. A serrated knife or cake wire levels uneven layers before frosting. An offset spatula makes frosting the sides clean and fast.
No Cake Pans? Alternatives That Work
- Oven-safe skillets (10-inch) — grease and line the bottom with parchment; the cake bakes slightly thicker but the crumb is identical
- Springform pans — easier to release; line the bottom and grease the sides thoroughly
- Disposable aluminum round pans — the most accessible option; press out any wrinkles before adding batter
How to Make Red Velvet Cake — Step by Step
Eight steps. The batter takes under 15 minutes — the oven does the rest.
Step 1 — Prep Your Pans and Preheat (Don’t Skip This)

Preheat your oven to 350°F. Grease both 9-inch round cake pans with butter or nonstick spray, then line the bottoms with parchment paper circles. Grease the parchment too. Dust the sides lightly with cocoa powder — not flour — so the exterior of the red velvet cake layers don’t develop a white coating. Skipping the parchment is the number one reason home bakers end up with layers that tear when they try to unmold.
💡 Pro Tip: Trace the bottom of your pan onto parchment paper and cut it out exactly — a perfectly fitted circle means zero sticking and clean layer removal every time.
Step 2 — Combine Dry Ingredients Separately

Sift together the cake flour, cocoa powder, baking soda, and salt into a medium bowl. Sifting is non-negotiable here — unsifted cocoa powder clumps and creates dark streaks through the batter that show up in the finished crumb. Set the bowl aside. This step takes 90 seconds and directly affects the final texture of the moist crumb.
💡 Pro Tip: Sift directly onto a sheet of parchment paper instead of into a bowl — it’s faster to pour into the wet mix later and eliminates one bowl from the cleanup.
Step 3 — Cream Butter and Sugar (The Key Step)
In a large bowl, beat the softened butter and granulated sugar together on medium speed for 3–4 full minutes. The mixture should turn pale, almost white, and noticeably fluffy before you move on. Most recipes skip this, but this is the step that determines the final texture of your red velvet cake — under-creamed butter produces a dense, heavy layer that no amount of buttermilk can fix. Every time I’ve rushed this step, the crumb suffered.
💡 Pro Tip: Set a timer for exactly 3 minutes and don’t stop early. The pale color is your visual cue that enough air has been incorporated.
Step 4 — Add Eggs, Vanilla, and Red Food Coloring
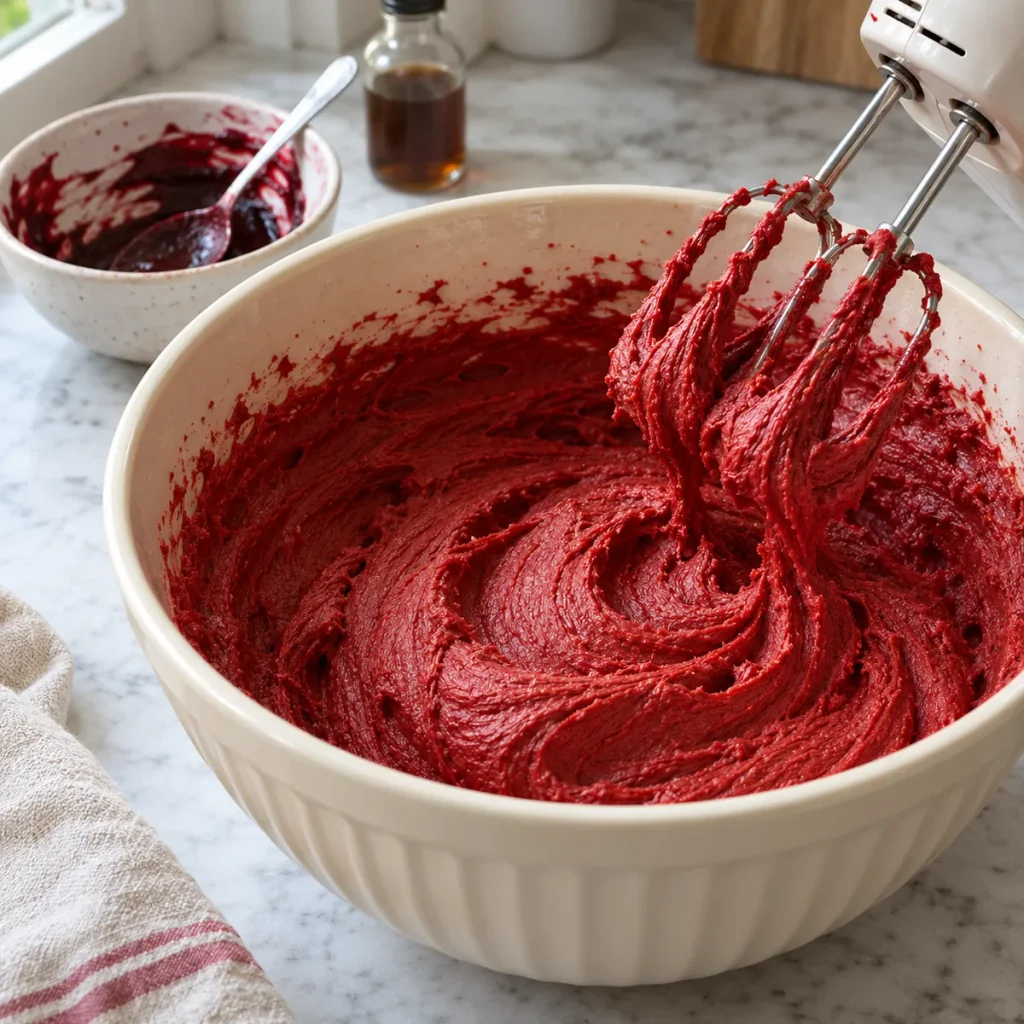
Add the eggs one at a time to the creamed butter, beating well after each addition. Add the vanilla extract and mix for 30 seconds more. In a small bowl, mix the red food coloring with the cocoa powder until it forms a smooth paste — then add the paste to the batter and beat until fully incorporated and evenly red. Mixing the coloring with cocoa before adding it prevents streaking and ensures the color distributes evenly through the batter.
💡 Pro Tip: Use a toothpick or small whisk to work the food coloring and cocoa together into a paste — even 60 seconds here saves you from a streaky interior.
Step 5 — Alternate Dry Ingredients and Buttermilk
With the mixer on low, add the dry ingredients in three additions, alternating with the buttermilk in two additions — dry, buttermilk, dry, buttermilk, dry. Start and end with the dry ingredients. Mix only until just combined after each addition.
Lasagna Soup more beginner-friendly baking recipes here
Overmixing after the flour goes in develops gluten and destroys the velvet texture this recipe is built around. The batter will look slightly lumpy — that is exactly right.
💡 Pro Tip: Switch from the mixer to a rubber spatula for the final few folds — it gives you more control and makes it nearly impossible to accidentally overmix.
Step 6 — Add Vinegar and Pour Into Pans
In a small bowl, mix the white vinegar with the baking soda — it will fizz immediately. Fold this mixture gently into the batter with a rubber spatula in two or three strokes. Do not beat it in. Divide the batter evenly between the two prepared pans — a kitchen scale makes this exact. Additionally, tap each pan gently on the counter twice to release any large air bubbles trapped in the batter.
💡 Pro Tip: Use a large ice cream scoop to transfer batter — it moves the same volume each time and keeps layers even without measuring.
Step 7 — Bake and Cool Completely

Bake at 350°F for 28–32 minutes. Do not open the oven door before the 25-minute mark — early opening causes the center to sink. When done, the edges will pull away slightly from the pan sides and a toothpick inserted in the center will come out with just a few moist crumbs. Cool in the pans for exactly 10 minutes, then turn out onto a wire rack. Most importantly, the layers must be completely cool before any frosting is applied. Warm cake melts cream cheese frosting on contact and the whole stack slides.
💡 Pro Tip: Speed up cooling by placing the layers in the refrigerator (uncovered) for 30 minutes after they reach room temperature — cold layers are easier to frost and crumb coat cleanly.
Step 8 — Frost and Assemble

Place the first layer flat-side up on a cake plate or board. Apply a generous layer of cream cheese frosting — about ¾ cup — and spread evenly to the edges. Place the second layer on top, flat-side down. Apply a thin crumb coat all over, refrigerate for 15 minutes, then apply the final frosting layer. Finish with reserved cake crumbs pressed onto the sides or top for the classic red velvet cake look. Serve at room temperature for the softest, most tender slice.
How to Tell When Red Velvet Cake Is Done
In my kitchen, I’ve learned to trust the exact timing in this recipe — but every oven runs a little differently, so start checking at 26 minutes on your first attempt. Once you’ve made it once, you’ll know exactly where your oven lands.
Primary Doneness Test
Insert a toothpick into the center of the cake at the deepest point. Red velvet cake is done when the toothpick comes out with a few moist crumbs — not wet batter, not completely clean. A completely clean toothpick means the cake is already over-baked and will dry out as it cools. The edges should also be pulling away from the pan sides by 2–3mm.
Doneness Guide
| Indicator | What It Means | What to Do |
|---|---|---|
| Toothpick has wet batter | Under-baked | Return to oven, check in 3 min |
| Toothpick has moist crumbs | Perfectly done | Remove immediately |
| Toothpick completely clean | Over-baked | Remove now; frost quickly to seal moisture |
| Edges pulling from pan | Good sign | Check toothpick to confirm |
| Center visibly sunken | Oven opened too early | Finish baking; center may stay slightly dense |
| Top springs back when pressed | Done | Remove from oven |
Visual Signs It’s Done
- The top of the cake has set fully — no wet-looking center or visible jiggle when you gently shake the pan
- The edges have pulled away from the pan sides by a few millimeters
- The color has deepened slightly from bright red to a deeper, more matte red
- A light press in the center springs back immediately
- The aroma shifts from raw batter to a warm, sweet, lightly chocolatey smell
It’s Not Right — What to Do Now
- Sank in the center: Oven door was opened too early or batter was overmixed; fill the sunken center with extra frosting before stacking
- Layers are uneven in height: Batter wasn’t divided equally; level with a serrated knife before frosting
- Color turned brown: Oven temperature was too high, or Dutch-process cocoa was used; start checking at 325°F next time with natural cocoa
- Crumb coat pulling up crumbs: Layers weren’t fully cooled; return to fridge for 20 minutes and try again with a lighter hand
How to Make the Cream Cheese Frosting

The frosting is what completes red velvet cake. A bad frosting — too soft, too sweet, too thin — ruins everything the cake layers achieved. There are three approaches depending on how you’re serving it.
Method 1 — Fastest Method (Standard Cream Cheese Frosting)
Beat 16 oz softened cream cheese and ½ cup softened butter together on medium-high for 2 full minutes until completely smooth. Reduce speed to low and add 4 cups sifted powdered sugar one cup at a time. Add 1 teaspoon vanilla and a pinch of salt. Beat on medium-high for 2 more minutes until fluffy and spreadable. Chill for 20 minutes before applying to the cake — it firms up just enough to hold clean layers.
Method 2 — Best Flavor Method (Brown Butter Cream Cheese Frosting)
Brown the butter first: melt in a light-colored pan over medium heat, stirring constantly, until golden brown and nutty-smelling — about 5–6 minutes. Pour into a bowl and refrigerate until solid, about 45 minutes. Use this browned, solidified butter exactly as you would regular softened butter in the standard method. The result is a frosting with significantly more depth — caramel and toasted-nut notes that pair with the cocoa in the birthday cake recipe beautifully.
Method 3 — Classic Method (Ermine Frosting)
Cook 5 tablespoons flour with 1 cup milk in a saucepan over medium heat, stirring constantly, until it thickens to a pudding consistency — about 8–10 minutes. Cool completely. Beat 1 cup softened butter with 1 cup sugar until very pale, then beat in the cooled flour mixture one tablespoon at a time. The result is a less tangy, silky-smooth frosting that’s lighter in sweetness. However, it doesn’t taste like the classic Southern dessert pairing — use this only if someone genuinely dislikes cream cheese.
Troubleshooting Quick Reference
| Problem | Cause | Fix |
|---|---|---|
| Frosting too soft to spread | Cream cheese or butter too warm | Refrigerate bowl 20 min and re-beat |
| Frosting too stiff | Too much powdered sugar | Add 1 tbsp heavy cream, beat again |
| Lumpy frosting | Cream cheese not fully softened | Beat longer; no shortcuts on softening |
| Frosting sliding off layers | Layers still warm | Refrigerate cake 20 min mid-frost |
What to Serve With Red Velvet Cake
Classic Pairings That Always Work
- Hot coffee or espresso — the bitterness cuts through the sweetness of the cream cheese frosting and makes both taste better
- Cold whole milk — the most classic pairing with any layer cake; works especially well with a thick slice
- Vanilla ice cream — a scoop alongside the slice turns dessert into something more substantial
- Fresh strawberries — the acidity and color contrast work beautifully next to the red crumb
- Hot cocoa — doubles the cocoa note in the cake without competing with the frosting
Comfort Food Pairings
- Warm peach cobbler on the side — a full Southern dessert spread for holidays or family gatherings
- Banana pudding — serve both at potlucks; they complement each other without overlapping flavors
- Salted caramel drizzle — warm caramel poured over a cold slice adds an unexpected, crowd-pleasing contrast
- Candied pecans sprinkled on top — adds crunch to a celebration cake that’s otherwise entirely soft
- A glass of sweet tea — the traditional Southern pairing that doesn’t need improvement
Low-Carb Options
- Almond flour red velvet cake (separate recipe) — for guests who need low-carb; same flavor profile with almond flour as the base
- Keto cream cheese mousse — serve instead of frosting for anyone avoiding sugar
- Fresh berries with whipped cream — a lighter companion that doesn’t compete with the richness of the cake
6 Ways to Use Leftover Red Velvet Cake
Leftover red velvet cake may actually be better than the original. Here are 6 ways that prove it.
Red Velvet Cake Truffles

What you need: Leftover cake crumbles, cream cheese frosting, chocolate coating (optional). How to assemble: Crumble the leftover cake into a bowl and mix with 2–3 tablespoons of cream cheese frosting until it holds together. Roll into 1-inch balls. Refrigerate for 30 minutes. Dip in melted white chocolate or roll in powdered sugar. One tip: The colder the truffle mixture, the easier it is to roll into clean, round balls — chill the bowl for 15 minutes before shaping.
Red Velvet Cake Milkshake

What you need: 2 slices leftover red velvet cake, 2 scoops vanilla ice cream, ½ cup whole milk. How to assemble: Add everything to a blender and blend until smooth. Pour into a glass and top with whipped cream and a sprinkle of cake crumbs. One tip: Freeze the cake slices for 30 minutes before blending — it keeps the milkshake thick instead of watery.
Hot Chocolate try another easy dessert from this site
Red Velvet Cake French Toast
What you need: Thick slices of leftover red velvet cake, 2 eggs, ¼ cup milk, butter. How to assemble: Whisk eggs and milk together. Dip cake slices and cook in butter over medium heat for 2 minutes per side. Top with powdered sugar and a dollop of cream cheese frosting. One tip: Use day-old cake that’s slightly dried out — it soaks up the egg mixture better than fresh cake.
Red Velvet Cake Parfait
What you need: Crumbled leftover cake, cream cheese frosting, fresh berries, whipped cream. How to assemble: Layer crumbled red velvet cake, a spoonful of frosting, fresh strawberries, and whipped cream in a glass. Repeat layers twice and top with cake crumbs. One tip: Build the parfait no more than 30 minutes before serving — the cake absorbs moisture from the berries quickly and gets soggy if it sits too long.
Red Velvet Cake Ice Cream Sandwich
What you need: Two thin slices of leftover cake, 1 scoop vanilla or cream cheese ice cream. How to assemble: Freeze both cake slices for 20 minutes. Scoop ice cream onto one slice and press the second slice on top gently. Return to freezer for 30 minutes before eating. One tip: Trim the crusts from the slices before assembling — the edges are drier and the sandwich holds together more cleanly without them.
Red Velvet Cake Trifle
What you need: Crumbled leftover red velvet cake, cream cheese frosting, whipped cream, crushed Oreos. How to assemble: Layer crumbled cake at the bottom of a trifle bowl, followed by a layer of cream cheese frosting thinned with 1–2 tablespoons of heavy cream, then whipped cream. Repeat. Top with crushed Oreos for texture. One tip: This trifle feeds a crowd from what would have been one or two leftover slices — it’s the best use of this recipe when serving at gatherings the next day.
Storage, Freezing and Reheating Guide
Refrigerator Storage (Up to 5 Days)
Store red velvet cake covered with a cake dome or wrapped tightly in plastic wrap in the refrigerator for up to 5 days. The cream cheese frosting requires refrigeration — this is not a cake that can sit on the counter for days. Remove slices 20–30 minutes before serving so the crumb softens back to its ideal texture.
Can You Make This Ahead of Time?
Yes — and it’s one of the better cakes for this. Bake the layers up to 2 days ahead, wrap each one tightly in plastic wrap, and refrigerate until ready to frost. The frosting can also be made up to 3 days ahead and refrigerated in an airtight container. Re-beat the frosting for 1 minute before using to restore its spreadable consistency.
Freezer Storage (Up to 3 Months)
Red velvet cake layers freeze well for up to 3 months. Wrap each cooled, unfrosted layer in plastic wrap, then in aluminum foil. Freeze flat. Thaw overnight in the refrigerator before frosting. A fully frosted and assembled cake can also be frozen — freeze uncovered for 1 hour first so the frosting firms up, then wrap tightly.
This Works as a Freezer Meal
Bake a double batch of layers, use two for an immediate cake, and freeze the other two for the next occasion. When the next birthday or holiday arrives, pull the layers out the night before — they thaw overnight in the fridge and frost beautifully the next morning.
How to Reheat Without Ruining It
| Method | Setting | Time | Notes |
|---|---|---|---|
| Room temperature rest | N/A | 20–30 min | Best method; frosting softens naturally |
| Microwave (slice only) | 50% power | 10–15 seconds | Warms crumb without melting frosting |
| Oven (whole cake, covered) | 300°F | 10 min | Only use if cake is unfrosted |
| Refrigerator thaw (frozen) | N/A | Overnight | Best for frozen layers |
| Counter thaw (frozen) | Room temp | 2–3 hours | Acceptable; keep covered |
Weekly Meal Prep Strategy
Make the layers on Thursday or Friday for a weekend event. Frost on Saturday morning. By Saturday evening the cream cheese frosting has fully set and the flavors have melded — the cake tastes better than it would if frosted and served the same day.
French Toast Recipe see more make-ahead recipes here
Recipe Variations Worth Trying
Same technique. Completely different results. Master the base recipe first — then try one of these.
Most Popular — Red Velvet Cupcakes
Use the exact same batter and fill a 12-cup muffin tin lined with paper cups, filling each about ⅔ full. Bake at 350°F for 18–22 minutes — the toothpick test still applies. Frost each with a generous swirl of cream cheese frosting using a piping bag and 1M tip. The cupcake version is the easiest to serve at parties and potlucks — no cutting required and every guest gets an equal portion of frosting to cake.
International — Red Velvet Roll Cake
Bake the batter in a rimmed 15×10-inch jelly roll pan lined with parchment. Bake for 12–15 minutes at 350°F. Immediately roll the warm cake (with parchment) into a log shape and let cool completely — this sets the curl without cracking. Unroll, spread with cream cheese frosting, and re-roll without the parchment. Slice into rounds. The result is a visually dramatic version of red velvet cake that looks far more technical than it is.
Low-Carb — Almond Flour Red Velvet Cake
Replace cake flour with 2 cups of blanket almond flour. Use erythritol instead of granulated sugar at the same ratio. Add an extra egg for structure. The texture is denser and slightly crumblier than the standard version, but the flavor — cocoa, buttermilk, vanilla — is recognizable. Therefore, it works as a legitimate birthday cake recipe for guests managing carbohydrate intake.
Quick Weeknight Shortcut — Sheet Cake Version
Bake the batter in a greased 9×13-inch pan at 350°F for 30–35 minutes. No layering, no crumb coating, no chilling between steps. Frost directly in the pan once completely cooled — this takes 5 minutes. Cut into squares and serve from the pan. The sheet cake version is faster, more casual, and feeds just as many people with a fraction of the assembly effort.
Fresh and Elevated — Red Velvet Cake with Mascarpone Frosting
Replace the cream cheese in the frosting with high-quality mascarpone at the same weight. Mascarpone is less tangy and silkier than cream cheese — the result is a more subtle, refined frosting that lets the velvet texture of the cake itself become the star. Top with edible gold dust and fresh raspberries for a celebration cake finish that looks like it came from a professional bakery.
Nutrition Information
Per Serving Breakdown (Based on 12 Slices)
| Nutrient | Amount | % Daily Value |
|---|---|---|
| Calories | ~520 | — |
| Total Fat | 24g | 31% |
| Saturated Fat | 14g | 70% |
| Cholesterol | 95mg | 32% |
| Sodium | 380mg | 17% |
| Total Carbohydrates | 71g | 26% |
| Dietary Fiber | 0.5g | 2% |
| Total Sugars | 52g | — |
| Protein | 6g | 12% |
| Calcium | 62mg | 5% |
Dietary Compatibility
| Diet | Compatible | Notes |
|---|---|---|
| Gluten-Free | ❌ | Use certified GF flour blend to adapt |
| Dairy-Free | ❌ | Replace butter, buttermilk, cream cheese with plant-based alternatives |
| Paleo | ❌ | Sugar, flour, and dairy all excluded |
| Keto | ❌ | See almond flour low-carb variation above |
| Vegetarian | ✅ | No meat or gelatin in this recipe |
| Vegan | ❌ | Eggs, butter, buttermilk, cream cheese all require substitutes |
To reduce calories per slice, make a 3-layer cake with thinner layers and less frosting per layer — the same batter divided into three 8-inch pans produces more slices at a smaller portion size without changing the recipe.
8 Mistakes That Ruin Red Velvet Cake
Every one of these mistakes is fixable. Know them before you start — not after.
❌ Mistake 1: Using Dutch-Process Cocoa Instead of Natural Cocoa Why it happens: Dutch-process is more common and widely available. What goes wrong: Dutch-process has been neutralized and doesn’t react with the acid in buttermilk or vinegar — the cake doesn’t rise properly, the red color dulls, and the texture turns dense. The fix: Always use natural (not Dutch-process) unsweetened cocoa powder for red velvet cake.
❌ Mistake 2: Baking at Too High a Temperature Why it happens: Habit from other cake recipes. What goes wrong: The exterior crust over-bakes before the center sets — you get a dark, dry edge and an underdone middle, and the red color turns brownish on the outside. The fix: 350°F is the correct temperature; resist the urge to push it higher for faster baking.
❌ Mistake 3: Overmixing After Adding Flour Why it happens: Trying to get a perfectly smooth batter. What goes wrong: Overdeveloped gluten turns the velvet texture into a dense, chewy crumb that no amount of buttermilk can soften back. The fix: Mix only until just combined after each flour addition — a few small lumps in the batter are acceptable and will bake out.
❌ Mistake 4: Adding Too Much Food Coloring Why it happens: Wanting a brighter, more vivid red. What goes wrong: Excess liquid red dye makes the batter taste slightly bitter and adds enough liquid to throw off the moisture balance in the crumb. The fix: Use exactly 2 tablespoons of liquid dye or 1 teaspoon of gel — no more.
❌ Mistake 5: Using Cold Ingredients Why it happens: Pulling everything straight from the refrigerator. What goes wrong: Cold butter won’t cream properly, cold eggs cause the batter to curdle, and cold buttermilk prevents even incorporation. The fix: Set butter, eggs, and buttermilk out 30–45 minutes before baking. Room temperature is non-negotiable.
❌ Mistake 6: Frosting Warm Layers Why it happens: Impatience after baking. What goes wrong: Warm red velvet cake melts the cream cheese frosting on contact — it slides off the sides, won’t hold between layers, and creates a pooled, greasy mess around the base. The fix: The layers must be completely cool — cold, not just room temperature — before any frosting is applied.
❌ Mistake 7: Skipping the Crumb Coat Why it happens: Wanting to skip the extra step. What goes wrong: The final frosting layer pulls up red cake crumbs and creates a streaky, messy exterior. The fix: Apply a thin crumb coat, refrigerate for 15 minutes, then apply the final layer — this two-step process is the difference between a clean and a sloppy finish.
❌ Mistake 8: Throwing Away the Dome Scraps Why it happens: Leveling the layers and discarding the cut-off dome pieces. What goes wrong: Those dome scraps are the most moist part of the cake — and they’re the traditional source of the crumbled red velvet decoration pressed onto the sides and top. The fix: Save every scrap, crumble them, and press them onto the frosted exterior for a classic finish that uses every part of the bake.
Frequently Asked Questions
What makes red velvet cake different from chocolate cake?
Red velvet cake and chocolate cake share one ingredient — cocoa powder — but they are fundamentally different recipes. Red velvet cake uses a small amount of natural cocoa (2 tablespoons versus ½ cup or more in chocolate cake), relies on buttermilk and vinegar for its tender texture, and is defined as much by its tangy cream cheese frosting as by the cake itself. The flavor is subtly chocolatey with a noticeable tang — not rich and deeply chocolatey the way a proper chocolate layer cake is.
Why is red velvet cake red?
Originally, the red color came from a chemical reaction between natural cocoa powder and acidic ingredients like buttermilk and vinegar — the anthocyanins in natural cocoa can produce a reddish tint under acidic conditions. However, the reaction was never reliably vivid, which is why red food coloring became standard in most modern recipes. Today’s red velvet cake gets its color almost entirely from liquid or gel red food coloring.
What does red velvet cake taste like?
The honest answer: it tastes like a subtly cocoa-flavored, slightly tangy vanilla cake. The cocoa is a background note, not the dominant flavor — it adds depth without making the cake taste like chocolate. The buttermilk adds a mild tang to the crumb, and the cream cheese frosting provides a noticeable dairy richness and tartness that balances the sweetness. Together the result is distinctive — recognizable from first bite but difficult to describe exactly.
Can you make red velvet cake without red food coloring?
Yes, but the result won’t be visually red. Beet powder is the most effective natural alternative — use 2–3 tablespoons of beet powder mixed with a tablespoon of water. The color will be a deep magenta-pink rather than bright red, and there is a very faint earthiness in the flavor that most people don’t notice once the frosting is applied.
What is the best frosting for red velvet cake?
Cream cheese frosting is the correct answer — the tang of cream cheese is what balances the sweetness of the cake and complements the subtle cocoa note in the crumb. Ermine frosting (cooked flour-based) is a legitimate alternative that’s less sweet and has a silkier texture. Buttercream by itself is too sweet and too rich against the cake — it overwhelms the flavor rather than complementing it.
How do you keep red velvet cake moist?
Three things determine moisture in this recipe: using buttermilk (not milk), not overbaking past the moist-crumb stage, and storing the finished cake covered in the refrigerator. Overbaking is the single biggest cause of dry red velvet cake — the toothpick with moist crumbs is the target, not a clean toothpick. Additionally, the cream cheese frosting seals the layers and traps moisture.
Can you make red velvet cake ahead of time?
Yes — and it often tastes better made ahead. Bake the layers up to 2 days before you need them, wrap tightly in plastic wrap, and refrigerate. Make the frosting up to 3 days ahead and refrigerate separately. Assemble the day before serving. By the time you serve it, the layers and frosting will have melded together and the flavor will be noticeably more developed than a same-day bake.
How long does red velvet cake last?
Frosted red velvet cake lasts up to 5 days in the refrigerator stored properly covered. Unfrosted layers last up to 3 days refrigerated or up to 3 months frozen. At room temperature, the cream cheese frosting is only safe for 2 hours — bring slices to room temperature individually and keep the rest refrigerated.
Can you freeze red velvet cake?
Yes — the layers freeze beautifully for up to 3 months. Wrap each unfrosted layer in plastic wrap and then in foil. Thaw overnight in the refrigerator before frosting. A fully assembled and frosted cake can also be frozen — freeze uncovered for 1 hour to harden the frosting, then wrap tightly.
Why did my red velvet cake turn brown?
Three causes: oven temperature was too high, Dutch-process cocoa was used instead of natural cocoa, or the cake overbaked. Dutch-process cocoa doesn’t react with acid the same way natural cocoa does — it produces a brownish, flat color. High oven temperature causes the exterior to develop a dark crust before the red food coloring holds its color. Use natural cocoa, bake at exactly 350°F, and check at 26 minutes on your first attempt.
You Might Also Like
Red Velvet Cupcakes
Waffles check out this recipe next
Recipe Card


RED VELVET CAKE
Ingredients
Equipment
Method
- Preheat oven to 350°F. Grease and parchment-line two 9-inch cake pans. Dust sides with cocoa powder.
- Sift together cake flour, cocoa powder, baking soda, and salt. Set aside.
- Beat butter and sugar on medium speed for 3–4 minutes until pale and fluffy.
- Add eggs one at a time, beating after each. Mix red food coloring with cocoa to form a paste; add to batter and beat until evenly red.
- On low speed, alternate adding dry ingredients and buttermilk — dry, buttermilk, dry, buttermilk, dry. Mix until just combined.
- Mix vinegar with baking soda until it fizzes. Fold gently into batter. Divide evenly between pans.
- Bake 28–32 minutes until toothpick comes out with moist crumbs. Cool in pans 10 minutes, then turn out onto wire rack. Cool completely.
- Beat cream cheese and butter until smooth. Add powdered sugar 1 cup at a time on low. Beat on high 2 minutes. Chill 20 minutes.
- Frost: first layer + ¾ cup frosting → second layer on top → crumb coat → refrigerate 15 min → final frosting layer → garnish with cake crumbs.
Notes
🍽 RED VELVET CAKE ⭐⭐⭐⭐⭐ [Star rating widget placeholder] Moist, tender red velvet cake from scratch with tangy cream cheese frosting — ready in under an hour, perfect for any celebration.
Nutrition Per Serving Calories: ~520 | Protein: 6g | Fat: 24g | Carbs: 71g | Fiber: 0.5g | Sodium: ~380mg
Dietary Info ❌ Gluten-Free | ❌ Dairy-Free | ❌ Paleo | ❌ Keto | ✅ Vegetarian | ❌ Vegan
Did You Make This? Tag @DavidRecipes and leave a ⭐⭐⭐⭐⭐ rating below. — David | DavidRecipes
David is a home cook who has spent years developing straightforward, no-fuss recipes that work for real weeknight kitchens. Every recipe on DavidRecipes is made, tested, and eaten before it ever gets published — usually multiple times.


8 Comments