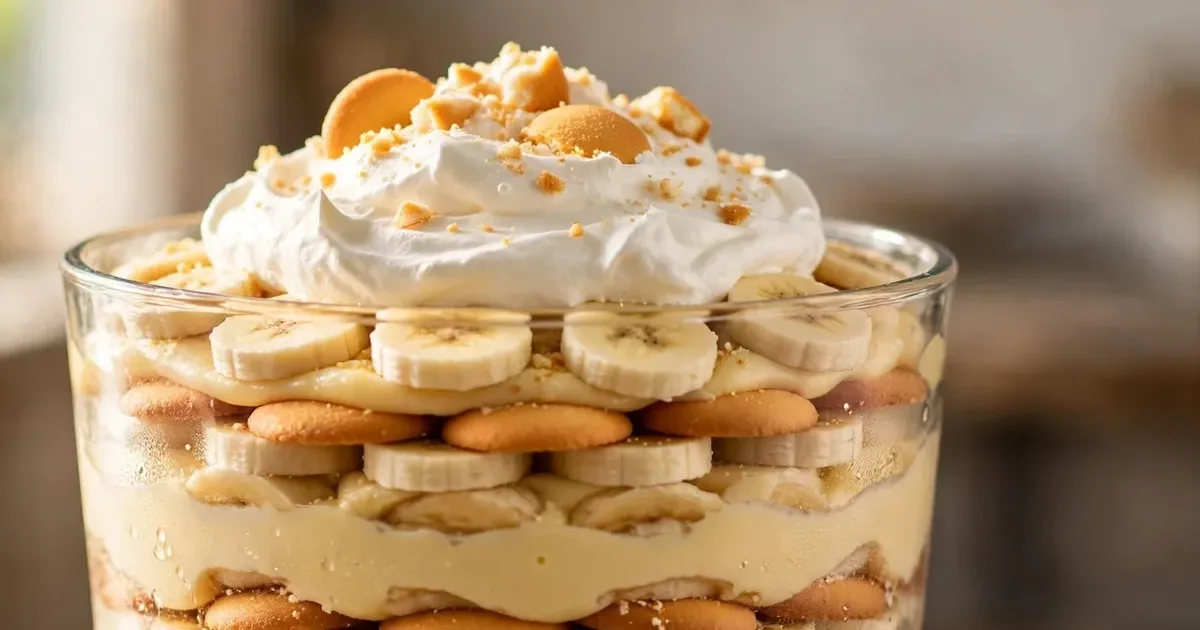
Best Banana Pudding (Creamy, Ready in 30 Minutes)
⭐⭐⭐⭐⭐ Rate this recipe

Banana pudding done right has a genuinely rich, homemade custard base with real vanilla flavor, layered with soft wafers and ripe banana slices — not a thin, bland pudding made from an instant mix with mushy, browning fruit. This banana pudding recipe uses a proper stovetop custard technique plus a specific tempering method that prevents scrambled eggs, producing a silky, thick result every time. The entire dish comes together in about 30 minutes of active time, plus chilling.
This recipe is built for anyone who’s made a watery, flavorless batch from a box and wants a version that tastes like a genuine Southern classic. If you’ve ever ended up with a thin, runny custard or bananas that turned brown and unappealing before serving — every one of those problems has a specific fix here. It works for a potluck dessert table, a summer cookout, or a comforting family dessert that holds up well overnight.
Made this already? Scroll down and leave a ⭐⭐⭐⭐⭐ rating below — it helps more than you know.
Once the custard technique in this recipe clicks, the instant pudding version stops making sense.
⏱ Prep Time: 15 minutes
🕐 Cook Time: 15 minutes
⏳ Total Time: 30 minutes (plus at least 4 hours to chill)
🍽 Servings: 8
📊 Difficulty: Easy
💰 Estimated Cost: ~$8 total / ~$1.00 per serving
🍌 Main Item: Homemade vanilla custard layered with wafers and bananas
Table of Contents
Why This Banana Pudding Recipe Works
- A real stovetop custard instead of instant pudding mix. Most quick versions rely on instant pudding, which tastes noticeably artificial and thin. This recipe cooks a genuine custard from eggs, milk, and sugar, producing a richer, more authentic flavor and texture.
👉 another easy potluck dessert here
- Tempering the eggs properly before adding them to the hot milk. Here’s the truth: dumping cold eggs straight into hot liquid scrambles them instantly. Slowly warming the eggs first with a bit of the hot milk prevents this entirely.
- Cornstarch as a stabilizing thickener. This ingredient is what keeps the custard thick and sliceable rather than loose and runny, even after a day in the fridge.
- Using just-ripe, not overripe, bananas. Overripe bananas turn mushy and brown far too quickly once sliced into the pudding, while just-ripe ones hold their shape and color much longer.
- Chilling for at least 4 hours before serving. This resting time lets the wafers soften into the custard and the flavors meld together, which is exactly what defines the texture people expect from this dessert.
Understanding the Key Ingredient
The one step worth never skipping in this recipe, no matter how tempting it is to rush, is the key technique in Step 2. Skipping it is the most common reason the custard turns out lumpy or scrambled instead of silky smooth. Followed properly, the result comes out right every time.
Why Just-Ripe Bananas Are the Right Choice
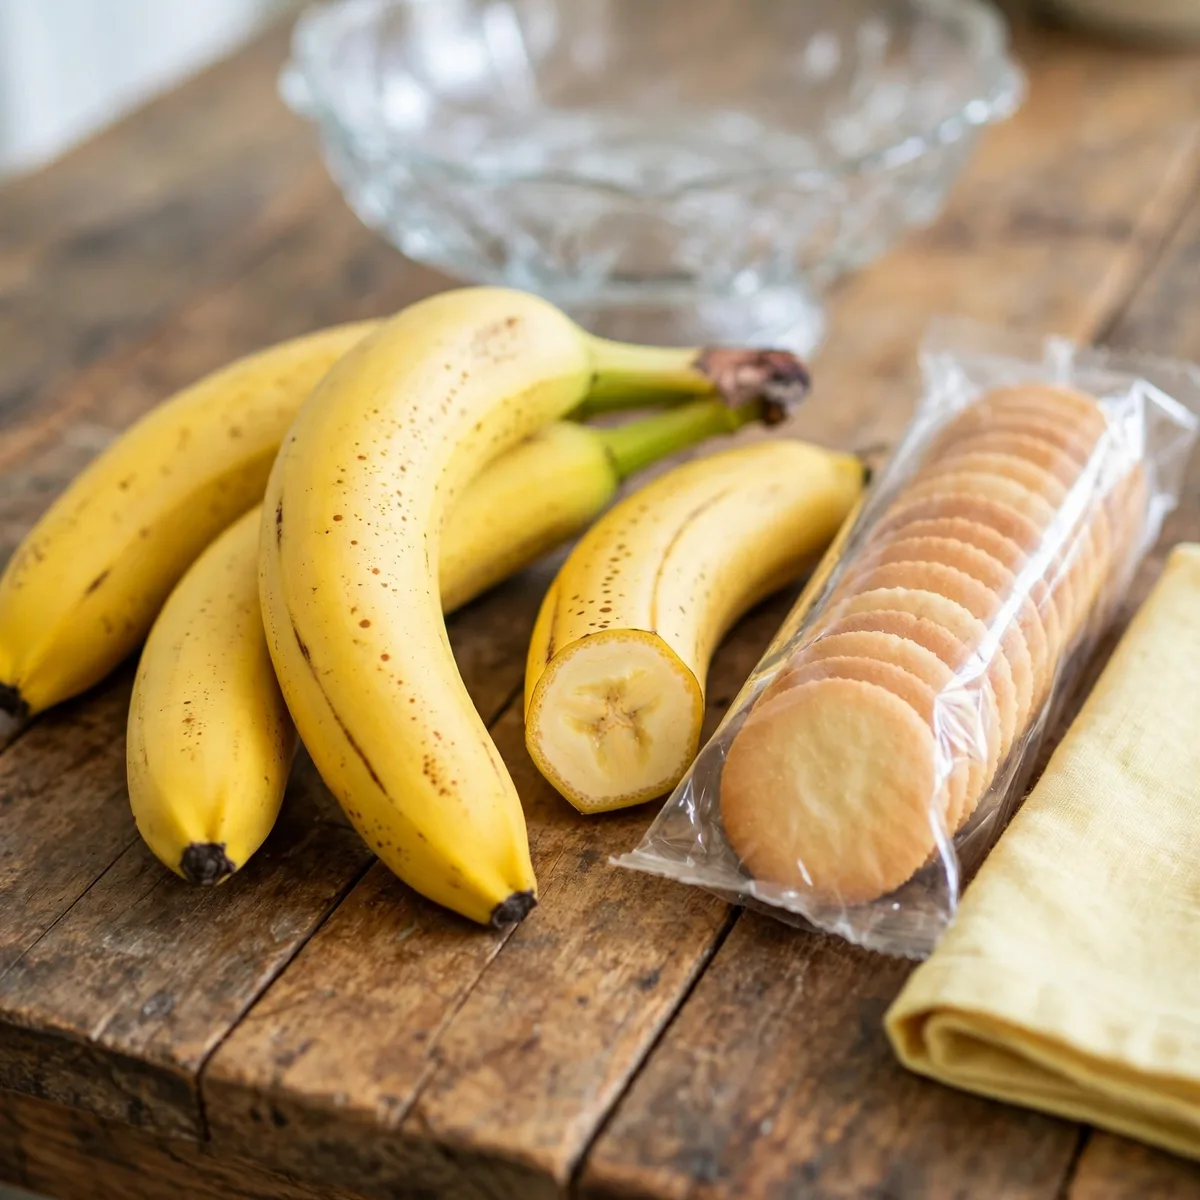
Just-ripe bananas, with a solid yellow peel and only a few small brown spots, hold their firm texture and pale color far longer once sliced into this dessert than overripe bananas, which have already begun breaking down internally and turn mushy and visibly brown within hours. Overripe bananas also carry a more intense, almost fermented sweetness that can throw off the balance of the custard’s vanilla flavor. Additionally, just-ripe bananas slice more cleanly, which matters for the visual layering that makes this dessert look as good as it tastes.
Banana Ripeness Comparison Guide
| Ripeness | Texture When Sliced | Browning Speed | Best For |
|---|---|---|---|
| Just-ripe, solid yellow with few spots | Firm, clean slices | Slow | Best overall result |
| Slightly underripe | Very firm, less sweet | Very slow | Acceptable but less flavorful |
| Overripe, heavily spotted | Soft, mushy | Very fast | Not recommended for layering |
| Black, fully ripe | Very soft, falls apart | Immediate | Avoid — better suited for banana bread |
How to Choose the Best at the Store
- Look for a solid yellow peel with only a few small brown spots. This indicates the right stage of ripeness for slicing.
- Avoid bananas with large brown or black patches. These are past the ideal stage for this recipe.
- Buy bananas a day or two before making the pudding. This timing usually lands them at just the right ripeness.
- Firm bananas hold their shape better when sliced. Avoid any that feel overly soft to the touch.
- A few bananas slightly underripe is safer than overripe. They’ll continue ripening slightly even after slicing, while overripe ones only get softer.
How Much Do You Need?
| Servings | Bananas | Vanilla Wafers |
|---|---|---|
| 4 | 2 medium | 1 cup |
| 8 | 4 medium | 2 cups |
| 12 | 6 medium | 3 cups |
| 16 | 8 medium | 4 cups |
Double Batch — How to Scale This Banana Pudding Recipe
Doubling works cleanly as long as the custard is cooked in a large enough saucepan, since a crowded pot makes stirring and monitoring the thickening process more difficult. Use a larger trifle dish or two separate dishes for layering, since an overly deep single dish can make the layers harder to see and serve neatly. Chilling time stays the same regardless of batch size.
Ingredients You’ll Need

This recipe uses straightforward pantry and fresh ingredients. Here is everything broken down.
Main Ingredients
- Whole milk — 3 cups. The liquid base of the custard. Whole milk produces a richer result than lower-fat options.
- Egg yolks — 4 large. Thickens and enriches the custard, along with the cornstarch.
- Granulated sugar — ¾ cup. Sweetens the custard base.
- Cornstarch — ¼ cup. The primary stabilizing thickener that keeps the custard set and sliceable.
- Vanilla extract — 1½ teaspoons. The defining flavor of a classic custard.
- Vanilla wafers — 2 cups, plus extra for garnish. The classic layering cookie for this dessert.
- Bananas — 4 medium, just-ripe, sliced. Adds fresh fruit flavor and texture between the custard layers.
Supporting Ingredients
- Butter — 2 tablespoons. Stirred in at the end for extra richness and shine.
- Salt — a pinch. Balances the sweetness of the custard.
- Heavy cream — 1 cup, whipped, for topping.
Optional Additions Table
| Add-In | Amount | Effect |
|---|---|---|
| Crushed graham crackers | ½ cup | A different crunchy layer option |
| Caramel sauce, drizzled | 2 tbsp | Adds extra sweetness between layers |
| Cream cheese | 4 oz, softened | Folded into the custard for a tangier, richer result |
| Toasted coconut | ¼ cup | Adds a tropical garnish on top |
| Chopped pecans | ¼ cup | Adds crunch and a nutty flavor |
Complete Substitutions Reference
| Original | Substitution | Notes |
|---|---|---|
| Vanilla wafers | Shortbread cookies | Slightly richer, still works well |
| Whole milk | 2% milk | Slightly less rich, still functional |
| Heavy cream, whipped | Store-bought whipped topping | Convenient substitute, less rich flavor |
| Egg yolks | 2 whole eggs | Slightly less rich, still thickens properly |
| Granulated sugar | Light brown sugar | Adds a subtle caramel note |
What NOT to Add to This Banana Pudding Recipe
❌ Overripe, heavily spotted bananas — turn mushy and brown far too quickly once layered
❌ Instant pudding mix as a shortcut — produces a noticeably thinner, more artificial-tasting result
❌ Adding cold eggs directly to hot milk — scrambles the eggs instantly instead of thickening smoothly
❌ Skipping the chill time — the wafers won’t have softened properly and the flavors won’t have had time to meld
❌ Slicing the bananas too far ahead of assembly — they begin browning the moment they’re cut
❌ Overcooking the custard past a thick, pudding-like consistency — can cause it to break or turn grainy
Equipment You’ll Need
Choosing the Right Equipment for Banana Pudding
| Tool | Purpose | Best For |
|---|---|---|
| Medium saucepan | Cooking the custard | Even heat, easy stirring |
| Whisk | Combining and cooking | Smooth, lump-free custard |
| Glass trifle dish | Layering and serving | Classic presentation, visible layers |
| Fine mesh strainer | Straining the custard | Removes any small lumps for extra smoothness |
Other Tools That Actually Matter
A whisk is essential throughout this recipe, since it combines the egg yolks, sugar, and cornstarch far more smoothly than a spoon and helps prevent lumps as the custard cooks. A glass trifle dish lets the classic layered look show through, which matters for both presentation and tradition. A fine mesh strainer is a genuinely useful extra step for straining the finished custard, catching any small bits of cooked egg before layering.
No Trifle Dish? Alternatives That Work for This Banana Pudding Recipe
- A 9×13 baking dish — works fine for layering, though the sides won’t show the classic visible layers
- Individual mason jars or glasses — a charming alternative for single-serving portions
- A large glass bowl — any clear glass vessel lets the layers show through similarly to a trifle dish
How to Make Banana Pudding — Step by Step
Five steps. Most take under ten minutes each.
Step 1 — Whisk the Custard Base

Heat the milk in a saucepan over medium heat until steaming but not boiling. Meanwhile, whisk together the egg yolks, sugar, cornstarch, and salt in a separate bowl until smooth and pale.
💡 Pro Tip: Whisk the egg mixture until it looks genuinely pale and slightly thickened — this indicates the sugar and cornstarch are fully incorporated before any hot milk is added.
Step 2 — Temper the Eggs (The Key Step)

Slowly pour about ½ cup of the hot milk into the egg mixture while whisking constantly, then repeat with another ½ cup. Once the egg mixture is warmed, pour it back into the saucepan with the remaining milk, whisking constantly. Most people skip this gradual warming step, but it’s exactly what prevents the eggs from scrambling instantly once they hit the hot liquid. Every batch where cold eggs went straight into hot milk came out with visible scrambled bits instead of a smooth custard.
💡 Pro Tip: Pour the hot milk in a thin, steady stream while whisking continuously — rushing this step with large additions at once risks cooking the eggs too quickly despite the tempering.
Step 3 — Cook Until Thickened

Cook the combined mixture over medium heat, whisking constantly, for 5–7 minutes until thickened to a pudding-like consistency that coats the back of a spoon. Remove from heat and stir in the butter and vanilla extract.
👉 another easy make-ahead dessert here
As a result, whisking constantly throughout this cooking time is what prevents the custard from scorching on the bottom of the pan while it thickens.
💡 Pro Tip: Strain the finished custard through a fine mesh strainer if any small lumps formed — this guarantees a perfectly smooth final texture.
Step 4 — Layer the Dessert
Spread a thin layer of custard in the bottom of a trifle dish. Add a layer of vanilla wafers, followed by a layer of sliced bananas, then more custard. Repeat the layers, ending with custard on top.
💡 Pro Tip: Slice the bananas right before layering, not ahead of time — this keeps them from browning before the dessert even goes into the fridge.
Step 5 — Chill and Top

Cover and refrigerate for at least 4 hours, or ideally overnight, allowing the wafers to soften and the flavors to meld. Before serving, top with whipped cream and a few crumbled vanilla wafers.
How to Tell When It’s Done
Every stove runs a little differently, so start checking the custard’s thickness a minute or two early on the first attempt with this dessert. Once it’s been made once, the exact timing for that specific stove becomes easy to predict.
Primary Doneness Test
The custard is done cooking when it coats the back of a spoon in a thick, even layer and holds a line when you drag a finger through it on the spoon, rather than running thin and watery.
Doneness Guide
| Indicator | What It Means | What to Do |
|---|---|---|
| Custard still thin, runs off a spoon | Under-cooked | Continue cooking 1–2 more minutes, whisking constantly |
| Custard coats a spoon, holds a line | Perfectly done | Remove from heat and stir in butter and vanilla |
| Custard very thick, almost paste-like | Over-cooked | Still usable but texture may be slightly grainy |
| Small lumps visible in custard | Eggs weren’t tempered gradually enough | Strain through a fine mesh strainer |
| Pudding set firm after chilling | Perfectly done | Ready to top and serve |
| Pudding still loose after chilling | Not enough cornstarch, or didn’t chill long enough | Chill longer; note the ratio for next batch |
Visual Signs It’s Done
- The custard has thickened from a thin, milky liquid to a glossy, pudding-like consistency
- A spoon dragged through the custard in the pan leaves a brief trail rather than filling back in immediately
- The color has deepened slightly to a richer, more golden-yellow
- After chilling, the layered dessert holds its shape when a spoon or knife cuts through it
- The wafers have softened into a cake-like texture after resting in the fridge
It’s Not Right — What to Do Now
- Custard turned out watery: Not enough cornstarch, or wasn’t cooked long enough — always cook until it visibly coats the back of a spoon
- Custard scrambled: Eggs weren’t tempered gradually enough — always add hot milk slowly while whisking
- Bananas turned brown: Sliced too far ahead of layering, or overripe bananas were used — slice right before assembling and use just-ripe fruit
- Pudding stayed loose after chilling: Didn’t chill long enough, or custard wasn’t thickened enough on the stove — chill longer and check the custard’s consistency before layering next time
How to Layer It Properly

Getting clean, visible layers comes down to technique more than any single ingredient. There are three approaches depending on your presentation preference.
Method 1 — Classic Trifle Layering (Standard Recipe)
Alternate thin layers of custard, wafers, and banana slices in a clear glass dish, ending with custard on top. This is the method used throughout this recipe and produces the most visually classic, traditional presentation.
Method 2 — Individual Cup Layering
Layer the same ingredients into individual glasses or mason jars instead of one large dish. This works especially well for a party or gathering where single-serving portions are more convenient to distribute.
Method 3 — Simple Mixed Method (No Distinct Layers)
Gently fold the wafers and bananas directly into the custard rather than layering them distinctly, then transfer to a serving dish. This produces a less visually striking but still delicious result, and can be quicker when presentation matters less.
Troubleshooting Quick Reference
| Problem | Cause | Fix |
|---|---|---|
| Layers look messy, not distinct | Custard too thin when layering | Make sure custard reaches full thickness before layering |
| Wafers still crunchy after chilling | Not chilled long enough | Chill longer, ideally overnight |
| Bananas sank to the bottom | Layered too loosely or dish disturbed before setting | Layer more carefully and avoid moving the dish while chilling |
| Top layer looks dry | Not enough custard reserved for the final layer | Reserve enough custard specifically for topping |
What to Serve With It
Classic Pairings That Always Work
- Extra vanilla wafers on the side — for anyone who wants more crunch alongside each bite
- Fresh whipped cream — a classic topping that’s often added right before serving
- Iced tea — a traditional Southern beverage pairing
- Fried chicken — a classic Southern meal that this dessert traditionally follows
- Pecan pie alongside — for a dessert table with multiple Southern classics
Comfort Food Pairings
- Cornbread earlier in the meal — rounds out a full Southern-style spread
- BBQ ribs — a hearty main course that this sweet, creamy dessert balances nicely
- Sweet tea — another classic Southern beverage pairing
- Biscuits and gravy for breakfast the next morning — using any leftover custard creatively
Lighter Options
- Smaller individual portions — a simple way to enjoy the dessert without a large serving
- Fresh fruit on the side — adds lightness alongside the rich, creamy pudding
- Skip the whipped cream topping — reduces some richness while keeping the core dessert intact
6 Ways to Use Leftover Banana Pudding

Leftover pudding can be used in several completely different ways. Here are 6 ideas.
Banana Pudding Parfait
What you need: Leftover pudding, fresh berries.
How to assemble: Layer leftover pudding with fresh berries in a glass for a quick, refreshed parfait.
One tip: Fresh berries add a tart contrast that brightens up pudding that’s been sitting a day or two.
Banana Pudding Milkshake
What you need: Leftover pudding, 1 cup milk, 2 scoops vanilla ice cream.
How to assemble: Blend leftover pudding with milk and ice cream until smooth and creamy.
👉 try another easy dessert recipe here
One tip: This works especially well with leftovers that have gotten a bit too soft to serve as a traditional layered dessert.
Banana Pudding Ice Cream
What you need: Leftover pudding, heavy cream.
How to assemble: Fold leftover pudding into softly whipped cream and freeze in a loaf pan for a few hours for a simple no-churn ice cream.
One tip: Stir once halfway through freezing to prevent large ice crystals from forming.
Banana Pudding Trifle Cups
What you need: Leftover pudding, extra crushed wafers.
How to assemble: Spoon leftover pudding into small cups and top with extra crushed wafers for a quick single-serving treat.
One tip: This is a fast way to repackage leftovers into something that feels freshly made.
Banana Pudding Toast Topping
What you need: Leftover pudding, toasted bread or pound cake.
How to assemble: Spread leftover pudding over a slice of toasted pound cake for a quick, indulgent breakfast or snack.
One tip: A light toasting of the pound cake first adds a nice textural contrast to the creamy pudding.
Banana Pudding Pie Filling
What you need: Leftover pudding, a pre-made graham cracker crust.
How to assemble: Spoon leftover pudding into a pre-made crust and chill for an hour to set into a quick pie.
One tip: This works best with pudding that’s still thick enough to hold its shape once sliced.
Storage, Freezing and Reheating Guide
Refrigerator Storage (Up to 3 Days)
This dessert stores in the refrigerator for up to 3 days in an airtight container. The bananas will continue to soften and darken slightly the longer it sits, though the flavor remains good throughout this window.
Can You Make This Ahead of Time?
Yes — this recipe is genuinely designed to be made ahead, since the chilling time is a required part of the process rather than an optional step. Assemble the full dessert the night before serving for the best texture, since the extended chill lets the wafers soften fully and the flavors meld together.
Freezer Storage (Not Recommended)
Freezing isn’t recommended for this dessert, since the custard’s texture can separate and turn grainy once thawed, and the bananas themselves become unpleasantly mushy and watery. This dessert is genuinely best enjoyed within the first few days after making it, stored in the refrigerator rather than the freezer.
This Recipe Works as a Make-Ahead Potluck Dessert
Assemble the full dish the night before any gathering, allowing the required chill time to happen overnight without any extra effort on the day itself. Add the whipped cream topping just before leaving for the event to keep it looking fresh.
👉 see more make-ahead potluck desserts here
How to Freshen Up a Batch That’s Started to Look Tired
| Method | Setting | Time | Notes |
|---|---|---|---|
| Add fresh whipped cream | N/A | — | Freshens the appearance right before serving |
| Add a few fresh banana slices on top | N/A | — | Covers any browning in the layers below |
| Serve within the first 2 days | N/A | — | For the best texture and appearance overall |
Weekly Prep Strategy
This dessert isn’t ideal for stretching across a full week, since fresh bananas are central to the dish and lose their appeal the longer they sit. It’s better suited to making once for a specific occasion and enjoying within the first few days.
Recipe Variations Worth Trying
Same technique. Completely different flavor profiles. Master this base recipe first — then try one of these.
Most Popular — Banana Pudding with Cream Cheese
Fold 4 ounces of softened cream cheese into the finished custard before layering. The added tang and richness make this one of the most requested variations of this dessert for anyone who wants an even more decadent result.
International — Caribbean-Inspired Coconut Banana Pudding
Replace half the whole milk with coconut milk and top the finished dessert with toasted coconut flakes instead of plain whipped cream. This tropical twist adds a subtle coconut flavor that pairs naturally with the banana throughout the dish.
Lighter — Reduced Sugar Version
Cut the granulated sugar to ½ cup and rely more on the natural sweetness of the ripe bananas to carry the flavor. Therefore, you get a noticeably less sweet, more banana-forward version that still sets properly for this banana pudding recipe.
Quick Shortcut — Instant Pudding Base
Use a box of instant vanilla pudding mix prepared according to the package directions in place of the homemade custard, folding in a bit of whipped cream for extra richness. This cuts the active cooking time down to nearly nothing, though the flavor and texture won’t be quite as rich as the from-scratch version.
Fresh and Elevated — Banana Pudding with Caramel Drizzle
Drizzle a thin layer of caramel sauce between each layer of custard, wafers, and bananas. The added caramel brings a deeper, more complex sweetness that elevates this classic dessert into something feeling more special for a holiday table.
Nutrition Information
Per Serving Breakdown (Based on 8 Servings)
| Nutrient | Amount | % Daily Value |
|---|---|---|
| Calories | ~310 | — |
| Total Fat | 14g | 18% |
| Saturated Fat | 7g | 35% |
| Cholesterol | 140mg | 47% |
| Sodium | 110mg | 5% |
| Total Carbohydrates | 40g | 15% |
| Dietary Fiber | 2g | 7% |
| Total Sugars | 28g | — |
| Protein | 6g | 12% |
| Potassium | 10% DV | — |
According to USDA FoodData Central, bananas provide a meaningful source of potassium per serving — meaning this banana pudding recipe contributes a bit of nutritional value alongside its rich, classic flavor.
Dietary Compatibility
| Diet | Compatible | Notes |
|---|---|---|
| Gluten-Free | ❌ | Use gluten-free vanilla wafers to adapt |
| Dairy-Free | ❌ | Requires dairy-free milk, butter, and whipped topping substitutes |
| Paleo | ❌ | Wafers, sugar, and dairy all excluded |
| Keto | ❌ | High in carbohydrates from both the bananas and sugar |
| Vegetarian | ✅ | No meat in this recipe |
| Vegan | ❌ | Requires egg, dairy, and whipped cream substitutes to adapt |
To reduce sugar in this banana pudding recipe, cut the granulated sugar to ½ cup and let the ripe bananas carry more of the natural sweetness instead.
8 Mistakes That Ruin Banana Pudding
Every mistake with this banana pudding recipe is fixable. Know them before you start — not after.
❌ Mistake 1: Using Overripe Bananas
Why it happens: Grabbing whatever bananas happen to be on hand.
What goes wrong: Overripe bananas turn mushy and brown far too quickly once sliced into the layers.
The fix: Use just-ripe bananas with a solid yellow peel and only a few small brown spots.
❌ Mistake 2: Adding Eggs Directly to Hot Milk
Why it happens: Skipping what seems like an unnecessary extra step.
What goes wrong: Cold eggs added straight to hot liquid scramble almost instantly instead of thickening smoothly.
The fix: Always temper the eggs by gradually whisking in hot milk before combining everything.
❌ Mistake 3: Undercooking the Custard
Why it happens: Pulling it off the heat too early.
What goes wrong: A custard that hasn’t thickened enough on the stove stays loose and watery even after chilling.
The fix: Cook until it visibly coats the back of a spoon before removing from heat.
❌ Mistake 4: Using Instant Pudding as the Base
Why it happens: Wanting a faster shortcut.
What goes wrong: Instant pudding produces a noticeably thinner, more artificial-tasting result compared to a genuine homemade custard.
The fix: Take the extra few minutes to cook a real custard from scratch for authentic flavor.
❌ Mistake 5: Skipping the Chill Time
Why it happens: Wanting to serve the dessert immediately after assembling.
What goes wrong: The wafers stay crunchy instead of softening, and the flavors haven’t had time to meld together.
The fix: Always chill for at least 4 hours, ideally overnight.
❌ Mistake 6: Slicing Bananas Too Far Ahead
Why it happens: Trying to prep everything in advance.
What goes wrong: Sliced bananas begin browning within minutes of being cut, turning unappealing before serving.
The fix: Slice the bananas right before layering, not earlier.
❌ Mistake 7: Not Straining the Custard
Why it happens: Assuming the custard came out perfectly smooth.
What goes wrong: Any small cooked egg bits that formed during cooking remain in the final texture if not strained out.
The fix: Pass the finished custard through a fine mesh strainer before layering.
❌ Mistake 8: Overcrowding the Layers With Too Much Fruit
Why it happens: Wanting extra banana flavor in every bite.
What goes wrong: Too much banana relative to custard and wafers can make the layers collapse and the texture unbalanced.
The fix: Stick to a moderate, even layer of banana slices throughout.
Frequently Asked Questions
Why is my banana pudding watery?
The most common cause is undercooking the custard, since it needs to visibly coat the back of a spoon before being removed from heat in order to set properly once chilled. Using too little cornstarch relative to the liquid is the second major cause, since cornstarch is the primary stabilizer that keeps the custard thick rather than loose. Cooking the custard to the correct thickness and following the recipe’s exact cornstarch measurement solves this issue in nearly every batch of this banana pudding recipe.
Should you use instant pudding or homemade custard for banana pudding?
Homemade custard produces a noticeably richer, more authentic flavor and a thicker, more satisfying texture compared to instant pudding mix, which tends to taste thinner and slightly artificial. While instant pudding offers genuine convenience and works as a legitimate shortcut when time is short, a from-scratch custard is what defines the classic, traditional version of this Southern dessert.
How ripe should bananas be for banana pudding?
Just-ripe bananas, with a solid yellow peel and only a few small brown spots, are ideal for this recipe since they hold their firm texture and pale color far longer than overripe fruit once sliced. Overripe, heavily spotted bananas turn mushy and brown within hours of slicing, which looks unappealing in the finished layered dessert even though the flavor itself might still be fine.
Can you make banana pudding ahead of time?
Yes — this recipe is genuinely designed to be made ahead, since the required chilling time is a built-in part of achieving the right texture rather than an optional step. Assemble the full dish the night before serving, allowing it to chill overnight, which also happens to be the most convenient way to prepare this dessert for any gathering.
What do you serve with banana pudding?
Extra vanilla wafers on the side give anyone who wants more crunch something to add. Iced tea or sweet tea are traditional Southern beverage pairings that accompany this dessert at most gatherings. For a complete Southern meal, this dessert traditionally follows fried chicken or barbecue ribs as the final course.
Can you freeze banana pudding?
Freezing isn’t recommended for this recipe, since the custard’s texture can separate and turn grainy once thawed, and the bananas themselves become unpleasantly watery and mushy. This dessert is genuinely best stored in the refrigerator and enjoyed within the first few days after making it rather than frozen for longer storage.
How long does banana pudding last in the fridge?
This banana pudding recipe lasts up to 3 days in the refrigerator stored in an airtight container. The bananas will continue to soften and darken somewhat the longer it sits, though the overall flavor remains good throughout this window, especially within the first 1–2 days.
Why did my bananas turn brown in the pudding?
This almost always means the bananas were sliced too far ahead of assembling the dessert, since cut bananas begin oxidizing and browning within minutes of exposure to air. Using overripe bananas, which brown even faster than just-ripe ones, can also contribute to this issue. Slicing the bananas right before layering, rather than prepping them in advance, solves this problem in nearly every case.
Can you make banana pudding without eggs?
It’s more challenging for this specific recipe, since the egg yolks play a central role in both thickening and enriching the custard. A fully eggless version typically relies entirely on cornstarch as the thickener, with a slightly different, less rich texture as a result. For anyone needing to avoid eggs, exploring a dedicated eggless custard formulation, rather than simply omitting the eggs from this recipe, produces a more reliable result.
Why does my banana pudding taste bland?
The most common cause is skipping or reducing the vanilla extract, which is the defining background flavor in a classic custard base. Using bananas that aren’t flavorful enough, either underripe or simply a less sweet variety, can also leave the overall dessert tasting flatter than expected. Using the full amount of vanilla extract and choosing properly just-ripe, flavorful bananas usually resolves a bland batch.
You Might Also Like
Best Peanut Butter Cookies

🍽 BANANA PUDDING
Ingredients
Equipment
Method
- Heat milk in a saucepan until steaming. Whisk egg yolks, sugar, cornstarch, and salt in a separate bowl until smooth.
- Gradually whisk hot milk into the egg mixture, then pour back into the saucepan with remaining milk.
- Cook over medium heat, whisking constantly, 5–7 minutes until thickened. Remove from heat; stir in butter and vanilla.
- Layer custard, wafers, and banana slices in a trifle dish, repeating and ending with custard on top.
- Chill at least 4 hours, ideally overnight. Top with whipped cream and crumbled wafers before serving.