

Best Salmon Recipes (Flaky, Ready in 20 Minutes)
⭐⭐⭐⭐⭐ Rate this recipe

These salmon recipes deliver genuinely moist, flaky fish with crispy, golden skin — not dry, overcooked salmon that flakes apart into chalky pieces or tastes overwhelmingly fishy. This salmon recipes guide uses a specific internal temperature target plus a skin-crisping technique that produces restaurant-quality results without any special equipment. The entire dish comes together in one pan in just 20 minutes.
This recipe is built for anyone who’s pulled dry, overcooked salmon off the heat and wants a version that stays moist every single time. If you’ve ever ended up with salmon that stuck to the pan and tore apart, or fish that tasted unpleasantly fishy instead of mild and fresh — every one of those problems has a specific fix here. It works for a quick weeknight dinner, a simple date night meal, or a meal-prep staple that reheats better than most seafood dishes.
Made this already? Scroll down and leave a ⭐⭐⭐⭐⭐ rating below — it helps more than you know.
Once the temperature and searing technique in these salmon recipes click, dry, overcooked fish stops happening.
⏱ Prep Time: 5 minutes
🕐 Cook Time: 15 minutes
⏳ Total Time: 20 minutes
🍽 Servings: 4
📊 Difficulty: Easy
💰 Estimated Cost: ~$18 total / ~$4.50 per serving
🐟 Main Item: Pan-seared salmon fillets with lemon butter sauce
Table of Contents
- Why These Salmon Recipes Work
- Understanding the Key Ingredient
- Ingredients You’ll Need
- Equipment You’ll Need
- How to Make Salmon — Step by Step
- How to Tell When It’s Done
- How to Make the Lemon Butter Sauce
- What to Serve With It
- 6 Ways to Use Leftover Salmon
- Storage, Freezing and Reheating Guide
- Recipe Variations Worth Trying
- Nutrition Information
- 8 Mistakes That Ruin Salmon
- Frequently Asked Questions
- You Might Also Like
Why These Salmon Recipes Work
- Patting the salmon completely dry before searing. Most people skip this step, but any surface moisture left on the fillet steams instead of sears, preventing the skin from ever turning genuinely crispy. These salmon recipes always start with a thoroughly dried fillet.
👉 another easy weeknight dinner here
- Starting skin-side down in a hot pan. The skin acts as a natural barrier that protects the delicate flesh while it crisps, and starting this side first gives it the longest, most even contact with the heat.
- Pulling the salmon at 125°F, not 145°F. Here’s the truth: salmon continues cooking from residual heat after it’s removed from the pan, so pulling it slightly underdone and letting it rest produces perfectly flaky, moist fish rather than an overcooked, dry result.
- Not moving the fillet while it sears. Flipping or shifting salmon too early breaks the skin’s fragile crust before it’s had a chance to release naturally from the pan.
- Finishing with a quick lemon butter sauce in the same pan. Building the sauce in the pan used for searing captures the flavorful browned bits left behind, rather than starting from a clean pan and missing out on that depth.
Understanding the Key Ingredient

The one step worth never skipping in these salmon recipes, no matter how rushed the night is, is the key technique in Step 1. Skipping it is the most common reason home-cooked salmon ends up dry instead of moist. Followed properly, the result comes out right every time.
Why Skin-On Salmon Is the Right Choice
Skin-on salmon fillets hold together far better during searing than skinless ones, since the skin acts as a protective layer that keeps the delicate flesh from falling apart against the hot pan, which is exactly why these salmon recipes specifically call for it. The skin also crisps into a genuinely delicious, textural contrast once properly seared, adding something skinless salmon simply can’t replicate. Additionally, the fat layer just beneath the skin helps keep that portion of the fillet especially moist throughout cooking.
Salmon Cut Comparison Guide
| Type | Texture Result | Ease of Cooking | Best For |
|---|---|---|---|
| Skin-on fillet | Crispy skin, moist flesh | Easiest to sear well | Best overall result |
| Skinless fillet | No crispy element | Can stick more easily | Acceptable alternative |
| Whole side of salmon | Even cooking, more impressive presentation | Takes longer, needs oven | Good for a crowd |
| Salmon steaks | Firmer texture | Different cooking approach needed | Works but less common for searing |
How to Choose the Best at the Store
- Look for firm, glossy flesh. Dull or discolored flesh can indicate the fish isn’t fresh.
- Fresh salmon should smell like the ocean, not fishy. A strong, unpleasant smell is a sign to pass on it.
- Buy evenly sized fillets if cooking multiple pieces. This ensures they finish cooking at the same time.
- Wild-caught and farm-raised both work well for these salmon recipes. The choice mostly comes down to personal preference and flavor intensity.
- Frozen salmon works just as well as fresh. Thaw it fully and pat it extra dry before cooking.
How Much Do You Need?
| Servings | Salmon Fillets | Butter |
|---|---|---|
| 2 | 2 (6 oz each) | 2 tbsp |
| 4 | 4 (6 oz each) | 4 tbsp |
| 6 | 6 (6 oz each) | 6 tbsp |
| 8 | 8 (6 oz each) | 8 tbsp |
Double Batch — How to Scale These Salmon Recipes
Doubling works best by searing the fillets in two batches rather than overcrowding one pan, since overcrowding drops the pan’s temperature and prevents the skin from crisping properly. Make the sauce in a single larger batch once all the salmon is seared, rather than trying to double every sauce ingredient while also managing more fillets. Resting time stays the same regardless of quantity.
Ingredients You’ll Need

These salmon recipes use straightforward pantry and fresh ingredients. Here is everything broken down.
Main Ingredients
- Salmon fillets — 4 (6 oz each), skin-on. The star of the dish. Patted completely dry before cooking.
- Butter — 4 tablespoons, divided. Used for searing and building the pan sauce.
- Fresh lemon juice — 2 tablespoons. Brightens the finished sauce.
- Garlic — 2 cloves, minced. Adds aromatic depth to the sauce.
- Fresh dill — 2 tablespoons, chopped. A classic herb pairing with salmon.
- Olive oil — 1 tablespoon. Used alongside butter for a higher smoke point while searing.
Supporting Ingredients
- Salt and black pepper — to taste.
- Lemon wedges — for serving.
Optional Additions Table
| Add-In | Amount | Effect |
|---|---|---|
| Capers | 1 tbsp | Adds a briny, tangy element |
| White wine | 2 tbsp | Adds depth to the pan sauce |
| Fresh parsley | 1 tbsp | A fresh, herbal alternative to dill |
| Red pepper flakes | ¼ tsp | Adds subtle background heat |
| Honey | 1 tsp | Adds a touch of sweetness to balance the lemon |
Complete Substitutions Reference
| Original | Substitution | Notes |
|---|---|---|
| Butter | Olive oil only | Lighter, less rich sauce |
| Fresh dill | Fresh parsley or tarragon | Different but complementary herb flavor |
| Fresh lemon juice | Bottled lemon juice | Less bright, still works in a pinch |
| Skin-on salmon | Skinless salmon | Watch carefully, as it sticks more easily |
| Garlic | Garlic powder (½ tsp) | Less pronounced, still adds flavor |
What NOT to Add to These Salmon Recipes
❌ Wet, unpatted salmon straight into the pan — prevents the skin from ever crisping properly
❌ Overcrowding the pan with multiple fillets — drops the temperature and causes steaming instead of searing
❌ Flipping the salmon too early — tears the delicate crust before it naturally releases from the pan
❌ Cooking past 125°F before removing from heat — leads to dry, overcooked fish once residual heat finishes the job
❌ Cold butter added all at once to a very hot pan — can cause the sauce to separate instead of emulsifying smoothly
❌ Skipping the rest time after cooking — the fish continues cooking and redistributing moisture during this brief window
Equipment You’ll Need
Choosing the Right Equipment for Salmon Recipes
| Tool | Purpose | Best For |
|---|---|---|
| Stainless steel skillet | Searing | Good browning, even heat |
| Cast iron skillet | Searing | Excellent heat retention and crispy skin |
| Fish spatula | Flipping | Thin, flexible, won’t tear the fillet |
| Meat thermometer | Checking doneness | Most precise way to avoid overcooking |
Other Tools That Actually Matter
A fish spatula is genuinely worth having for these salmon recipes, since its thin, flexible edge slides underneath delicate fillets without tearing them the way a thicker spatula might. A meat thermometer removes the guesswork around doneness, which matters enormously with salmon since the difference between perfectly moist and dry can be just a few degrees. A stainless steel or cast iron skillet both develop better browning than a nonstick pan, which helps the skin crisp more reliably.
No Fish Spatula? Alternatives That Work for These Salmon Recipes
- Thin metal spatula — works reasonably well as long as it’s thin enough to slide under the fillet cleanly
- Two forks — carefully lift from both sides if a proper spatula isn’t available
- Tongs — can work for flipping, though they require a gentler touch to avoid tearing the fillet
How to Make Salmon — Step by Step
Four steps. Most take under five minutes each.
Step 1 — Dry and Season the Salmon (The Key Step)

Pat the salmon fillets completely dry with paper towels, pressing firmly to remove as much surface moisture as possible. Season both sides generously with salt and pepper. Most people skip drying the fish thoroughly, but this step is exactly what allows the skin to crisp properly instead of steaming in the pan. Every batch where the fillets weren’t dried enough came out with noticeably softer, less crispy skin.
💡 Pro Tip: Don’t rush this step — spend a genuine 30 seconds pressing paper towels against each fillet, flipping and pressing again if the first pass still leaves visible moisture.
Step 2 — Sear Skin-Side Down
Heat the olive oil and 2 tablespoons of butter in a skillet over medium-high heat until shimmering. Place the salmon skin-side down and press gently with a spatula for the first 10 seconds to prevent curling. Cook undisturbed for 5–6 minutes, until the skin is deeply golden and crispy.
💡 Pro Tip: Resist the urge to move the fillet during this time — letting it sit completely still is what allows the skin to naturally release from the pan once it’s properly crisped.
Step 3 — Flip and Finish Cooking
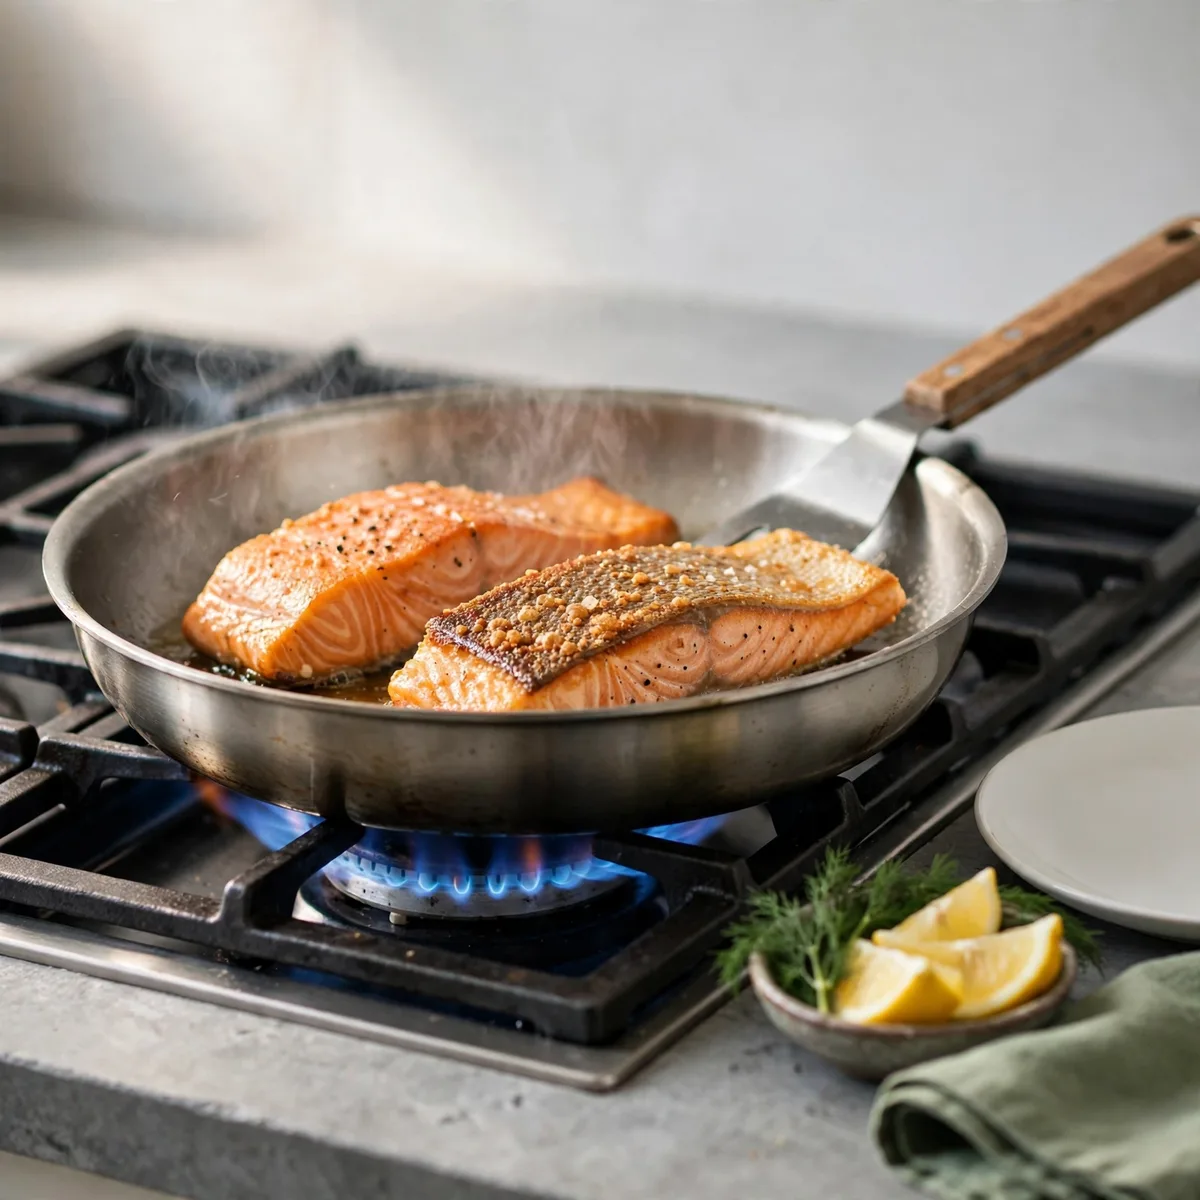
Flip the salmon using a fish spatula and cook for an additional 2–3 minutes on the flesh side, until the internal temperature reaches 125°F at the thickest part. Remove to a plate and let rest for 3 minutes.
👉 another easy seafood dinner here
As a result, pulling the salmon at 125°F rather than waiting for a higher temperature is what keeps the finished fish moist and flaky rather than dry once residual heat finishes the cooking process during the rest.
💡 Pro Tip: Check the temperature at the thickest part of the fillet, not the thinner edges, which will read higher and can mislead you into pulling the fish too early.
Step 4 — Make the Lemon Butter Sauce
In the same skillet, reduce the heat to medium-low. Add the remaining butter and minced garlic, stirring until the garlic is fragrant, about 30 seconds. Stir in the lemon juice and fresh dill, scraping up any browned bits from the bottom of the pan. Spoon the sauce over the rested salmon and serve immediately.
How to Tell When It’s Done
Every stove runs a little differently, so start checking the salmon’s temperature a minute or two early on the first attempt with these salmon recipes. Once it’s been made once, the exact timing for that specific stove becomes easy to predict.
Primary Doneness Test
The salmon is done when it reaches 125°F at the thickest part before resting, which will rise to about 130–135°F after a few minutes off the heat, and the flesh flakes easily with a fork while still looking moist and slightly translucent in the very center.
Doneness Guide
| Indicator | What It Means | What to Do |
|---|---|---|
| Flesh translucent, temp below 120°F | Under-cooked | Continue cooking 1–2 more minutes |
| Temp reads 125°F, flesh mostly opaque | Perfectly done | Remove and rest 3 minutes |
| Flesh fully opaque, temp above 140°F | Over-cooked | Still edible but noticeably drier |
| Skin pale, not crispy | Pan wasn’t hot enough or fillet wasn’t dry | Increase heat and dry thoroughly next time |
| Skin deeply golden and crispy | Perfectly done | Proceed to flipping |
| Sauce looks separated or oily | Butter added too fast at too high heat | Reduce heat and whisk to recombine |
Visual Signs It’s Done
- The skin has turned from pale and translucent to a deep, even golden brown
- The flesh has shifted from a bright, raw pink to a lighter, slightly opaque color throughout most of the fillet
- A fork inserted into the thickest part flakes the fish apart easily, with only the very center looking slightly translucent
- The internal temperature reads 125°F before resting, climbing slightly higher afterward
- The sauce looks glossy and emulsified, clinging to the fish rather than pooling thin and separated
It’s Not Right — What to Do Now
- Salmon turned out dry: Cooked past 125°F before removing from heat — pull it earlier and trust the resting time to finish the job
- Skin didn’t crisp: Fillet wasn’t dried thoroughly, or the pan wasn’t hot enough — always pat completely dry and preheat properly
- Salmon stuck to the pan and tore: Flipped too early, before the skin had naturally released — wait for it to lift easily on its own
- Sauce looks oily or separated: Butter was added too fast over too-high heat — reduce heat and whisk gently to recombine
How to Make the Lemon Butter Sauce
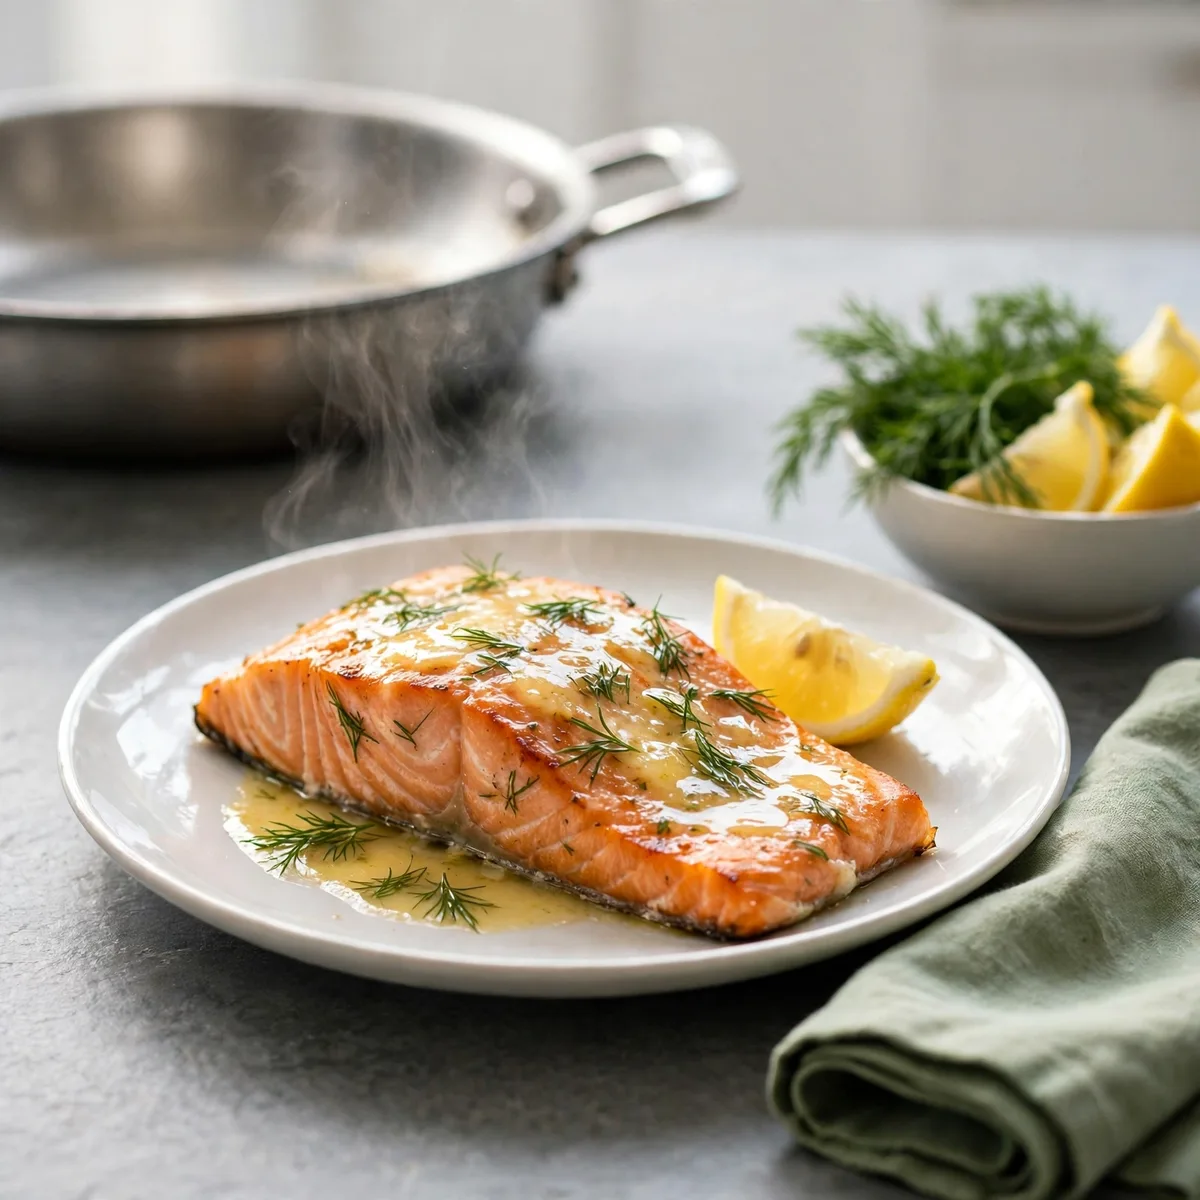
The sauce is a simple finishing touch, but getting it right still comes down to technique. There are three approaches depending on your preference.
Method 1 — Pan Sauce Method (Standard Recipe)
Build the sauce directly in the same skillet used for searing, capturing the browned bits left behind. This is the method used throughout these salmon recipes and produces the most flavorful result with minimal extra cleanup.
Method 2 — Separate Sauce Method (Cleaner Presentation)
Make the lemon butter sauce in a small saucepan while the salmon rests, rather than in the fish-searing pan. This produces a cleaner-tasting, slightly less savory sauce without any fish bits mixed in, which some people prefer.
Method 3 — Compound Butter Method (No Pan Sauce Needed)
Mix softened butter with lemon zest, garlic, and dill ahead of time, then simply place a pat directly on top of the hot, rested salmon to melt naturally. This skips the active sauce-making step entirely and works well for a quicker finish.
Troubleshooting Quick Reference
| Problem | Cause | Fix |
|---|---|---|
| Sauce separated, oily | Butter added too fast over high heat | Reduce heat and whisk gently |
| Sauce tastes flat | Not enough lemon juice or garlic | Add a bit more of each and taste |
| Sauce too thin | Pan wasn’t deglazed enough before adding butter | Scrape up more browned bits before adding butter |
| Sauce too salty | Salted butter used without adjusting added salt | Use unsalted butter or reduce added salt |
What to Serve With It
Classic Pairings That Always Work
- Steamed asparagus — a classic, simple vegetable pairing that complements salmon’s richness
- Roasted potatoes — a hearty side that rounds out the meal
- A simple green salad — adds freshness alongside the rich fish
- Rice pilaf — a neutral base that soaks up the lemon butter sauce well
- Crusty bread — perfect for mopping up any extra sauce on the plate
Comfort Food Pairings
- Garlic mashed potatoes — a rich, comforting side for a heartier meal
- Creamy risotto — an indulgent pairing for a special dinner
- Buttered egg noodles — a simple, satisfying base alongside the salmon
- Roasted brussels sprouts — adds a slightly caramelized, savory contrast
Lighter Options
- Cauliflower rice — keeps the meal lower in carbohydrates
- A simple cucumber salad — adds crunch and brightness without heaviness
- Steamed green beans — a straightforward vegetable side that doesn’t compete with the salmon’s flavor
6 Ways to Use Leftover Salmon
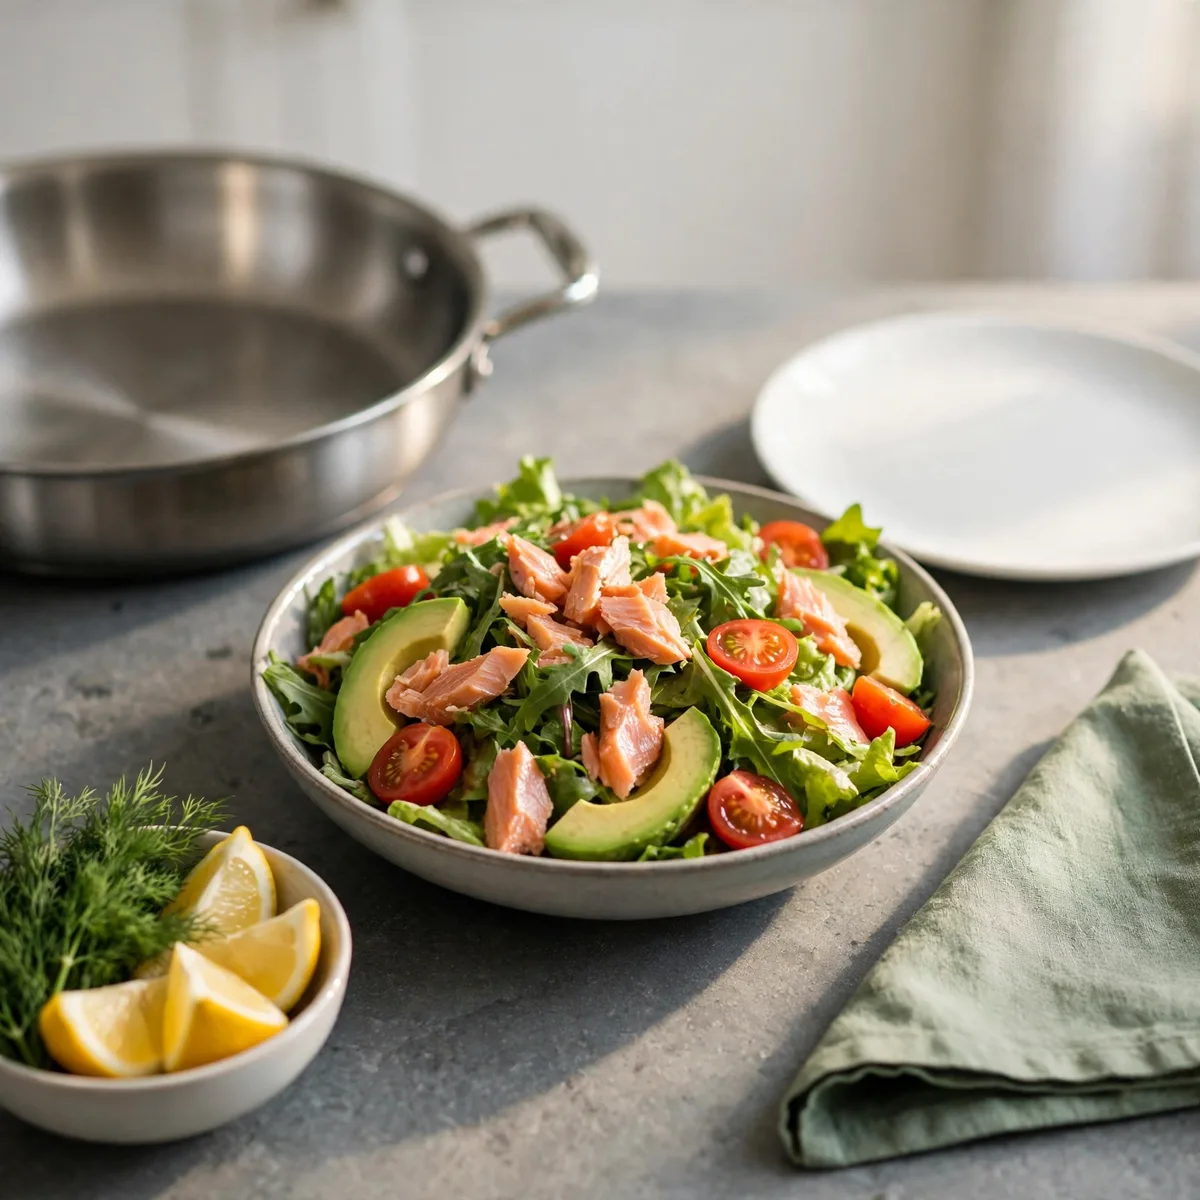
Leftover salmon from these salmon recipes can become several completely different meals. Here are 6 ways to use it.
Salmon Salad
What you need: Leftover salmon, flaked, mixed greens, avocado, cherry tomatoes.
How to assemble: Flake leftover salmon over a bed of greens with avocado and tomatoes for a quick, filling salad.
One tip: A squeeze of fresh lemon over the salad brightens the leftovers back up after a day in the fridge.
Salmon Cakes
What you need: Leftover salmon, flaked, 1 egg, ¼ cup breadcrumbs.
How to assemble: Mix flaked leftover salmon with egg and breadcrumbs, form into patties, and pan-fry in butter until golden on both sides.
One tip: Chill the formed patties for 15 minutes before frying — this helps them hold together better in the hot pan.
Salmon Pasta
What you need: Leftover salmon, flaked, cooked pasta, a splash of cream.
How to assemble: Toss flaked leftover salmon with hot cooked pasta and a splash of cream or the reserved lemon butter sauce.
👉 try another easy dinner here
One tip: Add the salmon off heat, at the very end, so it warms through without flaking apart too much.
Salmon Tacos
What you need: Leftover salmon, flaked, tortillas, cabbage slaw.
How to assemble: Warm tortillas, fill with flaked leftover salmon and a quick cabbage slaw, and finish with a squeeze of lime.
One tip: A drizzle of the reserved lemon butter sauce works beautifully in place of a separate taco sauce.
Salmon Rice Bowl
What you need: Leftover salmon, flaked, cooked rice.
How to assemble: Flake leftover salmon over a bowl of warm rice with any remaining lemon butter sauce drizzled on top.
One tip: Add a few fresh vegetables like cucumber or avocado to round out the bowl.
Salmon Breakfast Hash
What you need: Leftover salmon, flaked, diced potatoes, 1 fried egg.
How to assemble: Pan-fry diced potatoes until crispy, fold in flaked leftover salmon to warm through, and top each serving with a fried egg.
One tip: A runny yolk mixed through the hash adds richness that makes this feel like a completely different meal from dinner the night before.
Storage, Freezing and Reheating Guide
Refrigerator Storage (Up to 3 Days)
These salmon recipes store in the refrigerator for up to 3 days in an airtight container. The texture firms up slightly when cold, which is completely normal — gentle reheating restores most of the original moist flakiness.
Can You Make This Ahead of Time?
Partially — the sauce can be made a day ahead and reheated gently, but the salmon itself is genuinely best cooked fresh right before serving, since reheating cooked fish tends to dry it out more than searing it fresh. If prepping ahead, season the salmon and have everything measured out, then cook it right before the meal.
Freezer Storage (Up to 2 Months)
Cooked salmon from these salmon recipes freezes reasonably well for up to 2 months, though the texture can soften slightly after thawing. Freeze in individual portions in airtight containers, thawing overnight in the refrigerator before reheating gently.
This Recipe Works Best Made Fresh
Unlike many main dishes, salmon genuinely tastes and looks its best eaten the same day it’s cooked. For a dinner party, consider cooking the salmon in the final 20 minutes before guests sit down rather than earlier in the day.
👉 see more quick weeknight dinner ideas here
How to Reheat Without Ruining It
| Method | Setting | Time | Notes |
|---|---|---|---|
| Oven | 275°F | 10–12 min | Best method; gentle heat prevents drying out |
| Stovetop | Low | 3–4 min | Covered; add a splash of water or broth |
| Microwave | 50% power | 1 min | Fastest but dries out the most |
Weekly Prep Strategy
These salmon recipes aren’t ideal for a full week of meal prep since fish is best fresh, but seasoning and prepping the fillets ahead of time cuts the active cooking time down to just the final searing step when ready to eat.
Recipe Variations Worth Trying
Same technique. Completely different flavor profiles. Master this base salmon recipes approach first — then try one of these.
Most Popular — Garlic Butter Salmon
Increase the garlic to 4 cloves and skip the dill entirely, relying on the garlic and butter alone to carry the flavor. The richer, more savory profile makes this one of the most requested variations of these salmon recipes for anyone who prefers a less herbaceous result.
International — Teriyaki Salmon
Replace the lemon butter sauce with a mixture of soy sauce, mirin, and a touch of brown sugar, brushed onto the salmon during the last minute of cooking and again right before serving. This Japanese-inspired approach shifts the flavor profile toward something sweeter and more savory.
Low-Carb — Herb-Crusted Version
Press a mixture of finely chopped fresh herbs and lemon zest onto the salmon before searing, skipping the butter sauce in favor of a simple drizzle of olive oil at the end. Therefore, you get a lighter version of these salmon recipes with less added fat while still delivering plenty of fresh flavor.
Quick Shortcut — Oven-Baked Version
Skip the stovetop searing entirely and bake the seasoned salmon at 400°F for 12–15 minutes, until it reaches the same 125°F internal temperature. This hands-off method works well for cooking multiple fillets at once without needing to manage batches in a pan.
Fresh and Elevated — Salmon with Brown Butter and Capers
Brown the butter used in the sauce first, cooking it until golden and nutty-smelling before adding the garlic, lemon, and a tablespoon of capers. The browned butter and briny capers add a more sophisticated, restaurant-style depth to this everyday dinner.
Nutrition Information
Per Serving Breakdown (Based on 4 Servings)
| Nutrient | Amount | % Daily Value |
|---|---|---|
| Calories | ~360 | — |
| Total Fat | 24g | 31% |
| Saturated Fat | 9g | 45% |
| Cholesterol | 100mg | 33% |
| Sodium | 320mg | 14% |
| Total Carbohydrates | 1g | 0% |
| Dietary Fiber | 0g | 0% |
| Total Sugars | 0g | — |
| Protein | 34g | 68% |
| Omega-3 Fatty Acids | High | — |
According to USDA FoodData Central, salmon is one of the richest dietary sources of omega-3 fatty acids, which support heart and brain health — meaning these salmon recipes deliver substantial nutritional value alongside their rich, buttery flavor.
Dietary Compatibility
| Diet | Compatible | Notes |
|---|---|---|
| Gluten-Free | ✅ | Naturally gluten-free as written |
| Dairy-Free | ❌ | Replace butter with olive oil or a dairy-free alternative |
| Paleo | ✅ | Fits naturally within Paleo guidelines |
| Keto | ✅ | Naturally low-carb and keto-friendly as written |
| Vegetarian | ❌ | Fish-based; no straightforward substitute within this recipe |
| Vegan | ❌ | Same limitation as vegetarian |
To reduce sodium in these salmon recipes, use unsalted butter and season the fish itself more lightly, adjusting to taste at the end rather than over-salting upfront.
8 Mistakes That Ruin Salmon
Every mistake with these salmon recipes is fixable. Know them before you start — not after.
❌ Mistake 1: Not Drying the Fillet Thoroughly
Why it happens: Skipping what seems like an unnecessary extra step. What goes wrong: Surface moisture steams instead of sears, preventing the skin from ever turning crispy. The fix: Pat the fillet completely dry with paper towels before seasoning.
❌ Mistake 2: Overcooking Past 125°F
Why it happens: Worrying the fish isn’t done enough. What goes wrong: Salmon cooked past this point, especially once residual heat finishes the job during resting, turns dry and loses its flaky texture. The fix: Pull the fish at 125°F and trust the resting time to finish cooking it gently.
❌ Mistake 3: Flipping Too Early
Why it happens: Impatience during the searing process. What goes wrong: The skin tears and sticks to the pan if flipped before it’s naturally released. The fix: Wait until the fillet lifts easily on its own before attempting to flip.
❌ Mistake 4: Overcrowding the Pan
Why it happens: Trying to cook multiple fillets at once to save time. What goes wrong: A crowded pan drops in temperature, causing the fish to steam rather than sear. The fix: Cook in batches if needed, giving each fillet room to properly crisp.
❌ Mistake 5: Using a Pan That Isn’t Hot Enough
Why it happens: Rushing to start cooking before the pan fully preheats. What goes wrong: Salmon added too early sticks and never develops a proper crispy skin. The fix: Let the pan and oil get genuinely hot and shimmering before adding the fish.
❌ Mistake 6: Skipping the Rest Time
Why it happens: Wanting to serve immediately once the fish is pulled from the pan. What goes wrong: Without resting, the fish doesn’t finish cooking gently through residual heat, and the juices haven’t had time to redistribute. The fix: Always rest the salmon for 3 minutes before serving.
❌ Mistake 7: Adding Cold Butter Too Fast to a Hot Pan
Why it happens: Rushing through the sauce step. What goes wrong: Butter added all at once over high heat can cause the sauce to separate into an oily mess. The fix: Reduce the heat before adding butter and stir it in gradually.
❌ Mistake 8: Not Checking Internal Temperature
Why it happens: Relying on guesswork or a timer alone. What goes wrong: Without a thermometer, it’s easy to either undercook or significantly overcook the fish. The fix: Use a meat thermometer to check the thickest part of the fillet.
Frequently Asked Questions
Why does my salmon turn out dry?
The most common cause is cooking the fish past 125°F before removing it from the heat, since salmon continues cooking from residual heat during the rest and can easily overshoot into dry territory if pulled too late. Overcrowding the pan, which drops the cooking temperature and extends the time the fish spends over heat, is the second major cause. Pulling the salmon at 125°F and trusting the rest period solves this issue in nearly every batch of these salmon recipes.
How do you know when salmon is fully cooked?
The most reliable method is checking the internal temperature at the thickest part with a meat thermometer, pulling the fish at 125°F before resting, which will rise to a safe, fully cooked temperature during the few minutes off heat. Visually, the flesh should flake easily with a fork and look mostly opaque, with only the very center still appearing slightly translucent at the moment it’s removed from the pan.
Should you cook salmon skin-side down first?
Yes — starting skin-side down gives the skin the longest, most direct contact with the hot pan, which is what allows it to render and crisp properly. This method also protects the more delicate flesh side from direct contact with the hottest part of the pan during the longer initial cooking period, helping it stay moist throughout the process.
Can you make salmon ahead of time?
Only partially — while the sauce can be made a day ahead and reheated gently, the salmon itself is genuinely best seared fresh right before serving, since reheating already-cooked fish tends to dry it out more than cooking it fresh. Seasoning the fillets ahead of time and keeping everything else prepped can speed up the actual cooking process when it’s time to eat.
What do you serve with salmon?
Steamed asparagus and roasted potatoes are both classic, simple pairings that round out the meal without overpowering the fish’s flavor. A simple green salad adds freshness, while rice pilaf or crusty bread both work well for soaking up the lemon butter sauce. For a lighter meal, cauliflower rice or a cucumber salad pair nicely without adding significant richness.
Can you freeze cooked salmon?
Yes — cooked salmon freezes reasonably well for up to 2 months, though the texture can soften slightly after thawing compared to freshly cooked fish. Freeze in individual portions in airtight containers, thaw overnight in the refrigerator, and reheat gently to avoid drying it out further.
How long does cooked salmon last in the fridge?
This cooked salmon recipe lasts up to 3 days in the refrigerator stored in an airtight container. The texture firms up slightly when cold, which is completely normal, and gentle reheating restores most of the original moist, flaky texture.
Why does my salmon stick to the pan?
This almost always means the fillet was flipped too early, before the skin had naturally released from the hot pan, or the pan itself wasn’t hot enough before the fish was added. Waiting for the fillet to lift easily on its own, rather than forcing it with a spatula before it’s ready, solves this issue in nearly every case. A properly preheated pan with enough oil also helps prevent sticking from the start.
Can you cook salmon from frozen?
It’s possible but not ideal for these salmon recipes, since frozen fish releases significant moisture as it thaws during cooking, making it much harder to achieve a crispy skin. Thawing the salmon completely in the refrigerator overnight, then patting it thoroughly dry before cooking, produces noticeably better results than cooking straight from frozen.
Why does my salmon taste fishy?
A strong, unpleasant fishy taste usually indicates the fish wasn’t fresh to begin with, rather than anything about the cooking method itself. Fresh, properly stored salmon should smell clean and mild, almost like the ocean, rather than sharp or unpleasant. If the fish tasted fine before cooking but seems off afterward, overcooking can sometimes intensify any existing off-flavors, so checking freshness at the point of purchase matters more than any cooking adjustment.
You Might Also Like
Best Pickled Red Onions
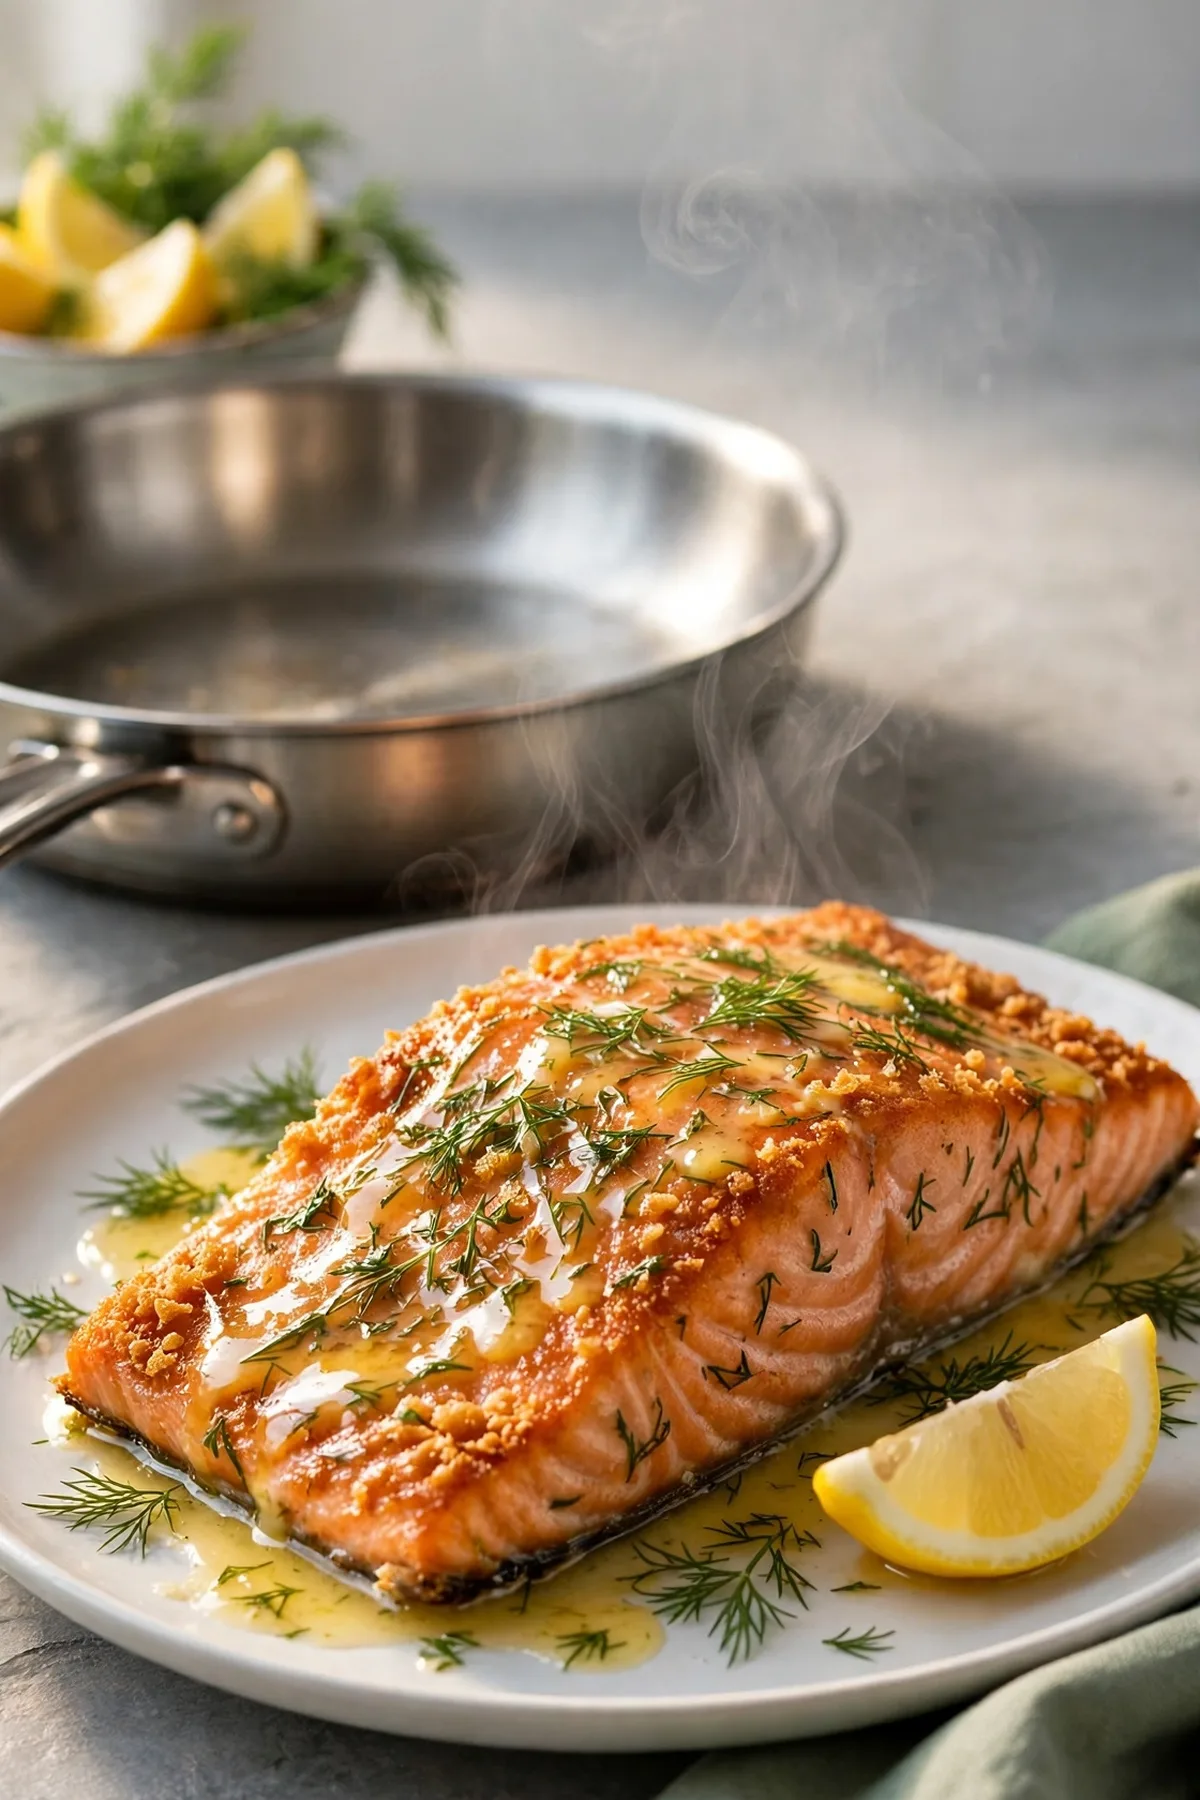
🍽 SALMON RECIPES
Ingredients
Equipment
Method
- Pat salmon completely dry. Season both sides with salt and pepper.
- Heat olive oil and 2 tbsp butter in a skillet over medium-high heat. Place salmon skin-side down; cook undisturbed 5–6 minutes until crispy.
- Flip and cook 2–3 minutes more, until internal temperature reaches 125°F. Remove and rest 3 minutes.
- Reduce heat to medium-low. Add remaining butter and garlic to the pan, cook 30 seconds. Stir in lemon juice and dill, scraping up browned bits. Spoon over salmon and serve.





One Comment