
Best Peanut Butter Cookies (Soft, Chewy, Ready in 25 Minutes)
⭐⭐⭐⭐⭐ Rate this recipe
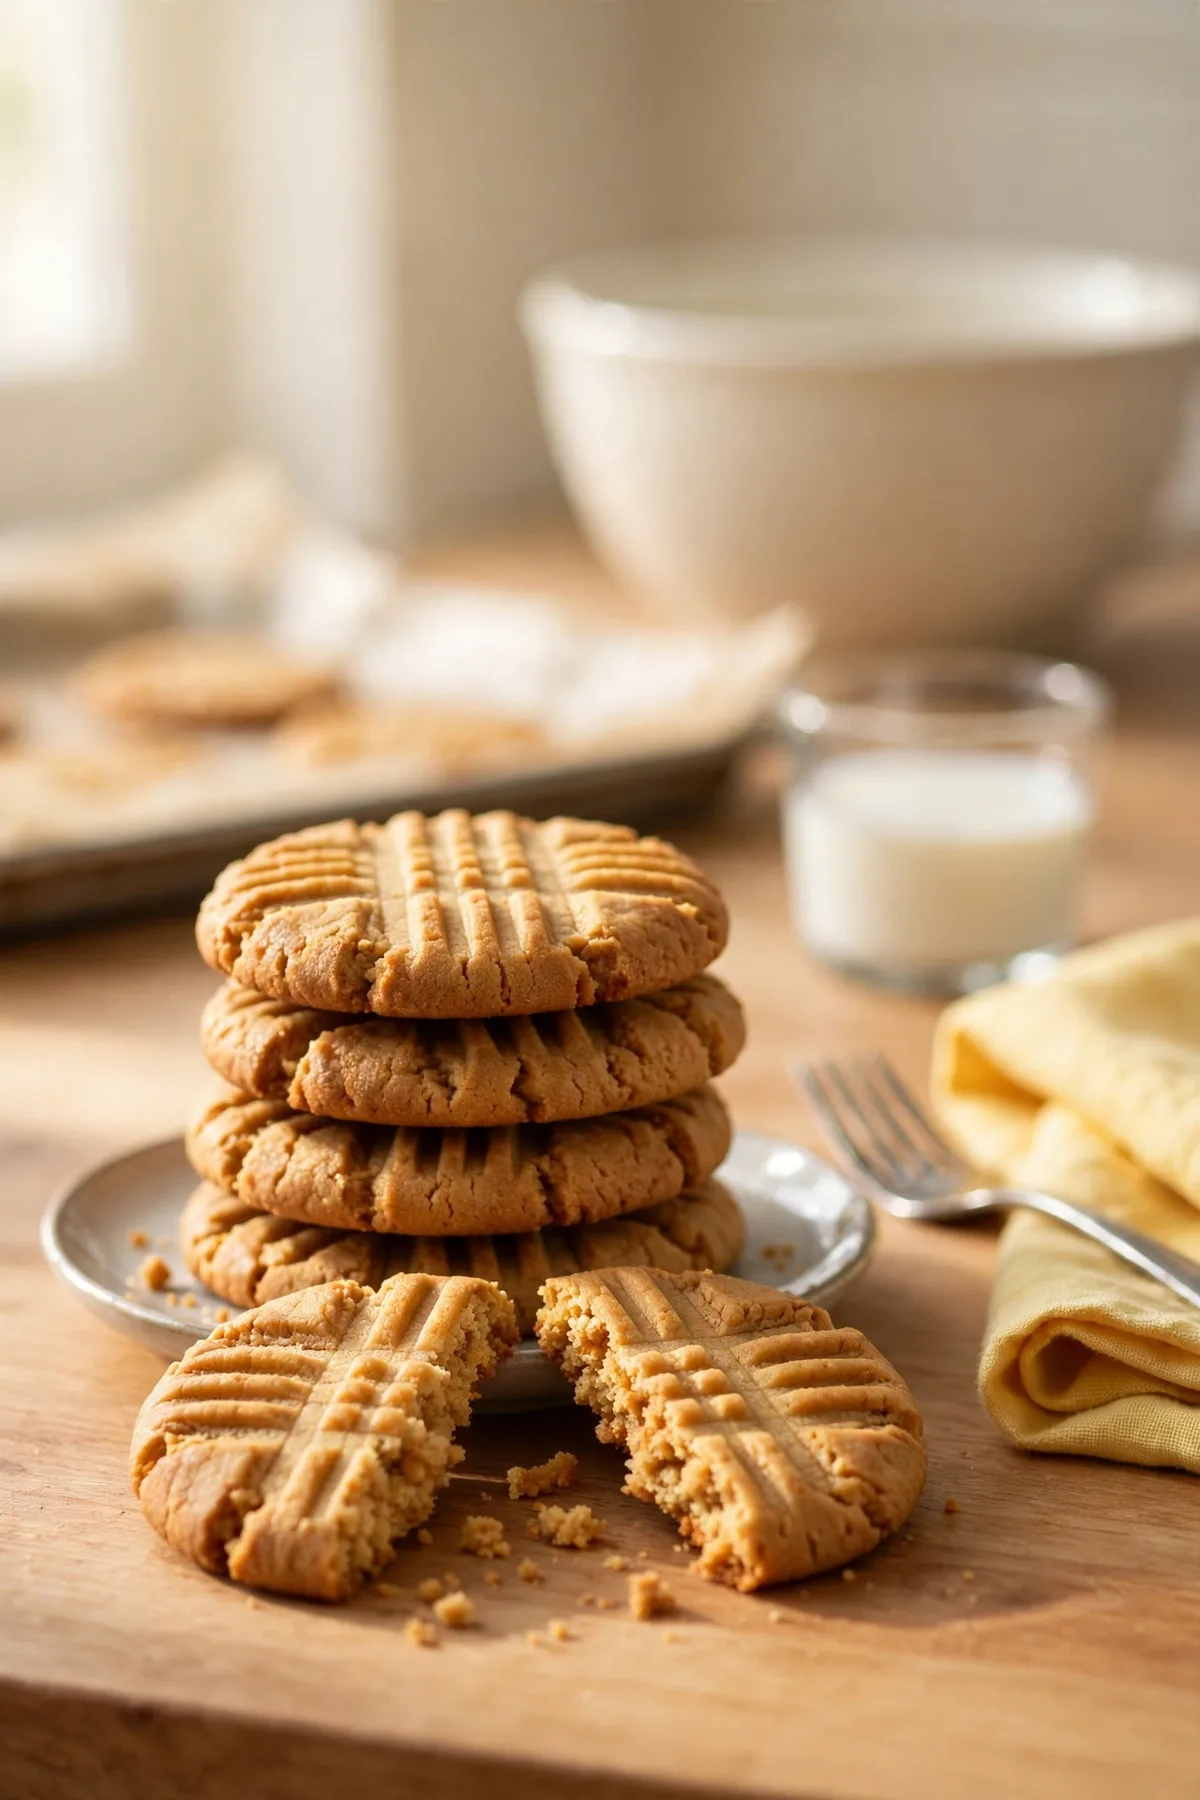
Peanut butter cookies done right are soft and genuinely chewy, with golden edges and a rich, concentrated peanut flavor — not dry, crumbly cookies that fall apart the moment they’re picked up. This peanut butter cookies recipe uses a specific brown sugar ratio plus a brief chilling step that keeps the dough from spreading too thin while baking. The entire batch comes together in 25 minutes using just 6 ingredients.
This recipe is built for anyone who’s pulled a batch of dry, sandy cookies from the oven and wants a version that turns out soft every single time. If you’ve ever had cookies spread into flat, greasy puddles, or ones that crumbled apart before they even made it off the tray — every one of those problems has a specific fix here. It works for a weekend baking project, a holiday cookie exchange, or a quick after-school treat that beats anything from a package.
Made this already? Scroll down and leave a ⭐⭐⭐⭐⭐ rating below — it helps more than you know.
Once the chilling step in this peanut butter cookies recipe clicks, the dry, crumbly version most bakeries sell stops being acceptable.
⏱ Prep Time: 15 minutes
🕐 Cook Time: 10 minutes
⏳ Total Time: 25 minutes
🍽 Servings: 24 cookies
📊 Difficulty: Easy
💰 Estimated Cost: ~$4 total / ~$0.17 per cookie
🥜 Main Item: Soft, chewy peanut butter cookies with a classic crosshatch top
Table of Contents
Why This Peanut Butter Cookies Recipe Works
- More brown sugar than granulated sugar. Most recipes use an even split or lean toward granulated sugar, which produces a crisper, drier cookie. This peanut butter cookies recipe leans heavily on brown sugar, whose molasses content keeps the texture genuinely soft and chewy.
👉 another easy baking recipe here
- Chilling the dough for just 10 minutes before baking. Here’s the truth: warm dough spreads too fast in a hot oven, producing thin, greasy cookies. A short chill firms the fat enough to hold the shape through baking.
- Creamy peanut butter instead of natural, unstabilized versions. Natural peanut butter separates and varies in oil content, which throws off the texture. Standard creamy peanut butter produces a consistent result every time.
- Pulling the cookies slightly underdone. This recipe removes the cookies from the oven while the centers still look a touch soft, since they continue setting on the hot baking sheet afterward.
- The classic fork crosshatch pattern. This isn’t just decorative — pressing down with a fork flattens the thick dough balls enough to help them bake through evenly without needing extra time in the oven.
Understanding the Key Ingredient

The one step worth never skipping in this peanut butter cookies recipe, no matter how tempting it is to bake immediately, is the key technique in Step 3. Skipping it is the most common reason the cookies spread flat instead of staying thick and chewy. Followed properly, the result comes out right every time.
Why Creamy Peanut Butter Is the Right Choice
Standard creamy peanut butter has a consistent, stabilized fat content thanks to added oils and emulsifiers, which is exactly what produces a predictable texture for this recipe every single time it’s made. Natural peanut butter, by contrast, separates in the jar and varies in how much oil sits on top versus mixed throughout, which can throw off the dough’s moisture balance unpredictably from batch to batch. Additionally, the smoother consistency of creamy peanut butter blends more evenly into the dough than the sometimes grittier texture of natural varieties.
Peanut Butter Comparison Guide
| Type | Consistency | Texture Result | Best For |
|---|---|---|---|
| Creamy, standard (stabilized) | Smooth, consistent | Chewy, predictable | Best overall result |
| Crunchy, standard | Smooth with pieces | Similar chewiness, added crunch | Good alternative for texture |
| Natural, creamy | Variable oil separation | Can be drier or oilier unpredictably | Acceptable with extra stirring |
| Natural, crunchy | Variable oil separation | Less predictable than standard | Works but requires careful stirring |
How to Choose the Best at the Store
- Check the ingredient label for added oils. Standard, shelf-stable peanut butter typically lists this, which helps with consistency.
- Buy a fresh jar rather than one that’s been opened for a while. Freshness affects both flavor and texture slightly.
- Avoid reduced-fat peanut butter for this recipe. The altered fat content can affect how the cookies bake and hold together.
- Room temperature peanut butter mixes in more smoothly. Letting a cold jar sit out briefly makes the creaming step easier.
- A well-known, widely available brand works just as well as a specialty one. Consistency matters more than any particular brand name here.
How Much Do You Need?
| Servings | Peanut Butter | Brown Sugar |
|---|---|---|
| 12 cookies | ½ cup | ¼ cup |
| 24 cookies | 1 cup | ½ cup |
| 36 cookies | 1½ cups | ¾ cup |
| 48 cookies | 2 cups | 1 cup |
Double Batch — How to Scale This Peanut Butter Cookies Recipe
Doubling works cleanly in a stand mixer as long as the bowl has enough capacity, since an overfilled bowl makes it hard to fully incorporate the sugars without spilling. Chill the doubled batch for the same 10 minutes, just in a larger covered bowl rather than trying to speed up the process. Baking time per tray stays the same regardless of how many batches of dough are made.
Ingredients You’ll Need

This peanut butter cookies recipe uses just 6 main ingredients. Here is everything broken down.
Main Ingredients
- Creamy peanut butter — 1 cup. The entire flavor and structural base of the cookie.
- Brown sugar — ½ cup, packed. Adds moisture and chewiness thanks to its molasses content.
- Granulated sugar — ¼ cup. Adds a touch of crispness at the edges while balancing the brown sugar’s moisture.
- Egg — 1 large. Binds the dough together.
- Vanilla extract — 1 teaspoon. Rounds out the sweetness with warmth.
- Baking soda — ½ teaspoon. The leavener responsible for a light, tender texture.
Supporting Ingredients
- Salt — a pinch. Balances the sweetness and makes the peanut flavor more pronounced.
Optional Additions Table
| Add-In | Amount | Effect |
|---|---|---|
| Mini chocolate chips | ½ cup | Adds pockets of melted chocolate throughout |
| Flaky sea salt | pinch on top | Adds a sophisticated salty-sweet finish |
| Chopped peanuts | ¼ cup | Adds extra crunch and peanut flavor |
| Honey | 1 tbsp | Adds a subtle floral sweetness |
| Cinnamon | ¼ tsp | Adds a warm background spice |
Complete Substitutions Reference
| Original | Substitution | Notes |
|---|---|---|
| Creamy peanut butter | Crunchy peanut butter | Same ratio; adds textural crunch |
| Granulated sugar | Additional brown sugar | Slightly chewier, less crisp edge |
| Vanilla extract | Almond extract (½ tsp) | Stronger — use less |
| Egg | Flax egg (1 tbsp ground flax + 3 tbsp water) | Works for an egg-free version |
| Baking soda | Baking powder (1 tsp) | Slightly different rise; still works |
What NOT to Add to This Peanut Butter Cookies Recipe
❌ Natural, unstabilized peanut butter without extra stirring — the inconsistent oil content throws off the dough’s texture
❌ Skipping the chill step — warm dough spreads too fast and produces thin, greasy cookies
❌ Overbaking past slightly underdone centers — the cookies continue setting on the hot tray and can turn dry if baked too long
❌ Flattening the dough balls completely flat before baking — leaves no room for the cookies to puff up properly in the oven
❌ Too much flour if adding any as a thickener — this recipe doesn’t call for flour at all, and adding it changes the texture entirely
❌ Overmixing once the dry ingredients are added — can make the texture slightly tougher than intended
Equipment You’ll Need
Choosing the Right Equipment for Peanut Butter Cookies
| Tool | Purpose | Best For |
|---|---|---|
| Stand mixer or hand mixer | Mixing | Most consistent, even combining |
| Large mixing bowl | Mixing | Any batch size |
| Cookie scoop | Portioning | Even, consistent sizing |
| Fork | Pressing crosshatch pattern | Classic finish, helps flatten dough |
Other Tools That Actually Matter
A cookie scoop produces evenly sized dough balls that bake through at the same rate, which prevents some cookies from being underdone while others overbake. A stand or hand mixer combines the peanut butter and sugars more thoroughly than mixing by hand, producing a smoother dough. A fork, specifically, is needed for the classic crosshatch pattern — this detail actually affects how evenly the cookies bake, not just how they look.
No Stand Mixer? Alternatives That Work for This Peanut Butter Cookies Recipe
- Hand mixer — works just as well, though it takes a bit more active attention than a stand mixer
- Mixing by hand with a sturdy spoon — possible but takes more effort to fully combine the thick peanut butter and sugar
- Food processor — pulse the peanut butter and sugars together, then pulse in the egg and remaining ingredients
How to Make Peanut Butter Cookies — Step by Step
Four steps. Most take under five minutes each.
Step 1 — Cream the Peanut Butter and Sugars
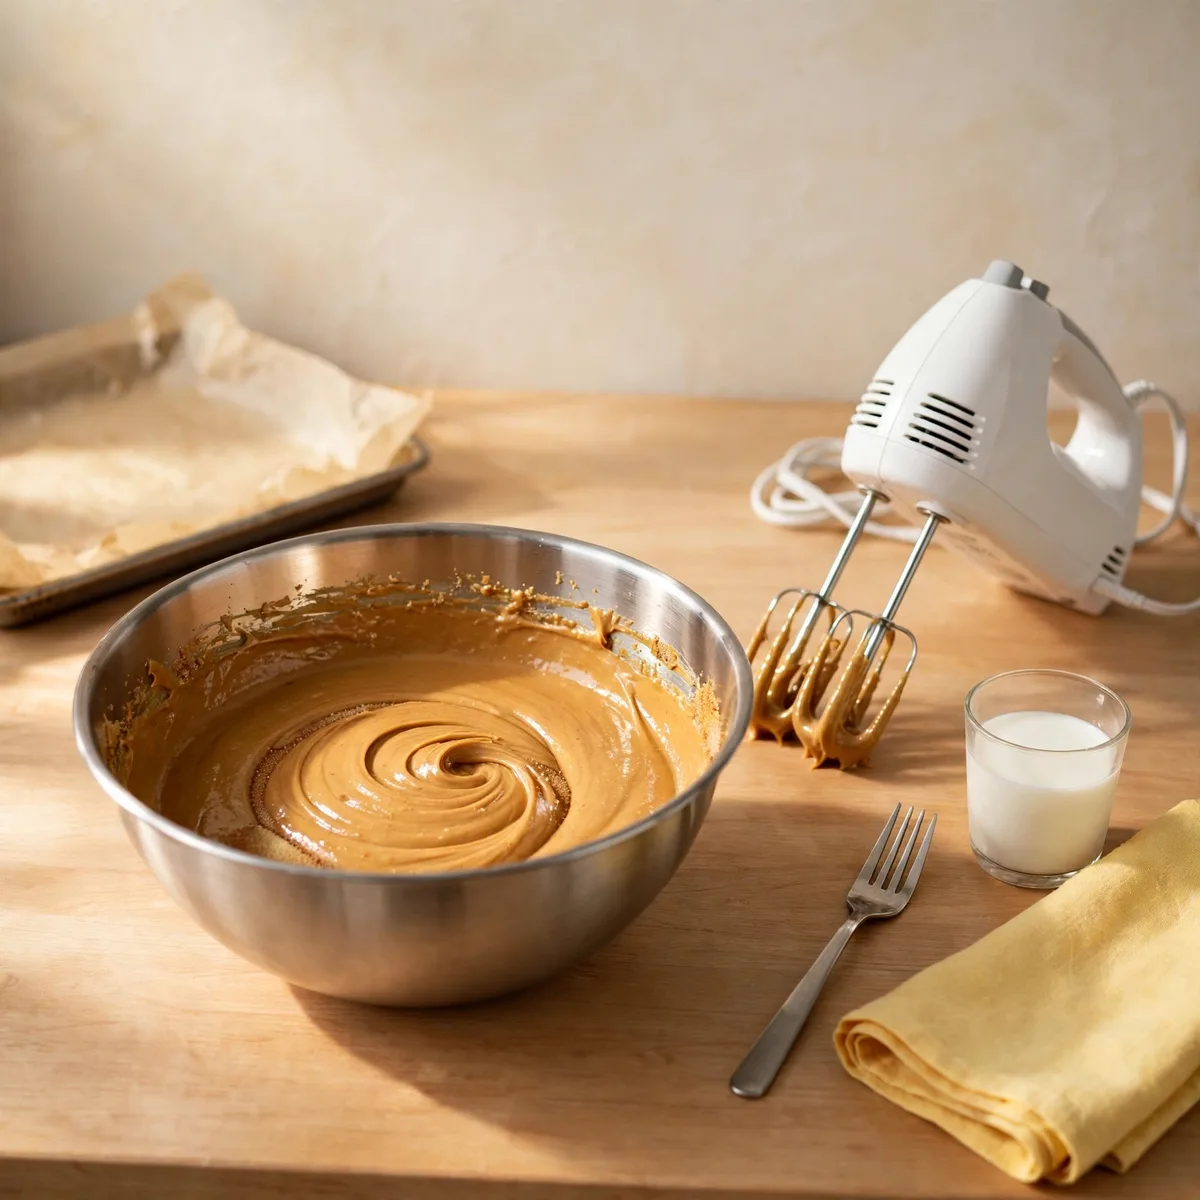
Beat the peanut butter, brown sugar, and granulated sugar together on medium speed until smooth and well combined, about 2 minutes. Add the egg and vanilla extract, beating until fully incorporated.
💡 Pro Tip: Scrape down the sides of the bowl at least once during this step — peanut butter can cling to the edges and leave unmixed pockets if not scraped down properly.
Step 2 — Add the Baking Soda and Salt
Sprinkle the baking soda and salt evenly over the dough and mix on low speed just until combined. Overmixing at this stage can make the texture slightly tougher than intended, so stop as soon as everything looks evenly incorporated.
💡 Pro Tip: Sprinkling the baking soda evenly across the surface before mixing helps it distribute more consistently than dumping it in one spot.
Step 3 — Chill the Dough (The Key Step)
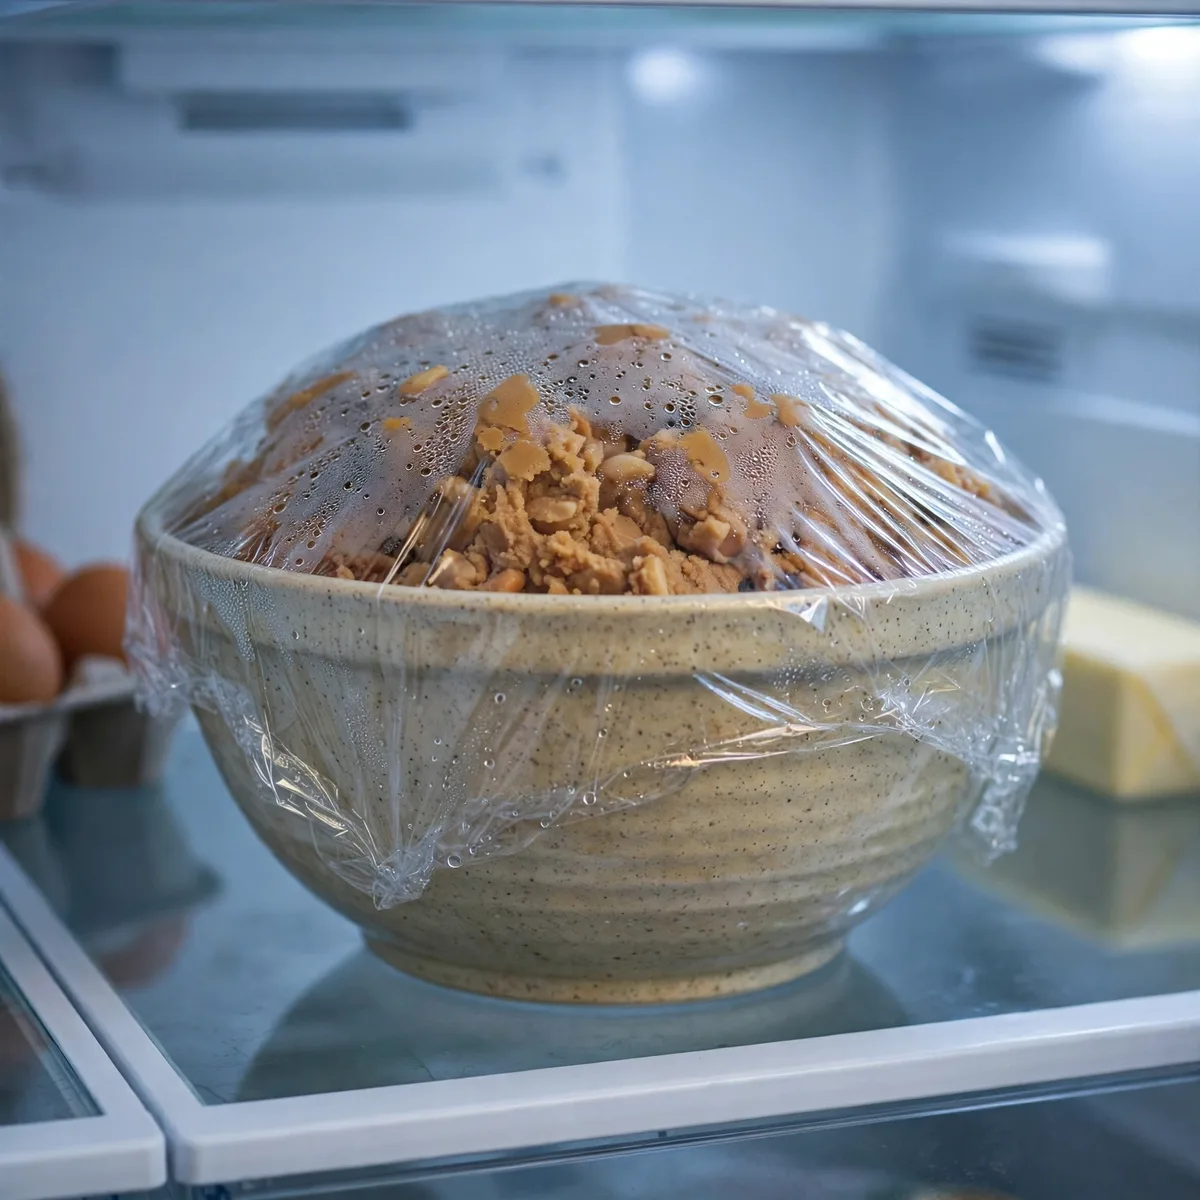
Cover the bowl and refrigerate the dough for 10 minutes. Most people skip straight to baking, but this brief chill is exactly what firms the fat enough to prevent the cookies from spreading too thin and greasy in a hot oven. Every batch where this step was skipped came out noticeably flatter and more spread out than intended.
💡 Pro Tip: Don’t chill for much longer than 10–15 minutes — overly firm dough can be harder to scoop and shape evenly.
Step 4 — Scoop, Press, and Bake

Preheat the oven to 350°F. Scoop the chilled dough into 1.5-tablespoon balls and place on a parchment-lined baking sheet, spacing them about 2 inches apart. Press each ball with a fork in a crosshatch pattern, flattening slightly.
👉 another easy dessert recipe here
As a result, this fork pattern flattens the thick dough balls just enough to help them bake through evenly without drying out the edges before the center sets.
💡 Pro Tip: Dip the fork in a little sugar before pressing if it starts sticking to the dough — this keeps the crosshatch pattern crisp and clean.
Bake for 9–10 minutes, until the edges are set and lightly golden but the centers still look slightly underdone. Let cool on the baking sheet for 5 minutes before transferring to a wire rack.
How to Tell When It’s Done
Every oven runs a little differently, so start checking 1–2 minutes early on the first attempt with this peanut butter cookies recipe. Once it’s been made once, the exact timing for that specific oven becomes easy to predict.
Primary Doneness Test
The cookies are done when the edges look set and lightly golden, while the centers still appear slightly soft and underdone — they’ll continue firming up on the hot baking sheet during the cooling time.
Doneness Guide
| Indicator | What It Means | What to Do |
|---|---|---|
| Centers look wet, edges pale | Under-baked | Continue baking 1–2 more minutes |
| Edges golden, centers slightly soft | Perfectly done | Remove and cool on the tray |
| Edges very dark, centers firm | Over-baked | Reduce bake time next round |
| Cookies spread very thin and greasy | Dough wasn’t chilled, or oven ran hot | Chill dough longer next time |
| Cookies stayed thick, didn’t spread at all | Dough was over-chilled or too cold | Let dough sit a few minutes before scooping next time |
| Crosshatch pattern faded during baking | Normal — some softening happens as they bake | No action needed; this is expected |
Visual Signs It’s Done
- The edges have turned from pale and soft to lightly golden-brown
- The crosshatch pattern on top is still visible, though slightly softened
- The centers look just barely set, with a faint softness that firms up during cooling
- The surface has a slight sheen rather than a dry, matte appearance
- The aroma has shifted from raw dough to a warm, toasted peanut smell
It’s Not Right — What to Do Now
- Cookies turned out dry: Overbaked past the slightly underdone stage — pull them while the centers still look a touch soft
- Cookies spread too thin: Dough wasn’t chilled, or the oven ran hotter than expected — always chill for the full 10 minutes
- Cookies crumbled apart: Overmixed once the baking soda was added, or too much flour-like filler was added — mix gently and stick to the recipe as written
- Cookies tasted bland: Standard peanut butter wasn’t used, or salt was omitted — stick to the recipe’s ingredient choices for the intended flavor
How to Get the Softest Texture
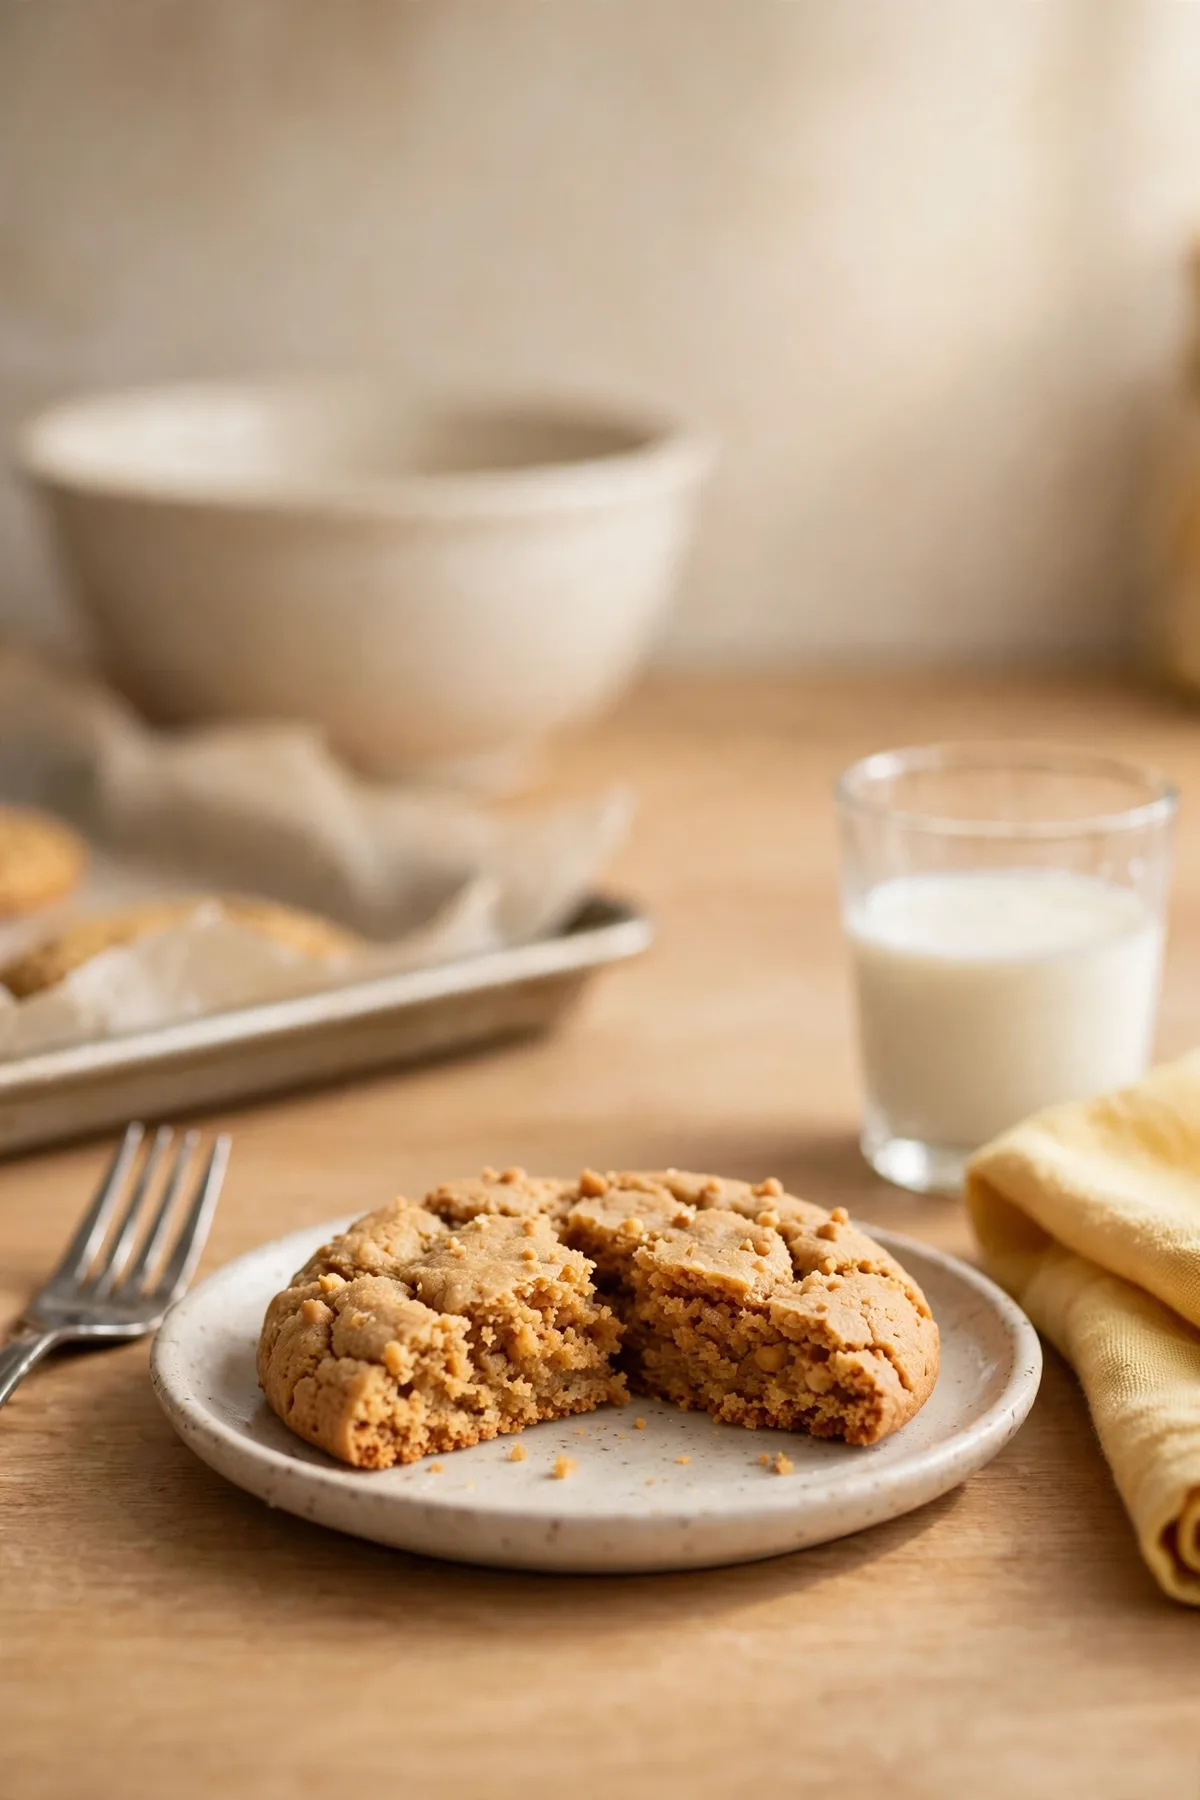
Getting genuinely soft, chewy cookies comes down to a few key techniques. There are three approaches depending on your preference.
Method 1 — Standard Chewy Method (Recipe as Written)
Chill the dough briefly, pull the cookies slightly underdone, and let them finish setting on the hot tray. This is the method used throughout this peanut butter cookies recipe and produces the most reliably soft, chewy result.
Method 2 — Extra-Soft Method (Longer Chill)
Chill the dough for 30 minutes instead of 10, which firms the fat even more and produces cookies that stay slightly thicker and softer throughout baking. This variation works well for anyone who wants an even more pillowy texture.
Method 3 — Crisper Edge Method (Shorter Bake, No Chill)
Skip the chilling step entirely and bake immediately, which produces a thinner cookie with crisper edges while the center stays soft. This method trades some of the classic thick, chewy texture for a different style some people prefer.
Troubleshooting Quick Reference
| Problem | Cause | Fix |
|---|---|---|
| Too dry, crumbly | Overbaked | Pull cookies while centers still look slightly soft |
| Too thin, greasy | Dough not chilled | Always chill for the full 10 minutes |
| Too dense, heavy | Overmixed after adding baking soda | Mix gently, just until combined |
| Bland flavor | Reduced-fat peanut butter used | Use standard, full-fat creamy peanut butter |
What to Serve With Them
Classic Pairings That Always Work
- Cold milk — the single most classic pairing; the creaminess balances the rich peanut flavor
- Hot coffee — the bitterness cuts through the sweetness nicely for an adult-friendly pairing
- Vanilla ice cream — sandwich a scoop between two cookies for an instant ice cream sandwich
- Hot chocolate — doubles down on the comforting, cozy flavor profile
- Fresh bananas on the side — the classic peanut butter and banana combination
Comfort Food Pairings
- Chocolate chips mixed in — for anyone who wants even more chocolate flavor
- A drizzle of melted chocolate on top — turns a simple cookie into something more indulgent
- Crumbled over a bowl of ice cream — adds texture and extra peanut flavor
- A dollop of whipped cream — light and simple alongside a few cookies
Lighter Options
- Smaller cookies, more servings — portioning 36 instead of 24 reduces the amount per serving
- Pair with fresh fruit — balances the richness of the cookie with something lighter
- One cookie instead of two — a simple way to enjoy the flavor in moderation
6 Ways to Use Leftover Peanut Butter Cookies
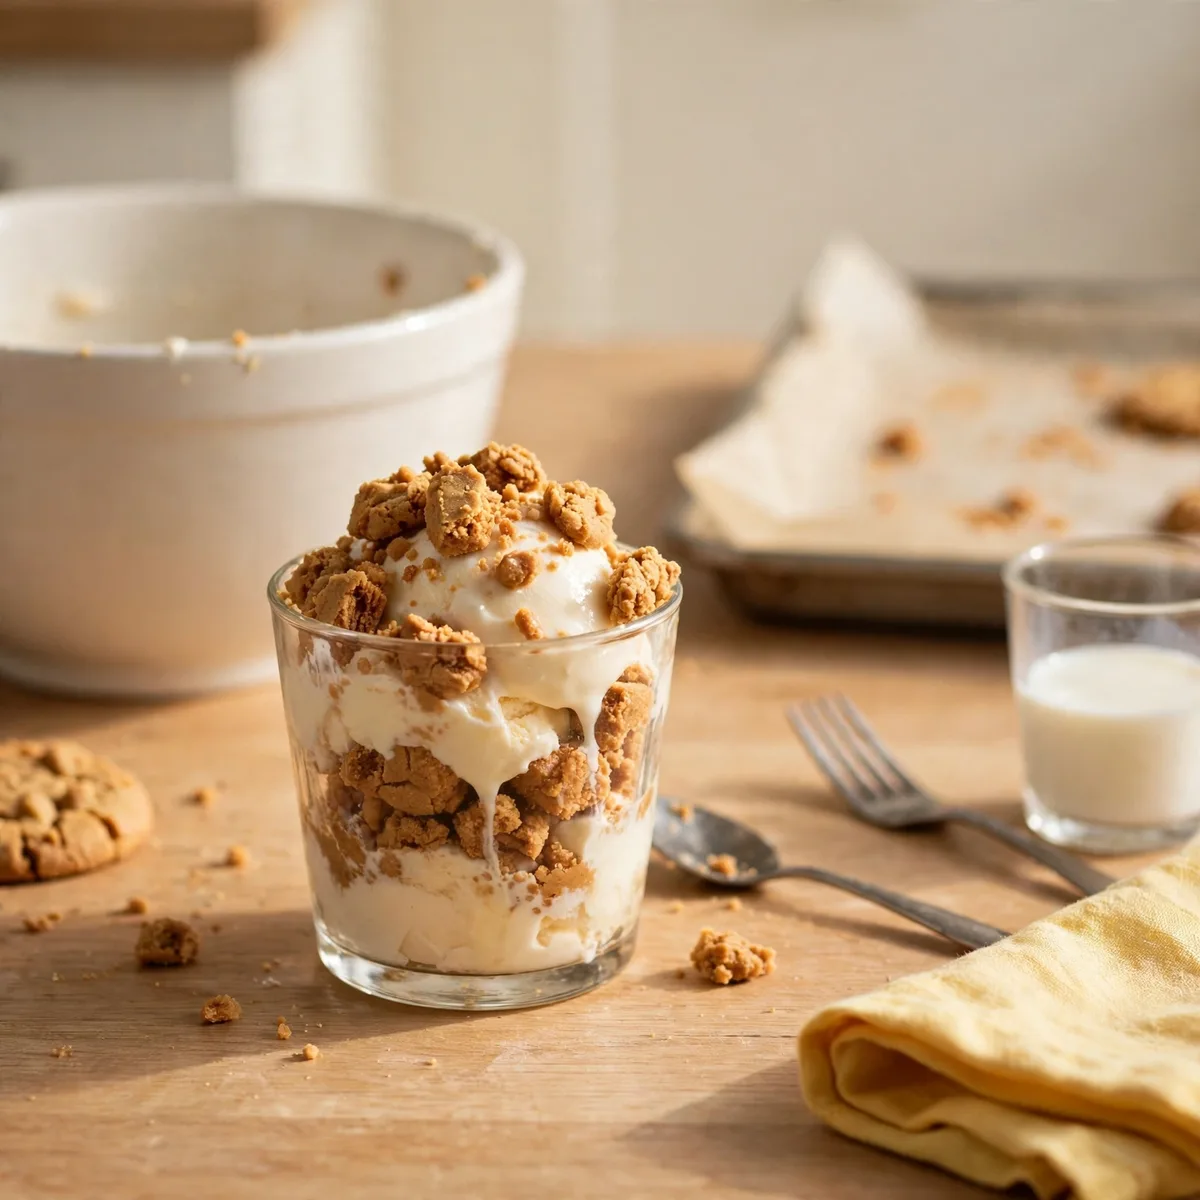
Leftover cookies can become several completely different treats. Here are 6 ways to use them.
Peanut Butter Cookie Ice Cream Sandwich
What you need: Two leftover cookies, a scoop of vanilla ice cream.
How to assemble: Sandwich a scoop of softened ice cream between two leftover cookies and freeze briefly before eating.
One tip: Freeze the assembled sandwich for 15 minutes before eating — it holds together much better once firm.
Peanut Butter Cookie Milkshake
What you need: 2 crumbled leftover cookies, 2 scoops vanilla ice cream, ½ cup milk.
How to assemble: Blend all ingredients together until smooth and pour into a glass.
One tip: Freeze the cookies for 15 minutes before blending — it keeps the milkshake thick instead of watery.
Peanut Butter Cookie Pie Crust
What you need: 10–12 crumbled leftover cookies, 2 tbsp melted butter.
How to assemble: Mix crumbled cookies with melted butter until it holds together, press into a pie dish, and chill for 20 minutes before filling.
👉 see more easy dessert ideas here
One tip: This crust sets faster than a traditional graham cracker crust, since the cookies already contain fat from the peanut butter.
Peanut Butter Cookie Truffles
What you need: 10 crumbled leftover cookies, 2 tbsp cream cheese, melted chocolate for coating.
How to assemble: Mix crumbled cookies with cream cheese until it holds together, roll into small balls, and dip in melted chocolate. Chill until set.
One tip: The colder the mixture, the easier it is to roll into clean, round balls.
Peanut Butter Cookie Parfait
What you need: Crumbled leftover cookies, vanilla yogurt, fresh berries.
How to assemble: Layer crumbled cookies, yogurt, and berries in a glass, repeating twice and topping with a final dollop of yogurt.
One tip: This works best with slightly dry leftover cookies, since they hold their crumble texture longer in the yogurt.
Peanut Butter Cookie Breakfast Bowl
What you need: 1 crumbled leftover cookie, milk, sliced banana.
How to assemble: Crumble the cookie into a bowl like cereal, pour milk over the top, and add sliced banana.
One tip: This works best with slightly stale leftover cookies, which hold their shape in milk longer than fresh, soft ones.
Storage, Freezing and Reheating Guide
Room Temperature Storage (Up to 1 Week)
This peanut butter cookies recipe stores perfectly at room temperature for up to 1 week in an airtight container. Keeping them well-sealed is the single biggest factor in maintaining their soft, chewy texture.
Can You Make This Ahead of Time?
Yes — this recipe is genuinely excellent for making ahead, since the dough itself can be refrigerated for up to 3 days before baking. Scoop and chill the dough balls, then bake fresh whenever a craving hits, adding a minute or two to the bake time since the dough will be colder than the recipe’s standard chill.
Freezer Storage (Up to 3 Months)
This peanut butter cookies recipe freezes exceptionally well for both baked cookies and raw dough. Freeze baked cookies in an airtight container, or portion raw dough balls on a baking sheet until solid before transferring to a freezer bag, baking straight from frozen with a couple of extra minutes added.
This Recipe Works as a Make-Ahead Baking Staple
Make a double batch of dough specifically to keep some in the freezer. Having pre-portioned, frozen dough balls on hand means fresh-baked cookies are only ever about 12 minutes away whenever the craving strikes.
👉 see more make-ahead dessert ideas here
How to Reheat Without Ruining It
| Method | Setting | Time | Notes |
|---|---|---|---|
| Microwave | Low power | 5–10 sec | Best method; restores some softness quickly |
| Oven | 300°F | 3–4 min | Good for a slightly crisper warm-up |
| Room temperature | N/A | — | Simply let sit out; these cookies stay soft on their own |
Weekly Prep Strategy
Make a double batch at the start of the week, baking half and freezing the other half as raw dough balls. This recipe stays convenient throughout the week since fresh cookies are always just a short bake away.
Recipe Variations Worth Trying
Same technique. Completely different flavor profiles. Master this base recipe first — then try one of these.
Most Popular — Chocolate Chip Peanut Butter Cookies
Fold in ½ cup of mini chocolate chips along with the dry ingredients in Step 2. The combination of chocolate and peanut butter makes this the most popular variation of this recipe at nearly any gathering.
International — Peanut Butter Cookies with a Thai-Inspired Twist
Add ¼ teaspoon of ground ginger and a pinch of cayenne pepper to the dough along with the baking soda. The subtle warmth and background heat nod toward the flavors found in Thai peanut sauces, adding an unexpected depth to a familiar cookie.
Lighter — Reduced Sugar Version
Cut the granulated sugar in half and rely more on the natural sweetness of the peanut butter and brown sugar to carry the flavor. Therefore, you get a noticeably less sweet, more intensely peanut-buttery version that still bakes up properly for this recipe.
Quick Shortcut — No-Chill Version
Skip the 10-minute chill and bake the dough immediately after mixing, accepting that the cookies will spread a bit thinner and crisper than the standard version. This works fine when time is genuinely short, though the texture won’t be quite as thick and chewy.
Fresh and Elevated — Peanut Butter Cookies with Flaky Sea Salt
Sprinkle a pinch of flaky sea salt over each cookie right after pressing the fork pattern, before baking. The salt adds a sophisticated salty-sweet contrast that elevates this simple cookie into something feeling more bakery-quality.
Nutrition Information
Per Serving Breakdown (Based on 24 Cookies)
| Nutrient | Amount | % Daily Value |
|---|---|---|
| Calories | ~105 | — |
| Total Fat | 6g | 8% |
| Saturated Fat | 1.5g | 8% |
| Cholesterol | 10mg | 3% |
| Sodium | 65mg | 3% |
| Total Carbohydrates | 10g | 4% |
| Dietary Fiber | 0.5g | 2% |
| Total Sugars | 8g | — |
| Protein | 3g | 6% |
| Iron | 2% DV | — |
According to USDA FoodData Central, peanut butter provides a meaningful source of protein and healthy fats per serving — making this recipe one of the few sweet treats that also contributes a small nutritional benefit alongside its rich, chewy flavor.
Dietary Compatibility
| Diet | Compatible | Notes |
|---|---|---|
| Gluten-Free | ✅ | Naturally gluten-free as written, with no flour |
| Dairy-Free | ✅ | No dairy in this recipe |
| Paleo | ❌ | Refined sugar excluded from strict Paleo guidelines |
| Keto | ❌ | High in sugar from both brown and granulated sugar |
| Vegetarian | ✅ | No meat in this recipe |
| Vegan | ❌ | Requires an egg substitute to adapt |
To reduce sugar in this recipe, cut the granulated sugar in half and rely more on the brown sugar’s natural sweetness — the flavor stays rich without tasting overly sugary.
8 Mistakes That Ruin Peanut Butter Cookies
Every mistake with this recipe is fixable. Know them before you start — not after.
❌ Mistake 1: Using Natural Peanut Butter Without Extra Care
Why it happens: Reaching for whatever peanut butter is on hand. What goes wrong: The unstabilized oil content in natural peanut butter varies unpredictably, which can throw off the dough’s texture. The fix: Use standard, stabilized creamy peanut butter for the most consistent results.
❌ Mistake 2: Skipping the Chill Step
Why it happens: Wanting to bake immediately without waiting. What goes wrong: Warm dough spreads too fast in a hot oven, producing thin, greasy cookies instead of thick, chewy ones. The fix: Always chill the dough for the full 10 minutes before baking.
❌ Mistake 3: Overbaking Past the Slightly Underdone Stage
Why it happens: Wanting the centers to look fully set before pulling the cookies. What goes wrong: Cookies baked until the centers look completely firm continue cooking on the hot tray and turn dry once cooled. The fix: Pull them while the centers still look a touch soft, trusting the residual heat to finish setting them.
❌ Mistake 4: Overmixing After Adding Baking Soda
Why it happens: Wanting to make sure everything is thoroughly combined. What goes wrong: Excessive mixing at this stage can make the final texture slightly tougher than intended. The fix: Mix only until the baking soda and salt are evenly incorporated.
❌ Mistake 5: Using Reduced-Fat Peanut Butter
Why it happens: Trying to make the cookies lighter. What goes wrong: The altered fat content affects how the cookies bake and hold together, often producing a drier or less structurally sound result. The fix: Stick to standard, full-fat creamy peanut butter.
❌ Mistake 6: Scooping Inconsistent Dough Ball Sizes
Why it happens: Not using a cookie scoop for portioning. What goes wrong: Uneven sizes bake through at different rates, leaving some cookies underdone while others overbake. The fix: Use a cookie scoop for consistent, evenly sized dough balls.
❌ Mistake 7: Flattening the Dough Completely Before Baking
Why it happens: Pressing too hard with the fork crosshatch. What goes wrong: Overly flattened dough has no room to puff up slightly in the oven, resulting in a thinner, less satisfying cookie. The fix: Press gently, flattening the dough balls only partway, not completely flat.
❌ Mistake 8: Storing Cookies Uncovered
Why it happens: Leaving them out on a plate for easy snacking. What goes wrong: Exposed air dries the cookies out, turning a soft, chewy texture firm and less enjoyable within a day or two. The fix: Always store in an airtight container at room temperature.
Frequently Asked Questions
Why are my peanut butter cookies dry and crumbly?
The most common cause is overbaking, since these cookies continue setting on the hot baking sheet after they’re pulled from the oven, meaning centers that look fully firm at the oven stage will have overshot into dry territory by the time they cool. Using reduced-fat peanut butter instead of the standard, full-fat version is the second common cause, since the altered fat content changes how the cookies hold together. Pulling the cookies while the centers still look slightly soft, and sticking with standard peanut butter, solves this issue in nearly every batch of this peanut butter cookies recipe.
Why do you press a fork pattern into peanut butter cookies?
The classic crosshatch pattern isn’t purely decorative — pressing down with a fork flattens the thick dough balls enough to help them bake through evenly without the edges drying out before the center sets properly. This technique has been part of the traditional recipe for so long partly because it genuinely improves how evenly the cookies cook, beyond just giving them a recognizable look.
What type of peanut butter is best for peanut butter cookies?
Standard, stabilized creamy peanut butter is the best choice for this recipe, since its consistent fat content produces predictable results every time it’s made. Crunchy peanut butter works as a substitute at the same ratio if some texture is desired. Natural, unstabilized peanut butter can work but requires extra stirring to fully recombine the separated oil, and even then the result can be somewhat less consistent than using a standard jar.
Can you make peanut butter cookie dough ahead of time?
Yes — this recipe is genuinely excellent for making ahead. The dough can be refrigerated for up to 3 days before baking, or portioned into dough balls and frozen for even longer storage. Baking straight from the fridge or freezer just requires a minute or two of extra time compared to the standard bake time.
What do you serve with peanut butter cookies?
Cold milk is the classic pairing and the one that works best with the rich peanut flavor of this peanut butter cookies recipe. For something more indulgent, sandwich a scoop of vanilla ice cream between two cookies, or drizzle melted chocolate over a few for extra richness. Hot coffee is a popular pairing for an adult-friendly version of the classic combination.
Can you freeze peanut butter cookies?
Yes — both baked cookies and raw dough freeze exceptionally well for this recipe. Baked cookies can be frozen in an airtight container, while raw dough balls freeze best portioned individually on a baking sheet first before transferring to a bag, allowing them to be baked straight from frozen whenever needed.
How long do peanut butter cookies last at room temperature?
This peanut butter cookies recipe lasts up to 1 week at room temperature stored in an airtight container. Keeping them well-sealed is the single biggest factor in maintaining their soft, chewy texture over that time, since exposed air dries them out noticeably faster.
Why are my peanut butter cookies spreading too thin?
This almost always means the dough wasn’t chilled before baking, since warm fat spreads much more quickly in a hot oven than chilled fat does. Skipping or shortening the 10-minute chill is the most common cause, though an oven running hotter than expected can also contribute. Always chilling for the full recommended time solves this issue in nearly every batch.
Can you make peanut butter cookies without eggs?
Yes — a flax egg, made by combining 1 tablespoon of ground flaxseed with 3 tablespoons of water and letting it sit for a few minutes to thicken, works as a direct substitute for the egg in this recipe. The texture comes out very similar to the egg-based version, making this a reliable swap for anyone avoiding eggs.
Why do my peanut butter cookies taste bland?
The most common cause is using reduced-fat or a less flavorful peanut butter, since the fat content in standard peanut butter carries much of the characteristic richness this cookie is known for. Skipping the pinch of salt can also leave the overall flavor tasting flatter than intended, since salt enhances the perceived sweetness and peanut flavor together. Sticking with standard, full-fat peanut butter and not skipping the salt usually resolves a bland batch.
You Might Also Like
Best Potato Soup

🍽 PEANUT BUTTER COOKIES
Ingredients
Equipment
Method
- Beat the peanut butter, brown sugar, and granulated sugar together on medium speed until smooth and well combined, about 2 minutes. Add the egg and vanilla extract, beating until fully incorporated.
- Sprinkle the baking soda and salt evenly over the dough and mix on low speed just until combined.
- Cover the bowl and refrigerate the dough for 10 minutes.
- Preheat the oven to 350°F. Scoop the chilled dough into 1.5-tablespoon balls and place on a parchment-lined baking sheet, spacing them about 2 inches apart. Press each ball with a fork in a crosshatch pattern, flattening slightly. Bake for 9–10 minutes, until the edges are set and lightly golden but the centers still look slightly underdone. Let cool on the baking sheet for 5 minutes before transferring to a wire rack.