
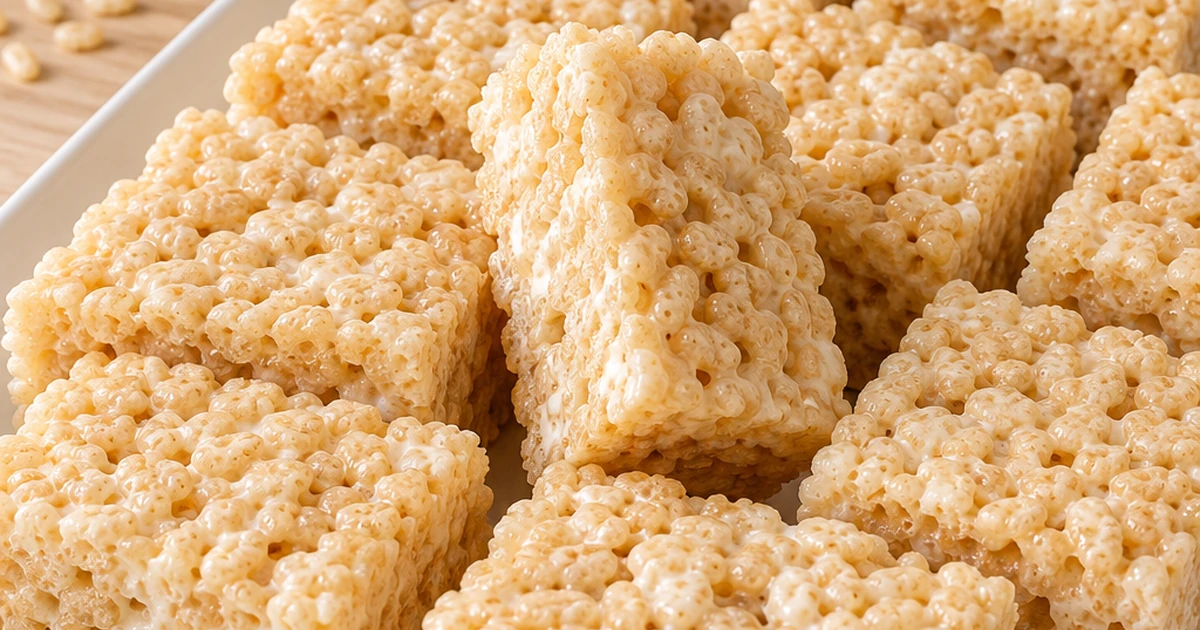
Best Rice Krispie Treats (Soft, Gooey, Ready in 15 Minutes)
⭐⭐⭐⭐⭐ Rate this recipe
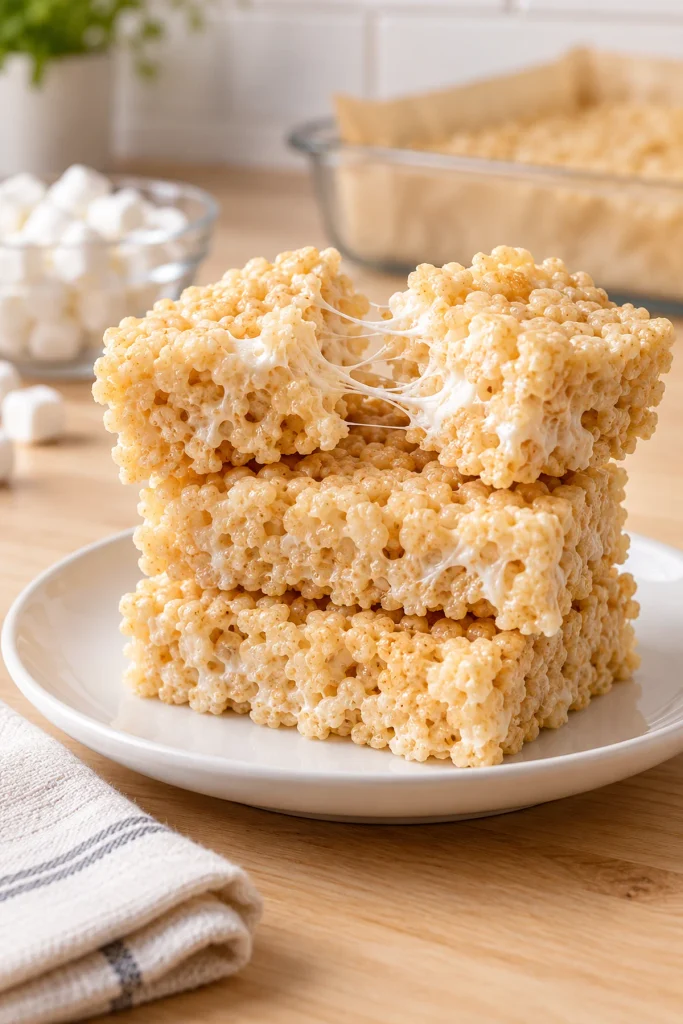
Rice Krispie Treats done right have a soft, pillowy bite that pulls apart in gooey marshmallow strands — not a dry, hard brick that cracks your teeth or a treat so sticky it falls apart in your hands. This Rice Krispie Treats recipe uses just 3 pantry ingredients and a specific melting technique that keeps the marshmallow mixture soft for days instead of hardening within hours. The whole batch comes together in 15 minutes with zero oven time.
This recipe is built for anyone who wants a nostalgic, crowd-pleasing dessert without any real baking skill required. If you’ve ever made Rice Krispie Treats that turned rock-hard the next day or stuck permanently to the pan — every one of those problems has a specific fix here. It works for a last-minute bake sale, a kids’ party, or a simple weeknight treat that takes almost no effort.
Made this already? Scroll down and leave a ⭐⭐⭐⭐⭐ rating below — it helps more than you know.
Once you nail the technique for soft Rice Krispie Treats, the store-bought version will never compare again.
By David | Last Updated: October 2026
⏱ Prep Time: 5 minutes
🕐 Cook Time: 10 minutes
⏳ Total Time: 15 minutes (plus 30 minutes to set)
🍽 Servings: 16 bars
📊 Difficulty: Easy
💰 Estimated Cost: ~$4 total / ~$0.25 per bar
🍬 Main Item: Soft, gooey marshmallow and crispy rice cereal bars
Table of Contents
Why This Rice Krispie Treats Recipe Works
- Low, slow heat for melting. Most Rice Krispie Treats recipes melt butter and marshmallows too fast over high heat, which scorches the sugar and produces a tough, chewy bar instead of a soft one. This recipe uses low heat the entire time, which keeps the marshmallow proteins intact and the final texture tender.
Best Pizza Dough Recipe another easy no-bake dessert here
- Extra butter compared to the box recipe. Most box instructions call for 3 tablespoons of butter — this Rice Krispie Treats recipe uses double that. The extra fat coats the cereal more thoroughly and is the single biggest reason these bars stay soft for days instead of hardening overnight.
- Reserved marshmallows folded in at the end. A portion of mini marshmallows gets stirred in after the cereal is already coated, rather than all of it melting completely. This creates pockets of extra-gooey marshmallow throughout every bar instead of a uniform, flatter texture.
- Pressing gently, not packing tightly. Most people press this mixture into the pan far too hard. Here’s the truth: a light touch with a buttered spatula produces a tender bar — pressing hard compacts the cereal and produces the dense, hard bricks everyone complains about.
- No oven, no waiting on a preheat. This entire Rice Krispie Treats recipe happens on the stovetop in one pot, which means zero cleanup beyond a single saucepan and zero time lost waiting for an oven to heat up.
Understanding the Key Ingredient
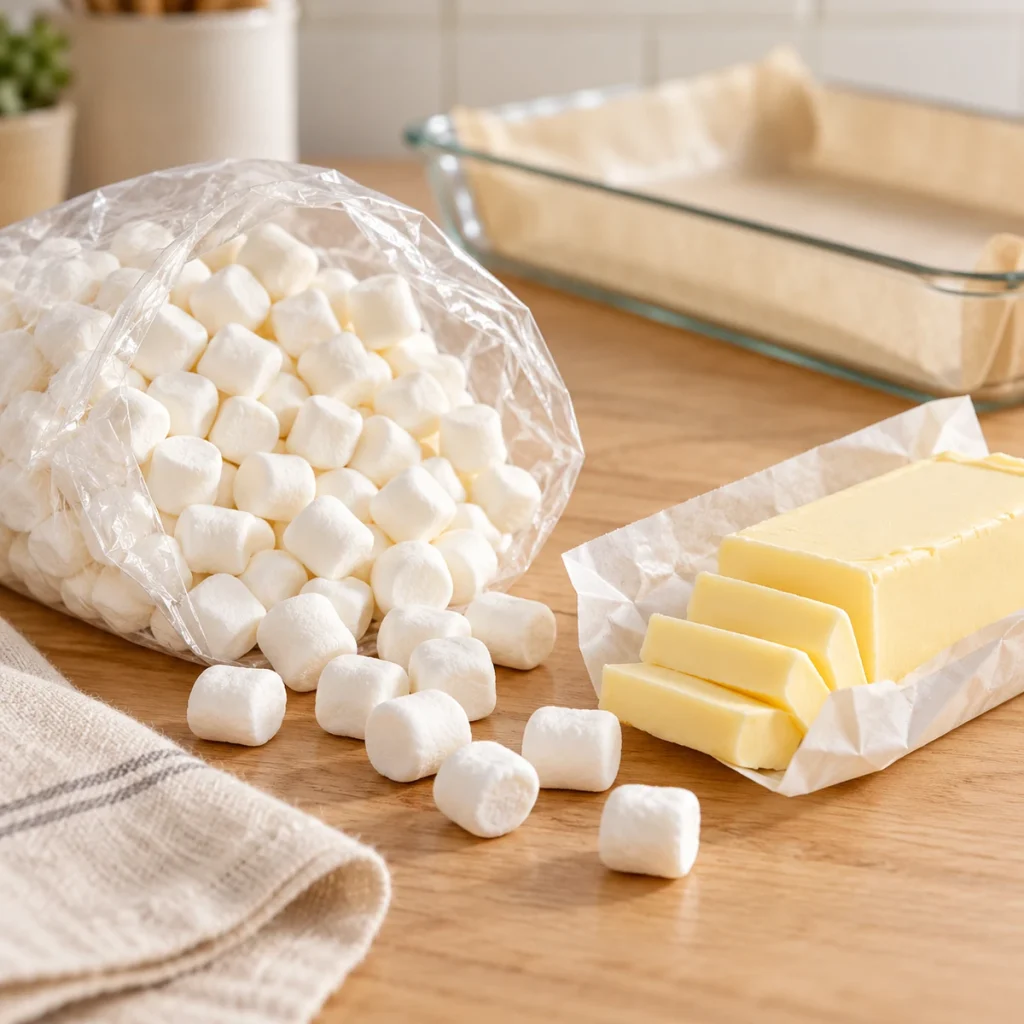
I’ve made this Rice Krispie Treats recipe in my own kitchen more times than I can count — always for real gatherings, never just for testing. The one step I never skip, no matter how rushed I am, is the key technique in Step 2. Every single time I’ve tried cutting corners on it, the final bars suffered. Every time I followed it properly, the result was exactly right.
Why Mini Marshmallows Are the Right Choice
Mini marshmallows melt faster and more evenly than large marshmallows because they have significantly more surface area relative to their volume, which means less time over heat and a gentler process overall for this Rice Krispie Treats recipe. That shorter melting time matters because marshmallow sugar starts to stiffen and lose its gooeyness the longer it’s exposed to heat. Additionally, mini marshmallows distribute more evenly through the cereal mixture, so every bite gets the same soft, gooey texture instead of uneven pockets of unmelted marshmallow.
Marshmallow Comparison Guide
| Type | Melt Time | Texture Result | Best For |
|---|---|---|---|
| Mini marshmallows | Fastest, most even | Softest, most consistent | Best overall result |
| Large marshmallows (cut up) | Slower, less even | Slightly firmer | Acceptable substitute |
| Marshmallow fluff | Instant, no melting needed | Very soft, slightly sticky | Fastest shortcut version |
| Stale marshmallows | Slower, clumpier | Drier final bars | Avoid if possible |
How to Choose the Best at the Store
- Check the bag for freshness. Fresh marshmallows feel soft and pillowy through the bag — hard or clumped marshmallows won’t melt smoothly.
- Mini over large for this recipe. Mini marshmallows melt faster and more evenly, which is exactly what a soft Rice Krispie Treats recipe needs.
- Buy slightly more than the recipe calls for. Reserving extra marshmallows to fold in at the end is what creates those gooey pockets.
- Avoid flavored or colored marshmallows for the classic version. They work fine in variations but change the color and flavor of a traditional bar.
- Store any leftover marshmallows sealed tightly. Air exposure dries them out within days, making future batches harder to melt smoothly.
How Much Do You Need?
| Servings | Marshmallows | Butter | Cereal |
|---|---|---|---|
| 8 bars | 5 oz (half bag) | 2 tbsp | 3 cups |
| 16 bars | 10 oz (1 bag) | 6 tbsp | 6 cups |
| 24 bars | 15 oz | 9 tbsp | 9 cups |
| 32 bars | 20 oz | 12 tbsp | 12 cups |
Double Batch — How to Scale This Rice Krispie Treats Recipe
Doubling this recipe works well as long as you use a large enough pot — a standard saucepan struggles to hold doubled marshmallow volume without overflowing when stirred. Melt the butter and marshmallows in two batches if your pot is on the smaller side, then combine both batches with the cereal in one large bowl before pressing into a bigger pan. However, don’t double the melting time — larger marshmallow volume still melts in roughly the same window over low heat with occasional stirring.
Ingredients You’ll Need

This Rice Krispie Treats recipe uses just three main ingredients. Here is everything broken down.
Main Ingredients
- Crispy rice cereal — 6 cups. The base of every bar. Slightly stale cereal actually works better than fresh, since it holds its crunch longer inside the marshmallow coating.
- Mini marshmallows — 10 oz (1 standard bag), divided. Most of the bag melts into the coating; a reserved portion gets folded in at the end for gooey pockets.
- Unsalted butter — 6 tablespoons. Double the standard box amount — this is the ingredient most responsible for keeping these bars soft for days.
Supporting Ingredients
- Salt — a pinch. Balances the sweetness of the marshmallow and makes the butter flavor more noticeable.
- Vanilla extract — 1 teaspoon (optional). Adds warmth and rounds out the overall flavor of this Rice Krispie Treats recipe.
Optional Additions Table
| Add-In | Amount | Effect |
|---|---|---|
| Mini chocolate chips | ½ cup | Folded in after cooling slightly for melty pockets |
| Sprinkles | ¼ cup | Pressed on top for a festive, birthday-party look |
| Peanut butter | 2 tbsp | Melted in with the marshmallows for a nutty flavor |
| Cinnamon | ½ tsp | Warm spice note throughout |
| Crushed pretzels | ½ cup | Adds a salty crunch contrast |
Complete Substitutions Reference
| Original | Substitution | Notes |
|---|---|---|
| Mini marshmallows | Large marshmallows, cut into quarters | Melts slightly slower |
| Mini marshmallows | Marshmallow fluff (7 oz jar) | Skip melting — just warm and stir |
| Unsalted butter | Salted butter | Omit the added pinch of salt |
| Crispy rice cereal | Any puffed rice cereal brand | Works identically |
| Vanilla extract | Almond extract (½ tsp) | Stronger — use less |
What NOT to Add to This Rice Krispie Treats Recipe
❌ Too much heat under the pot — high heat scorches the marshmallow sugar and produces a tough, chewy bar instead of soft
❌ Melted butter substitute oils — margarine or oil substitutes don’t coat the cereal the same way and produce a greasier, less structured bar
❌ Pressing the mixture down hard — firm packing compacts the cereal and is the single biggest cause of hard, dense treats
❌ Cold marshmallows straight from the fridge — refrigerated marshmallows melt unevenly and take noticeably longer
❌ Stirring for too long after adding cereal — overmixing breaks down the cereal pieces and makes the final texture mushy instead of crisp
❌ Cutting the bars before they’ve set — warm, unset bars smear and lose their clean shape when sliced
Equipment You’ll Need
Choosing the Right Equipment for Rice Krispie Treats
| Tool | Purpose | Best For |
|---|---|---|
| Large stainless steel pot | Melting | Even heat distribution, easy stirring |
| 9×13 inch pan | Setting | Standard thickness, 16 bars |
| 8×8 inch pan | Setting | Thicker, taller bars from the same batch |
| Silicone spatula | Pressing | Nonstick, won’t tear the mixture |
Other Tools That Actually Matter
A buttered or sprayed spatula is essential for pressing the mixture into the pan without it sticking to your tool the moment you touch it. Parchment paper lining the pan makes removing the finished bars effortless — lifting them out in one piece rather than scraping at the pan. A sharp knife, lightly greased before cutting, slices through the soft marshmallow mixture cleanly instead of tearing and stretching it.
No Stovetop Pot? Alternatives That Work for This Rice Krispie Treats Recipe
- Microwave method — melt butter and marshmallows together in a large microwave-safe bowl in 30-second bursts, stirring between each, until smooth
- Double boiler — melts more slowly and gently than direct heat, producing an even softer result for anyone worried about scorching
- Slow cooker on low — melt butter and marshmallows over 20–30 minutes, stirring occasionally, for a completely hands-off hot-weather method
How to Make Rice Krispie Treats — Step by Step
Five steps. Most take under three minutes each.
Step 1 — Melt the Butter
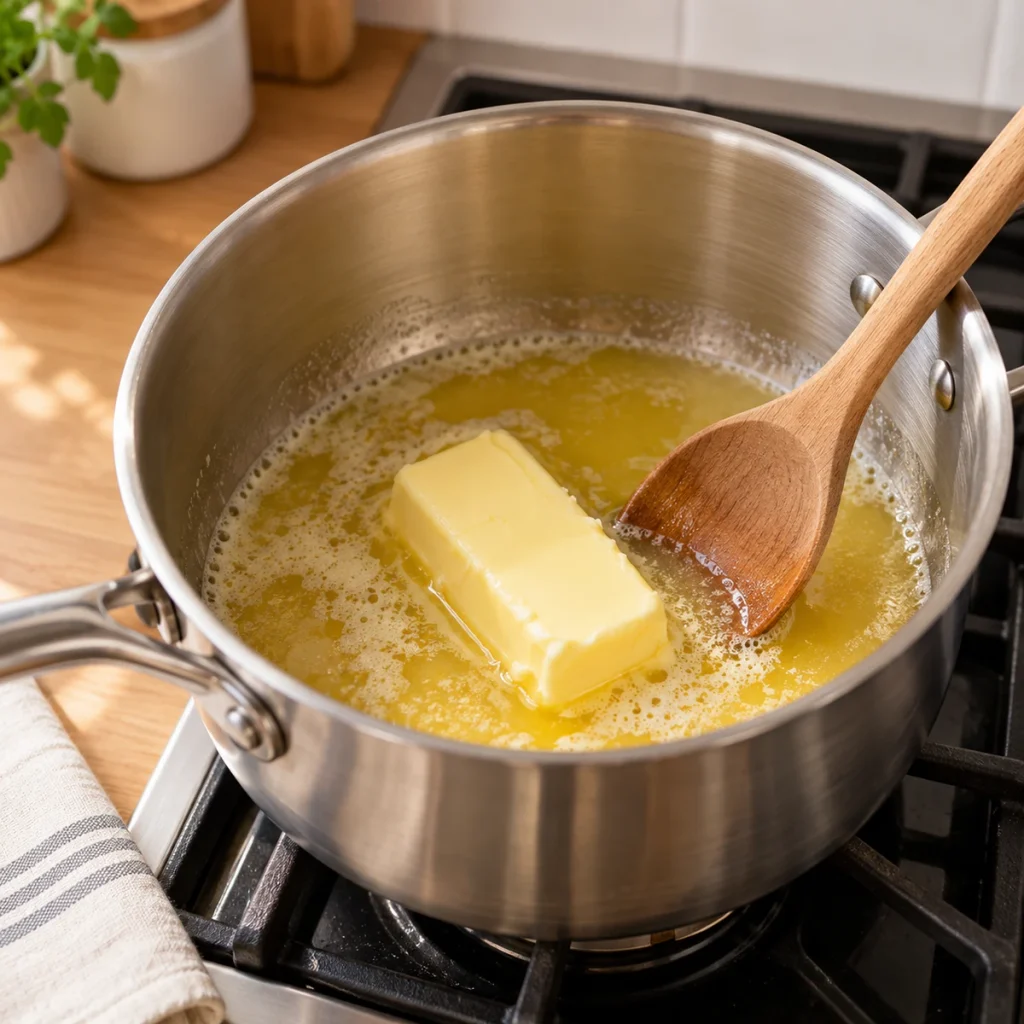
Melt the butter in a large pot over low heat, stirring occasionally until completely liquid — about 2 minutes. Keep the heat low throughout this entire recipe; rushing this step with higher heat is the first domino that leads to hard, overcooked bars later. The butter should look clear and golden, never browned or bubbling aggressively.
💡 Pro Tip: Cut the butter into smaller pieces before adding it to the pot — it melts faster and more evenly than one large stick.
Step 2 — Melt the Marshmallows (The Key Step)

Add most of the marshmallows to the melted butter, reserving about 1 cup to fold in later. Stir constantly over low heat until completely smooth and glossy — about 3–4 minutes. Most recipes rush this step with high heat, but low and slow is what keeps the marshmallow proteins from toughening. Every single time I’ve tried speeding this up, the final bars turned out noticeably firmer and less gooey.
💡 Pro Tip: Remove the pot from heat the moment the last few marshmallow lumps are melting — residual heat finishes the job without any risk of scorching.
Step 3 — Fold in the Cereal
Remove the pot from heat completely. Add the crispy rice cereal in two additions, folding gently with a spatula after each — stirring too vigorously crushes the cereal and makes the final bars mushy instead of crisp. The mixture should look evenly coated, with every piece of cereal glossy from the marshmallow mixture. Fold in the reserved cup of marshmallows last, stirring just enough to distribute them without melting them completely.
💡 Pro Tip: Work quickly once the cereal goes in — the mixture firms up as it cools, and it’s much easier to press into the pan while still warm and pliable.
Step 4 — Press Into the Pan
Transfer the mixture to a parchment-lined 9×13 inch pan. Using a buttered or sprayed spatula, press gently and evenly across the surface — just enough pressure to fill the corners without compacting the mixture. Most importantly, a light touch here is what separates a tender bar from a dense, hard brick. As a result, properly pressed Rice Krispie Treats should look loosely packed, almost fluffy, rather than tightly compressed.
Best Waffles Recipe try another quick kids dessert here
💡 Pro Tip: Lay a second sheet of parchment paper on top and press through that layer instead of directly on the mixture — it prevents sticking and lets you press evenly without tearing the surface.
Step 5 — Let Set and Cut

Let the pan sit at room temperature for 30 minutes to fully set before cutting. Cutting too early causes the bars to smear and lose their clean edges. Once set, lift the entire block out using the parchment paper overhang and cut into 16 even bars with a lightly greased knife for the cleanest slices.
💡 Pro Tip: If you’re in a hurry, 15 minutes in the refrigerator sets the bars just as firmly as 30 minutes at room temperature, without making them harder once they come back to room temperature.
How to Tell When Rice Krispie Treats Are Done
In my kitchen, I’ve learned to trust the texture over the clock for this Rice Krispie Treats recipe — but every stove and marshmallow brand behaves slightly differently, so check the mixture’s glossiness closely on your first attempt. Once you’ve made it once, you’ll know exactly what to look for.
Primary Doneness Test
The marshmallow mixture is ready to combine with cereal when it’s completely smooth, glossy, and stretches in long strands when you lift the spoon — no visible lumps of unmelted marshmallow remaining. The finished bars are set and ready to cut when the surface feels firm but still gives slightly to gentle pressure, not hard or crusty.
Doneness Guide
| Indicator | What It Means | What to Do |
|---|---|---|
| Lumps still visible in marshmallow | Not fully melted | Continue stirring over low heat |
| Mixture smooth and stretchy | Ready for cereal | Remove from heat immediately |
| Bars feel soft and sink when pressed | Not set yet | Wait 10–15 more minutes |
| Bars feel firm but slightly springy | Perfectly set | Ready to cut |
| Bars feel hard and crusty on top | Over-rested or over-cooked mixture | Will still taste fine, just firmer |
| Bars crumble when cut | Under-pressed or too much cereal | Press next batch more evenly |
Visual Signs They’re Done
- The marshmallow mixture has turned from lumpy and opaque to smooth, glossy, and slightly stretchy
- The cereal looks evenly coated with no dry, uncoated patches visible
- The pressed surface in the pan looks smooth and slightly shiny, not dull or crumbly
- The edges of the pan show the mixture pulling together into one cohesive block
- A light press on the surface leaves a shallow indent that slowly springs back
It’s Not Right — What to Do Now
- Bars turned out hard: Too much heat was used while melting, or the mixture was pressed too firmly — use lower heat and a lighter touch next time
- Bars are falling apart: Not enough butter or marshmallow relative to cereal — stick to the exact ratios in this recipe
- Bars stuck to the pan: Pan wasn’t lined with parchment, or the spatula wasn’t greased — always line and grease before pressing
- Bars taste bland: Salt or vanilla was skipped — both are small additions that meaningfully round out the sweetness
How to Make the Marshmallow Mixture
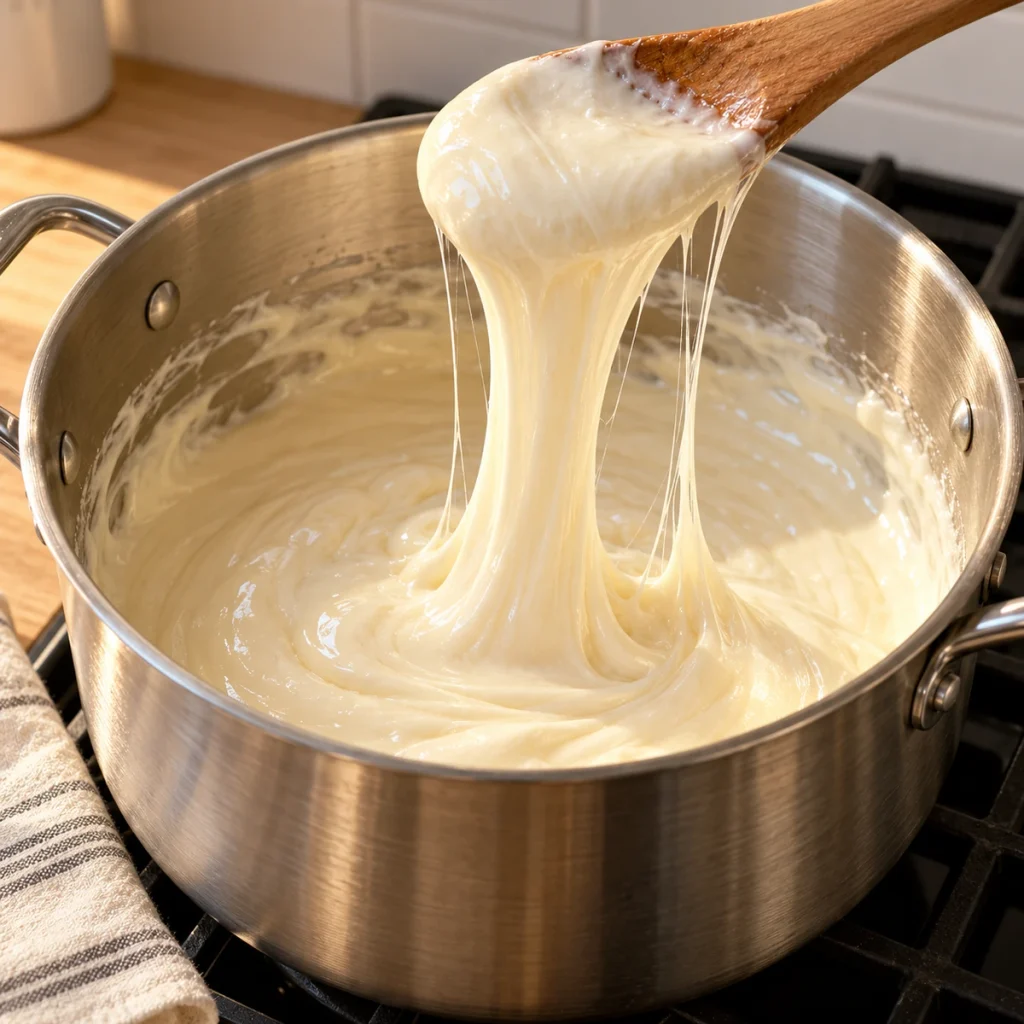
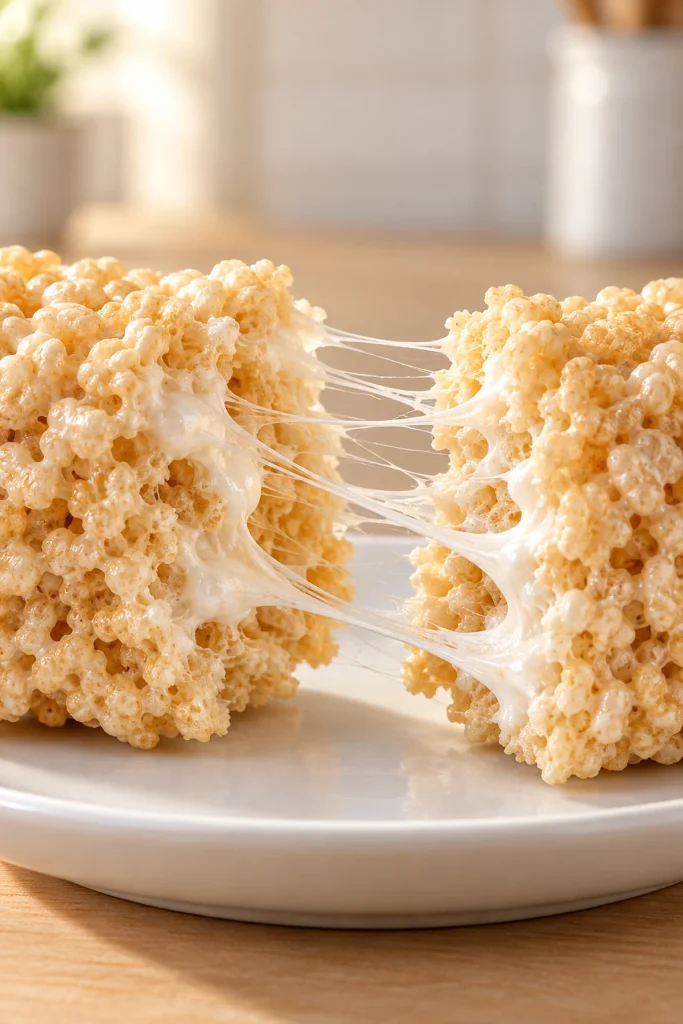
The marshmallow mixture is what determines whether these bars turn out soft or hard. There are three approaches depending on what you have available.
Method 1 — Stovetop Method (Standard Recipe)
Melt butter over low heat, add most of the marshmallows, and stir constantly until smooth — about 5–6 minutes total. This is the most controllable method and the one used throughout this Rice Krispie Treats recipe. Low, steady heat produces the most reliably soft result.
Method 2 — Microwave Method (Fastest)
Combine butter and marshmallows in a large microwave-safe bowl. Microwave in 30-second bursts, stirring between each, until smooth — typically 2–3 bursts total. This method is faster but requires closer attention, since marshmallows can scorch quickly if left in the microwave too long without stirring.
Method 3 — Marshmallow Fluff Shortcut (No Melting Required)
Melt only the butter, then stir in a 7 oz jar of marshmallow fluff off the heat until combined — no additional melting step needed. This produces an extremely soft, almost fudgy bar texture. However, it skips the textural contrast that whole melted marshmallows provide, so the result is uniformly soft rather than having gooey pockets throughout.
Troubleshooting Quick Reference
| Problem | Cause | Fix |
|---|---|---|
| Mixture won’t melt smoothly | Heat too low or inconsistent stirring | Increase heat slightly, stir constantly |
| Mixture scorched or smells burnt | Heat too high | Start over with lower heat next time |
| Mixture too thin and runny | Too much butter relative to marshmallow | Reduce butter slightly next batch |
| Mixture seized and clumpy | Marshmallows were stale or old | Use fresh marshmallows for smoothest melt |
What to Serve With Rice Krispie Treats
Classic Pairings That Always Work
- Cold milk — the single most classic pairing; the creaminess balances the sweetness perfectly
- Vanilla ice cream — crumble a bar over a scoop for an instant sundae topping
- Hot chocolate — the marshmallow flavors complement each other beautifully in colder months
- Fresh berries on the side — adds a tart contrast to the sweetness of the bars
- Coffee — the bitterness cuts through the sugar nicely for an adult-friendly pairing
Comfort Food Pairings
- Chocolate drizzle — melted chocolate over the top turns a simple bar into something more indulgent
- Peanut butter cups, crushed on top — adds richness and a salty-sweet contrast
- Caramel sauce — warm caramel drizzled over a bar makes an easy dessert centerpiece
- S’mores-style toppings — graham cracker crumbs and extra chocolate chips pressed on top
- A scoop of whipped cream — light and simple alongside a warm, fresh-cut bar
Low-Sugar Options
- Sugar-free mini marshmallows — a direct swap that noticeably reduces total sugar content
- Smaller portion sizes — cutting 24 bars instead of 16 from the same pan halves the sugar per serving
- Pair with unsweetened fruit — balances the sweetness of the treat without adding more sugar to the dessert itself
6 Ways to Use Leftover Rice Krispie Treats

Leftover Rice Krispie Treats can become several completely different desserts. Here are 6 ways to use them.
Rice Krispie Treat Ice Cream Sundae
What you need: Crumbled leftover bars, vanilla ice cream, chocolate sauce.
How to assemble: Layer crumbled treats, a scoop of ice cream, and chocolate sauce in a glass. Repeat the layers once more and top with a final drizzle.
One tip: Freeze the crumbled pieces for 10 minutes before layering — they hold their shape better against the melting ice cream.
Rice Krispie Treat Milkshake
What you need: 1 crumbled leftover bar, 2 scoops vanilla ice cream, ½ cup milk.
How to assemble: Blend all ingredients together until smooth. Pour into a glass and top with a small piece of leftover treat as garnish.
One tip: Freeze the leftover bar for 15 minutes before blending — it keeps the milkshake thick instead of watery.
Rice Krispie Treat Trifle
What you need: Crumbled leftover bars, whipped cream, fresh berries.
How to assemble: Layer crumbled treats, whipped cream, and berries in a glass. Repeat the layers twice and top with a final dollop of whipped cream.
One tip: This trifle turns a few leftover bars into a dessert that easily serves a crowd at a gathering.
Rice Krispie Treat Breakfast Bowl
What you need: 1 crumbled leftover bar, milk, fresh fruit.
How to assemble: Crumble the treat into a bowl like cereal, pour milk over the top, and add fresh fruit.
Best Waffles Recipe see more quick breakfast ideas here
One tip: This works best with slightly stale leftover bars — they hold their shape in milk longer than fresh, soft ones.
Rice Krispie Treat Pie Crust
What you need: 2–3 crumbled leftover bars, 2 tbsp melted butter.
How to assemble: Mix crumbled treats with melted butter until it holds together like a graham cracker crust. Press into a pie dish and chill for 20 minutes before filling with pudding or cheesecake filling.
One tip: This no-bake crust sets faster than a traditional graham cracker crust because the marshmallow helps bind it together.
Rice Krispie Treat Pops
What you need: Leftover bars cut into cubes, lollipop sticks, melted chocolate.
How to assemble: Press a lollipop stick into each cube, dip in melted chocolate, and let set on parchment paper for 15 minutes.
One tip: Chill the cubes for 10 minutes before dipping — cold treats hold the chocolate coating better than room-temperature ones.
Storage, Freezing and Reheating Guide
Room Temperature Storage (Up to 5 Days)
This Rice Krispie Treats recipe stores perfectly at room temperature for up to 5 days in an airtight container. Layer parchment paper between stacked bars to prevent them from sticking together. Keeping them well-sealed is the single biggest factor in staying soft — exposed treats dry out and harden within a day.
Can You Make This Rice Krispie Treats Recipe Ahead of Time?
Yes — this recipe is genuinely better made a few hours ahead, since the bars need time to fully set before cutting anyway. Make the full batch up to 2 days before you need it, store tightly sealed at room temperature, and the texture stays just as soft as the day it was made.
Freezer Storage (Up to 2 Months)
These bars freeze surprisingly well for up to 2 months. Wrap individual bars tightly in plastic wrap, then place in a freezer bag. Thaw at room temperature for about 20 minutes before serving — they return almost exactly to their original soft, gooey texture.
This Recipe Works as a Make-Ahead Party Dessert
Make a double batch the day before any party or bake sale. Cut into bars, layer with parchment in an airtight container, and they’ll be just as fresh and soft the next day as if made that morning.
Best Sweet Potato Casserole see more make-ahead party desserts here
How to Soften Rice Krispie Treats That Have Hardened
| Method | Setting | Time | Notes |
|---|---|---|---|
| Microwave | 50% power | 8–10 sec | Softens quickly; watch closely to avoid melting |
| Room temperature rest | N/A | 2–3 hours | Gradually softens on its own if well-sealed |
| Wrap in damp paper towel | N/A | 10 min | Adds a bit of moisture back into dried bars |
Weekly Prep Strategy
Make a batch at the start of the week and store sealed at room temperature. This Rice Krispie Treats recipe stays soft enough to be a grab-and-go snack all week without needing to remake it.
Recipe Variations Worth Trying
Same technique. Completely different flavor profiles. Master this base Rice Krispie Treats recipe first — then try one of these.
Most Popular — Chocolate Rice Krispie Treats
Stir ½ cup of mini chocolate chips into the mixture right after folding in the cereal, once the mixture has cooled slightly so the chips don’t melt completely. The result is a bar with pockets of intact chocolate throughout, rather than an overly melted, muddy chocolate flavor. This is the most requested variation of this Rice Krispie Treats recipe at any gathering.
International — Thai-Inspired Coconut Rice Krispie Treats
Replace 2 tablespoons of the butter with coconut oil and stir in ½ cup of toasted sweetened shredded coconut along with the cereal. The coconut oil adds a subtle tropical aroma while the toasted coconut provides texture and a nutty sweetness that pairs beautifully with the marshmallow base.
Low-Sugar — Reduced Sugar Marshmallow Version
Use sugar-free mini marshmallows in place of regular ones at the same quantity — the melting process and texture stay nearly identical. Therefore, you get a noticeably lower-sugar treat with the same soft, gooey bite that makes this Rice Krispie Treats recipe so popular in the first place.
Quick Shortcut — No-Stir Microwave Version
Combine butter and marshmallows directly in the final mixing bowl and microwave in 30-second bursts, stirring between each, then fold in the cereal right in the same bowl. This skips transferring between pot and bowl entirely, cutting active cleanup time nearly in half.
Fresh and Elevated — Browned Butter Rice Krispie Treats
Brown the butter first: melt in a light-colored pan over medium heat, stirring constantly, until golden and nutty-smelling — about 4–5 minutes. Use this browned butter in place of regular melted butter in the recipe. The browned butter adds a deep, caramel-like complexity that elevates this simple treat into something genuinely sophisticated.
Nutrition Information
Per Serving Breakdown (Based on 16 Bars)
| Nutrient | Amount | % Daily Value |
|---|---|---|
| Calories | ~115 | — |
| Total Fat | 3.5g | 4% |
| Saturated Fat | 2g | 10% |
| Cholesterol | 9mg | 3% |
| Sodium | 95mg | 4% |
| Total Carbohydrates | 21g | 8% |
| Dietary Fiber | 0g | 0% |
| Total Sugars | 12g | — |
| Protein | 1g | 2% |
| Iron | 1.8mg | 10% |
According to USDA FoodData Central, fortified rice cereal provides a meaningful source of iron per serving — making this Rice Krispie Treats recipe one of the few sweet treats that also contributes a small nutritional benefit.
Dietary Compatibility
| Diet | Compatible | Notes |
|---|---|---|
| Gluten-Free | ✅ | Most rice cereal brands are naturally gluten-free — check the label |
| Dairy-Free | ❌ | Replace butter with dairy-free margarine or coconut oil |
| Paleo | ❌ | Marshmallows and cereal both excluded |
| Keto | ❌ | High in sugar from marshmallows; not keto-friendly |
| Vegetarian | ✅ | No meat in this recipe |
| Vegan | ❌ | Traditional marshmallows contain gelatin; use vegan marshmallows to adapt |
To reduce sugar in this Rice Krispie Treats recipe, use sugar-free marshmallows or simply cut the bars smaller — 24 pieces instead of 16 noticeably reduces sugar per serving without changing the recipe itself.
8 Mistakes That Ruin Rice Krispie Treats
Every one of these mistakes in this Rice Krispie Treats recipe is fixable. Know them before you start — not after.
❌ Mistake 1: Using High Heat to Melt the Marshmallows
Why it happens: Wanting to speed up the process. What goes wrong: High heat scorches the marshmallow sugar and tightens the proteins, producing a tough, chewy bar instead of a soft one. The fix: Always melt over low heat, stirring constantly, even though it takes a few extra minutes.
❌ Mistake 2: Not Using Enough Butter
Why it happens: Following the standard box instructions exactly. What goes wrong: The standard 3-tablespoon ratio produces bars that harden within a day. The fix: Double the butter to 6 tablespoons — this single change is responsible for keeping the bars soft for days.
❌ Mistake 3: Pressing the Mixture Too Hard
Why it happens: Wanting a neat, even surface. What goes wrong: Firm pressing compacts the cereal and produces dense, hard bricks instead of tender, light bars. The fix: Use a buttered spatula and the lightest touch possible — just enough to fill the pan evenly.
❌ Mistake 4: Cutting the Bars Too Soon
Why it happens: Impatience to serve or taste them. What goes wrong: Warm, unset bars smear when cut and lose their clean shape entirely. The fix: Let the pan rest a full 30 minutes at room temperature, or 15 minutes in the fridge, before cutting.
❌ Mistake 5: Overcooking the Marshmallow Mixture
Why it happens: Leaving it on the heat too long after it looks melted. What goes wrong: Extended heat exposure continues to tighten the marshmallow structure even after it looks smooth, producing a firmer final bar. The fix: Remove from heat the moment the last few lumps are melting — residual heat finishes the job.
❌ Mistake 6: Not Lining the Pan
Why it happens: Assuming a nonstick pan doesn’t need it. What goes wrong: The sticky marshmallow mixture bonds to almost any pan surface, making removal and cleanup significantly harder. The fix: Always line with parchment paper, leaving overhang on the sides for easy lifting.
❌ Mistake 7: Stirring the Cereal In Too Vigorously
Why it happens: Trying to coat every piece thoroughly and quickly. What goes wrong: Aggressive stirring crushes the delicate cereal pieces, producing a mushy, dense texture instead of light and crisp. The fix: Fold gently in two additions rather than stirring hard all at once.
❌ Mistake 8: Storing the Bars Uncovered
Why it happens: Leaving them out on a plate for easy snacking. What goes wrong: Exposed air dries the marshmallow out within a day, turning soft bars hard and stale. The fix: Always store in an airtight container with parchment between layers.
Frequently Asked Questions
Why are my Rice Krispie Treats hard instead of soft?
The most common cause is not using enough butter — standard box recipes call for only 3 tablespoons, which isn’t enough fat to keep the bars soft past the first day. This Rice Krispie Treats recipe doubles that to 6 tablespoons specifically to solve this problem. The second most common cause is pressing the mixture too firmly into the pan, which compacts the cereal into a dense brick. Using low heat while melting and a light touch while pressing both make a measurable difference.
How much butter do you need for Rice Krispie Treats?
This Rice Krispie Treats recipe uses 6 tablespoons of butter for a standard batch of 16 bars — double the amount most box instructions recommend. The extra butter coats the cereal more thoroughly and is the single biggest factor in keeping the bars soft for several days instead of hardening overnight. Less butter produces a drier, firmer bar that stales faster.
How do you keep Rice Krispie Treats soft for days?
The honest answer: it comes down to three things — enough butter, low heat while melting, and proper airtight storage. Use the full 6 tablespoons of butter called for in this recipe, melt everything over low heat rather than rushing with high heat, and store the finished bars in a sealed container with parchment between layers. Skipping any of these three steps shortens how long the bars stay soft.
Can you make Rice Krispie Treats ahead of time?
Yes — this recipe is actually ideal for making ahead since the bars need 30 minutes to set regardless. Make the full batch up to 2 days before you need it and store tightly sealed at room temperature; the texture stays just as soft as the day it was made. For longer storage, the bars also freeze well for up to 2 months.
Why are my Rice Krispie Treats falling apart?
This usually means there wasn’t enough marshmallow or butter relative to the amount of cereal used, so there’s not enough binding structure to hold the bars together. Stick to the exact ratios in this recipe — 6 cups of cereal to 10 oz of marshmallows and 6 tablespoons of butter — rather than eyeballing the amounts. Cutting the bars before they’ve fully set can also cause them to crumble apart at the edges.
Can you freeze Rice Krispie Treats?
Yes — they freeze well for up to 2 months. Wrap individual bars tightly in plastic wrap and place them in a freezer bag to prevent freezer burn. Thaw at room temperature for about 20 minutes before eating; the texture returns almost exactly to its original soft, gooey state once fully thawed.
What do you serve with Rice Krispie Treats?
Cold milk is the classic pairing and the one that works best with the sweetness of the bars. For a more indulgent presentation, crumble a bar over vanilla ice cream for an instant sundae, or drizzle melted chocolate and caramel sauce over a fresh-cut bar. Hot chocolate is a popular pairing in colder months since the marshmallow flavors complement each other naturally.
How long do Rice Krispie Treats take to set?
This Rice Krispie Treats recipe needs about 30 minutes at room temperature to fully set before cutting. If you’re short on time, 15 minutes in the refrigerator sets the bars just as firmly without making them any harder once they return to room temperature. Cutting before the mixture has set causes the bars to smear and lose their clean shape.
Can you make Rice Krispie Treats without marshmallows?
Marshmallow fluff is the closest substitute and skips the melting step entirely — just melt the butter and stir in a 7 oz jar of fluff until combined. The texture comes out extremely soft, though it loses the gooey pockets that come from folding in whole reserved marshmallows at the end. There isn’t a true marshmallow-free version that produces the same classic texture, since marshmallow is what binds the cereal together.
Why do my Rice Krispie Treats stick to the pan?
This happens when the pan isn’t properly lined with parchment paper before pressing the mixture in. The sticky marshmallow coating bonds directly to glass, metal, or even most nonstick surfaces without a barrier. Always line the pan with parchment, leaving some overhang on the sides, so the entire block lifts out cleanly once set.
You Might Also Like
Classic No-Bake Cookies
French Toast Recipe
White Chicken Chili
check out this recipe next
Recipe Card


RICE KRISPIE TREATS
Ingredients
Equipment
Method
- Melt butter in a large pot over low heat, stirring occasionally, about 2 minutes.
- Add most of the marshmallows (reserve 1 cup). Stir constantly over low heat until smooth and glossy, 3–4 minutes.
- Remove from heat. Fold in cereal in two additions, stirring gently. Fold in reserved marshmallows last.
- Transfer to a parchment-lined 9×13 pan. Press gently and evenly with a buttered spatula.
- Let set at room temperature for 30 minutes, or 15 minutes in the fridge, before cutting into 16 bars.
Notes
✅ Double the standard butter amount — this is what keeps the bars soft for days.
🔄 No mini marshmallows? Use a 7 oz jar of marshmallow fluff instead, skipping the melting step.
❄️ Store airtight at room temperature up to 5 days, or freeze wrapped bars up to 2 months.
📌 Press the mixture gently, never firmly — a light touch is the difference between soft and hard bars. Make Ahead + Freezer Notes
Make the full batch up to 2 days ahead and store sealed at room temperature. Freeze individually wrapped bars up to 2 months; thaw at room temperature for 20 minutes before serving.
🍽 RICE KRISPIE TREATS
⭐⭐⭐⭐⭐ [Star rating widget placeholder]
Soft, gooey Rice Krispie Treats made with just 3 ingredients — the best no-bake dessert ready in 15 minutes.
| Prep | 5 min |
| Cook | 10 min |
| Total | 15 min + 30 min to set |
| Servings | 16 bars |
| Calories | ~115 per bar |
| Course | Dessert / Snack |
| Cuisine | American |
| Estimated Cost | ~$4 total / ~$0.25 per bar |
| Keywords | rice krispie treats, no-bake dessert, marshmallow treats, easy dessert, kids snack |
Equipment
- Large stainless steel pot
- 9×13 inch pan
- Parchment paper
- Silicone spatula
- Sharp knife
Ingredients
- 6 tbsp unsalted butter
- 10 oz mini marshmallows (1 standard bag), divided
- 6 cups crispy rice cereal
- Pinch of salt
- 1 tsp vanilla extract (optional)
Instructions
- Melt butter in a large pot over low heat, stirring occasionally, about 2 minutes.
- Add most of the marshmallows (reserve 1 cup). Stir constantly over low heat until smooth and glossy, 3–4 minutes.
- Remove from heat. Fold in cereal in two additions, stirring gently. Fold in reserved marshmallows last.
- Transfer to a parchment-lined 9×13 pan. Press gently and evenly with a buttered spatula.
- Let set at room temperature for 30 minutes, or 15 minutes in the fridge, before cutting into 16 bars.
Recipe Notes
⚠️ Never use high heat to melt the marshmallows — it toughens the final texture significantly.
✅ Double the standard butter amount — this is what keeps the bars soft for days.
🔄 No mini marshmallows? Use a 7 oz jar of marshmallow fluff instead, skipping the melting step.
❄️ Store airtight at room temperature up to 5 days, or freeze wrapped bars up to 2 months.
📌 Press the mixture gently, never firmly — a light touch is the difference between soft and hard bars.
Make Ahead + Freezer Notes
Make the full batch up to 2 days ahead and store sealed at room temperature. Freeze individually wrapped bars up to 2 months; thaw at room temperature for 20 minutes before serving.
Nutrition Per Serving
Calories: ~115 | Protein: 1g | Fat: 3.5g | Carbs: 21g | Fiber: 0g | Sodium: ~95mg
Dietary Info
✅ Gluten-Free | ❌ Dairy-Free | ❌ Paleo | ❌ Keto | ✅ Vegetarian | ❌ Vegan
Did You Make This?
Tag @DavidRecipes and leave a ⭐⭐⭐⭐⭐ rating below.
— David | DavidRecipes
David is a home cook who has spent years developing straightforward, no-fuss recipes that work for real weeknight kitchens. Every recipe on DavidRecipes is made, tested, and eaten before it ever gets published — usually multiple times.



4 Comments