
Best Waffles Recipe (Crispy Outside, Fluffy Inside, Ready in 20 Minutes)
⭐⭐⭐⭐⭐ Rate this recipe

Waffles done right give you a deep golden crust that snaps when you break it and a soft, airy interior that holds its shape on the plate — not a soggy, steam-softened disappointment that collapses the moment you add syrup. This recipe builds that result from scratch using 7 pantry ingredients and a batter that comes together in under 10 minutes. The waffles cook in a standard waffle iron and come out perfectly crispy every single time.
This recipe is built for anyone who wants a weekend breakfast that feels special without requiring skill or extra equipment. If you’ve ever made waffles that came out pale, soft, or stuck to the iron — every one of those problems has a specific fix in this recipe. It works for a lazy Sunday morning, a full brunch spread, or breakfast for dinner when nothing else sounds worth making.
Made this already? Scroll down and leave a ⭐⭐⭐⭐⭐ rating below — it helps more than you know.
Once you make waffles from scratch, the frozen box version will never feel worth it again.
By David | Last Updated: October 2026
⏱ Prep Time: 10 minutes
🕐 Cook Time: 10 minutes
⏳ Total Time: 20 minutes
🍽 Servings: 4 (2 waffles per person)
📊 Difficulty: Easy
💰 Estimated Cost: ~$5 total / ~$1.25 per serving
🧇 Main Item: Classic crispy waffles with golden brown grid
Table of Contents
Why This Recipe Works
- Separated eggs for maximum lift. Beaten egg whites folded into the batter at the end create air pockets that expand in the waffle iron — this is what produces a genuinely fluffy interior without making the batter complicated. Most waffle recipes skip this step entirely.
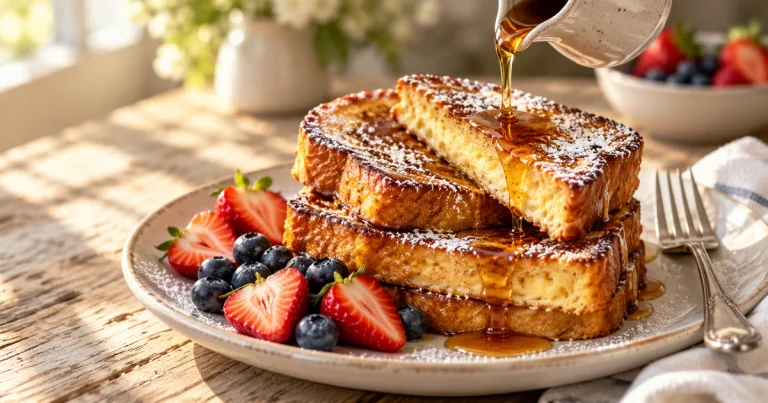
French Toast Recipe another great breakfast recipe here
- Oil instead of butter in the batter. Melted butter adds flavor but produces softer waffles. Neutral oil keeps the exterior crispier longer — it doesn’t re-absorb moisture the way butter does. This single swap is the biggest difference between crispy waffles and soft ones.
- Baking powder and baking soda together. Baking powder provides steady lift throughout cooking. Baking soda reacts immediately with the buttermilk for an extra burst of rise the moment batter hits the hot iron. The combination produces a lighter, more open crumb than either alone.
- Buttermilk in the batter. The acidity tenderizes the gluten in the flour, which keeps the interior soft while the exterior crisps. Here’s the truth: waffles made with regular milk are noticeably denser and less flavorful than buttermilk waffles.
- Hot iron, rested batter. Letting the batter rest for 5 minutes while the iron heats fully allows the gluten to relax and the leavening to activate — the result is waffles that cook evenly from edge to center without raw spots or uneven browning.
Understanding the Key Ingredient
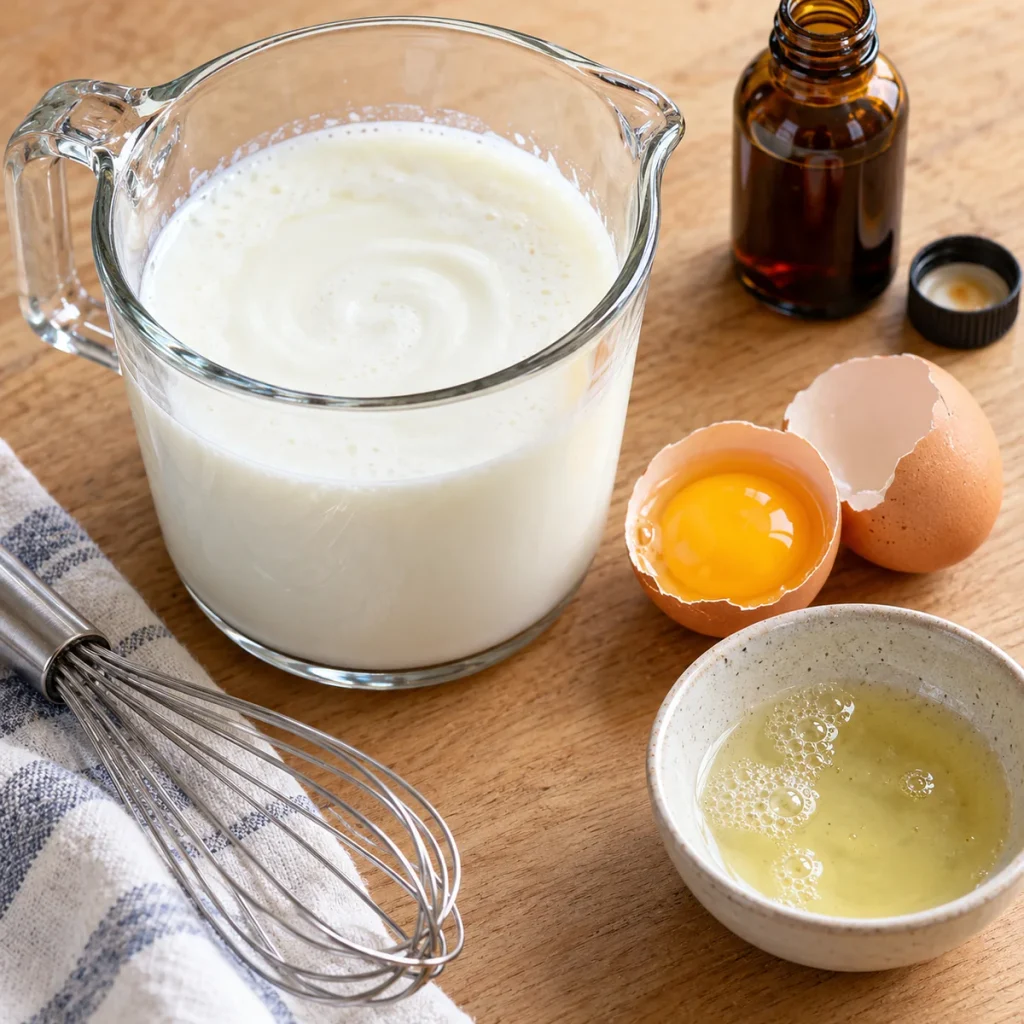
I’ve made this recipe in my own kitchen more times than I can count — always for real meals, never just for testing. The one step I never skip, no matter how rushed the morning is, is the key technique in Step 3. Every single time I’ve tried cutting corners on it, the final dish suffered. Every time I followed it properly, the result was exactly right.
Why Buttermilk Is the Right Choice
Buttermilk does two things in waffle batter that regular milk cannot. First, its acidity reacts with the baking soda to create immediate lift the moment batter touches the hot iron — producing a lighter, more open crumb. Second, the acid tenderizes the gluten strands in the flour, which keeps the interior soft and pillowy while the exterior goes golden and crisp. Additionally, buttermilk adds a subtle tang that balances the sweetness of the waffle toppings — without it, the waffles taste flat and one-dimensional.
Buttermilk Comparison Guide
| Type | Acidity | Result | Best For |
|---|---|---|---|
| Full-fat buttermilk | High | Crispiest exterior, most tender crumb | Best overall result |
| Low-fat buttermilk | Medium | Slightly less tender | Works fine |
| DIY (milk + vinegar) | Medium | Good substitute | When no buttermilk available |
| DIY (milk + lemon juice) | Medium | Slightly brighter flavor | Alternative substitute |
| Regular whole milk | Low | Denser, less crispy | Last resort only |
How to Choose the Best at the Store
- Check the fat content. Full-fat buttermilk produces the crispiest exterior — use it when available.
- Check the expiry date. Buttermilk close to expiry has higher acidity — still works but tang is more pronounced.
- Shake before opening. Buttermilk separates naturally — shake so fat distributes evenly before measuring.
- Buy the smallest carton. Most waffle recipes use 1–2 cups — a large carton often goes to waste.
- Room temperature is best. Cold buttermilk straight from the fridge can make the batter uneven — let it sit out 15–20 minutes before using.
How Much Do You Need?
| Servings | Buttermilk | Waffles |
|---|---|---|
| 2 | ¾ cup | 4 waffles |
| 4 | 1½ cups | 8 waffles |
| 6 | 2¼ cups | 12 waffles |
| 8+ | 3 cups | 16 waffles |
Double Batch — How to Scale This Recipe
Doubling this waffle recipe is simple — double every ingredient exactly. Mix the batter in a large bowl and keep it covered in the refrigerator between batches. However, beat the egg whites separately in two batches rather than one — a larger volume of egg whites takes longer to reach stiff peaks and can deflate before folding. Cook immediately after folding — rested batter beyond 15 minutes starts to lose its lift.
Ingredients You’ll Need
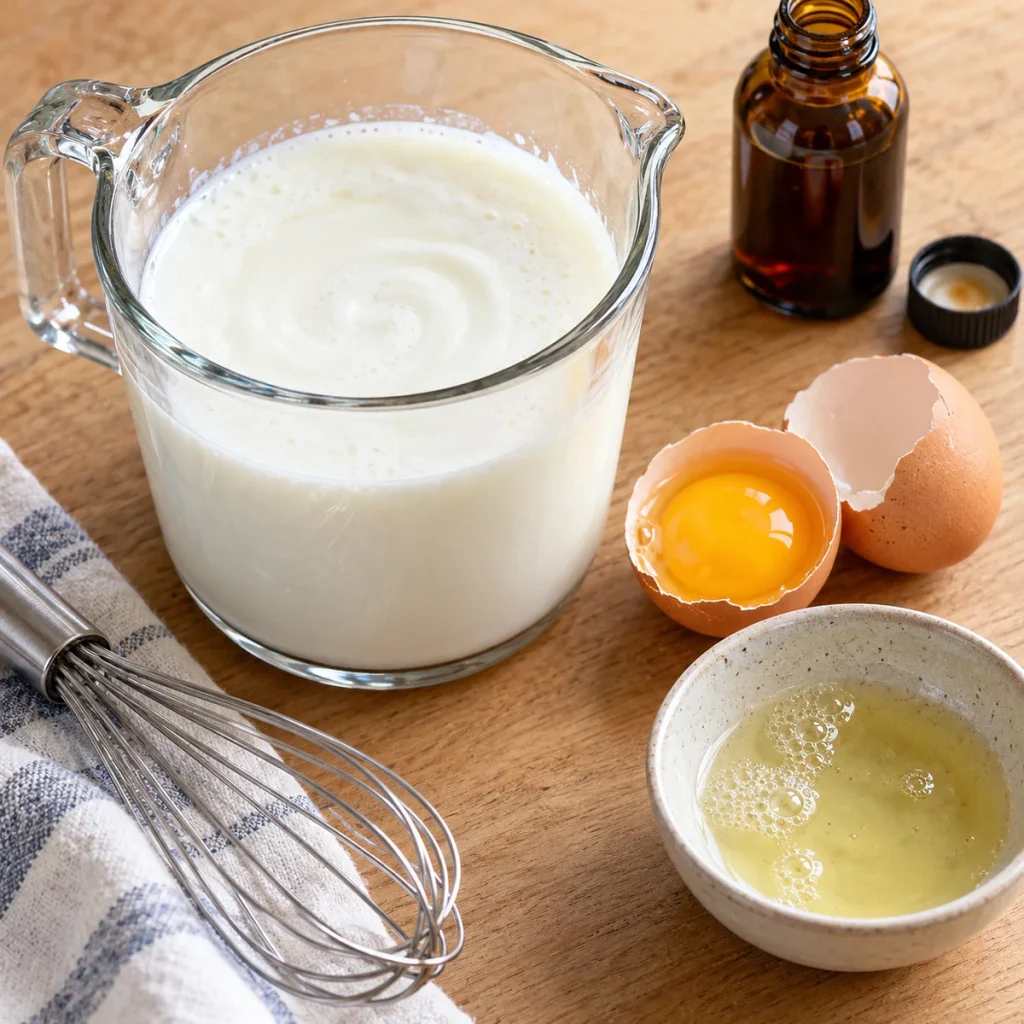
This recipe uses two groups: the dry base and the wet base. Here is everything broken down.
Main Ingredients
- All-purpose flour — 2 cups. The structure of the waffles. Spooned and leveled into the measuring cup — not scooped — to avoid dense, heavy waffles.
- Buttermilk — 1½ cups, room temperature. The acid that activates the leavening and tenderizes the crumb. Non-negotiable for the best result.
- Eggs — 2 large, separated. Yolks go into the batter for richness. Whites are beaten to stiff peaks and folded in last — this is what creates the fluffy interior.
- Neutral oil — ¼ cup. Vegetable or canola oil. Keeps the exterior crispier longer than butter — the most important ingredient for crispy waffles.
- Baking powder — 2 teaspoons. Steady lift throughout cooking.
- Baking soda — ½ teaspoon. Reacts immediately with buttermilk for extra initial rise.
- Vanilla extract — 1 teaspoon. Adds warmth and rounds out the flavor.
- Salt — ½ teaspoon. Balances sweetness and makes every other flavor pop.
- Sugar — 1 tablespoon. Just enough to encourage browning and add a subtle sweetness to the batter.
Supporting Ingredients
- Powdered sugar — for serving. Dusted over the top just before serving.
- Maple syrup — for serving. Real maple syrup — not pancake syrup — makes a noticeable difference.
- Fresh berries — for serving (optional). Strawberries, blueberries, or raspberries add color and freshness.
Optional Additions Table
| Add-In | Amount | Effect |
|---|---|---|
| Cinnamon | 1 tsp | Warm spice throughout every bite |
| Lemon zest | 1 tsp | Bright, citrusy lift |
| Brown sugar instead of white | 1 tbsp | Deeper caramel flavor |
| Chocolate chips | ¼ cup | Folded in last — dessert waffle version |
| Mashed banana | ½ cup | Natural sweetness, replaces some oil |
Complete Substitutions Reference
| Original | Substitution | Notes |
|---|---|---|
| Buttermilk | 1½ cups milk + 1½ tbsp white vinegar, rest 5 min | Good substitute |
| Neutral oil | Melted coconut oil | Slight coconut flavor |
| All-purpose flour | 1:1 gluten-free flour blend | Works well |
| Eggs | Flax eggs (1 tbsp flaxseed + 3 tbsp water each) | Vegan option; less lift |
| Sugar | Honey or maple syrup (1 tbsp) | Slightly different browning |
What NOT to Add
❌ Too much oil — over ⅓ cup makes the batter greasy and the waffles oily rather than crispy
❌ Melted butter in the batter — produces softer waffles that lose their crisp within minutes of leaving the iron
❌ Extra baking powder — more than 2 teaspoons creates a metallic aftertaste and makes the waffles rise unevenly
❌ Overmixed batter — gluten development from over-stirring produces dense, tough waffles with no fluff
❌ Cold eggs — cold yolks don’t incorporate evenly and cold whites take twice as long to reach stiff peaks
❌ Syrup added during cooking — adding syrup to the iron or batter mid-cook burns the sugar and creates permanent sticking
Equipment You’ll Need
Choosing the Right Equipment
| Waffle Iron Type | Grid Style | Best For |
|---|---|---|
| Classic Belgian waffle iron | Deep grid | Thick, fluffy waffles with deep pockets |
| American waffle iron | Shallow grid | Thinner, crispier waffles |
| Rotating waffle iron | Deep or shallow | Most even cooking — flips for uniform browning |
| Mini waffle iron | Small grid | Kids’ portions, bite-sized waffles |
Other Tools That Actually Matter
A hand mixer or stand mixer is essential for beating egg whites to stiff peaks — whisking by hand takes 8–10 minutes and rarely produces the right texture. Two large mixing bowls are needed — one for dry ingredients, one for wet. A rubber spatula for folding egg whites preserves the air you’ve beaten in. A ladle or measuring cup makes pouring batter into the iron consistent — the same amount every time means every waffle cooks in the same time.
No Waffle Iron? Alternatives That Work
- Waffle pan (stovetop) — produces waffles on a gas or electric burner; less even than electric iron but works well
- Oven method — pour batter into a greased muffin tin and bake at 400°F for 15–18 minutes; produces a waffle-flavored muffin with a similar crumb
- Grill pan — produces a gridded surface similar to a waffle iron; press down with a spatula for defined marks
How to Make Waffles — Step by Step
Eight steps. Most take under two minutes each.
Step 1 — Preheat the Waffle Iron (Don’t Rush This)

Turn your waffle iron to medium-high heat and let it preheat for a full 5 minutes before adding any batter. A fully preheated iron is the single most important factor for crispy waffles — batter added to a lukewarm iron steams instead of sears, producing pale, soft waffles that stick to the plates. Brush or spray the plates lightly with neutral oil even if your iron is nonstick — this ensures even release and adds to the crispiness of the exterior.
💡 Pro Tip: Test the iron by dropping a few drops of water onto the plate — they should sizzle and evaporate immediately. If they just sit there, the iron needs more time.
Step 2 — Mix the Dry Ingredients

In a large bowl, whisk together the flour, baking powder, baking soda, salt, and sugar until fully combined. Whisking the dry ingredients distributes the leavening evenly through the flour — uneven distribution means some waffles rise more than others and some have flat spots from concentrated baking soda. Set the bowl aside. This step takes 30 seconds and directly affects the consistency of every waffle in the batch.
💡 Pro Tip: Spoon flour into the measuring cup and level it off with a straight edge — never scoop directly from the bag. Scooping packs 20–30% more flour into the cup, which produces dense, heavy waffles.
Step 3 — Separate and Beat the Egg Whites (The Key Step)
Separate the eggs — yolks into a medium bowl, whites into a clean, completely dry mixing bowl. Beat the egg whites with a hand mixer on medium-high until stiff peaks form — about 2–3 minutes. The whites should hold their shape when you lift the beaters and the tips should stand straight up without drooping. This step is what separates genuinely fluffy waffles from flat, dense ones — the beaten whites fold into the batter and create thousands of tiny air pockets that expand in the hot iron. Every time I’ve skipped this step to save time, the waffles came out noticeably flatter and less interesting.
💡 Pro Tip: Any trace of yolk, water, or grease in the bowl prevents egg whites from reaching stiff peaks — wipe the bowl and beaters with a paper towel and a drop of white vinegar before starting.
Step 4 — Mix the Wet Ingredients

In the medium bowl with the egg yolks, add the buttermilk, neutral oil, and vanilla extract. Whisk until fully combined — about 30 seconds. The mixture should look uniform and slightly golden from the yolks. Pour the wet ingredients into the dry ingredients and stir with a rubber spatula until just combined — stop the moment no dry flour is visible. The batter will look lumpy. That is exactly right. Overmixing at this stage develops gluten and produces tough, dense waffles regardless of how well you beat the egg whites.
💡 Pro Tip: Make a well in the center of the dry ingredients before adding the wet — it reduces the number of strokes needed to combine everything and makes under-mixing much easier.
Step 5 — Fold in the Egg Whites
Add the beaten egg whites to the batter in two additions. Use a rubber spatula and fold gently — cut down through the center, sweep along the bottom, and fold up and over. Rotate the bowl a quarter turn and repeat. Most importantly, stop folding the moment the whites are incorporated — streaks of white are fine. Overfold and you deflate all the air you just spent 3 minutes beating in.
Best Sweet Potato Casserole more easy breakfast ideas from this site
As a result, a properly folded batter looks thick, slightly lumpy, and airy — not smooth and pourable like pancake batter.
💡 Pro Tip: Fold in the first addition more vigorously to lighten the batter — this makes the second addition easier to fold in gently without deflating the whites.
Step 6 — Cook the Waffles

Pour enough batter to fill your waffle iron about ¾ full — too little produces thin, uneven waffles; too much overflows the sides. Close the lid and cook for 4–5 minutes without opening. Do not lift the lid early — opening before the waffle has set tears it apart and it sticks to both plates. The waffle is ready when steam stops coming out of the iron sides — this is the most reliable doneness signal for any waffle iron regardless of brand.
💡 Pro Tip: Pour batter slightly toward the back of the iron — it spreads forward as the lid closes and fills the grid more evenly than pouring dead center.
Step 7 — Keep Warm and Repeat
Transfer finished waffles to a wire rack set on a baking sheet in a 200°F oven. Never stack waffles on a plate — the steam trapped between them makes every waffle soft within 2 minutes. The wire rack method keeps them crispy for up to 30 minutes while you finish the batch. Add a fresh light brush of oil to the iron before each new waffle — this maintains the crispy exterior on every single one.
💡 Pro Tip: This wire rack oven method is the same technique used in short-order diners to keep waffles crispy during a busy service — it works every time without exception.
Step 8 — Plate and Serve
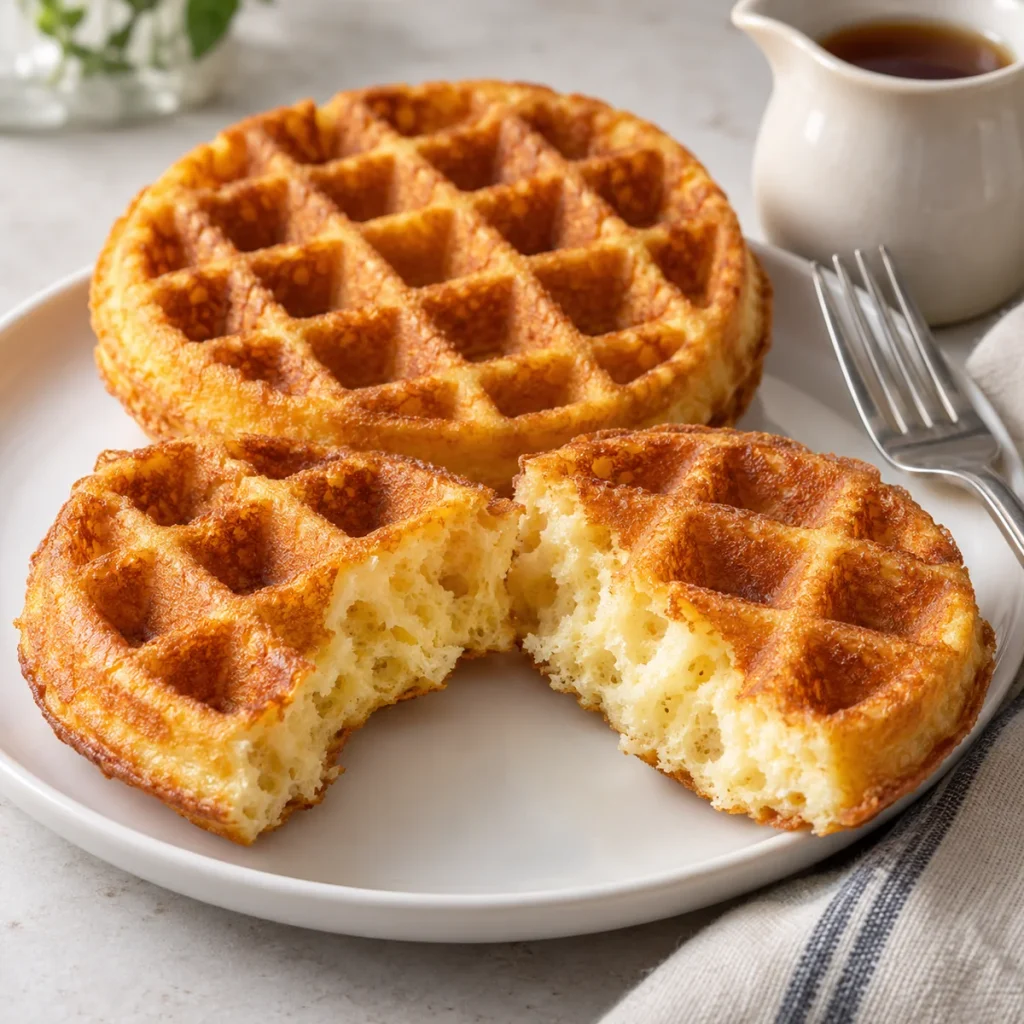
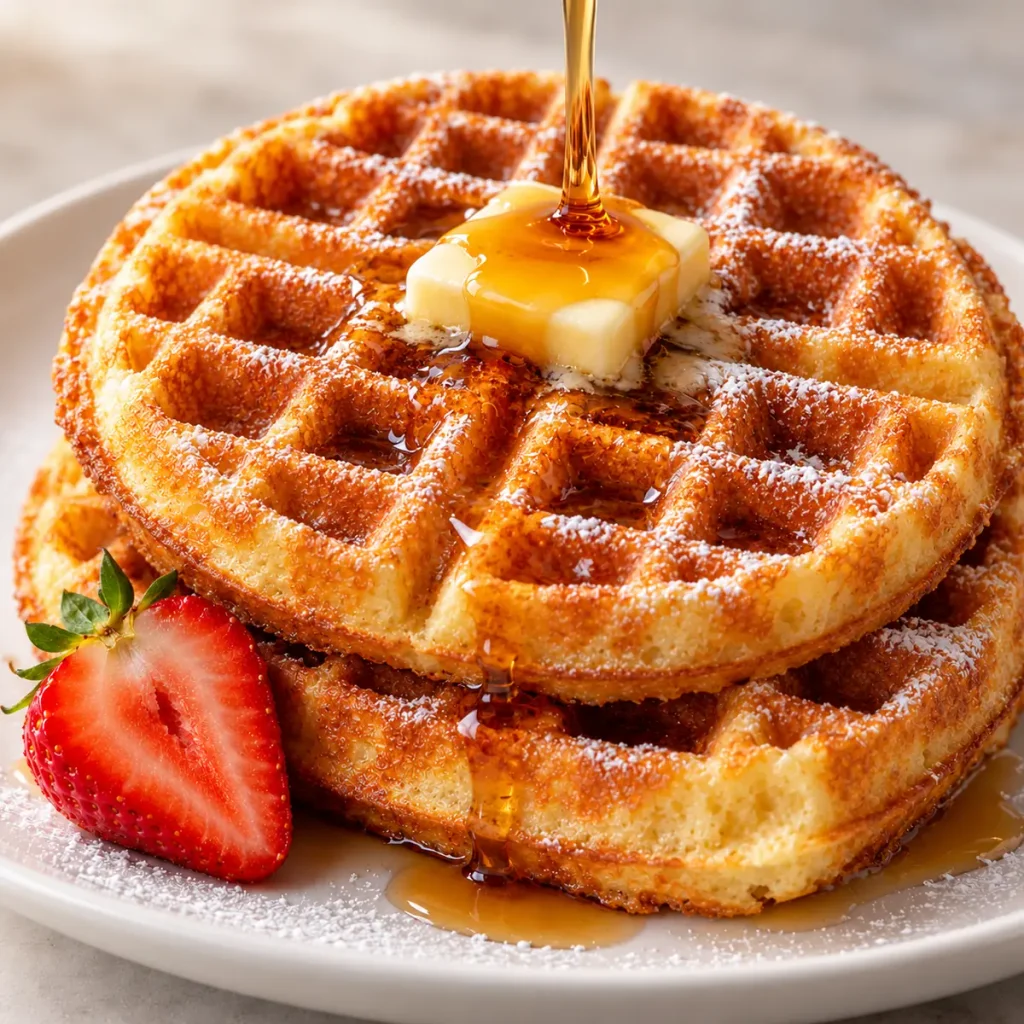
Plate 2 waffles per serving, add a pat of butter directly on the hot grid so it melts immediately, dust with powdered sugar, and pour maple syrup over the top. Add fresh berries on the side if using. Serve immediately — waffles are at their absolute best in the first 3 minutes after leaving the iron.
How to Tell When Waffles Are Done
In my kitchen, I’ve learned to trust the exact timing in this recipe — but every waffle iron runs a little differently, so start checking at 3.5 minutes on your first attempt. Once you’ve made it once, you’ll know exactly where your iron lands.
Primary Doneness Test
Watch the steam coming from the sides of your waffle iron. Waffles are done when the steam stops completely — this means all the surface moisture has cooked off and the exterior has had a chance to crisp. Opening before the steam stops guarantees a stuck, undercooked waffle. Opening well after the steam stops risks an overdone, dry waffle.
Doneness Guide
| Indicator | What It Means | What to Do |
|---|---|---|
| Steam still coming out | Not done | Keep closed, wait |
| Steam stops | Done | Open immediately |
| Waffle releases cleanly | Fully cooked | Remove and serve |
| Waffle sticks to plates | Under-cooked or iron not oiled | Close and cook 1 more min |
| Deep golden brown color | Perfect | Remove from iron |
| Very dark brown edges | Slightly over-done | Reduce time by 30 sec next batch |
Visual Signs It’s Done
- Steam has completely stopped coming from the iron sides
- The edges of the waffle visible through the iron gap are deep golden brown
- The waffle releases from both plates cleanly without any pulling
- The grid pattern is deeply defined with no pale, uncooked patches
- The color is uniform golden brown across the entire surface — no light spots
It’s Not Right — What to Do Now
- Waffle stuck to iron: Iron wasn’t hot enough or wasn’t oiled — close and cook 1 more minute before trying to open again
- Pale and soft exterior: Iron temperature too low or opened too early — increase heat and wait for steam to fully stop
- Raw center, crispy outside: Too much batter or iron too hot — reduce batter volume and lower temperature slightly
- Flat, dense texture: Egg whites weren’t beaten to stiff peaks or batter was overmixed — beat whites longer next batch
How to Make the Perfect Waffle Batter
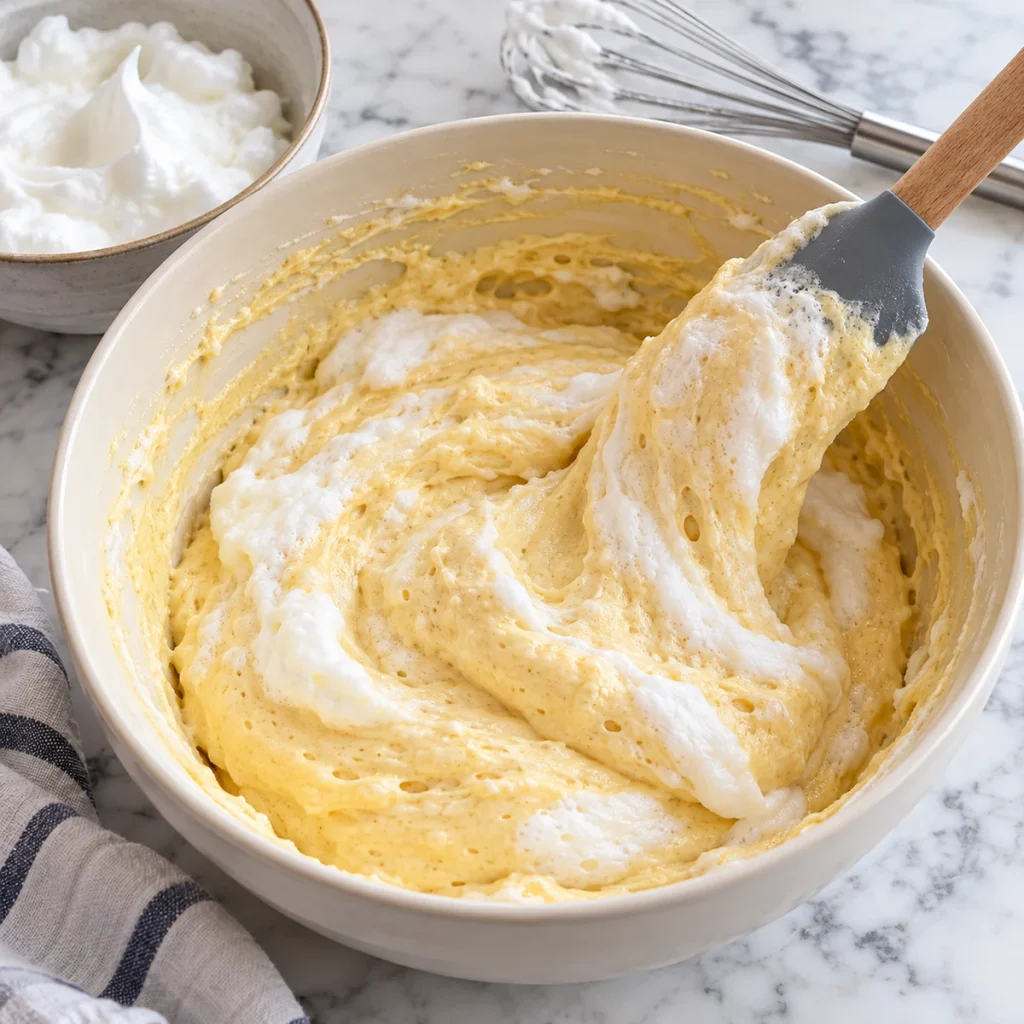
The batter is the foundation of everything. There are three versions depending on what you have available.
Method 1 — Classic Buttermilk Batter (Standard Recipe)
2 cups flour + 1½ cups buttermilk + 2 separated eggs + ¼ cup neutral oil + 1 tbsp sugar + 2 tsp baking powder + ½ tsp baking soda + 1 tsp vanilla + ½ tsp salt. Whites beaten to stiff peaks and folded in last. This is the version in this recipe — it produces the most reliably crispy exterior and fluffy interior of any batter formula.
Method 2 — Extra Rich Batter (Best Flavor Version)
Same as Method 1 — but replace ¼ cup of the buttermilk with sour cream. The sour cream adds fat and tang that makes the waffle flavor noticeably richer. Additionally, add 1 teaspoon of cinnamon to the dry ingredients. This version is worth making when you want the waffles to be the centerpiece of a full brunch spread.
Method 3 — Quick Batter (No Separated Eggs)
Use whole eggs instead of separating them — whisk 2 whole eggs directly into the wet ingredients. Skip the egg white beating step entirely. The waffles will be slightly less fluffy but still crispy — acceptable for a weekday morning when speed matters more than perfection. However, the texture difference is noticeable compared to the full method — reserve this shortcut for when time is genuinely short.
Troubleshooting Quick Reference
| Problem | Cause | Fix |
|---|---|---|
| Batter too thick | Too much flour | Add buttermilk 1 tbsp at a time |
| Batter too thin | Too much liquid | Add flour 1 tbsp at a time |
| Flat waffles | Egg whites under-beaten or overmixed | Beat to stiff peaks, fold gently |
| Tough texture | Batter overmixed | Mix until just combined — lumps are fine |
What to Serve With Waffles
Classic Pairings That Always Work
- Maple syrup — the non-negotiable standard; real maple syrup over pancake syrup every time
- Fresh strawberries and whipped cream — the most crowd-pleasing waffle topping for brunch
- Butter — a pat placed directly on the hot waffle so it melts into the grid squares immediately
- Powdered sugar — dusted right before serving; adds light sweetness without heaviness
- Crispy bacon — the salty contrast to sweet waffles is one of the best combinations in breakfast food
Comfort Food Pairings
- Fried chicken — the classic Southern combination; serve waffles as the base under crispy fried chicken with hot honey
- Scrambled eggs on the side — for anyone who wants a full protein-forward plate alongside the sweet waffles
- Caramelized bananas — cooked in butter and brown sugar for 3 minutes and spooned over the top
- Peanut butter and honey — spread peanut butter on the hot waffle and drizzle honey over — simple and surprisingly satisfying
- Nutella and crushed hazelnuts — a European-style finish that works especially well on Belgian-style deep-grid waffles
Low-Carb Options
- Almond flour waffles — same technique, same iron, different batter — slightly denser but the crispy grid holds
- Greek yogurt instead of whipped cream — adds protein and tang alongside fresh berries
- Berries with no syrup — the natural sweetness of ripe strawberries is enough when the batter is properly seasoned
6 Ways to Use Leftover Waffles
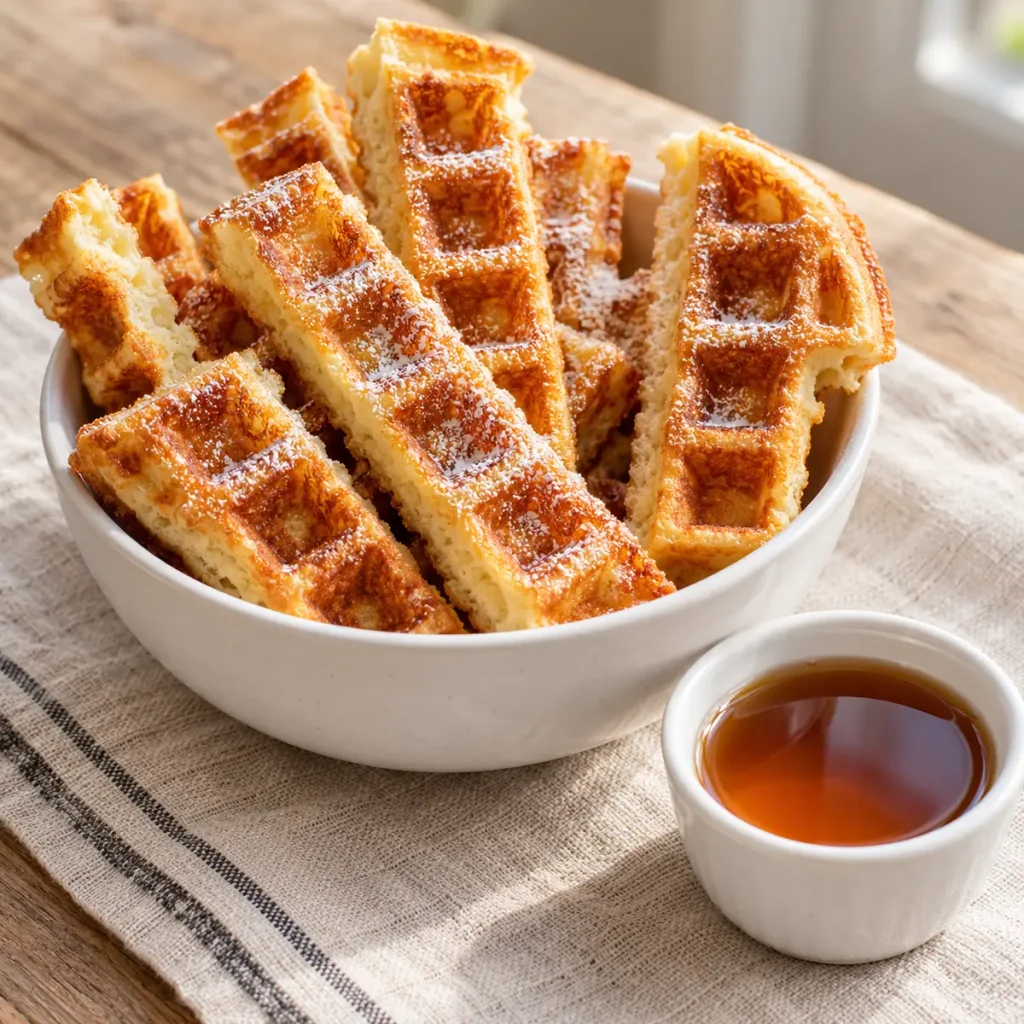
Leftover waffles may actually be better than the original when reheated right. Here are 6 ways to use them.
Waffle Sticks with Dipping Sauce
What you need: Leftover waffles, maple syrup or Nutella for dipping.
How to assemble: Cut each waffle into 4 long strips. Reheat in the toaster or air fryer at 370°F for 3–4 minutes until crispy again. Serve standing upright in a cup with dipping sauce.
One tip: Air fryer reheating restores the crispy exterior better than any other method — even better than fresh from the iron in some cases.
Waffle Breakfast Sandwich
What you need: 2 leftover waffles, 2 eggs, cheese, salt and pepper.
How to assemble: Reheat both waffles in the toaster. Fry or scramble eggs separately. Layer eggs and a slice of cheese between the two waffles and press gently.
One tip: Add a thin spread of cream cheese on the inside of each waffle before adding eggs — it melts into the warm grid and adds richness the egg alone can’t provide.
Waffle Ice Cream Sandwich
What you need: 2 leftover waffles, 1 scoop vanilla or strawberry ice cream.
How to assemble: Freeze both waffles for 10 minutes. Scoop ice cream onto one waffle and press the second on top gently. Return to freezer for 20 minutes for a firmer sandwich.
One tip: The grid pattern of the waffle holds ice cream better than flat bread — it doesn’t slide out the sides when you bite it.
Waffle French Toast
What you need: Leftover waffles, 1 egg, 2 tbsp milk, cinnamon, butter.
How to assemble: Whisk egg, milk, and cinnamon together. Dip each waffle for 10 seconds per side. Cook in butter over medium heat for 90 seconds per side.
Red Velvet Cake try another easy breakfast from this site
One tip: The grid soaks up the egg custard in the squares and crisps the ridges — the result is a textured, layered version of French toast that’s more interesting than the flat bread original.
Waffle Pizza
What you need: Leftover waffles, pizza sauce, shredded mozzarella, toppings of choice.
How to assemble: Spread pizza sauce thinly over each waffle. Add cheese and toppings. Bake at 400°F for 6–8 minutes until cheese is melted and bubbling.
One tip: Mini waffles work best for waffle pizza — each one becomes a personal-sized portion that’s easy to serve at parties without cutting.
Waffle Parfait
What you need: Crumbled leftover waffles, vanilla yogurt, fresh berries, honey.
How to assemble: Layer crumbled waffles at the bottom of a glass, then yogurt, then fresh berries, then a drizzle of honey. Repeat once and top with a light dusting of cinnamon.
One tip: Build this parfait no more than 20 minutes before eating — the waffles absorb moisture from the yogurt quickly and lose their texture if they sit too long.
Storage, Freezing and Reheating Guide
Refrigerator Storage (Up to 3 Days)
Let waffles cool completely on a wire rack before storing — placing warm waffles in a container traps steam and makes them permanently soft. Store in an airtight container or zip-lock bag with parchment paper between each waffle for up to 3 days. The exterior softens in the refrigerator but crisps back up perfectly in the toaster or air fryer.
Can You Make This Ahead of Time?
Yes — two ways. Make the dry ingredients the night before and store covered. Make the full batter up to 30 minutes ahead and refrigerate — any longer and the leavening starts to lose its punch and the egg whites deflate. For full make-ahead, cook a complete batch, cool, and refrigerate or freeze — reheat to order each morning.
Freezer Storage (Up to 3 Months)
Waffles freeze better than almost any other breakfast item. Cool completely, then freeze flat on a baking sheet for 1 hour until solid. Transfer to a freezer bag with parchment between each waffle. Reheat directly from frozen in the toaster — no thawing needed. The toaster restores the crispy exterior in 2 cycles.
This Works as a Freezer Meal
Make a triple batch specifically for the freezer on Sunday. Store in individual portions in labeled freezer bags. Pull 2 waffles each morning and reheat in the toaster in under 3 minutes.
White Chicken Chili see more make-ahead meal ideas here
This is one of the most practical batch-cook breakfast items because waffles reheat in the toaster with zero quality loss — better than any store-bought frozen waffle by a significant margin.
How to Reheat Without Ruining It
| Method | Setting | Time | Notes |
|---|---|---|---|
| Toaster | Medium-high | 1–2 cycles | Best method; restores crispy exterior perfectly |
| Air fryer | 370°F | 3–4 min | Excellent; even crispier than toaster |
| Oven | 375°F | 8–10 min | Good for batches; use wire rack |
| Waffle iron | Medium | 2–3 min | Best of all — re-crisps the grid |
| Microwave | 70% power | 45 sec | Fast but softens exterior — use as last resort |
Weekly Meal Prep Strategy
Make a full batch every Sunday. Cool and freeze in individual portions. Pull waffles each weekday morning and reheat in the toaster — breakfast is ready in under 3 minutes with zero active cooking.
Recipe Variations Worth Trying
Same technique. Completely different flavor profiles. Master this base waffle recipe first — then try one of these.
Most Popular — Blueberry Waffles
Add ½ cup of fresh or frozen blueberries to the batter after folding in the egg whites — fold them in with 2–3 gentle strokes. Frozen blueberries work better than fresh in batter because they don’t bleed as much color. Cook at the same temperature for the same time. The blueberries burst slightly during cooking and create pockets of warm fruit inside the fluffy interior — the most popular waffle variation by far.
International — Liège Waffles (Belgian Street Style)
Replace the batter with a yeast-based dough: 2 cups flour, 1 packet yeast, ¼ cup warm milk, 2 eggs, 1 stick butter, and — most importantly — 1 cup pearl sugar folded in at the end. Let rise 1 hour. Press portions into the iron. The pearl sugar caramelizes directly on the iron surface and creates a crunchy, candy-coated crust that no regular waffle batter can replicate. These are the waffles sold on Belgian street corners — no syrup needed.
Low-Carb — Almond Flour Waffles
Replace all-purpose flour with 1½ cups blanket almond flour. Add an extra egg for structure. Keep buttermilk and oil the same. Cook at medium heat — almond flour browns faster than wheat flour. Therefore, you get a crispier exterior with a nuttier, slightly denser interior — a legitimate low-carb version that satisfies the same craving at a fraction of the carbohydrate count.
Quick Weeknight Shortcut — 5-Minute Batter
Use whole eggs instead of separating them, replace buttermilk with regular milk plus 1 tablespoon of white vinegar (rest 5 minutes), and skip the egg white beating step. Total batter prep: under 5 minutes. The waffles will be slightly less fluffy but perfectly acceptable for a weekday when speed is the priority. This shortcut version still outperforms any box mix.
Fresh and Elevated — Brown Butter Waffles
Brown the butter before adding to the batter: melt ¼ cup butter in a light-colored pan over medium heat, stirring constantly, until golden brown and nutty-smelling — about 5 minutes. Cool slightly and use in place of the neutral oil. The browned butter adds a caramel, toasted-nut depth to the waffle flavor that regular oil or plain melted butter simply doesn’t have. Top with toasted pecans and real maple syrup for the best version of this recipe.
Nutrition Information
Per Serving Breakdown (Based on 4 Servings / 2 Waffles Each)
| Nutrient | Amount | % Daily Value |
|---|---|---|
| Calories | ~340 | — |
| Total Fat | 12g | 15% |
| Saturated Fat | 2g | 10% |
| Cholesterol | 95mg | 32% |
| Sodium | 380mg | 17% |
| Total Carbohydrates | 48g | 17% |
| Dietary Fiber | 1g | 4% |
| Total Sugars | 6g | — |
| Protein | 9g | 18% |
| Calcium | 120mg | 9% |
Nutrition calculated without toppings. Add ~52 calories per tablespoon of maple syrup.
According to USDA FoodData Central, two large eggs provide approximately 12 grams of complete protein — making waffles a more protein-forward breakfast than most people expect from a sweet dish.
Dietary Compatibility
| Diet | Compatible | Notes |
|---|---|---|
| Gluten-Free | ❌ | Use certified GF flour blend to adapt |
| Dairy-Free | ❌ | Replace buttermilk with oat milk + vinegar; use coconut oil |
| Paleo | ❌ | Flour and sugar excluded |
| Keto | ❌ | See almond flour variation above |
| Vegetarian | ✅ | No meat in this recipe |
| Vegan | ❌ | Eggs and buttermilk require substitutes |
To reduce sodium, use unsalted butter for serving and reduce salt in the batter to ¼ teaspoon — the flavor difference is minimal but sodium per serving drops by approximately 80mg.
8 Mistakes That Ruin Waffles
Every one of these mistakes is fixable. Know them before you start — not after.
❌ Mistake 1: Not Preheating the Iron Long Enough
Why it happens: Impatience. What goes wrong: A lukewarm iron steams the batter instead of searing it — waffles come out pale, soft, and stick to the plates. The fix: Preheat for a full 5 minutes and test with water drops — they should sizzle and evaporate instantly before adding any batter.
❌ Mistake 2: Opening the Lid Too Early
Why it happens: Curiosity or fear of burning. What goes wrong: The waffle tears apart — half stays on each plate — and the raw interior spills out. The fix: Never open the iron before the steam stops. Steam = moisture still cooking off. No steam = done.
❌ Mistake 3: Overmixing the Batter
Why it happens: Wanting a smooth, lump-free batter. What goes wrong: Gluten develops and the waffles turn out tough and dense with no fluff regardless of the egg whites. The fix: Stir until just combined — lumps in waffle batter are normal and correct.
❌ Mistake 4: Under-Beating the Egg Whites
Why it happens: Stopping too early or using a bowl with grease residue. What goes wrong: Soft, droopy whites don’t hold air during folding — the waffles bake flat without the fluffy interior. The fix: Beat to stiff peaks — tips should stand straight up. Wipe bowl and beaters with vinegar first.
❌ Mistake 5: Using Butter Instead of Oil in the Batter
Why it happens: Thinking butter always tastes better. What goes wrong: Butter re-absorbs moisture as the waffle cools — the crispy exterior you worked for softens within minutes of leaving the iron. The fix: Use neutral oil in the batter. Save butter for serving on top.
❌ Mistake 6: Stacking Finished Waffles on a Plate
Why it happens: The instinct to keep everything together and warm. What goes wrong: Steam trapped between the stacked waffles makes every exterior soft within 2 minutes — the whole batch is limp by the time you serve. The fix: Wire rack over a baking sheet in a 200°F oven. This is the only correct method.
❌ Mistake 7: Pouring Too Much Batter
Why it happens: Wanting a thicker, bigger waffle. What goes wrong: Overflow batter burns on the outside of the iron and creates a mess — the waffle itself is uneven and raw in the center. The fix: Fill the iron to about ¾ capacity — check your iron’s manual for the exact amount if unsure.
❌ Mistake 8: Not Oiling the Iron Between Each Waffle
Why it happens: Thinking nonstick coating is enough. What goes wrong: By the second or third waffle, the dry iron surface causes sticking and tearing — the grid pattern transfers unevenly and the exterior loses its crispiness. The fix: A light brush of neutral oil before every single waffle — it takes 5 seconds and makes a measurable difference.
Frequently Asked Questions
What makes waffles crispy?
Three things produce crispy waffles: neutral oil in the batter (not butter), a fully preheated iron, and cooking until all steam has stopped escaping from the sides. Neutral oil doesn’t re-absorb moisture the way butter does, so the exterior stays crunchy longer after leaving the iron. A hot iron sears the batter surface instantly — a cool iron steams it. And steam still escaping means moisture still present — the exterior can’t crisp until all surface moisture has cooked off.
What is the difference between waffle batter and pancake batter?
Waffle batter contains significantly more fat than pancake batter — oil or butter — because fat is what produces the crispy exterior in a hot iron. Pancake batter is thinner and lower in fat because pancakes cook in a pan with added butter and don’t need internal fat for crispiness. Additionally, waffle batter often uses separated egg whites for lift, while pancake batter uses whole eggs. The two batters are not interchangeable — pancake batter in a waffle iron produces pale, soft, limp waffles.
Should waffle batter be thick or thin?
Waffle batter should be thick enough to pour slowly — thicker than pancake batter but not as stiff as cookie dough. It should flow off a spoon in a thick ribbon, not pour like water. Batter that’s too thin produces flat, dense waffles that spread past the iron edges. Batter that’s too thick doesn’t spread to fill the grid and leaves raw spots. The buttermilk, beaten egg whites, and rested batter in this recipe produces exactly the right consistency automatically.
Can you make waffle batter ahead of time?
The dry ingredients can be mixed up to 24 hours ahead and stored covered at room temperature. The full batter can be made up to 30 minutes ahead and refrigerated — beyond 30 minutes the baking soda loses its reactivity and the beaten egg whites begin to deflate, producing flat waffles. For full make-ahead convenience, cook a complete batch, cool on a wire rack, and freeze — reheat in the toaster each morning in under 3 minutes.
Why are my waffles not crispy?
Four causes: butter instead of oil in the batter, iron not fully preheated, opening the lid too early, or stacking finished waffles on a plate. Butter re-absorbs moisture as the waffle cools. A lukewarm iron steams instead of sears. Opening early means the surface hasn’t had time to set and crisp. Stacking traps steam between the waffles and softens every surface within minutes. Fix all four and the waffles will be crispy.
How do you keep waffles crispy?
Place finished waffles on a wire rack set over a baking sheet in a 200°F oven — never stack them on a plate. The wire rack allows air to circulate under and around every waffle, which prevents steam from building up and softening the exterior. This method keeps waffles crispy for up to 30 minutes — long enough to finish an entire batch before serving.
Can you freeze waffles?
Yes — waffles freeze better than almost any other homemade breakfast item. Cool completely on a wire rack, then freeze flat on a baking sheet for 1 hour until solid. Transfer to a freezer bag with parchment between each waffle and freeze for up to 3 months. Reheat directly from frozen in the toaster on medium-high — no thawing needed. Homemade frozen waffles reheat with a significantly crispier result than any store-bought frozen brand.
What do you serve with waffles?
Maple syrup and fresh berries are the classic combination. A pat of butter placed directly on the hot waffle so it melts into the grid is essential. For a full brunch, serve alongside scrambled eggs and crispy bacon — the salty, savory contrast to sweet waffles is one of the best pairings in breakfast food. For something more indulgent, caramelized bananas or fried chicken on top are the two most popular non-standard toppings.
How long do you cook waffles in a waffle iron?
Cook for 4–5 minutes at medium-high heat without opening the lid. The most reliable doneness signal is when steam stops coming from the iron sides — this happens at different times depending on your iron’s wattage and the batter volume, but it always means the waffle is done. On your first batch, check at 3.5 minutes by watching the steam — each subsequent batch will take the same time once the iron is at full operating temperature.
Can you make waffles without a waffle iron?
Yes — a stovetop waffle pan produces a similar result on a gas or electric burner. Pour batter and press down firmly with a spatula for defined grid marks. Cook 3 minutes per side over medium heat. The exterior won’t be quite as evenly crispy as an electric iron, but the flavor and interior texture are identical. A grill pan also works — the ridges create marks and the high heat produces a crispy surface on both sides.
You Might Also Like
Classic French Toast Recipe
Lasagna Soup check out this recipe next
Recipe Card


WAFFLES
Ingredients
Equipment
Method
- Preheat waffle iron to medium-high for 5 full minutes. Brush plates lightly with neutral oil.
- Whisk flour, baking powder, baking soda, salt, and sugar in a large bowl. Set aside.
- Beat egg whites with a hand mixer to stiff peaks — about 2–3 minutes. Set aside.
- Whisk egg yolks, buttermilk, oil, and vanilla in a medium bowl until combined.
- Pour wet ingredients into dry ingredients. Stir with a rubber spatula until just combined — batter will be lumpy.
- Fold beaten egg whites into batter in two additions — gently, until just incorporated. Do not overfold.
- Pour batter into preheated iron (about ¾ full). Close lid. Cook until steam stops — 4–5 minutes. Do not open early.
- Transfer to wire rack in a 200°F oven. Repeat with remaining batter. Serve with butter, maple syrup, and berries.
Notes
⚠️ Never open the waffle iron before steam stops — the waffle will tear and stick to both plates.
✅ Beat egg whites to stiff peaks and fold gently — this is what creates the fluffy interior.
🔄 No buttermilk? Mix 1½ cups milk + 1½ tbsp white vinegar and rest 5 minutes before using.
❄️ Cool completely before storing. Freeze up to 3 months. Reheat in toaster directly from frozen.
📌 Use neutral oil in the batter (not butter) — oil keeps the exterior crispy longer after leaving the iron. Make Ahead + Freezer Notes
Cook full batch, cool on wire rack, freeze flat then bag with parchment between waffles. Reheat from frozen in toaster on medium-high — no thawing needed. Best batch-cook breakfast item in this recipe collection.
Dietary Info
❌ Gluten-Free | ❌ Dairy-Free | ❌ Paleo | ❌ Keto | ✅ Vegetarian | ❌ Vegan
Did You Make This?
Tag @DavidRecipes and leave a ⭐⭐⭐⭐⭐ rating below.
— David | DavidRecipes
David is a home cook who has spent years developing straightforward, no-fuss recipes that work for real weeknight kitchens. Every recipe on DavidRecipes is made, tested, and eaten before it ever gets published — usually multiple times.



5 Comments