

Best Chicken Enchiladas (Rich Sauce, Ready in 45 Minutes)
⭐⭐⭐⭐⭐ Rate this recipe
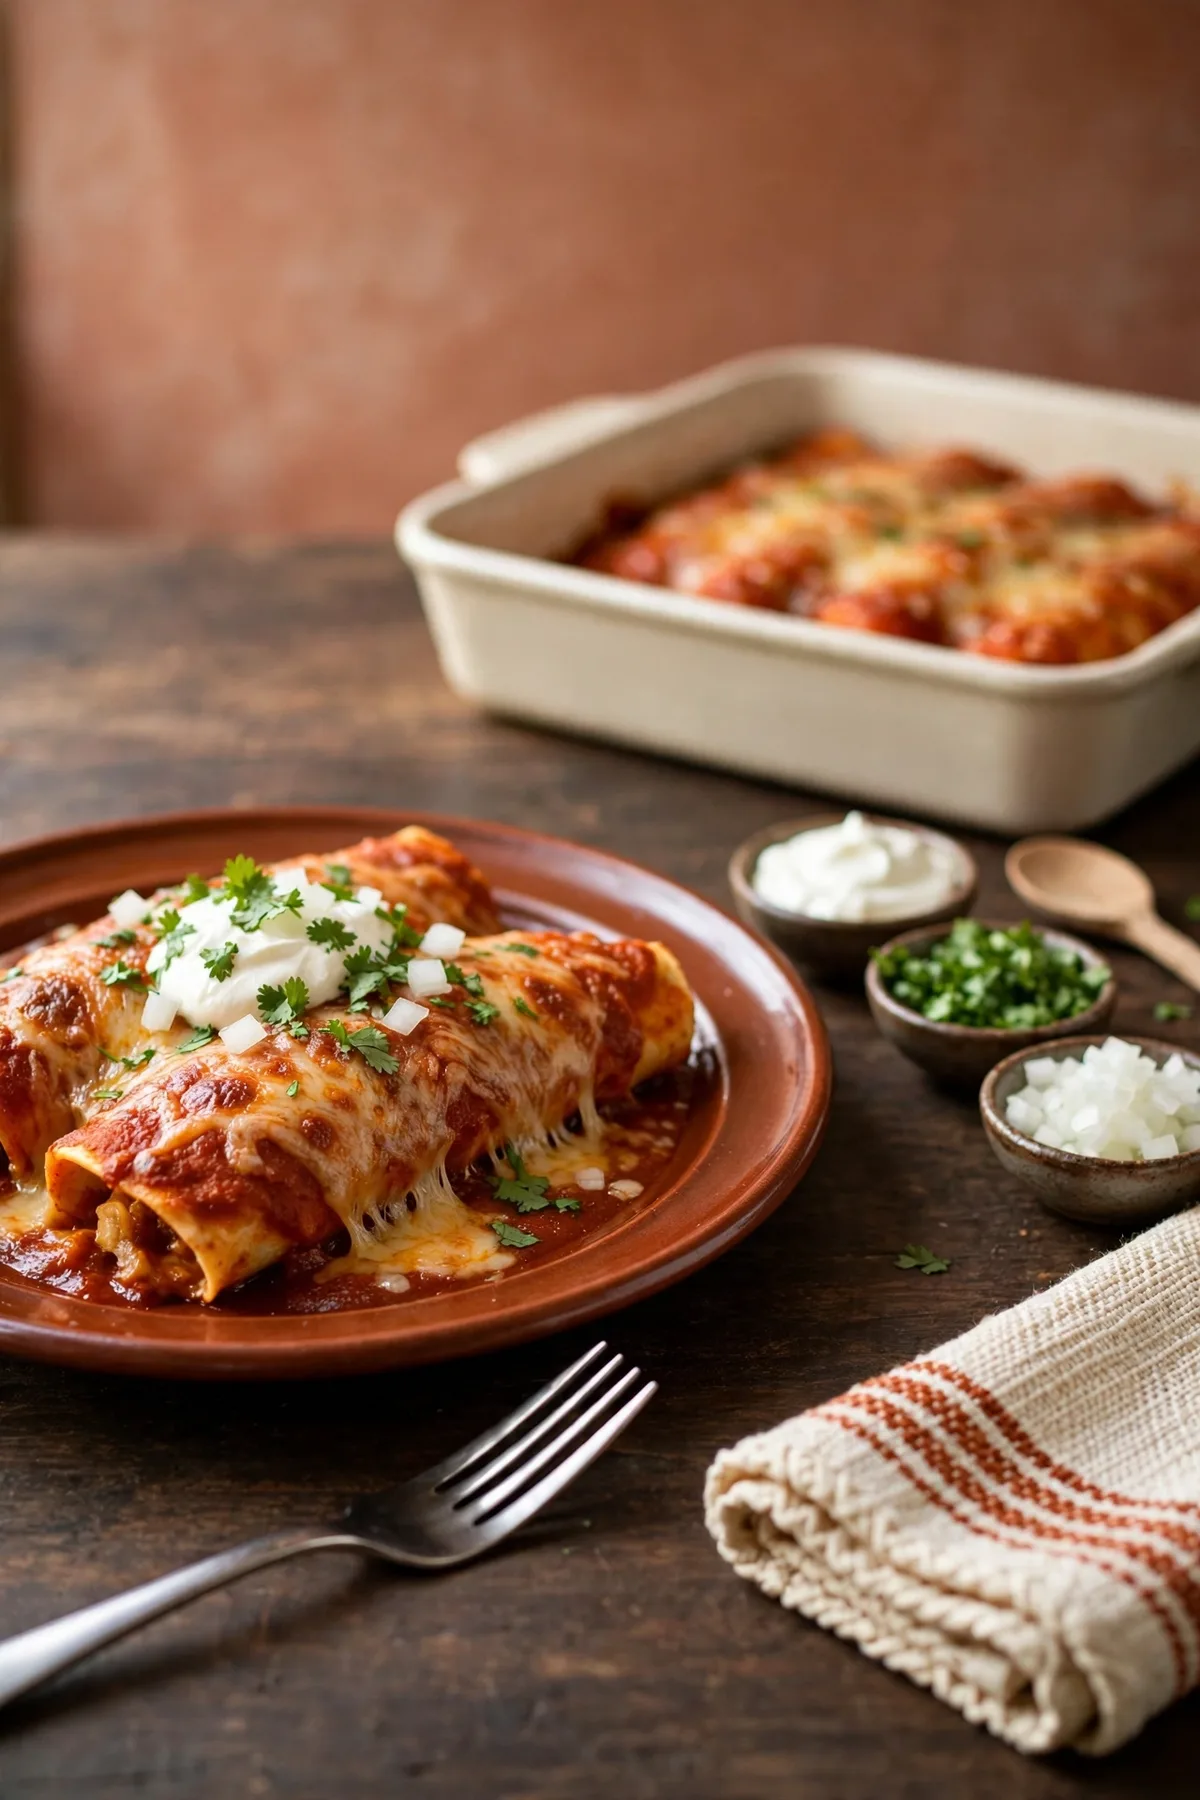
Chicken enchiladas done right have tender, well-seasoned shredded chicken wrapped in tortillas that hold their shape, covered in a rich, homemade red sauce that actually tastes like something — not a soggy, falling-apart mess drowning in sauce from a can. This recipe uses a quick stovetop enchilada sauce and a specific tortilla-warming trick that keeps every roll intact instead of cracking apart. The entire dish comes together in 45 minutes and bakes up bubbly in one pan.
This recipe is built for anyone who’s had enchiladas turn into a soupy pile that falls apart the second a fork touches them. If you’ve ever made a version with cracked tortillas or a flat, canned-tasting sauce — every one of those problems has a specific fix here. It works for a weeknight dinner, a make-ahead family meal, or a dish that reheats better than almost anything else in the fridge.
Made this already? Scroll down and leave a ⭐⭐⭐⭐⭐ rating below — it helps more than you know.
Once you make chicken enchiladas with real homemade sauce, the canned version stops making sense.
Table of Contents
Why This Chicken Enchiladas Recipe Works
- A quick homemade sauce instead of canned. Most versions rely entirely on canned enchilada sauce, which tastes noticeably flat and one-dimensional. This recipe builds a real sauce from scratch in 10 minutes using chili powder, cumin, and tomato sauce, producing far more depth.
another easy Mexican-inspired dinner here
- Warming the tortillas before rolling. Cold tortillas crack and tear the moment you try to roll them around filling. A quick warm-up in a dry skillet makes them pliable and far less likely to fall apart.
- Shredded chicken, seasoned separately before assembly. Here’s the truth: unseasoned chicken inside an enchilada tastes bland no matter how good the sauce is. Seasoning the chicken on its own first builds flavor all the way through.
- Sauce applied in two layers, not just poured on top. A thin layer on the bottom of the dish prevents sticking, while the remaining sauce goes over the top — this keeps the tortillas from getting soggy on one side while staying dry on the other.
- Baked just long enough to melt the cheese, not dry out the filling. This recipe bakes hot and relatively quick, which keeps the chicken moist instead of drying it out over a long bake.
Understanding the Key Ingredient

I’ve made this chicken enchiladas recipe more times than I can count — always for real family dinners, never just for testing. The one step I never skip, no matter how rushed the night is, is the key technique in Step 2. Every single time I’ve tried cutting corners on it, the final dish suffered. Every time I followed it properly, the result was exactly right.
Why Corn Tortillas Are the Right Choice
Corn tortillas are the traditional choice for chicken enchiladas because their sturdier, slightly coarse texture holds up to sauce far better than the softer, more delicate texture of flour tortillas. Once warmed properly, corn tortillas become pliable enough to roll without tearing, while still maintaining enough structure to survive baking in sauce without dissolving into mush. Additionally, corn tortillas carry a distinct, slightly nutty flavor that’s genuinely part of what makes enchiladas taste authentic rather than like a casserole with tortillas thrown in.
Tortilla Comparison Guide
| Type | Texture After Baking | Flavor | Best For |
|---|---|---|---|
| Corn tortillas, warmed first | Holds shape, slight chew | Traditional, nutty | Best overall result |
| Corn tortillas, not warmed | Cracks and tears | Same flavor | Avoid — leads to breakage |
| Flour tortillas | Softer, can turn gummy | Milder | Works but less traditional |
| Corn tortillas, lightly fried first | Sturdiest, best texture | Slightly richer | Most traditional, more effort |
How to Choose the Best at the Store
- Buy fresh, not stale, corn tortillas. Fresh tortillas are more pliable from the start and warm up more evenly.
- Check the package for a recent date. Corn tortillas dry out and crack more easily as they age.
- Buy a few extra. Some tortillas inevitably tear during the rolling process, so having backups matters.
- Standard 6-inch size works best. Smaller tortillas are easier to roll tightly around a reasonable amount of filling.
- Store unused tortillas sealed tightly. They dry out quickly once the package is opened.
How Much Do You Need?
| Servings | Tortillas | Shredded Chicken |
|---|---|---|
| 4 (8 enchiladas) | 8 | 2 cups |
| 6 (12 enchiladas) | 12 | 3 cups |
| 8 (16 enchiladas) | 16 | 4 cups |
| 10+ (20 enchiladas) | 20 | 5 cups |
Double Batch — How to Scale This Chicken Enchiladas Recipe
Doubling works cleanly as long as you use two baking dishes rather than one oversized one — an overcrowded dish bakes unevenly, with the center staying cool while the edges overcook. Make a full double batch of sauce rather than trying to stretch a single batch across double the enchiladas. Baking time stays roughly the same regardless of how many enchiladas are in each dish, since the depth doesn’t change much.
Ingredients You’ll Need

This recipe uses one main group of ingredients plus a simple sauce. Here is everything broken down.
Main Ingredients
- Cooked chicken — 3 cups, shredded. The protein filling. Can be freshly cooked or rotisserie chicken.
- Corn tortillas — 12. Hold the filling. Warmed first to prevent cracking when rolled.
- Monterey Jack cheese — 2 cups, shredded, divided. Melts throughout and on top for the classic bubbly finish.
- Tomato sauce — 15 oz can. The base of the homemade enchilada sauce.
- Chicken broth — 1 cup. Thins the sauce to the right consistency.
- Chili powder — 2 tablespoons. The dominant spice in the sauce.
- Ground cumin — 1 teaspoon. Adds warm, earthy depth to the sauce.
- Garlic — 2 cloves, minced. Builds aromatic depth in the sauce.
Supporting Ingredients
- Yellow onion — ¼ cup, diced, for the chicken filling.
- Salt and black pepper — to taste.
- Sour cream, diced onion, and cilantro — for garnish.
Optional Additions Table
| Add-In | Amount | Effect |
|---|---|---|
| Black beans, drained | 1 can | Adds heartiness and fiber to the filling |
| Diced green chiles | 4 oz can | Adds mild heat throughout |
| Corn kernels | 1 cup | Sweetness and texture contrast |
| Diced jalapeño | 1 | Extra fresh heat in the filling |
| Avocado, sliced | 1 | Creamy garnish on top |
Complete Substitutions Reference
| Original | Substitution | Notes |
|---|---|---|
| Cooked chicken | Rotisserie chicken, shredded | Saves time; skip cooking chicken separately |
| Corn tortillas | Flour tortillas | Softer texture, less traditional |
| Monterey Jack | Cheddar or a Mexican cheese blend | Similar meltability, different flavor |
| Tomato sauce | Canned enchilada sauce | Skip the homemade sauce step entirely |
| Chicken broth | Vegetable broth | Works identically |
What NOT to Add to This Chicken Enchiladas Recipe
- ❌ Cold, unwarmed tortillas — crack and tear the moment you try to roll them around filling
- ❌ Overfilled tortillas — too much filling makes rolling difficult and the enchiladas fall apart in the dish
- ❌ Sauce poured on cold, from the fridge — cools the dish down and extends baking time unnecessarily
- ❌ Too much sauce on the bottom only — skipping a layer on top leaves the tops dry while the bottoms go soggy
- ❌ Unseasoned chicken straight into the tortillas — tastes bland no matter how flavorful the sauce is
- ❌ Overbaking past bubbly and melted — dries out the filling and can make the tortillas on top go tough
Equipment You’ll Need
Choosing the Right Equipment for Chicken Enchiladas
| Tool | Purpose | Best For |
|---|---|---|
| 9×13 ceramic or glass baking dish | Assembling and baking | Standard batch, even heat |
| Cast iron skillet | Warming tortillas | Quick, even warming |
| Saucepan | Making the sauce | Standard stovetop sauce |
| Tongs | Handling warm tortillas | Safe handling without tearing |
Other Tools That Actually Matter
A cast iron or nonstick skillet is essential for warming the tortillas quickly and evenly right before rolling — this single step prevents the vast majority of tearing problems. A saucepan with a heavy bottom helps the sauce cook evenly without scorching. Tongs make transferring warm tortillas from the skillet to the filling station much easier than trying to handle them with your fingers alone.
No Skillet for Warming Tortillas? Alternatives That Work for This Chicken Enchiladas Recipe
- Microwave method — stack tortillas between two damp paper towels and microwave for 30–45 seconds until pliable
- Oven method — wrap tortillas in foil and warm in a 350°F oven for 10 minutes
- Direct flame method — briefly pass each tortilla over a gas flame for a few seconds per side for a slightly charred, pliable result
How to Make Chicken Enchiladas — Step by Step
Six steps. Most take under five minutes each.
Step 1 — Make the Enchilada Sauce
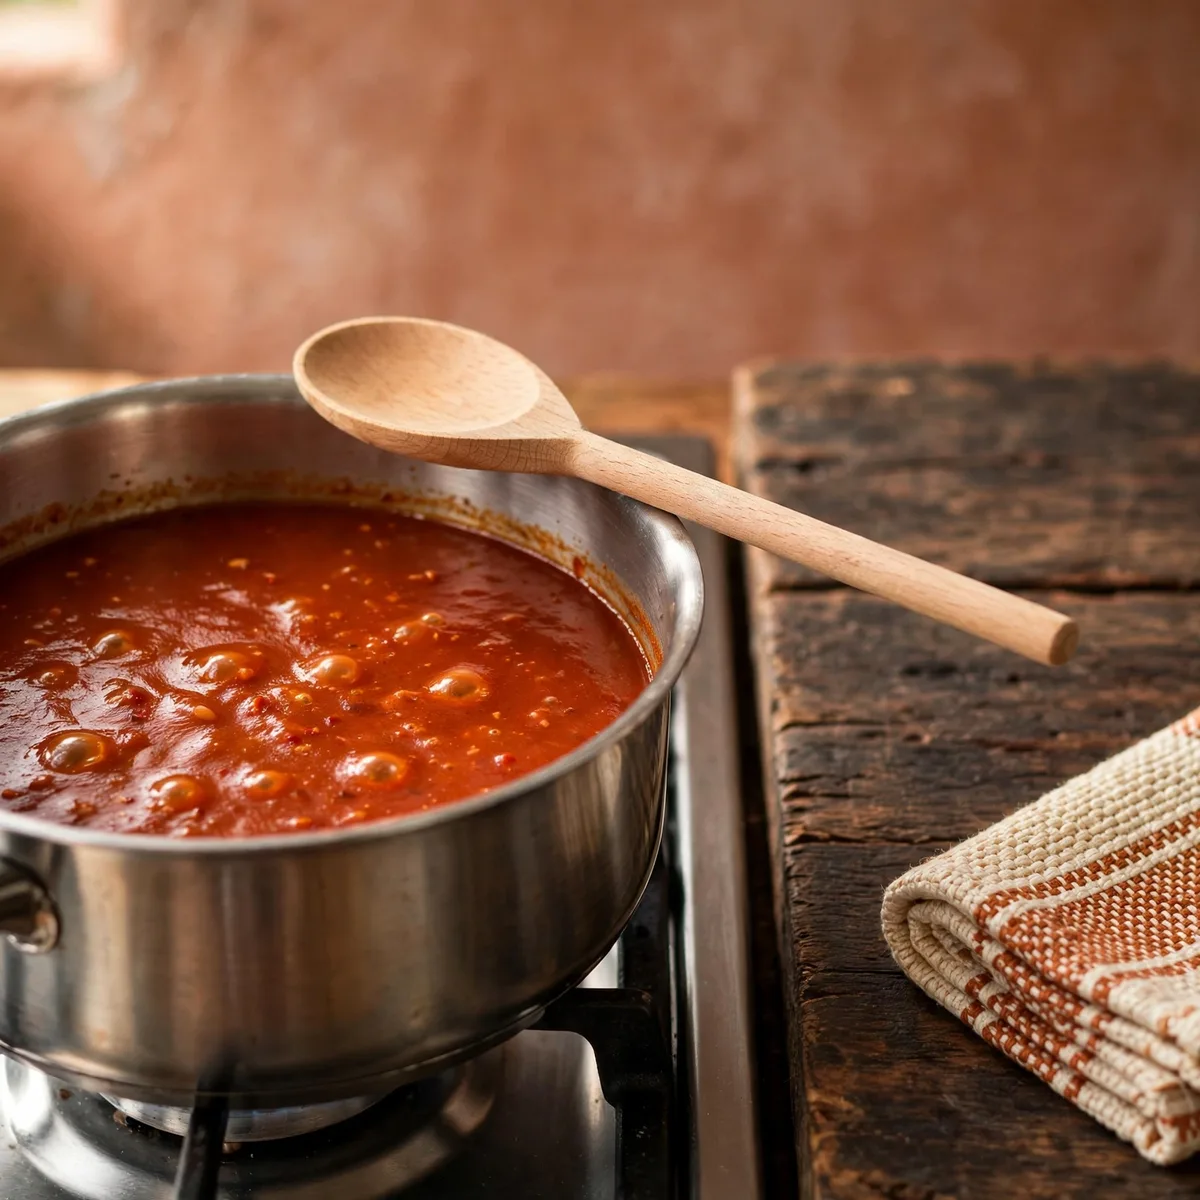
In a saucepan, whisk together the tomato sauce, chicken broth, chili powder, cumin, and minced garlic. Bring to a simmer over medium heat and cook for 8–10 minutes, stirring occasionally, until slightly thickened. Season with salt and pepper. This homemade sauce is what gives this chicken recipe real depth that canned sauce alone can’t provide.
💡 Pro Tip: Whisk the dry spices into the liquid before heating, rather than sprinkling them in later, to avoid any clumping as the sauce simmers.
Step 2 — Season and Warm the Chicken
While the sauce simmers, season the shredded chicken with a pinch of the chili powder, cumin, salt, and pepper, along with the diced onion. Warm it briefly in a skillet or microwave if it’s cold from the refrigerator. Seasoning the chicken separately, rather than relying only on the sauce for flavor, is what keeps the filling tasting good all the way through every bite.
💡 Pro Tip: Mix in a spoonful of the simmering sauce directly into the chicken filling — it adds moisture and ties the filling and sauce flavors together before assembly even begins.
Step 3 — Warm the Tortillas (The Key Step)
Heat a dry skillet over medium heat. Warm each tortilla for about 20–30 seconds per side, just until pliable and slightly puffed, stacking them under a clean kitchen towel to stay warm and soft. Most people skip this step entirely and go straight to rolling cold tortillas, but this is exactly what prevents the cracking and tearing that ruins so many homemade batches. Every single time I’ve skipped warming the tortillas, at least half of them tore while rolling.
💡 Pro Tip: Keep the warmed tortillas stacked and covered with a towel as you work through them — they stay pliable far longer covered than left exposed to air one at a time.
Step 4 — Fill and Roll

Spoon about ¼ cup of the seasoned chicken filling down the center of each warmed tortilla. Roll tightly and place seam-side down in a baking dish that’s been coated with a thin layer of the enchilada sauce.
another great weeknight dinner here
As a result, placing the seam side down keeps each enchilada from unrolling while it bakes, since the weight of the roll naturally holds the seam closed against the dish.
💡 Pro Tip: Don’t overfill — about ¼ cup per tortilla is enough to roll tightly without the filling spilling out the ends.
Step 5 — Sauce and Cheese
Pour the remaining enchilada sauce evenly over the rolled tortillas, making sure every enchilada is covered. Sprinkle the shredded Monterey Jack cheese evenly over the top. This top layer of sauce and cheese is what creates the bubbly, melted finish that makes chicken enchiladas look as good as they taste.
💡 Pro Tip: Use a spoon to make sure sauce reaches into the gaps between rolls, not just across the top — this prevents dry patches after baking.
Step 6 — Bake

Bake at 375°F for 20–22 minutes, until the cheese is fully melted and the sauce is visibly bubbling at the edges. Let rest for 5 minutes before serving, then top with sour cream, diced onion, and fresh cilantro.
How to Tell When It’s Done
In my kitchen, I’ve learned to trust the visual cues over the clock for this recipe — but every oven runs a little differently, so start checking at 18 minutes on your first attempt. Once you’ve made it once, you’ll know exactly where your oven lands.
Primary Doneness Test
The dish is done when the cheese on top is fully melted and golden in spots, and the sauce is visibly bubbling at the edges of the baking dish. A knife inserted into the center of one enchilada should come out hot, confirming the filling has heated through completely.
Doneness Guide
| Indicator | What It Means | What to Do |
|---|---|---|
| Cheese still pale, not melted | Under-baked | Continue baking, check in 5 min |
| Cheese melted and golden, sauce bubbling | Perfectly done | Remove and rest 5 minutes |
| Cheese very dark, almost burnt | Over-baked | Reduce bake time next round |
| Center still cold | Needs more time | Bake 5 more minutes |
| Sauce pooling excessively | Too much sauce used | Still fine to eat; drain slightly before serving |
| Tortillas on top dried out | Overbaked or not enough sauce coverage | Cover with foil for the last few minutes next time |
Visual Signs It’s Done
- The cheese has melted completely with golden-brown spots forming across the surface
- The sauce is actively bubbling at the edges of the baking dish
- The tortillas have softened into the sauce rather than looking dry or crisp
- The filling, when checked with a knife, is hot throughout rather than cool in the center
- The aroma has shifted from raw tomato sauce to a warm, toasted, cumin-forward smell
It’s Not Right — What to Do Now
- Enchiladas fell apart: Tortillas weren’t warmed properly before rolling — always warm them until pliable first
- Dish turned out soggy: Too much sauce used, or the chicken filling was too wet — drain excess liquid from the chicken before filling
- Filling tastes bland: Chicken wasn’t seasoned separately before rolling — always season the filling on its own, not just the sauce
- Tortillas cracked while rolling: Not warmed long enough, or tortillas were stale — warm a few extra seconds and use fresher tortillas next time
How to Make the Enchilada Sauce

The sauce is what separates homemade chicken enchiladas from a flat, canned-tasting version. There are three approaches depending on your preference.
Method 1 — Quick Stovetop Sauce (Standard Recipe)
Whisk tomato sauce, broth, chili powder, cumin, and garlic together and simmer for 8–10 minutes. This is the method used throughout this recipe and produces a well-balanced, genuinely flavorful sauce in under 10 minutes with no roux required.
Method 2 — Roux-Based Sauce (More Traditional)
Make a roux with flour and oil first, then whisk in chili powder and broth gradually to build a slightly thicker, more traditional Tex-Mex style red sauce. This method takes a few extra minutes but produces a noticeably richer, more restaurant-style texture.
Method 3 — Roasted Tomato Sauce (Most Flavorful)
Roast whole tomatoes with onion and garlic under the broiler until charred, then blend with the chili powder and cumin for a deeper, smokier sauce. This takes about 15 extra minutes but produces the most complex, homemade-tasting result of the three methods.
Troubleshooting Quick Reference
| Problem | Cause | Fix |
|---|---|---|
| Sauce too thin | Not simmered long enough | Simmer a few more minutes to reduce |
| Sauce too thick | Reduced too much or too little broth used | Whisk in a splash more broth |
| Sauce tastes flat | Not enough chili powder or cumin | Add an extra ½ teaspoon of each and taste |
| Sauce too spicy | Too much chili powder used | Add a touch more tomato sauce to mellow it |
What to Serve With It
Classic Pairings That Always Work
- Mexican rice — the most classic side that turns this into a complete, filling meal
- Refried beans — a traditional pairing that rounds out the plate
- Warm tortilla chips — for scooping up any extra sauce
- Fresh guacamole — adds a cooling, creamy contrast to the warm, saucy dish
- A simple side salad with lime vinaigrette — adds freshness alongside the rich enchiladas
Comfort Food Pairings
- Elote (Mexican street corn) — a flavorful side that complements the enchilada’s spices
- Queso dip — for a fully indulgent Mexican-inspired spread
- Churros for dessert — rounds out a complete Mexican-inspired dinner
- Horchata — a traditional, cooling drink pairing
Low-Carb Options
- Serve over cauliflower rice instead of regular rice — keeps the meal lighter on carbs
- Skip one tortilla layer and double the filling in the others — reduces overall carb count slightly
- Add extra avocado and lettuce on the side — balances the richness without added carbs
6 Ways to Use Leftover Chicken Enchiladas
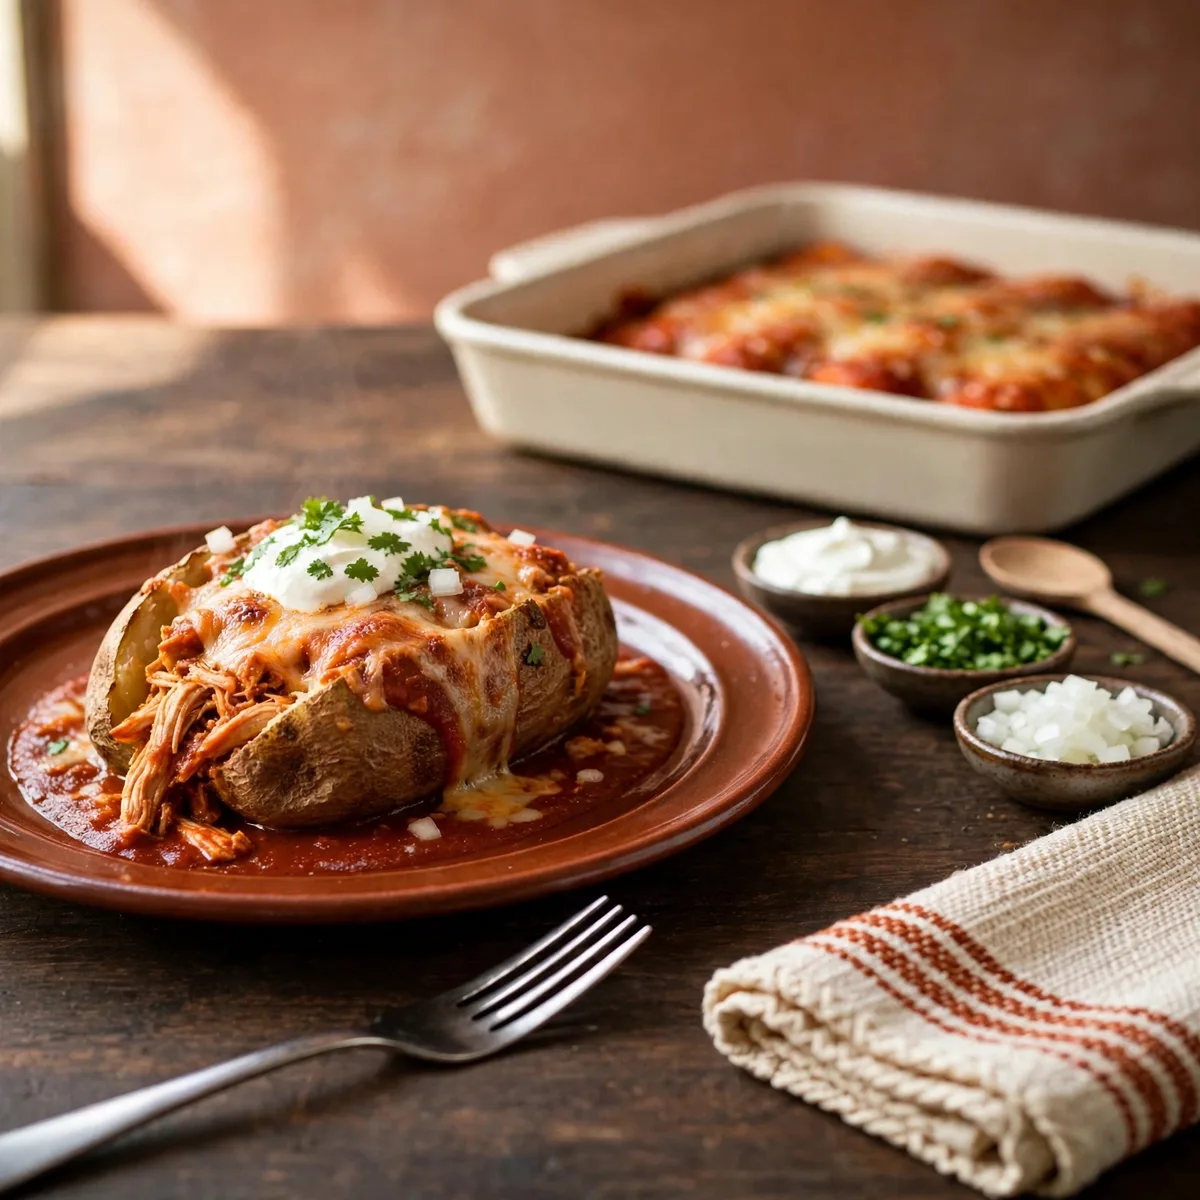
Leftover chicken enchiladas can become several completely different meals. Here are 6 ways to use them.
Chicken Enchilada Baked Potato
What you need: Leftover enchiladas, baked potatoes, sour cream.
How to assemble: Split open baked potatoes and spoon leftover enchilada filling and sauce directly over the top, finishing with sour cream.
One tip: Chop the leftover enchiladas roughly before spooning them on — it distributes more evenly over the potato than whole rolls.
Chicken Enchilada Soup
What you need: Leftover enchiladas (chopped), 4 cups chicken broth, extra cheese.
How to assemble: Chop leftover enchiladas roughly and simmer in chicken broth for 10 minutes. Top each bowl with extra shredded cheese.
One tip: This stretches a small amount of leftovers into a full second meal almost effortlessly.
Chicken Enchilada Nachos
What you need: Leftover enchiladas (chopped), tortilla chips, extra cheese.
How to assemble: Layer tortilla chips on a baking sheet, top with chopped leftover enchiladas and extra cheese, and bake at 375°F for 8–10 minutes until melted.
try another easy appetizer from this site
One tip: Add fresh toppings like avocado and cilantro after baking rather than before, so they stay vibrant instead of wilting.
Chicken Enchilada Casserole
What you need: Leftover enchiladas, extra tortilla chips, extra cheese.
How to assemble: Layer chopped leftover enchiladas with crushed tortilla chips and extra cheese in a baking dish, then bake at 350°F for 15 minutes until bubbly.
One tip: This is a great way to use up odd amounts of leftovers that aren’t quite enough for a full plate on their own.
Chicken Enchilada Burrito
What you need: Leftover enchilada filling, large flour tortillas, rice.
How to assemble: Fill large flour tortillas with leftover filling and a scoop of rice, then roll into burritos.
One tip: Drain any excess sauce from the filling first — too much liquid makes the burrito difficult to roll and prone to tearing.
Chicken Enchilada Stuffed Peppers
What you need: Leftover enchilada filling, bell peppers, halved and seeded.
How to assemble: Fill pepper halves with leftover filling and bake at 375°F for 20 minutes until the peppers are tender.
One tip: Top with a little extra cheese for the last 5 minutes if you want a melty finish.
Storage, Freezing and Reheating Guide
Refrigerator Storage (Up to 4 Days)
This recipe stores in the refrigerator for up to 4 days in an airtight container. The flavor actually deepens slightly by day 2, as the sauce has more time to soak into the tortillas and filling.
Can You Make This Ahead of Time?
Yes — this recipe is genuinely excellent for making ahead. Assemble the full dish up to 2 days before you plan to bake it, cover tightly and refrigerate unbaked, then bake fresh when ready, adding a few extra minutes to the bake time since it’s starting cold.
Freezer Storage (Up to 3 Months)
This chicken enchiladas recipe freezes exceptionally well for up to 3 months. Assemble the dish completely, wrap tightly before baking, and freeze. Thaw overnight in the refrigerator before baking as directed, adding a few extra minutes if needed.
This Recipe Works as a Freezer Meal
Make a double batch specifically for the freezer, assembling two full dishes at once. Bake one fresh and freeze the second unbaked, fully wrapped, for a completely homemade dinner ready on a night when cooking from scratch isn’t an option.
another easy make-ahead recipe here
How to Reheat Without Ruining It
| Method | Setting | Time | Notes |
|---|---|---|---|
| Oven | 350°F | 15–20 min | Best method; covered with foil to prevent drying out |
| Microwave | 70% power | 2–3 min | Good for individual portions |
| Air fryer | 325°F | 6–8 min | Good for crisping the top slightly |
Weekly Prep Strategy
Assemble a double batch on the weekend, baking one dish fresh and freezing the second unbaked. This recipe makes weeknight dinners significantly easier when one is already prepped and waiting in the freezer.
Recipe Variations Worth Trying
Same technique. Completely different flavor profiles. Master this base chicken enchiladas recipe first — then try one of these.
Most Popular — Sour Cream Chicken Enchiladas
Replace the red sauce with a white sauce made from sour cream, chicken broth, and green chiles, following the same assembly steps. This creamier, milder version is one of the most requested variations of this recipe for anyone who prefers a less spicy result.
International — Mole-Style Enchiladas
Add 1 tablespoon of unsweetened cocoa powder and a pinch of cinnamon to the standard sauce recipe. This nods toward the traditional Mexican mole sauce tradition, adding a subtle depth and warmth that pairs beautifully with the chicken filling.
Low-Carb — Lettuce Wrap Version
Skip the tortillas entirely and wrap the seasoned chicken filling in large lettuce leaves instead, then top with warm sauce and cheese just before serving rather than baking. Therefore, you get all the same flavors of this chicken enchiladas recipe without the carbohydrates from the tortillas.
Quick Shortcut — Rotisserie Chicken Version
Use shredded rotisserie chicken instead of cooking chicken from scratch, skipping the cooking step entirely and going straight to seasoning the already-cooked meat. This cuts the total active prep time down significantly since there’s no raw chicken to cook through.
Fresh and Elevated — Poblano and Corn Chicken Enchiladas
Add 1 diced roasted poblano pepper and ½ cup of corn kernels to the chicken filling in Step 2. The roasted poblano adds a deeper, smokier pepper flavor that pairs beautifully with the sweetness of the corn throughout the filling.
Nutrition Information
Per Serving Breakdown (Based on 6 Servings, 2 Enchiladas Each)
| Nutrient | Amount | % Daily Value |
|---|---|---|
| Calories | ~420 | — |
| Total Fat | 20g | 26% |
| Saturated Fat | 9g | 45% |
| Cholesterol | 95mg | 32% |
| Sodium | 780mg | 34% |
| Total Carbohydrates | 30g | 11% |
| Dietary Fiber | 5g | 18% |
| Total Sugars | 4g | — |
| Protein | 30g | 60% |
| Vitamin A | 25% DV | — |
According to USDA FoodData Central, corn tortillas provide a meaningful source of fiber compared to flour tortillas — making this chicken enchiladas recipe a more fiber-rich option alongside its rich, saucy flavor.
Dietary Compatibility
| Diet | Compatible | Notes |
|---|---|---|
| Gluten-Free | ✅ | Naturally gluten-free as written using corn tortillas |
| Dairy-Free | ❌ | Replace cheese with a dairy-free shredded cheese alternative |
| Paleo | ❌ | Corn tortillas and cheese both excluded |
| Keto | ❌ | See lettuce wrap variation above to adapt |
| Vegetarian | ❌ | Replace chicken with black beans or crumbled tofu |
| Vegan | ❌ | Same bean substitution plus dairy-free cheese needed |
To reduce sodium in this recipe, use low-sodium chicken broth and tomato sauce, and reduce the added salt — the chili powder and cumin already carry plenty of flavor on their own.
8 Mistakes That Ruin Chicken Enchiladas
Every one of these mistakes is fixable. Know them before you start — not after.
❌ Mistake 1: Not Warming the Tortillas First
Why it happens: Skipping what seems like an unnecessary extra step. What goes wrong: Cold tortillas crack and tear the moment they’re rolled, leaving filling spilling out everywhere. The fix: Always warm tortillas in a dry skillet until pliable before rolling.
❌ Mistake 2: Overfilling Each Tortilla
Why it happens: Wanting a generously stuffed enchilada. What goes wrong: Too much filling makes rolling difficult and the enchiladas fall apart or won’t close properly. The fix: Stick to about ¼ cup of filling per tortilla.
❌ Mistake 3: Using Only Canned Sauce With No Seasoning Added
Why it happens: Convenience and saving time. What goes wrong: Plain canned sauce alone tastes flat and one-dimensional compared to a sauce built with real spices. The fix: Make the quick homemade sauce, or at minimum doctor canned sauce with extra chili powder and cumin.
❌ Mistake 4: Not Seasoning the Chicken Filling
Why it happens: Assuming the sauce alone carries enough flavor. What goes wrong: Bland chicken inside flavorful sauce still tastes underwhelming overall, since each bite needs flavor throughout. The fix: Season the shredded chicken separately before rolling it into the tortillas.
❌ Mistake 5: Skipping the Sauce Layer on the Bottom of the Dish
Why it happens: Not realizing this step matters. What goes wrong: Enchiladas without a bottom layer of sauce can stick to the dish and burn slightly on the bottom. The fix: Always coat the bottom of the baking dish with a thin layer of sauce before adding the rolled tortillas.
❌ Mistake 6: Using Too Much Sauce
Why it happens: Wanting extra-saucy enchiladas. What goes wrong: Excess sauce makes the dish soupy and can cause the tortillas to fall apart entirely. The fix: Use just enough sauce to coat everything evenly without pooling excessively.
❌ Mistake 7: Overbaking Past Bubbly and Melted
Why it happens: Wanting extra golden, bubbly cheese. What goes wrong: Extended baking dries out the chicken filling and can toughen the tortillas on top. The fix: Pull the dish from the oven as soon as the cheese is melted and the sauce is bubbling, usually 20–22 minutes.
❌ Mistake 8: Using Stale, Dried-Out Tortillas
Why it happens: Not checking freshness before starting. What goes wrong: Stale tortillas crack more easily even after warming, since they’ve already lost much of their natural pliability. The fix: Buy fresh tortillas specifically for this recipe and check the date on the package.
Frequently Asked Questions
Why are my chicken enchiladas soggy?
The most common cause is using too much sauce, which pools at the bottom of the dish and soaks into the tortillas more than intended. The second common cause is chicken filling that’s too wet, often from excess liquid left in after shredding. This chicken enchiladas recipe calls for a controlled amount of sauce specifically to avoid this — sticking to the recipe’s proportions rather than adding extra sauce “to be safe” solves most sogginess issues.
Should you fry corn tortillas before rolling enchiladas?
Lightly frying tortillas in a small amount of oil before rolling is the most traditional method and produces the sturdiest, least likely to tear result, since the oil creates a slight barrier against the sauce. However, this chicken enchiladas recipe simply warms the tortillas in a dry skillet instead, which is faster, uses less oil, and still prevents cracking effectively enough for a reliable home result.
Can you use flour tortillas for chicken enchiladas?
Yes, though corn tortillas are more traditional and generally hold up better to baking in sauce without turning gummy. Flour tortillas work fine as a substitute in this chicken enchiladas recipe and don’t require the same warming step beforehand, since they’re naturally more pliable, but the texture after baking will be softer and less distinctly “enchilada-like” than the corn version.
Can you make chicken enchiladas ahead of time?
Yes — this recipe is excellent for making ahead. Assemble the full dish up to 2 days before you plan to bake it, cover tightly and refrigerate unbaked, then bake fresh when ready, adding a few extra minutes to the bake time since the dish will be starting cold rather than at room temperature.
What do you serve with chicken enchiladas?
Mexican rice and refried beans are the most classic pairings, turning this into a complete, traditional meal. Warm tortilla chips are useful for scooping up any extra sauce on the plate. For something lighter, a simple side salad with lime vinaigrette or fresh guacamole both add a cooling, bright contrast to the rich, saucy enchiladas.
Can you freeze chicken enchiladas?
Yes — this chicken enchiladas recipe freezes exceptionally well for up to 3 months. Assemble the dish completely, wrap it tightly before baking, and freeze. Thaw overnight in the refrigerator, then bake as directed, adding a few extra minutes to the bake time if the dish is still slightly cold in the center.
How long do chicken enchiladas last in the fridge?
This chicken enchiladas recipe lasts up to 4 days in the refrigerator stored in an airtight container. The flavor actually deepens slightly by the second day, as the sauce has more time to soak into the tortillas and chicken filling, making leftovers genuinely enjoyable rather than just acceptable.
Can you use rotisserie chicken for chicken enchiladas?
Yes — rotisserie chicken is an excellent shortcut for this chicken enchiladas recipe. Simply shred the chicken and season it the same way the recipe describes, skipping the step of cooking raw chicken entirely. This cuts the total active prep time down significantly while still producing a flavorful, well-seasoned filling.
Why do my corn tortillas crack when rolling?
This almost always means the tortillas weren’t warmed enough before rolling, since cold corn tortillas are naturally stiffer and more prone to tearing. Warming each one in a dry skillet for 20–30 seconds per side, until pliable and slightly puffed, solves this problem in nearly every case. Stale tortillas that have already dried out somewhat can still crack even after warming, so starting with fresh tortillas also helps.
Why do my chicken enchiladas taste bland?
The most common cause is seasoning only the sauce and not the chicken filling itself, which leaves each bite tasting underwhelming even when the sauce on top is flavorful. Using canned sauce straight from the can without doctoring it with extra spices also produces a flatter overall result. Seasoning the chicken separately before rolling, as this recipe does, and tasting the sauce before using it both help catch a bland batch before it goes into the oven.
You Might Also Like
Best Taco Seasoning

Chicken Enchiladas
Ingredients
Equipment
Method
- Whisk tomato sauce, broth, chili powder, cumin, and garlic in a saucepan. Simmer 8–10 minutes until slightly thickened.
- Season shredded chicken with a pinch of the spices, salt, pepper, and diced onion.
- Warm tortillas in a dry skillet 20–30 seconds per side until pliable.
- Fill each tortilla with ¼ cup chicken, roll tightly, and place seam-side down in a baking dish coated with a thin layer of sauce.
- Pour remaining sauce over the rolled tortillas. Top with remaining cheese.
- Bake at 375°F for 20–22 minutes until bubbly and melted. Rest 5 minutes. Top with sour cream, onion, and cilantro.


4 Comments