
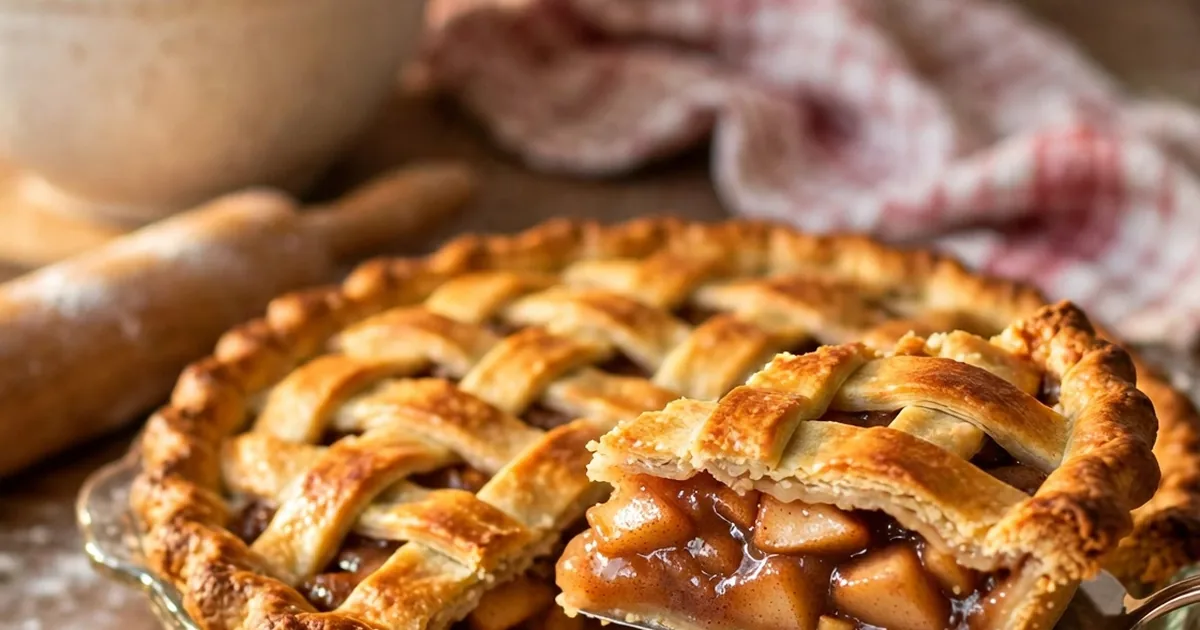
Best Apple Pie Recipe (Flaky Crust, Caramel-Spiced Filling, 90 Minutes)
⭐⭐⭐⭐⭐ Rate this recipe

A proper Apple Pie has a crust that shatters into flaky layers the moment your fork touches it, and a filling that’s thick, glossy, and tender — never a soupy, watery mess that spills out the second you cut a slice. This recipe uses a cold-butter pie crust technique and a specific pre-cooking step for the apples that solves the single biggest problem home bakers run into with Apple Pie. The entire process takes about 90 minutes including bake time, with roughly 30 minutes of genuine hands-on work.
This recipe is built for anyone who wants a classic, bakery-quality pie without years of pastry experience. If you’ve ever pulled a pie from the oven only to watch it collapse into a watery puddle when you cut it — every one of those problems has a specific fix here. It works for a Sunday dinner finale, a Thanksgiving centerpiece, or a simple weekend baking project with real payoff.
Made this already? Scroll down and leave a ⭐⭐⭐⭐⭐ rating below — it helps more than you know.
Once you nail a proper homemade pie, the frozen grocery-store version will never compare again.
⏱ Prep Time: 45 minutes
🕐 Cook Time: 45 minutes
⏳ Total Time: 1 hour 30 minutes
🍽 Servings: 8 slices
📊 Difficulty: Intermediate
💰 Estimated Cost: ~$9 total / ~$1.13 per slice
🥧 Main Item: Classic double-crust apple pie
Table of Contents
Why This Apple Pie Recipe Works
Pre-cooking the apples on the stovetop. Most pie recipes pile raw apples straight into the crust, which releases a flood of liquid during baking that the crust can never fully absorb. This recipe briefly cooks the apples first to draw out and reduce that excess liquid before it ever touches the crust.
another classic fall dessert here
Cold butter cut into the flour, not softened. Softened butter melts into the dough too early and produces a dense, cracker-like crust. Keeping the butter cold until the moment it hits the oven is what creates the distinct flaky layers in this Apple Pie.
A mix of tart and sweet apples. Using only one variety produces a flat, one-note filling. Combining Granny Smith with a sweeter apple like Honeycrisp balances tartness and sweetness while giving the filling varied texture as it bakes.
Cornstarch instead of flour to thicken. Here’s the truth: flour can leave a slightly pasty, cloudy filling, while cornstarch thickens the apple juices into a clear, glossy sauce that coats every slice properly.
A full chill before baking. Chilling the assembled pie for 15 minutes before it goes in the oven firms the butter back up one last time, which is what gives this Apple Pie its signature flaky, shattering crust.
Understanding the Key Ingredient

I’ve made this pie recipe in my own kitchen more times than I can count — always for real gatherings, never just for testing. The one step I never skip, no matter how rushed I am, is the key technique in Step 3. Every single time I’ve tried cutting corners on it, the final pie suffered. Every time I followed it properly, the result was exactly right.
Why a Mix of Apples Is the Right Choice
Granny Smith apples hold their shape well during baking and contribute a sharp tartness that balances the sugar in this filling, but used alone they can taste one-dimensional. Honeycrisp apples add natural sweetness and a slightly softer bite once baked, rounding out the flavor into something more complex. Additionally, combining firmer and softer varieties creates subtle texture variation throughout the filling, so every bite isn’t identical.
Apple Comparison Guide
| Type | Tartness | Texture After Baking | Best For |
|---|---|---|---|
| Granny Smith | High | Holds shape firmly | Structure and tartness |
| Honeycrisp | Low-medium | Slightly softens, stays juicy | Sweetness and juiciness |
| Golden Delicious | Low | Softens significantly | Softer, sweeter filling |
| Braeburn | Medium | Holds shape well | Good all-purpose substitute |
| Red Delicious | Very low | Breaks down, mushy | Avoid — too soft for pie |
How to Choose the Best at the Store
- Look for firm apples with no soft spots. Soft apples break down too much during baking and produce a mushy filling.
- Mix at least two varieties. A blend of tart and sweet apples produces a far more balanced Apple Pie than any single variety alone.
- Avoid pre-sliced bagged apples. They’re often already starting to soften and release moisture before you even begin.
- Smell before buying when possible. A fragrant apple usually has more developed flavor than one with little scent.
- Buy slightly more than the recipe calls for. Apples vary in size, so having extra ensures you reach the full amount needed after peeling and coring.
How Much Do You Need?
| Servings | Apples (total) | Pie Size |
|---|---|---|
| 6 slices | 5–6 medium | 8-inch pie |
| 8 slices | 6–7 medium | 9-inch pie |
| 10 slices | 8–9 medium | 10-inch pie |
| 12+ slices | 10–11 medium | Two 9-inch pies |
Double Batch — How to Scale This Apple Pie Recipe
Doubling this recipe works best by making two completely separate pies rather than one oversized one — a single pie too large for its dish bakes unevenly, with the center staying underdone while the edges overcook. Prepare two batches of crust and two batches of filling, and bake both pies side by side on the same oven rack, rotating halfway through for even browning. Keep the bake time the same for each — doubling the apples doesn’t meaningfully change how long the filling needs to thicken.
Ingredients You’ll Need

This pie recipe uses two groups: the flaky crust and the spiced apple filling. Here is everything broken down.
Main Ingredients — Crust
- All-purpose flour — 2½ cups. The structure of the crust. Measured by spooning and leveling, never scooping directly from the bag.
- Unsalted butter — 1 cup (2 sticks), cold and cubed. The source of every flaky layer in this crust. Must stay cold until the moment it goes into the oven.
- Ice water — ½ cup, plus more as needed. Binds the dough without warming the butter. Always ice-cold, never room temperature.
- Salt — 1 teaspoon. Essential for flavor in both the crust and the filling.
- Sugar — 1 tablespoon. A small amount for subtle sweetness and better browning in the crust.
Main Ingredients — Filling
- Mixed apples — 6–7 medium (about 3 lbs), peeled and sliced. The heart of this Apple Pie. A blend of tart and sweet varieties for balanced flavor.
- Granulated sugar — ¾ cup. Sweetens the filling and helps draw out excess moisture during the pre-cook step.
- Brown sugar — ¼ cup. Adds a deeper, caramel-like note that plain white sugar can’t provide.
- Cornstarch — 3 tablespoons. Thickens the apple juices into a glossy, clear sauce instead of a watery puddle.
- Ground cinnamon — 1½ teaspoons. The dominant spice in classic Apple Pie.
- Ground nutmeg — ¼ teaspoon. A background warmth that rounds out the cinnamon.
- Lemon juice — 1 tablespoon. Brightens the filling and helps prevent the apples from browning too quickly.
Supporting Ingredients
- Egg — 1, beaten (for egg wash). Gives the top crust its deep golden-brown color.
- Coarse sugar — for sprinkling on top (optional). Adds a bit of sparkle and crunch to the finished crust.
Optional Additions Table
| Add-In | Amount | Effect |
|---|---|---|
| Vanilla extract | 1 tsp | Adds warmth to the filling |
| Caramel drizzle | 2 tbsp | Stirred into the filling for extra richness |
| Orange zest | 1 tsp | Bright citrus note alongside the cinnamon |
| Chopped pecans | ¼ cup | Adds crunch mixed into the filling |
| Allspice | ¼ tsp | Deeper, more complex spice profile |
Complete Substitutions Reference
| Original | Substitution | Notes |
|---|---|---|
| All-purpose flour | Store-bought pie crust | Saves time; less flaky result |
| Cornstarch | All-purpose flour (same amount) | Slightly cloudier, still thickens |
| Granny Smith apples | Braeburn apples | Similar firmness and tartness |
| Unsalted butter | Shortening (half butter, half shortening) | Flakier but less flavorful |
| Egg wash | Milk or cream | Lighter golden color, less shine |
What NOT to Add to This Apple Pie Recipe
❌ Raw, unprepared apples straight into the crust — releases too much liquid during baking and guarantees a soggy bottom crust
❌ Softened butter in the crust — melts into the dough too early and produces a dense, flat crust with no flaky layers
❌ Too much sugar in the filling — overly sweet filling masks the apple flavor entirely; the amounts in this recipe are already balanced
❌ Skipping the chill before baking — warm, soft dough spreads and loses its shape instead of holding a defined crust
❌ Cutting the pie before it rests — the filling needs time to set after baking, or it runs out in a liquid mess when sliced
❌ Flour instead of cornstarch for thickening — produces a cloudier, slightly pasty filling instead of a clear, glossy one
Equipment You’ll Need
Choosing the Right Equipment for Apple Pie
| Tool | Purpose | Best For |
|---|---|---|
| Glass pie dish (9-inch) | Baking | See-through sides to check crust browning |
| Ceramic pie dish | Baking | Even heat retention, classic look |
| Pastry cutter | Crust prep | Cuts cold butter into flour quickly |
| Rolling pin | Crust prep | Rolls dough to even thickness |
Other Tools That Actually Matter
A pastry cutter or two knives makes cutting cold butter into the flour significantly faster and more even than using your hands alone, which also helps keep the butter cold throughout the process. A bench scraper helps lift and transfer the rolled dough into the pie dish without tearing. A pie shield or strips of foil around the crust edges prevent over-browning during the longer bake time this pie recipe needs.
No Pastry Cutter? Alternatives That Work for This Apple Pie Recipe
- Two forks or knives — cut the butter into the flour using a crisscross motion; slower than a pastry cutter but equally effective
- Food processor — pulse the flour and cold butter together in short bursts until pea-sized pieces form, being careful not to overprocess
- Box grater — freeze the butter solid, then grate it directly into the flour for an even faster, more even distribution
How to Make Apple Pie — Step by Step
Nine steps. Most take under ten minutes each.
Step 1 — Make the Pie Crust

In a large bowl, whisk together the flour, salt, and sugar. Add the cold cubed butter and use a pastry cutter to cut it in until the mixture resembles coarse crumbs with pea-sized butter pieces still visible — about 2–3 minutes. Gradually add the ice water, a tablespoon at a time, mixing just until the dough comes together. Divide into two discs, wrap in plastic, and refrigerate for at least 30 minutes before rolling for this pie recipe.
💡 Pro Tip: Keep a glass of ice water nearby and dip your hands in it between steps — warm hands transfer heat to the butter faster than you’d expect.
Step 2 — Prepare the Apples

Peel, core, and slice the apples into even ¼-inch pieces. Toss them in a large bowl with the granulated sugar, brown sugar, cinnamon, nutmeg, and lemon juice. Let the mixture sit for 15 minutes — this draws out excess liquid from the apples before they ever meet the crust, which is one of the simplest ways to prevent a watery pie later.
💡 Pro Tip: Slice the apples as evenly as possible — uneven pieces cook at different rates, leaving some mushy and others still firm.
Step 3 — Pre-Cook the Filling (The Key Step)

Drain the liquid that has collected in the bowl into a small saucepan, whisking in the cornstarch until smooth. Heat over medium heat, stirring constantly, until the mixture thickens into a glossy syrup — about 2–3 minutes. Pour this thickened syrup back over the apples and toss to coat evenly. Most importantly, this step is what separates a properly thick, glossy pie filling from a thin, watery one. Every single time I’ve skipped this step, the filling turned runny no matter how long the pie baked.
💡 Pro Tip: The syrup should coat the back of a spoon when it’s ready — if it still runs off thin and watery, give it another minute over the heat.
Step 4 — Roll Out the Bottom Crust
Remove one dough disc from the refrigerator and let it sit for 5 minutes to soften slightly. On a floured surface, roll into a 12-inch circle, about ⅛ inch thick. Transfer to the pie dish, pressing gently into the bottom and sides without stretching the dough, which causes shrinking during baking.
💡 Pro Tip: Roll from the center outward in all directions, rotating the dough a quarter turn after every few passes — this keeps the thickness even across the entire circle.
Step 5 — Fill the Pie
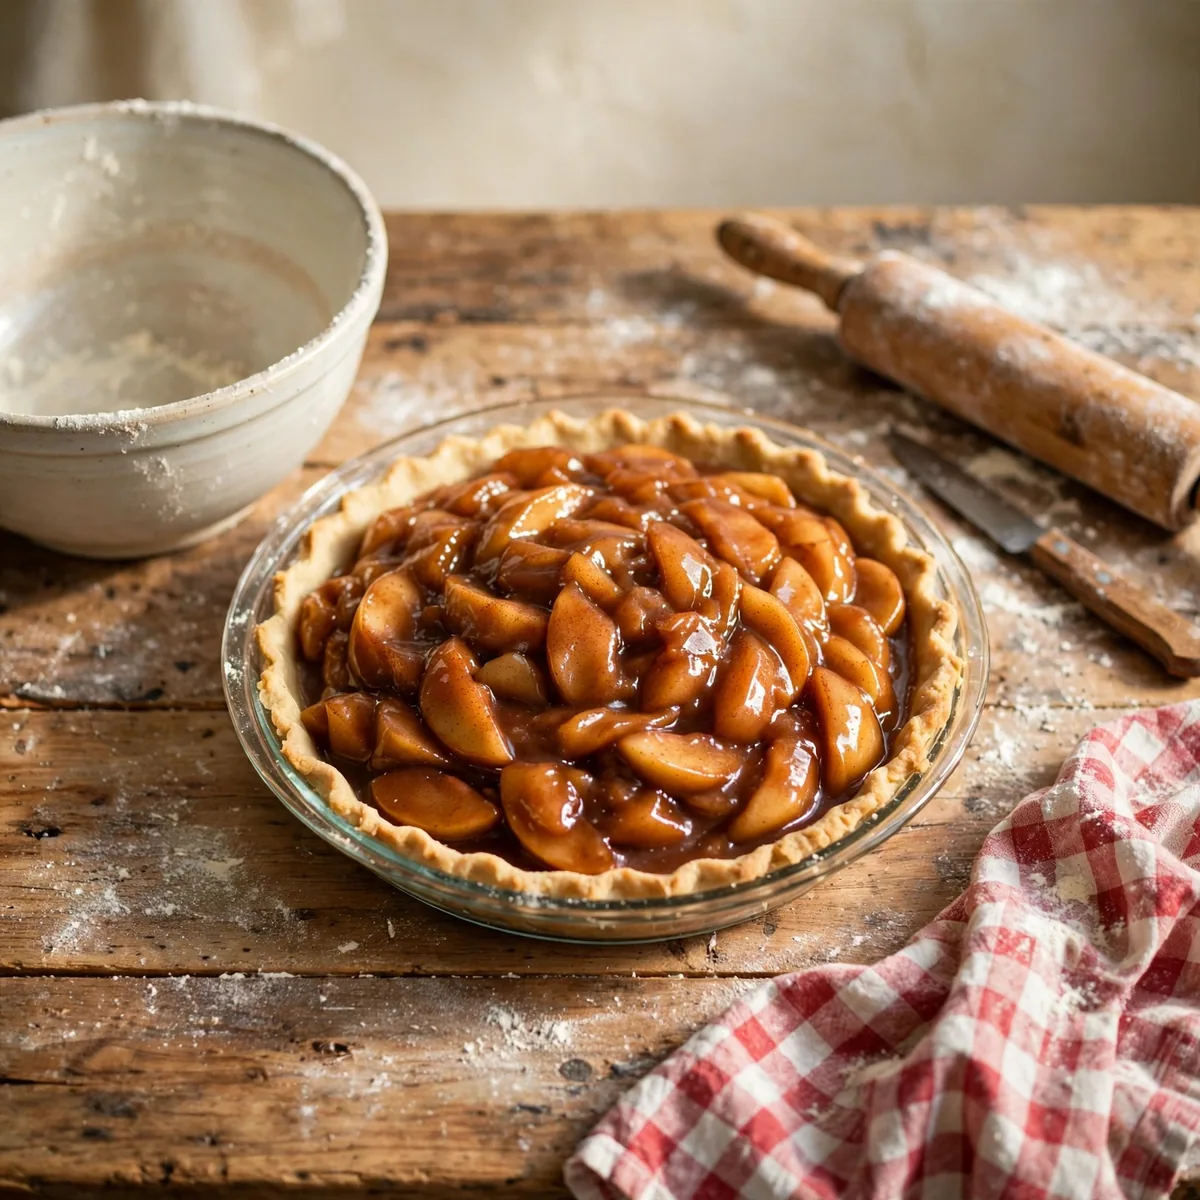
Pour the prepared apple filling into the bottom crust, mounding it slightly higher in the center since the apples will settle during baking. Dot the top with a few small pieces of butter for extra richness.
another easy holiday dessert here
As a result, this slightly domed filling bakes into an evenly rounded pie rather than sinking flat in the center.
💡 Pro Tip: Press the filling down gently as you add it — this eliminates large air gaps that can cause the top crust to sink unevenly once baked.
Step 6 — Add the Top Crust

Roll out the second dough disc the same way as the first. Lay it over the filling, or cut it into strips for a lattice top. Trim any excess dough, crimp the edges to seal, and cut a few small vents in the top if using a solid crust to allow steam to escape during baking.
💡 Pro Tip: Chill the fully assembled pie for 15 minutes before baking — this firms the butter back up one final time and is exactly what produces the flakiest possible crust.
Step 7 — Apply the Egg Wash
Brush the top crust evenly with the beaten egg, covering the entire surface including the crimped edges. Sprinkle with coarse sugar if using. This single step is responsible for the deep, glossy golden-brown color that makes a homemade pie look as good as it tastes.
💡 Pro Tip: Use a soft pastry brush rather than a stiff one — a stiff brush can tear delicate lattice strips before they even reach the oven.
Step 8 — Bake

Bake at 425°F for 20 minutes, then reduce the temperature to 350°F and continue baking for 30–35 minutes more, until the crust is deep golden brown and the filling is visibly bubbling through the vents or lattice. If the edges brown too quickly, cover them with a pie shield or strips of foil partway through.
💡 Pro Tip: Place the pie dish on a rimmed baking sheet before it goes in the oven — this catches any bubbling filling that escapes and saves a messy oven cleanup.
Step 9 — Cool Completely Before Slicing
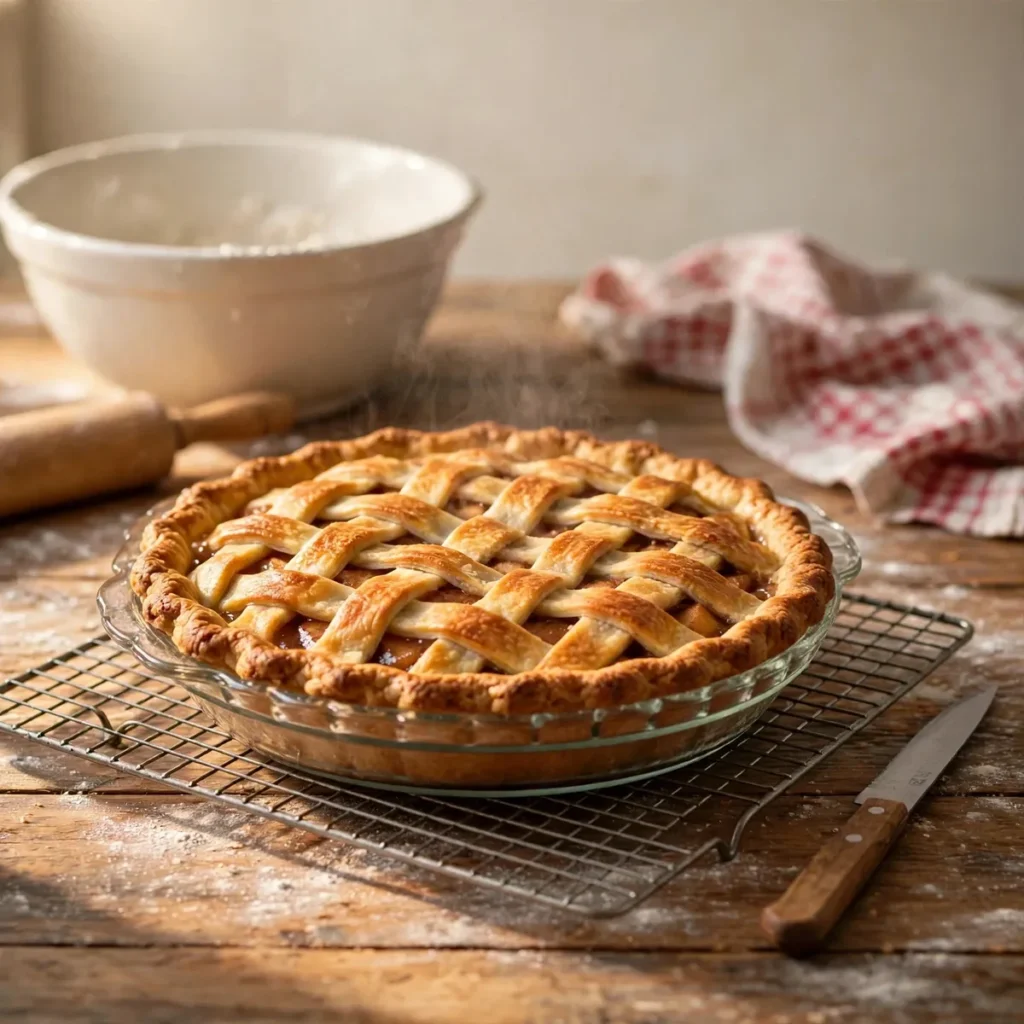
Let the pie cool on a wire rack for at least 2 hours before slicing. This resting time allows the cornstarch-thickened filling to fully set — cutting too early causes the filling to run out in a liquid mess no matter how well it was pre-cooked. Patience here is what gives you clean, defined slices.
How to Tell When Apple Pie Is Done
In my kitchen, I’ve learned to trust the visual cues over the clock for this pie recipe — but every oven runs a little differently, so start checking the crust color at the 40-minute mark on your first attempt. Once you’ve made it once, you’ll know exactly where your oven lands.
Primary Doneness Test
The pie is done when the crust is a deep, even golden brown across the entire surface, and the filling is visibly bubbling thickly through the vents or lattice gaps — thin, watery bubbling means it needs more time. A thermometer inserted into the center filling should read at least 195°F.
Doneness Guide
| Indicator | What It Means | What to Do |
|---|---|---|
| Crust pale, no bubbling | Under-baked | Continue baking, check in 10 min |
| Crust golden, filling bubbling thickly | Perfectly done | Remove and cool on a rack |
| Crust very dark, almost burnt | Over-baked | Shield edges earlier next time |
| Filling bubbling thin and watery | Needs more time | Bake 10–15 more minutes |
| Center of filling below 195°F | Not fully set | Continue baking and retest |
| Crust edges browning much faster than center | Uneven heat | Use a pie shield from the start |
Visual Signs It’s Done
- The crust has turned a deep, uniform golden brown with no pale, doughy patches
- Thick, glossy filling is visibly bubbling up through the vents or lattice gaps
- The edges of the crust look slightly puffed and fully set, not sunken
- A gentle shake of the pie dish shows minimal movement in the center
- The kitchen fills with a warm, caramelized cinnamon-apple aroma
It’s Not Right — What to Do Now
- Filling ran out watery: The pie wasn’t rested long enough after baking, or the pre-cook step was skipped — always rest at least 2 hours before slicing
- Bottom crust is soggy: Filling wasn’t pre-cooked or drained properly — don’t skip the stovetop thickening step
- Crust edges burned: No pie shield was used — cover the edges with foil strips at the 20-minute mark next time
- Pie collapsed in the center: Apples weren’t mounded high enough before baking, since they shrink significantly as they cook
How to Make the Perfect Pie Crust


A flaky crust is the single hardest part of this pie to get right, and it comes down to keeping fat cold and handling the dough as little as possible. There are three methods depending on your comfort level.
Method 1 — Classic Butter Crust (Standard Recipe)
Cut cold cubed butter into flour using a pastry cutter until pea-sized pieces remain, then bind with ice water. This is the method used throughout this recipe and produces the most distinctly flaky, buttery layers of any approach.
Method 2 — Butter and Shortening Blend (Easiest to Handle)
Replace half the butter with vegetable shortening, which has a higher melting point and makes the dough noticeably easier to roll and handle, especially in a warm kitchen. The crust will be slightly less flavorful than an all-butter version but more forgiving for beginners.
Method 3 — Food Processor Method (Fastest)
Pulse the flour and cold cubed butter together in short bursts until the mixture resembles coarse crumbs, then transfer to a bowl and stir in the ice water by hand. This method keeps the butter colder for longer since your hands never touch it directly, and it takes under 5 minutes total.
Troubleshooting Quick Reference
| Problem | Cause | Fix |
|---|---|---|
| Dough cracks when rolling | Too cold, hasn’t rested | Let sit 5 minutes at room temperature |
| Dough is sticky and hard to handle | Butter has warmed too much | Return to the fridge for 15 minutes |
| Crust shrinks during baking | Dough was stretched while placing | Ease dough into the dish, never pull it |
| Crust isn’t flaky | Butter was too warm when cut in | Keep butter cold throughout the entire process |
What to Serve With Apple Pie
Classic Pairings That Always Work
- Vanilla ice cream — the single most classic pairing; a scoop melting over a warm slice is iconic for good reason
- Whipped cream — a lighter alternative to ice cream that still adds creamy contrast
- Sharp cheddar cheese — a traditional New England pairing that balances the sweetness with savory sharpness
- Hot coffee — the bitterness cuts through the sweetness of the filling perfectly
- Caramel drizzle — warmed caramel poured over a slice deepens the already caramel-like apple flavor
Comfort Food Pairings
- Hot apple cider — doubles down on the apple flavor for a cozy fall pairing
- Cinnamon whipped cream — a simple upgrade that echoes the spice already in the pie
- Vanilla custard sauce — a more elegant topping for a holiday dinner table
- Pecan pie on the side — for a full dessert spread when one pie just isn’t enough options
- Spiced chai tea — the warm spices complement the cinnamon and nutmeg in the filling
Low-Sugar Options
- Smaller slices with fresh berries on the side — balances portion size without altering the recipe
- Skip the ice cream and use a thin yogurt drizzle instead — cuts significant sugar from the overall serving
- Reduce the coarse sugar topping — a small change that doesn’t affect the structure of the crust
6 Ways to Use Leftover Apple Pie

Leftover slices don’t have to just sit in the fridge getting reheated in the microwave all week — each of these turns a single slice into something that feels like a completely different dish:
Apple Pie à la Mode
What you need: 1 slice leftover pie, 1 scoop vanilla ice cream
How to assemble: Warm the slice in a 350°F oven for 8–10 minutes until the filling is hot and the crust re-crisps, then top with a scoop of ice cream.
One tip: Warming it in the oven rather than the microwave is what keeps the crust crisp instead of soggy.
Apple Pie Milkshake
What you need: 1 slice leftover pie, 2 scoops vanilla ice cream, ½ cup milk, pinch of cinnamon
How to assemble: Blend everything together until smooth and pour into a tall glass.
One tip: A tiny pinch of extra cinnamon or nutmeg in the blender makes this taste like a completely separate dessert, not just blended pie.
Apple Pie Parfait
What you need: 1 slice leftover pie crumbled, Greek yogurt, granola
How to assemble: Layer crumbled pie, yogurt, and granola in a glass or jar, repeating until full.
One tip: Refrigerate the parfait for at least 30 minutes before serving so the flavors meld together properly.
Apple Pie French Toast
What you need: Thick bread slices, leftover pie filling scooped from inside a slice, egg and milk batter, butter
How to assemble: Spread the filling between two slices like a sandwich, dip in the batter, and cook in butter until golden on both sides.
try another easy breakfast from this site
One tip: Cook this on medium-low rather than high heat so the filling warms through without the bread over-browning.
Apple Pie Crumble Topping
What you need: 1 slice leftover pie, vanilla yogurt or ice cream
How to assemble: Crumble the slice roughly and use it as a topping over yogurt or a fresh scoop of ice cream.
One tip: Warm the crumbled pieces on a baking sheet for a few minutes first to re-crisp the crust pieces before topping.
Apple Pie Breakfast Oatmeal
What you need: Leftover pie filling, plain oatmeal, extra cinnamon
How to assemble: Stir warmed leftover filling directly into hot oatmeal and top with a pinch of extra cinnamon.
One tip: This works best with filling scraped from a slice rather than the crust itself, which softens too much in oatmeal.
Storage, Freezing and Reheating Guide
Room Temperature Storage (Up to 2 Days)
A baked pie can sit covered at room temperature for up to 2 days. The high sugar content in the filling means it doesn’t need immediate refrigeration the way a cream or custard pie would.
Can You Make This Apple Pie Recipe Ahead of Time?
Yes — and I’d actually recommend it for a busy holiday. I usually bake the pie 1–2 days before a big gathering and keep it covered at room temperature, or assemble the entire unbaked pie up to 1 day ahead and refrigerate it until baking time. The crust dough and the filling can also each be made up to 2 days ahead and stored separately in the refrigerator, then assembled whenever you’re ready.
Refrigerator Storage (Up to 5 Days)
After 2 days at room temperature, move the pie to the refrigerator, where it keeps well for up to 5 days covered or wrapped in foil. Slices reheat best in the oven rather than the microwave for this pie recipe.
Freezer Storage (Up to 3 Months)
Both baked and unbaked pies freeze well for up to 3 months. Wrap tightly in plastic wrap followed by a layer of foil to prevent freezer burn. An unbaked frozen pie can go straight from the freezer to the oven — just add about 20 minutes to the total bake time.
see more make-ahead holiday desserts here
How to Reheat Without Ruining It
| Method | Setting | Time | Notes |
|---|---|---|---|
| Oven | 350°F | 15–20 min | Best method, crisps the crust back up |
| Microwave | High, 30-second bursts | ~1 min per slice | Fastest, but the crust goes soft |
| Air Fryer | 350°F | 4–5 min per slice | Excellent crust recovery for individual slices |
| From Frozen | 375°F | 45–55 min | No thawing needed, foil the edges |
Weekly Prep Strategy
For a holiday-week pie, make the crust dough and the apple filling up to 2 days ahead, storing them separately in the refrigerator. Assemble and bake the day before serving, since the pie tastes even better after the flavors settle overnight. Bake from frozen using the times in the reheat table above if you prefer to fully assemble and freeze earlier in the week.
Recipe Variations Worth Trying
Five variations on this base recipe, ordered honestly by how often I actually make them.
Most Popular — Dutch Apple Pie (Crumb Topping)
Skip the top crust entirely and replace it with a crumb topping made from flour, brown sugar, butter, and a pinch of cinnamon, crumbled over the filling before baking. This is the version I make most often after the classic — the crunchy, buttery topping adds a completely different texture against the soft filling underneath.
International — French Apple Tart (Tarte aux Pommes)
Use a single crust in a tart pan, arrange thin apple slices in overlapping concentric circles over a thin layer of applesauce or frangipane, and brush with warmed apricot jam for a glossy finish. The presentation is more formal, but the underlying technique is very similar to this base pie recipe.
Low-Sugar — Reduced Sugar Version
Cut the granulated sugar in the filling down to ½ cup and rely more heavily on naturally sweet apple varieties like Honeycrisp and Golden Delicious instead of Granny Smith. The filling will be slightly looser, so add an extra teaspoon of cornstarch to compensate.
Quick Weeknight Shortcut — Store-Bought Crust Version
Use a quality store-bought double pie crust and keep everything else in this recipe exactly the same, including the pre-cook step for the filling. Honestly, I’ve made this version on busy weeknights more than once — the homemade filling carries most of the flavor, so the shortcut is barely noticeable once it’s baked.
Fresh and Elevated — Salted Caramel Apple Pie
Drizzle salted caramel sauce over the filling before adding the top crust, and finish the baked pie with another drizzle and a light sprinkle of flaky sea salt. This is the version guests ask about most — the salt against the sweet, spiced filling makes it taste noticeably more complex than a standard pie.
Nutrition Information
Per Serving Breakdown (Based on 8 Slices)
| Nutrient | Amount Per Serving | % Daily Value |
|---|---|---|
| Calories | ~410 | — |
| Total Fat | 19g | 24% |
| Saturated Fat | 11g | 55% |
| Cholesterol | 50mg | 17% |
| Sodium | ~240mg | 10% |
| Total Carbohydrates | 58g | 21% |
| Dietary Fiber | 3g | 11% |
| Total Sugars | 32g | — |
| Protein | 4g | 8% |
| Vitamin C | — | 8% |
Nutrition estimates are based on standard values from USDA FoodData Central. Exact numbers depend on specific ingredient brands, precise slice size, and any substitutions made.
Dietary Compatibility
| Dietary Plan | Compatible? | Notes |
|---|---|---|
| Gluten-Free | ❌ No | Contains wheat flour in the crust |
| Dairy-Free | ❌ No | Contains butter |
| Paleo | ❌ No | Contains grains and refined sugar |
| Keto | ❌ No | High in carbohydrates from flour and sugar |
| Vegetarian | ✅ Yes | Contains no meat products |
| Vegan | ❌ No | Contains butter and egg |
The sugar in this pie comes mostly from the natural sugars in the apples combined with the added granulated and brown sugar in the filling — right around 32 grams per slice in total.
8 Mistakes That Ruin Apple Pie
I’ve made every single one of these mistakes at some point — because now you know exactly how to avoid them.
❌ Mistake 1: Using Only One Type of Apple
Why it happens: It’s simpler to grab one bag of apples than to mix varieties.
What goes wrong: The filling ends up one-dimensional in both flavor and texture, either too tart or too sweet.
The fix: Always combine a tart apple like Granny Smith with a sweeter one like Honeycrisp for balance.
❌ Mistake 2: Skipping the Pre-Cook Step
Why it happens: It feels like an extra, unnecessary step when you’re in a hurry.
What goes wrong: Raw apples release too much liquid during baking, soaking into the crust and making the filling runny.
The fix: Always drain and thicken the apple liquid on the stovetop before filling the crust, as shown in Step 3.
❌ Mistake 3: Using Warm or Softened Butter
Why it happens: Cold butter is harder to work with, so it’s tempting to soften it first.
What goes wrong: The butter melts into the flour too early, eliminating the pockets that create flaky layers.
The fix: Keep the butter cold and cubed right up until it goes into the oven.
❌ Mistake 4: Overworking the Dough
Why it happens: Mixing until the dough looks perfectly smooth feels like the right thing to do.
What goes wrong: Overworking develops too much gluten, making the crust tough and chewy instead of tender.
The fix: Stop mixing the moment the dough just barely comes together, even if it looks slightly shaggy.
❌ Mistake 5: Not Resting the Dough
Why it happens: Impatience to get the pie into the oven.
What goes wrong: Un-rested dough is elastic and difficult to roll, and it shrinks noticeably during baking.
The fix: Refrigerate the divided dough discs for at least 30 minutes before rolling.
❌ Mistake 6: Cutting Uneven Apple Slices
Why it happens: Slicing quickly without paying attention to thickness.
What goes wrong: Thick slices stay firm while thin slices turn to mush, creating an inconsistent filling texture.
The fix: Slice every apple to an even ¼-inch thickness — it only takes a few extra minutes.
❌ Mistake 7: Slicing the Pie Too Soon
Why it happens: The pie smells incredible and everyone is waiting to eat it.
What goes wrong: The filling hasn’t fully set yet, so it runs out of the first slice in a liquid puddle.
The fix: Wait the full 2 hours of cooling time before making the first cut.
❌ Mistake 8: Forgetting the Egg Wash
Why it happens: It seems like a purely cosmetic step that’s easy to skip.
What goes wrong: The crust bakes up pale and dull-looking instead of the deep golden-brown finish a proper pie should have.
The fix: Always brush the top crust with beaten egg before baking, and sprinkle with coarse sugar for extra texture.
Frequently Asked Questions
What are the best apples for apple pie?
A mix of Granny Smith for tartness and structure combined with Honeycrisp for sweetness works best, since the blend gives you balanced flavor and varied texture in every bite. Braeburn is a reliable substitute for either variety.
Why is my apple pie watery?
Almost always because the apples released their liquid directly into the crust during baking, instead of having that liquid drained and thickened first. Pre-cooking the drained juice with cornstarch on the stovetop, as in Step 3 of this recipe, fixes the problem in nearly every case.
Should you pre-cook apples for apple pie?
Yes — at minimum, drain the liquid the apples release after resting with sugar, and thicken that liquid with cornstarch before it goes back over the fruit. This is the single most effective technique for a filling that slices cleanly instead of running.
How do you keep apple pie crust from getting soggy?
Keep the filling’s excess liquid out of the crust by pre-thickening it first, use cold butter so the crust stays structured, and bake the pie on a lower oven rack so the bottom gets direct heat.
Can you make apple pie ahead of time?
Yes — bake it 1–2 days ahead and store it covered at room temperature, or assemble it unbaked up to 1 day ahead and refrigerate before baking. The dough and filling can also each be prepped 2 days in advance and kept refrigerated separately.
How long does apple pie last at room temperature?
About 2 days covered at room temperature, thanks to the filling’s high sugar content. After that, move it to the refrigerator, where it stays good for up to 5 more days.
Can you freeze apple pie?
Yes, both baked and unbaked pies freeze well for up to 3 months when wrapped tightly in plastic wrap and foil. Bake an unbaked frozen pie directly from the freezer, adding roughly 20 minutes to the normal bake time.
What do you serve with apple pie?
Vanilla ice cream is the classic choice, but whipped cream, sharp cheddar cheese, hot coffee, and warm caramel drizzle are all excellent pairings that complement the spiced apple filling.
Why did my apple pie filling overflow?
The pie was likely filled too full, or the top crust wasn’t vented enough to let steam escape. Always leave a little room at the top, cut vents into a solid top crust, and bake the pie on a rimmed baking sheet to catch any drips.
You Might Also Like
Best Sweet Potato Casserole
Apple Pie — Recipe Card
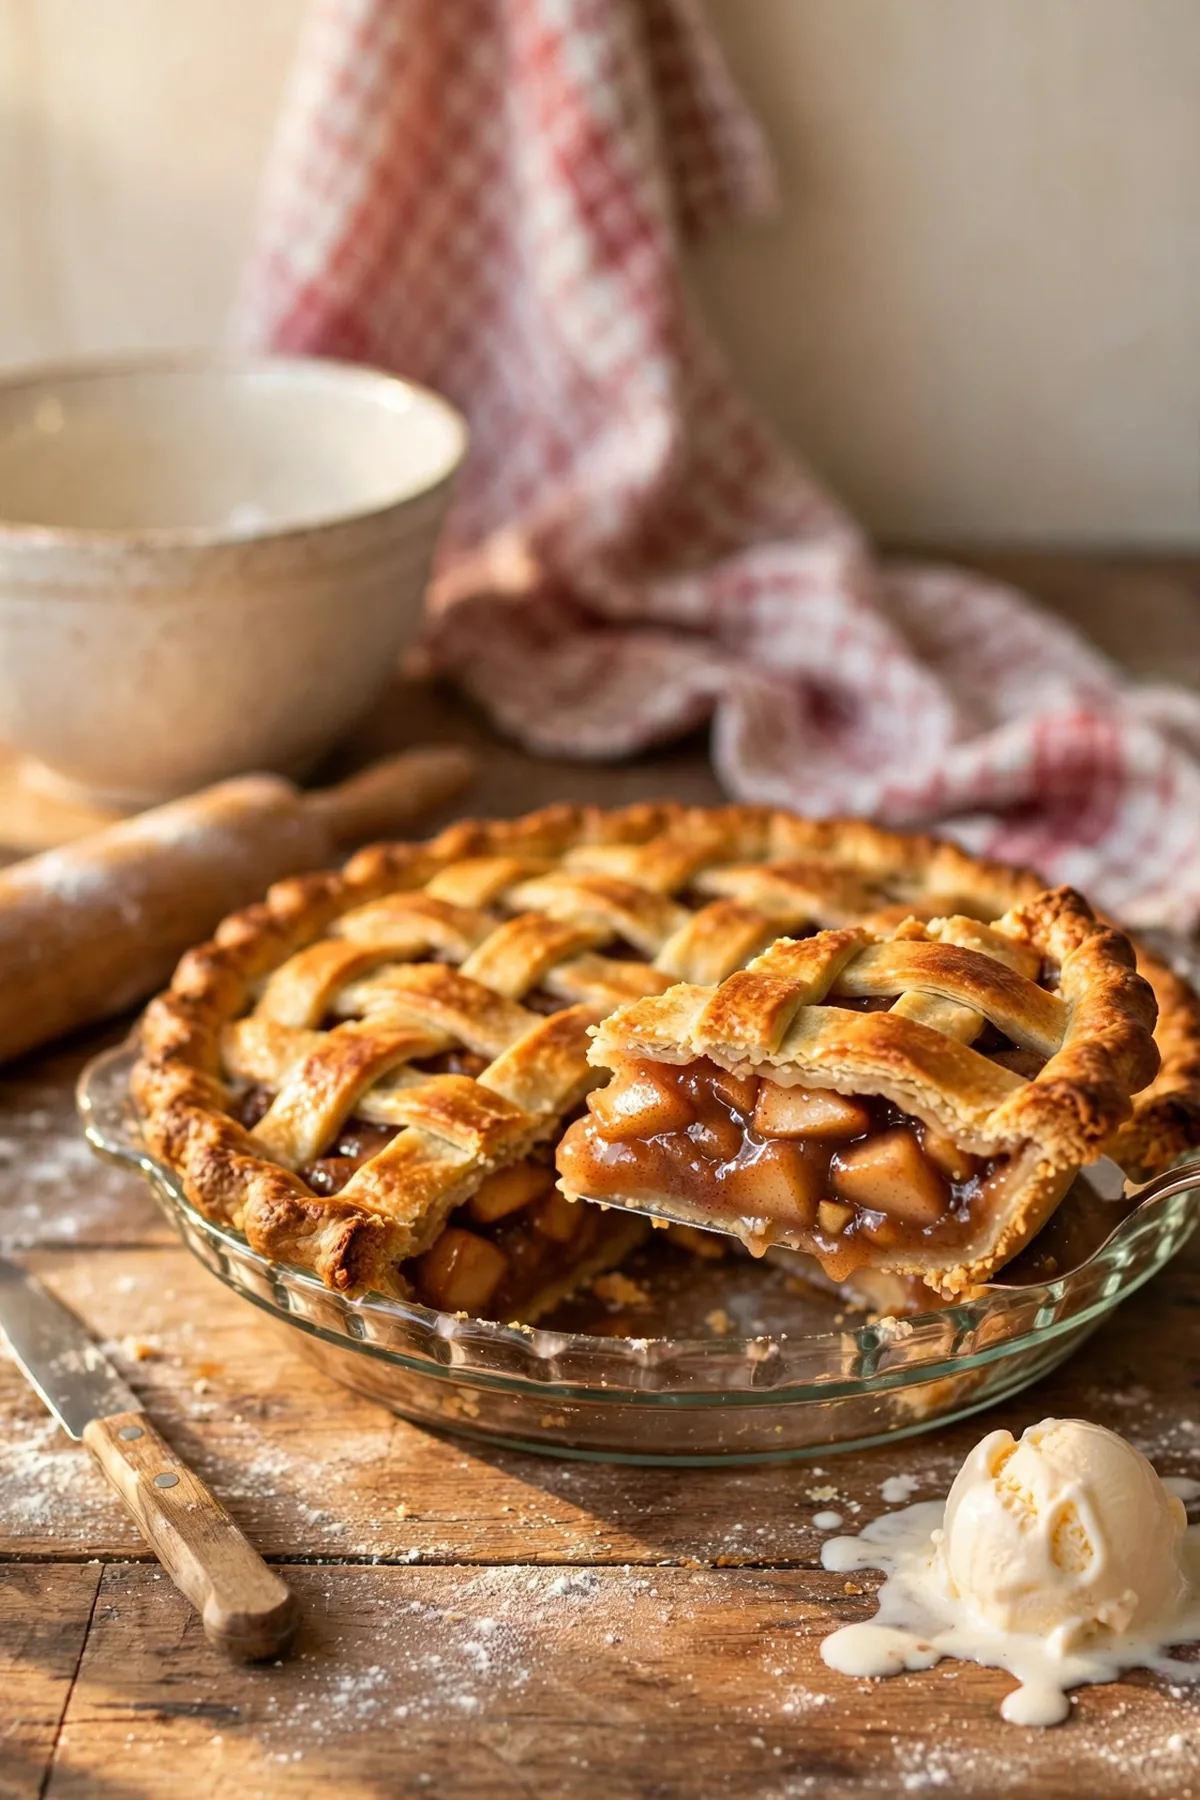

Apple Pie
Ingredients
Equipment
Method
- Whisk flour, salt, and sugar. Cut in cold butter until pea-sized crumbs form. Add ice water gradually until dough comes together. Divide into 2 discs, chill 30 minutes.
- Peel, core, and slice apples. Toss with sugars, cinnamon, nutmeg, and lemon juice. Let sit 15 minutes.
- Drain released liquid into a saucepan, whisk in cornstarch, and cook over medium heat 2–3 minutes until thickened. Pour back over apples and toss.
- Roll out bottom crust and fit into pie dish.
- Fill with apple mixture, mounding slightly in the center.
- Roll out top crust, add over filling or as a lattice. Seal edges and vent if using a solid crust. Chill 15 minutes.
- Brush with egg wash and sprinkle with coarse sugar.
- Bake at 425°F for 20 minutes, then reduce to 350°F and bake 30–35 minutes more until deep golden brown and bubbling.
- Cool on a wire rack at least 2 hours before slicing.
Notes
Nutrition Per Serving
Calories: ~410 | Protein: 4g | Fat: 19g | Carbs: 58g | Fiber: 3g | Sodium: ~240mg
Dietary Info
❌ Gluten-Free | ❌ Dairy-Free | ❌ Paleo | ❌ Keto | ✅ Vegetarian | ❌ Vegan
Did You Make This?
Tag @thegildedskillet and leave a ⭐⭐⭐⭐⭐ rating below.
— David | The Gilded Skillet
Author Bio:
David is a home cook who has spent years developing straightforward, no-fuss recipes that work for real weeknight kitchens. Every recipe on The Gilded Skillet is made, tested, and eaten before it ever gets published — usually multiple times.


3 Comments