
Best Mexican Rice (Fluffy, Flavorful, Ready in 30 Minutes)
⭐⭐⭐⭐⭐ Rate this recipe
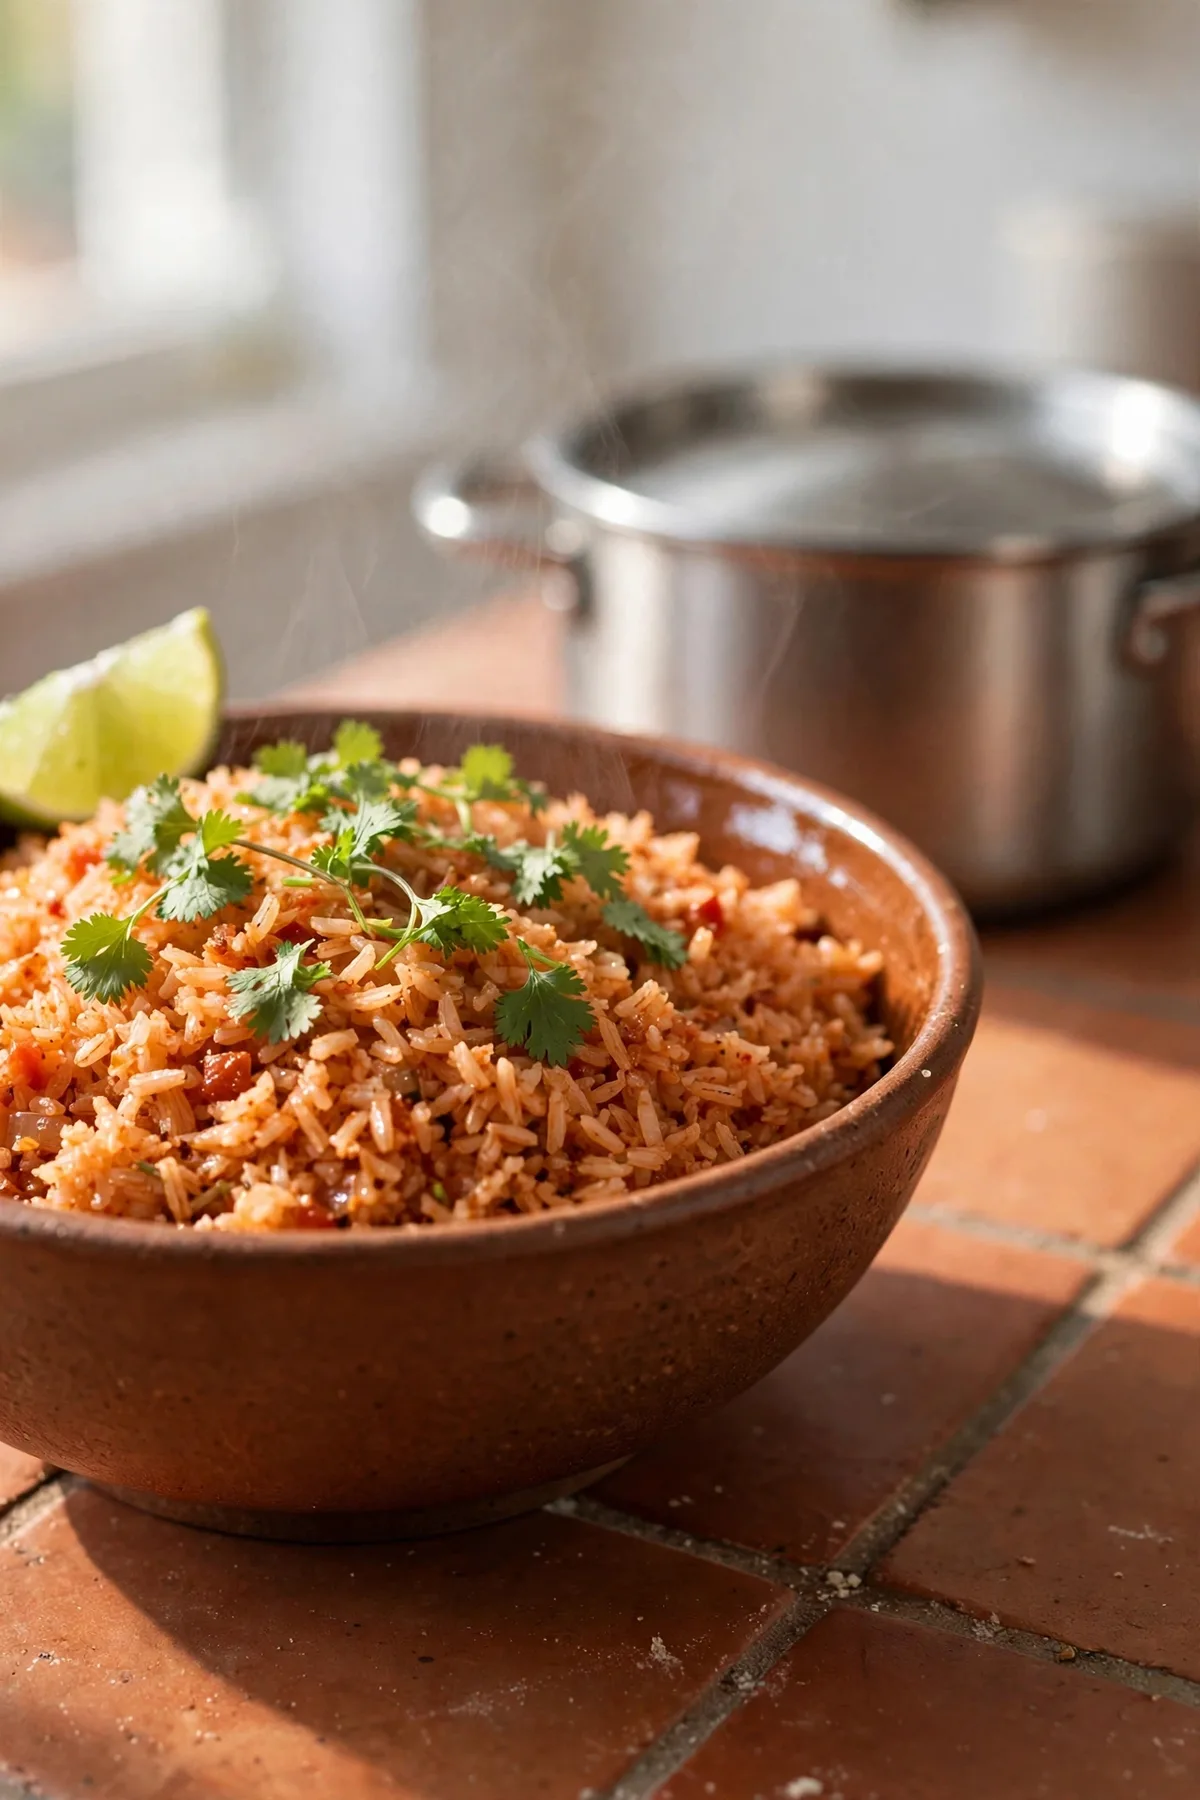
Mexican rice done right comes out genuinely fluffy, with every grain separate and coated in a rich, tomato-and-spice flavor — not a sticky, clumped mass or a bland, pale version that tastes like plain white rice with a little color added. This recipe uses a specific toasting technique for the raw rice before any liquid goes in, which is the single biggest factor separating restaurant-quality Mexican rice from a disappointing homemade attempt. The entire dish comes together in 30 minutes in one pot.
This recipe is built for anyone who’s made a gummy, flavorless batch and wants a version that works every single time. If you’ve ever ended up with rice that clumped together or tasted like watered-down tomato soup — every one of those problems has a specific fix here. It works for taco night, a full Mexican-inspired dinner spread, or a simple side that holds up well for meal prep.
Made this already? Scroll down and leave a ⭐⭐⭐⭐⭐ rating below — it helps more than you know.
Once you nail the toasting step for this rice, the bland box mix stops making sense.
Table of Contents
Why This Mexican Rice Recipe Works
- Toasting the raw rice in oil first. Most recipes skip straight to adding liquid, which produces a softer, less distinct texture. This recipe toasts the rice in oil until lightly golden before any liquid goes in, which builds a nutty flavor and helps every grain stay separate instead of clumping.
another easy Mexican-inspired side here
- Blending the tomato and onion before adding. Blending rather than dicing the tomato and a portion of the onion creates a smooth, evenly distributed flavor base instead of uneven pockets of raw vegetable throughout the finished dish.
- An exact liquid-to-rice ratio. Here’s the truth: too much liquid is the single most common cause of mushy, clumped rice. This recipe uses a precise ratio that produces properly fluffy grains every single time.
- Resting the rice off heat before fluffing. Pulling the pot off heat and letting it rest covered for 5 minutes allows the last bit of steam to finish the cooking gently, rather than continuing to boil and overcook the bottom layer.
- Fluffing with a fork, never stirring with a spoon. This recipe specifically calls for a fork at the end, since stirring with a spoon breaks the grains and releases starch that makes the texture gummy.
Understanding the Key Ingredient
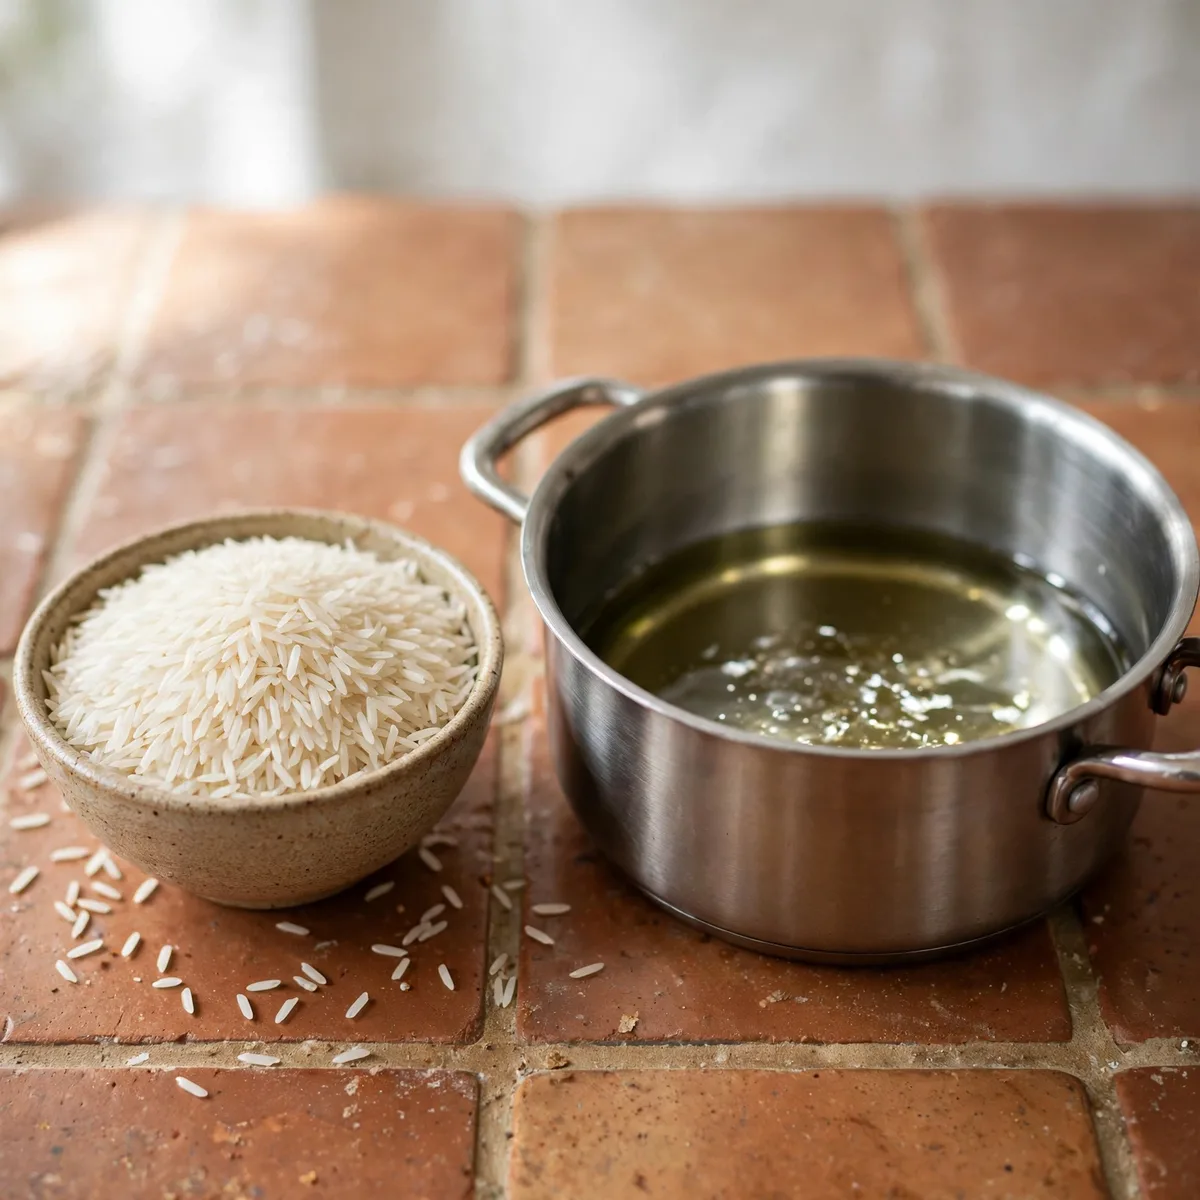
I’ve made this recipe more times than I can count — always for real family dinners, never just for testing. The one step I never skip, no matter how rushed I am, is the key technique in Step 1. Every single time I’ve tried cutting corners on it, the final dish suffered. Every time I followed it properly, the result was exactly right.
Why Long-Grain White Rice Is the Right Choice
Long-grain white rice contains less starch relative to its length compared to short or medium-grain varieties, which is exactly why it produces the light, fluffy, separate-grain texture that defines proper rice. Short-grain rice releases far more starch as it cooks, which causes the grains to stick together into a clumpy, risotto-like texture that doesn’t match the traditional result. Additionally, long-grain rice holds up better to the toasting step at the start, developing a golden color and nutty aroma without breaking down.
Rice Comparison Guide
| Type | Starch Content | Texture Result | Best For |
|---|---|---|---|
| Long-grain white rice | Low | Fluffy, separate grains | Best overall result |
| Medium-grain rice | Medium | Slightly stickier | Acceptable but less traditional |
| Short-grain rice | High | Clumps together | Avoid — wrong texture entirely |
| Jasmine rice | Low-medium | Fluffy with aromatic note | Good substitute with a fragrant twist |
How to Choose the Best at the Store
- Check the package for “long-grain” specifically. This is the key descriptor to look for when shopping for this recipe.
- Avoid pre-seasoned rice mixes. These already contain their own salt and spice blend that throws off this recipe’s balance.
- Buy a standard bag, not instant or parboiled rice. Instant rice cooks too fast to properly absorb the toasting and simmering flavors.
- Fresh rice cooks more evenly. Very old rice that’s been sitting for years can cook unevenly regardless of technique.
- Store any unused rice in a sealed container. Dry rice keeps for a long time in the pantry when properly sealed.
How Much Do You Need?
| Servings | Long-Grain Rice | Chicken Broth |
|---|---|---|
| 4 | 1 cup | 1¾ cups |
| 6 | 1½ cups | 2½ cups |
| 8 | 2 cups | 3½ cups |
| 12 | 3 cups | 5 cups |
Double Batch — How to Scale This Mexican Rice Recipe
Doubling works cleanly as long as you use a large enough pot with a tight-fitting lid — an overcrowded pot cooks unevenly, with the center staying wetter than the edges. Keep the liquid-to-rice ratio exactly the same regardless of batch size, since this is a fixed proportion rather than something that changes with volume. The resting time after cooking stays the same as well.
Ingredients You’ll Need

This recipe uses 8 main ingredients. Here is everything broken down.
Main Ingredients
- Long-grain white rice — 1½ cups. The base of the dish. Rinsed briefly before toasting for the cleanest texture.
- Vegetable oil — 2 tablespoons. Used to toast the rice until lightly golden.
- Roma tomato — 1 large, roughly chopped. Blended with onion for the flavor base.
- Yellow onion — ½ cup, divided (¼ cup blended, ¼ cup diced). Builds aromatic depth in two different textures.
- Garlic — 2 cloves, minced. Adds depth alongside the onion and tomato.
- Chicken broth — 2½ cups. The liquid base. Low-sodium preferred so you control salt.
- Ground cumin — 1 teaspoon. The dominant background spice.
- Tomato sauce — 2 tablespoons. Deepens the color and tomato flavor beyond the fresh tomato alone.
Supporting Ingredients
- Carrot — ¼ cup, finely diced. Adds color and a subtle sweetness.
- Salt — ½ teaspoon, or to taste.
- Fresh cilantro — for garnish.
Optional Additions
| Add-In | Amount | Effect |
|---|---|---|
| Frozen peas | ½ cup | Added in the last 5 minutes for color and sweetness |
| Diced jalapeño | 1 | Adds fresh heat throughout |
| Corn kernels | ½ cup | Sweetness and texture contrast |
| Bay leaf | 1 | Subtle aromatic depth while simmering |
| Lime juice | 1 tbsp | Brightens the finished dish |
Complete Substitutions Reference
| Original | Substitution | Notes |
|---|---|---|
| Chicken broth | Vegetable broth | Works identically for a vegetarian version |
| Long-grain white rice | Jasmine rice | Slightly more fragrant, still fluffy |
| Roma tomato | Canned diced tomatoes, drained | Convenient substitute, similar result |
| Vegetable oil | Olive oil | Slightly different flavor, still toasts well |
| Fresh garlic | Garlic powder (½ tsp) | Less pronounced, still adds flavor |
What NOT to Add to This Mexican Rice Recipe
- ❌ Too much liquid — the single most common cause of mushy, clumped rice instead of fluffy grains
- ❌ Skipping the toasting step — produces a softer, less flavorful texture that doesn’t develop the same nutty depth
- ❌ Stirring with a spoon at the end — breaks the grains and releases starch, making the texture gummy
- ❌ Lifting the lid repeatedly while simmering — releases steam that’s needed for even cooking and can lead to undercooked rice
- ❌ Short-grain rice as a direct substitute — releases far more starch and produces a sticky, clumped texture
- ❌ Adding cold broth straight from the fridge — slows the cooking process and can throw off the timing
Equipment You’ll Need
Choosing the Right Equipment for Mexican Rice
| Tool | Purpose | Best For |
|---|---|---|
| Medium saucepan with tight lid | Cooking everything | Even heat, proper steam retention |
| Dutch oven | Cooking everything | Great heat retention for larger batches |
| Blender or food processor | Blending tomato and onion | Smooth, even flavor base |
| Rice cooker | Alternative cooking method | Hands-off, consistent result |
Other Tools That Actually Matter
A saucepan with a genuinely tight-fitting lid matters more than it seems, since escaping steam is one of the most common reasons rice cooks unevenly. A blender or food processor makes quick work of pureeing the tomato and onion into a smooth base rather than leaving chunky, uneven pieces. A fork, specifically, is needed at the end for fluffing — this small detail actually affects the final texture.
No Blender? Alternatives That Work for This Mexican Rice Recipe
- Fine grating — grate the tomato and a portion of the onion on a box grater for a similarly smooth texture without a blender
- Very fine dicing — dice the tomato and onion as finely as possible with a knife; less smooth but still works
- Immersion blender — blend directly in a bowl or measuring cup for a quick, smooth result with less cleanup
How to Make Mexican Rice — Step by Step
Five steps. Most take under five minutes each.
Step 1 — Toast the Rice (The Key Step)
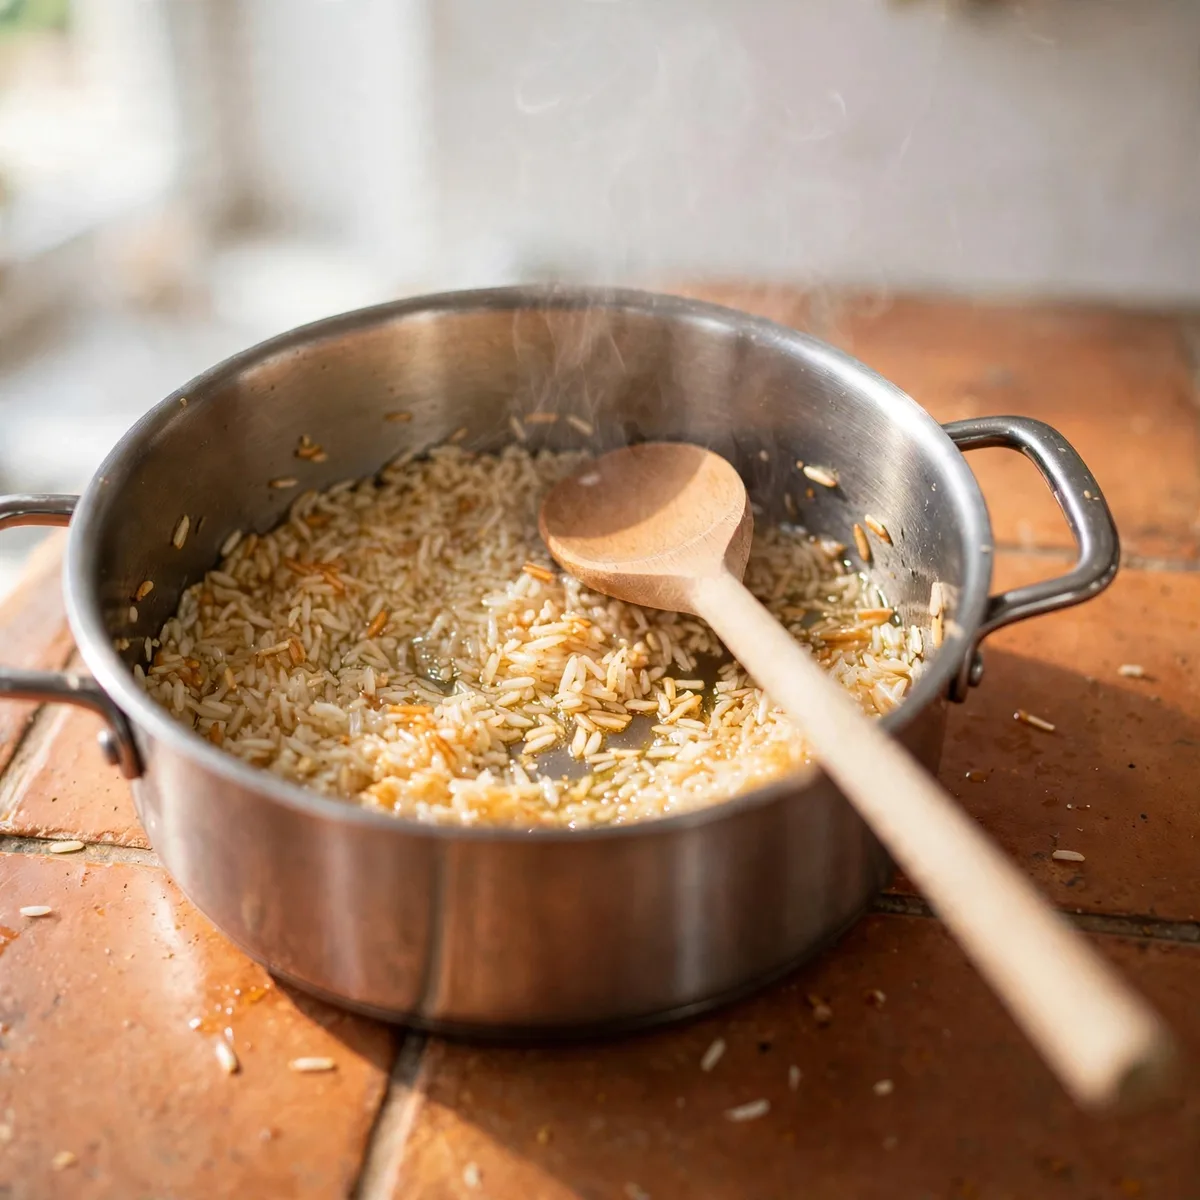
Heat the oil in a saucepan over medium heat. Add the rinsed rice and stir constantly for 4–5 minutes, until the grains turn a light golden color and smell distinctly toasted. Most recipes skip straight to adding liquid, but this step is exactly what builds the nutty depth and helps the grains stay separate once cooked. Every single time I’ve skipped toasting, the finished rice came out noticeably blander and softer in texture.
💡 Pro Tip: Stir constantly during this step — rice that sits still for even 30 seconds in hot oil can scorch and turn bitter instead of golden.
Step 2 — Blend the Tomato and Onion
While the rice toasts, blend the chopped tomato with ¼ cup of the onion until smooth. Set aside. Blending rather than dicing creates an evenly distributed flavor base instead of leaving uneven chunks throughout the finished rice.
💡 Pro Tip: Blend the tomato and onion right before you need them — letting the mixture sit too long before adding can cause it to separate slightly.
Step 3 — Add Aromatics and Liquid

Add the remaining diced onion, minced garlic, and diced carrot to the toasted rice and stir for 30 seconds. Pour in the blended tomato mixture, chicken broth, tomato sauce, cumin, and salt. Stir once to combine evenly, then bring to a boil.
another great taco night staple here
As a result, this single stir before covering is enough to distribute everything evenly without disturbing the rice too much once it starts simmering.
💡 Pro Tip: Stir only until combined here — excessive stirring at this stage starts releasing starch earlier than necessary.
Step 4 — Simmer Covered
Once boiling, reduce the heat to low, cover with a tight-fitting lid, and simmer undisturbed for 15–18 minutes. Do not lift the lid during this time, since escaping steam is needed for the rice to cook evenly all the way through. This recipe depends on that trapped steam finishing the cooking process gently rather than relying purely on the liquid at the bottom of the pot.
💡 Pro Tip: Resist the urge to check on it — lifting the lid even once releases enough steam to throw off the timing and can leave the rice undercooked.
Step 5 — Rest and Fluff

Remove the pot from heat and let it rest, still covered, for 5 minutes without lifting the lid. Fluff gently with a fork, never a spoon, and garnish with fresh cilantro before serving. This resting period allows any remaining moisture to redistribute, finishing the texture properly before you disturb the grains.
How to Tell When It’s Done
In my kitchen, I’ve learned to trust the visual and textural cues over the clock for this recipe — but every stove runs a little differently, so check at the 15-minute mark on your first attempt. Once you’ve made it once, you’ll know exactly where your stove lands.
Primary Doneness Test
The rice is done when all the liquid has been absorbed, with small steam holes visible across the surface, and the grains are tender but still distinct rather than mushy or gummy. A fork should fluff the rice into separate, light grains rather than a clumped mass.
Doneness Guide
| Indicator | What It Means | What to Do |
|---|---|---|
| Visible liquid still pooling | Under-cooked | Cover and simmer a few more minutes |
| Steam holes across the surface, liquid absorbed | Perfectly done | Remove from heat and rest |
| Rice tastes crunchy in the center | Needs more time | Add a splash more broth and continue simmering |
| Rice fluffs into separate grains | Perfectly done | Garnish and serve |
| Rice feels gummy or clumped | Overcooked or too much liquid used | Still edible; note the ratio for next batch |
| Bottom layer slightly scorched | Heat too high during simmer | Reduce heat next time; scrape around scorched bits |
Visual Signs It’s Done
- The surface shows small steam holes where liquid has fully evaporated and absorbed
- The color is an even reddish-orange throughout, not patchy or pale in spots
- The grains look separate and slightly glossy rather than clumped together
- A fork lifted through the rice shows individual grains falling apart cleanly
- The aroma has shifted from raw tomato and onion to a warm, toasted, cumin-forward smell
It’s Not Right — What to Do Now
- Rice turned out mushy: Too much liquid was used, or it simmered too long — reduce liquid slightly next batch
- Rice tastes bland: Toasting step was skipped or rushed — always toast until genuinely golden and fragrant
- Bottom layer scorched: Heat was too high during the simmer — use low heat and a heavy-bottomed pot
- Rice stayed crunchy: Needed more liquid or more time — add a splash more broth and continue covered simmering
How to Get the Right Texture

Getting genuinely fluffy, restaurant-quality texture comes down to technique more than any single ingredient. There are three approaches depending on your equipment.
Method 1 — Stovetop Method (Standard Recipe)
Toast the rice, add the liquid and aromatics, then simmer covered on the stovetop. This is the method used throughout this recipe and produces the most reliably fluffy texture with full control over every step.
Method 2 — Rice Cooker Method (Most Hands-Off)
Toast the rice in a separate pan first, then transfer to a rice cooker along with the blended tomato mixture, broth, and seasonings, cooking on the standard white rice setting. This method is completely hands-off once everything is combined, though the toasting step still needs to happen separately beforehand.
Method 3 — Oven-Baked Method (Best for Large Batches)
Combine the toasted rice with all the liquid and aromatics in a covered baking dish, then bake at 375°F for 20–25 minutes. This method works especially well when making a larger batch for a crowd, since it frees up stovetop space for other dishes.
Troubleshooting Quick Reference
| Problem | Cause | Fix |
|---|---|---|
| Too sticky, clumped | Too much liquid or short-grain rice used | Use the exact ratio with long-grain rice |
| Too dry, hard centers | Not enough liquid or lid not sealed tightly | Add a splash more broth and continue simmering covered |
| Uneven cooking | Lid lifted during simmering | Keep covered the entire simmer time |
| Bland flavor | Toasting step skipped | Always toast rice until golden before adding liquid |
What to Serve With It
Classic Pairings That Always Work
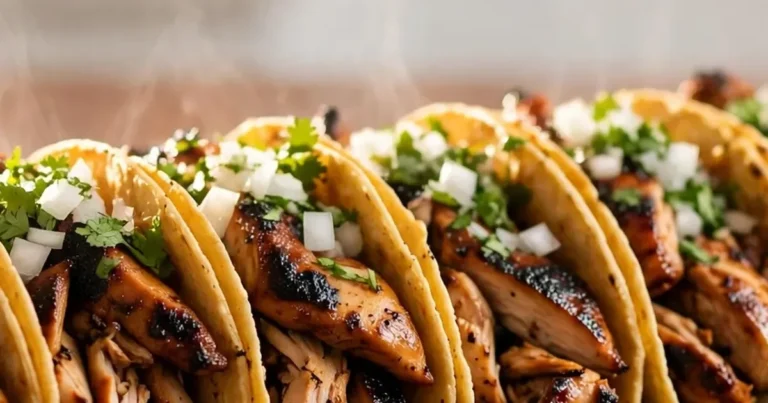
- Tacos — the single most classic pairing, rounding out any taco night spread
- Refried beans — a traditional side that pairs naturally alongside this dish
- Grilled fajitas — the rice soaks up extra juices from the fajita filling
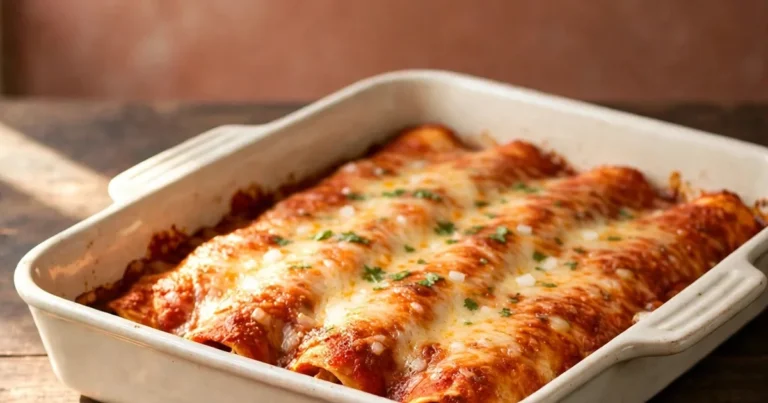
- Enchiladas — a standard combination at nearly any Mexican-inspired dinner
- Grilled chicken or steak — a simple protein pairing that lets the rice shine as the flavorful side
Comfort Food Pairings
- Queso dip — for a fully indulgent Mexican-inspired spread
- Chili con carne — serve the rice as a base underneath a hearty bowl of chili
- Carnitas — the classic combination found at most taquerias
- Quesadillas — a cheesy, crispy side that complements the rice’s flavor
Lighter Options
- Grilled fish tacos — a lighter protein pairing alongside the flavorful rice
- A simple side salad with lime vinaigrette — adds freshness without competing with the rice
- Steamed vegetables — a neutral side that lets the rice carry the meal’s flavor
6 Ways to Use Leftover Mexican Rice

Leftover rice can become several completely different meals. Here are 6 ways to use it.
Mexican Rice Stuffed Peppers
What you need: Leftover rice, bell peppers, halved and seeded, shredded cheese.
How to assemble: Fill pepper halves with leftover rice, top with cheese, and bake at 375°F for 20 minutes until the peppers are tender.
One tip: Mix in a little shredded chicken or black beans before filling for a more complete meal.
Mexican Rice Burrito Bowl
What you need: Leftover rice, black beans, shredded chicken, toppings of choice.
How to assemble: Layer leftover rice in a bowl with beans, chicken, and favorite taco toppings for a complete burrito bowl.
One tip: Reheat the rice separately first with a splash of broth — it keeps the grains from drying out when combined with other ingredients.
Mexican Rice Soup
What you need: Leftover rice, 4 cups chicken broth, shredded chicken.
How to assemble: Simmer leftover rice in chicken broth with shredded chicken for 10 minutes to turn it into a quick soup.
try another easy weeknight soup here
One tip: This stretches a small amount of leftover rice into a full second meal almost effortlessly.
Mexican Rice Fried Rice
What you need: Leftover rice, 1 egg, extra vegetables.
How to assemble: Scramble an egg in a hot pan, add leftover rice and any extra vegetables, and stir-fry together for 3–4 minutes.
One tip: Day-old rice works far better than freshly made — it fries up without clumping together.
Mexican Rice Taco Filling
What you need: Leftover rice, taco shells, shredded cheese.
How to assemble: Warm leftover rice and spoon into taco shells with cheese and any other usual taco toppings.
One tip: This works especially well as a quick vegetarian taco option using just the rice as the base filling.
Mexican Rice Breakfast Bowl
What you need: Leftover rice, 1 fried egg, salsa.
How to assemble: Reheat leftover rice and top each bowl with a fried egg and a spoonful of salsa.
One tip: A runny yolk mixed through the warm rice adds richness that makes this feel like a completely different meal from dinner the night before.
Storage, Freezing and Reheating Guide
Refrigerator Storage (Up to 5 Days)
This recipe stores in the refrigerator for up to 5 days in an airtight container. The texture firms up slightly when cold, which is completely normal — reheating restores most of its original fluffy consistency.
Can You Make This Ahead of Time?
Yes — this recipe is genuinely excellent for making ahead. Make the full batch up to 2 days before you need it, store covered in the refrigerator, and reheat gently with a splash of broth to restore moisture before serving.
Freezer Storage (Up to 3 Months)
This recipe freezes well for up to 3 months. Cool completely, then portion into individual freezer-safe containers or bags, leaving a little room for expansion. Thaw overnight in the refrigerator before reheating.
This Recipe Works as a Freezer Meal
Make a double batch specifically for the freezer. Portion into labeled containers before freezing so you can pull exactly what you need for a quick side on any busy night. The flavor holds up remarkably well through freezing compared to many other rice dishes.
see another easy freezer meal here
How to Reheat Without Ruining It
| Method | Setting | Time | Notes |
|---|---|---|---|
| Stovetop | Low | 5–6 min | Add a splash of broth, cover, and steam |
| Microwave | 70% power | 2–3 min | Add a splash of water, cover loosely |
| Oven | 325°F | 15 min | Covered with foil; good for larger batches |
Weekly Prep Strategy
Make a full batch on Sunday and portion into containers for the week. This recipe reheats well enough to be a genuinely practical side for multiple meals without needing to remake it from scratch each time.
Recipe Variations Worth Trying
Same technique. Completely different flavor profiles. Master this base recipe first — then try one of these.
Most Popular — Cilantro Lime Mexican Rice
Stir in 2 tablespoons of fresh lime juice and ¼ cup of chopped cilantro right after fluffing with a fork. The bright citrus and fresh herb flavor makes this one of the most requested variations of this recipe, especially alongside fish or shrimp tacos.
International — Arroz Rojo con Chorizo
Brown ¼ cup of crumbled chorizo in the pan before toasting the rice, leaving the rendered fat in the pot for extra flavor. This traditional Mexican approach adds a smoky, spicy depth that transforms the side into something hearty enough to stand closer to a main dish.
Low-Carb — Cauliflower Rice Version
Replace the long-grain rice entirely with riced cauliflower, reducing the liquid significantly since cauliflower releases its own moisture as it cooks. Therefore, you get a similar flavor profile with a fraction of the carbohydrates, though the texture is noticeably different from traditional grain-based rice.
Quick Shortcut — Instant Rice Version
Use instant white rice instead of long-grain, following the same toasting and liquid steps but reducing the simmer time to about 5 minutes according to the instant rice package guidance. This cuts the total cook time significantly while still delivering a reasonably flavorful result.
Fresh and Elevated — Roasted Poblano Mexican Rice
Roast a whole poblano pepper under the broiler until blackened, then peel, seed, and dice it before adding along with the other aromatics in Step 3. The roasted poblano adds a deeper, smokier pepper flavor that elevates this simple side into something more memorable.
Nutrition Information
Per Serving Breakdown (Based on 6 Servings)
| Nutrient | Amount | % Daily Value |
|---|---|---|
| Calories | ~210 | — |
| Total Fat | 5g | 6% |
| Saturated Fat | 0.5g | 3% |
| Cholesterol | 0mg | 0% |
| Sodium | 420mg | 18% |
| Total Carbohydrates | 37g | 13% |
| Dietary Fiber | 1g | 4% |
| Total Sugars | 2g | — |
| Protein | 5g | 10% |
| Vitamin A | 20% DV | — |
According to USDA FoodData Central, long-grain white rice provides a meaningful source of energy with minimal fat — making this Mexican rice recipe a genuinely light, satisfying side alongside its rich flavor.
Dietary Compatibility
| Diet | Compatible | Notes |
|---|---|---|
| Gluten-Free | ✅ | Naturally gluten-free as written |
| Dairy-Free | ✅ | No dairy in this recipe |
| Paleo | ❌ | Rice excluded from strict Paleo guidelines |
| Keto | ❌ | See cauliflower rice variation above to adapt |
| Vegetarian | ✅ | Use vegetable broth in place of chicken broth |
| Vegan | ✅ | Same vegetable broth substitution works for vegan |
To reduce sodium in this recipe, use low-sodium chicken broth and reduce the added salt — the cumin and toasted rice flavor already carry plenty of depth on their own.
8 Mistakes That Ruin Mexican Rice
Every one of these mistakes is fixable. Know them before you start — not after.
❌ Mistake 1: Skipping the Toasting Step
Why it happens: Wanting to save a few minutes. What goes wrong: The rice misses the nutty depth and tends toward a softer, mushier texture without that initial toasting. The fix: Always toast the rice in oil until lightly golden before adding any liquid.
❌ Mistake 2: Using Too Much Liquid
Why it happens: Worrying the rice won’t cook through otherwise. What goes wrong: Excess liquid produces mushy, clumped rice instead of fluffy, separate grains. The fix: Stick to the exact liquid-to-rice ratio called for in the recipe.
❌ Mistake 3: Lifting the Lid During Simmering
Why it happens: Checking on progress out of curiosity. What goes wrong: Escaping steam disrupts the even cooking process and can leave some rice undercooked while other parts overcook. The fix: Keep the lid on the entire simmer time, no exceptions.
❌ Mistake 4: Stirring With a Spoon Instead of Fluffing With a Fork
Why it happens: Habit from other rice dishes. What goes wrong: Stirring breaks the grains and releases excess starch, making the final texture gummy. The fix: Always use a fork to fluff gently at the end.
❌ Mistake 5: Using Short-Grain Rice
Why it happens: Not realizing rice variety matters this much. What goes wrong: Short-grain rice releases significantly more starch, producing a sticky, clumped texture that doesn’t match traditional Mexican rice. The fix: Always use long-grain white rice for the correct texture.
❌ Mistake 6: Skipping the Rest Period
Why it happens: Wanting to serve immediately after the timer goes off. What goes wrong: Fluffing too soon disrupts the final steaming process that finishes the texture properly. The fix: Let the covered pot rest off heat for 5 minutes before fluffing.
❌ Mistake 7: Not Rinsing the Rice First
Why it happens: Skipping what seems like an optional step. What goes wrong: Excess surface starch on unrinsed rice can make the finished texture slightly gummier than necessary. The fix: Give the rice a quick rinse under cold water before toasting.
❌ Mistake 8: Cooking at Too High a Heat
Why it happens: Trying to speed up the simmering time. What goes wrong: High heat can scorch the bottom layer of rice while the top stays undercooked. The fix: Always reduce to low heat once the liquid comes to a boil.
Frequently Asked Questions
Why is my Mexican rice mushy?
The most common cause is using too much liquid relative to the amount of rice, which this recipe’s exact ratio is specifically designed to avoid. The second most common cause is stirring with a spoon at the end instead of gently fluffing with a fork, which breaks the grains and releases excess starch. Sticking to the precise liquid measurements and always using a fork for fluffing solves this issue in nearly every batch.
Do you rinse rice before making Mexican rice?
Yes — a quick rinse under cold water before toasting removes excess surface starch that can contribute to a gummier final texture. This step takes only a few seconds and genuinely improves how distinct and fluffy the grains turn out once cooked. Skipping it won’t ruin the dish entirely, but it’s a simple habit that noticeably improves the result.
What is the difference between Mexican rice and Spanish rice?
Mexican rice and Spanish rice are often used interchangeably, though traditional Spanish rice typically relies more heavily on saffron for color and a more subtle flavor profile, while Mexican rice leans on tomato, cumin, and chili powder for its characteristic reddish-orange color and bolder, more pronounced taste. In most American households, the two terms describe essentially the same dish, with regional and family recipes shaping small variations in either direction.
Can you make Mexican rice ahead of time?
Yes — this recipe is genuinely excellent for making ahead. Make the full batch up to 2 days before you need it, store covered in the refrigerator, and reheat gently with a splash of broth to restore the moisture and fluffy texture before serving.
What do you serve with Mexican rice?
Tacos and refried beans are the most classic pairings, rounding out a complete taco night spread. It also works alongside grilled fajitas, enchiladas, and simple grilled chicken or steak as a flavorful, filling side. For a lighter meal, fish tacos or a simple side salad both pair well without competing with the rice’s rich, savory flavor.
Can you freeze Mexican rice?
Yes — this Mexican rice recipe freezes well for up to 3 months. Cool completely before portioning into individual freezer-safe containers, leaving a little room for expansion. Thaw overnight in the refrigerator and reheat gently on the stovetop or microwave with a splash of broth to restore moisture.
How long does Mexican rice last in the fridge?
This Mexican rice recipe lasts up to 5 days in the refrigerator stored in an airtight container. The texture firms up slightly when cold, which is completely normal, and reheating with a splash of broth restores most of its original fluffy consistency.
Why does my Mexican rice taste bland?
The most common cause is skipping or rushing the toasting step, which is where much of the dish’s depth of flavor develops before any liquid is even added. Using too little cumin, or old spices that have lost their potency, also contributes to a flatter overall taste. Toasting the rice until genuinely golden and fragrant, and using fresh spices, both make a measurable difference in the final flavor.
Can you make Mexican rice in a rice cooker?
Yes — toast the rice in a separate pan first, since rice cookers don’t typically handle that step well, then transfer the toasted rice to the rice cooker along with the blended tomato mixture, broth, and seasonings, cooking on the standard white rice setting. This method is largely hands-off once everything is combined, though the initial toasting step still needs to happen on the stovetop beforehand.
Why is my Mexican rice sticky instead of fluffy?
This almost always means either too much liquid was used, or short-grain rice was substituted for long-grain, both of which release excess starch and produce a sticky, clumped texture. Stirring with a spoon instead of gently fluffing with a fork at the end can also break the grains and worsen the stickiness. Sticking to the exact ratio, using long-grain rice, and fluffing gently with a fork together solve this problem in nearly every case.
You Might Also Like
Best Chicken Enchiladas

Mexican Rice
Ingredients
Equipment
Method
- Rinse rice briefly. Heat oil in a saucepan over medium heat. Add rice and toast, stirring constantly, 4–5 minutes until lightly golden.
- Blend chopped tomato with ¼ cup onion until smooth. Set aside.
- Add remaining onion, garlic, and carrot to toasted rice. Stir 30 seconds. Add blended tomato mixture, broth, tomato sauce, cumin, and salt. Stir once and bring to a boil.
- Reduce heat to low, cover tightly, and simmer undisturbed 15–18 minutes.
- Remove from heat, rest covered 5 minutes. Fluff with a fork and garnish with cilantro.
Notes
✅ Always fluff with a fork, never stir with a spoon — this keeps the grains separate and fluffy.
🔄 No long-grain rice? Jasmine rice works as a similar substitute.
❄️ Refrigerate up to 5 days or freeze up to 3 months.
📌 Toasting the rice first is the single biggest factor in achieving real flavor and texture.
Make Ahead + Freezer: Make up to 2 days ahead and refrigerate; reheat with a splash of broth. Freeze in individual portions up to 3 months; thaw overnight before reheating.
Did You Make This? Tag @thegildedskillet and leave a ⭐⭐⭐⭐⭐ rating below.
— David | The Gilded Skillet