

Best Pickled Red Onions (Crisp, Tangy, Ready in 10 Minutes)
⭐⭐⭐⭐⭐ Rate this recipe
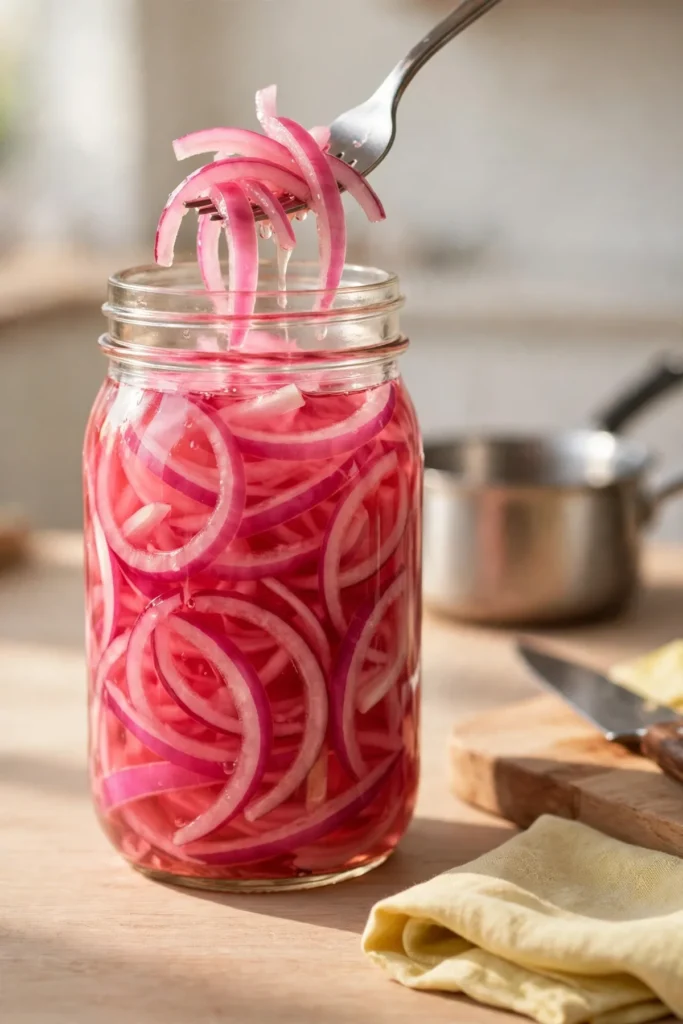
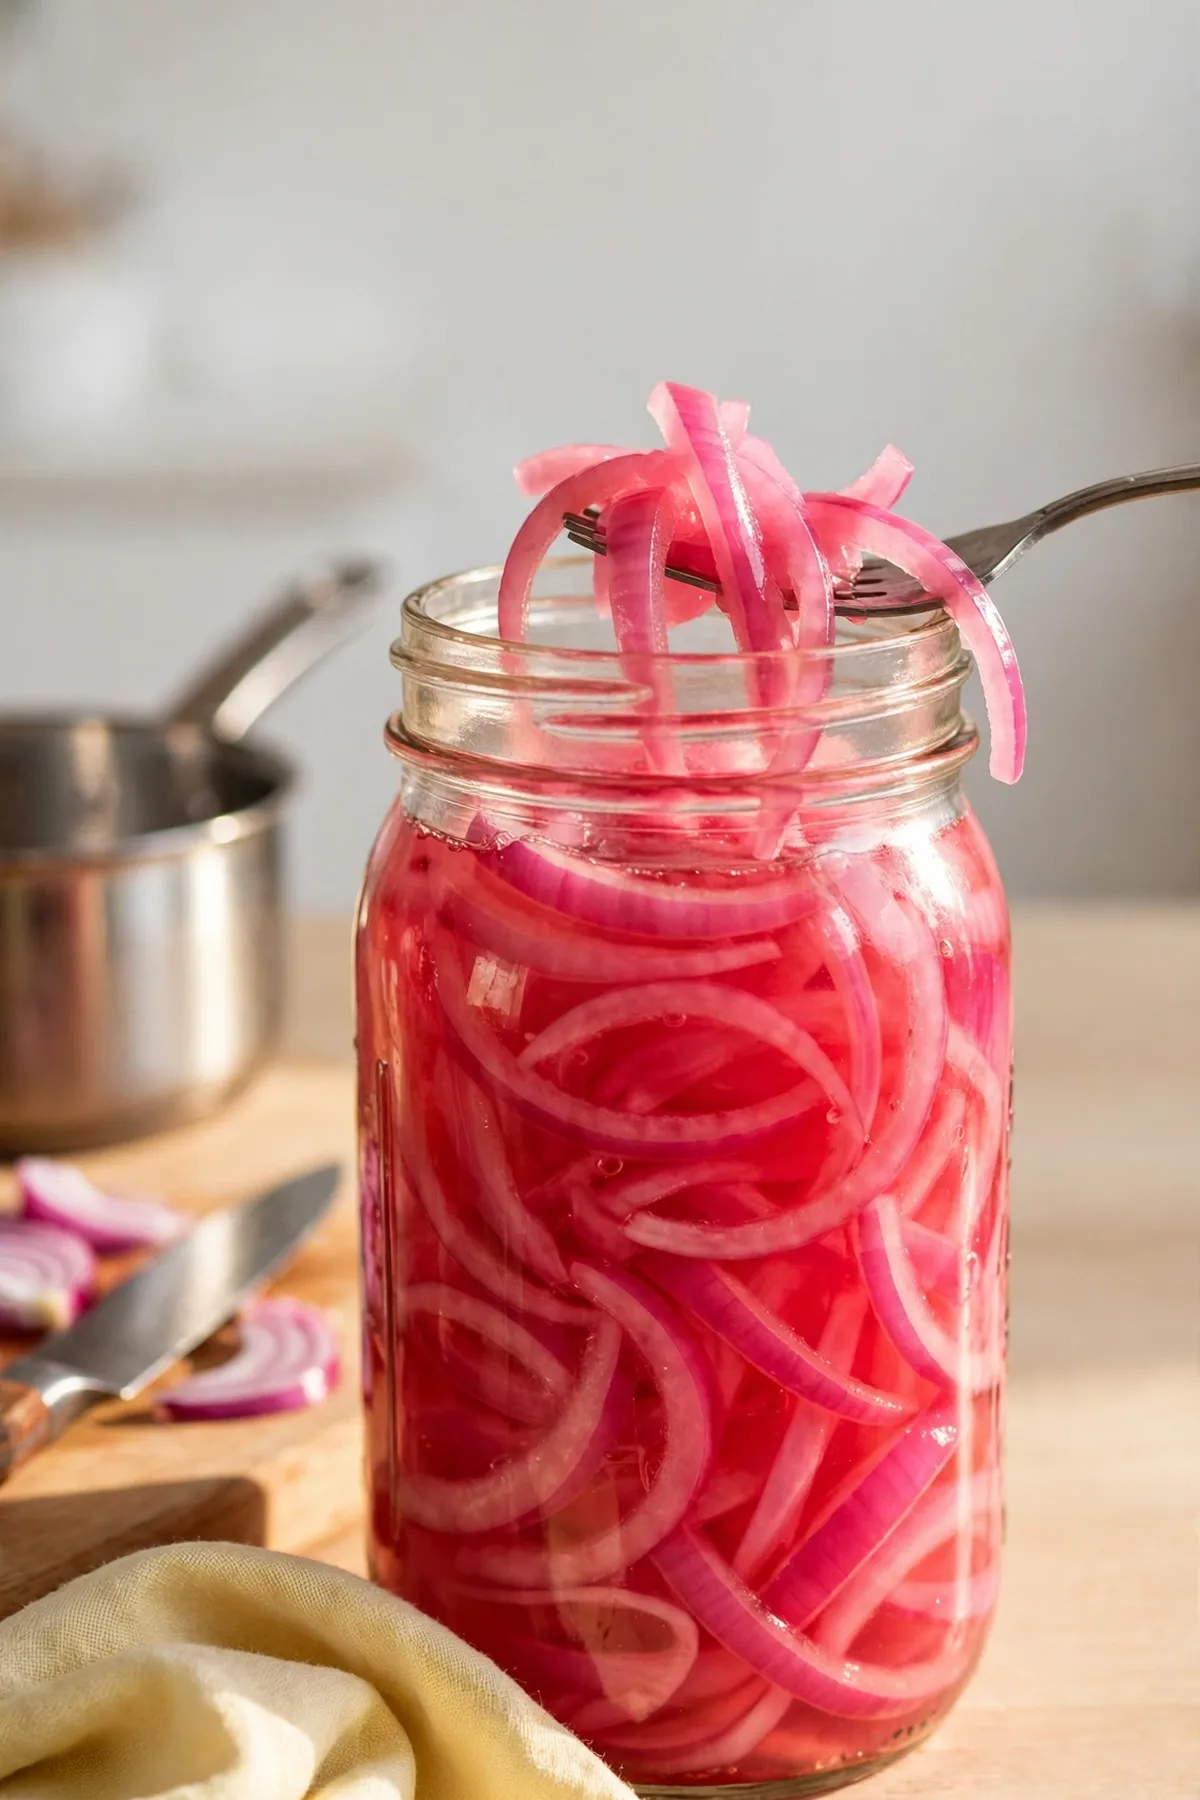
Pickled red onions done right stay genuinely crisp and crunchy while tasting bright and tangy, never going limp or mushy the way some versions do within a day. This pickled red onions recipe uses a specific hot brine ratio plus a quick resting technique that balances tang, sweetness, and salt without overwhelming the onion’s natural texture. The entire batch comes together in just 10 minutes, mostly hands-off while the brine does the work.
This recipe is built for anyone who’s made a batch that turned soft and flavorless within a couple of days and wants a version that stays crisp and vibrant for weeks. If you’ve ever ended up with onions that tasted like straight vinegar, or a brine that turned cloudy and dull — every one of those problems has a specific fix here. It works as a taco topping, a sandwich upgrade, or a bright garnish for nearly any savory dish that needs a little acidity.
Made this already? Scroll down and leave a ⭐⭐⭐⭐⭐ rating below — it helps more than you know.
Once the ratio in this recipe clicks, store-bought jars stop making sense.
⏱ Prep Time: 10 minutes
🕐 Cook Time: 0 minutes
⏳ Total Time: 10 minutes (plus 30 minutes to pickle)
🍽 Servings: Makes about 1½ cups
📊 Difficulty: Easy
💰 Estimated Cost: ~$2 total / ~$0.25 per serving
🧅 Main Item: Thinly sliced red onion in a tangy, sweet vinegar brine
Table of Contents
Why This Pickled Red Onions Recipe Works
- A hot brine poured over the onions, not a cold one. Most recipes mix the brine cold and pour it over raw onions, which takes far longer to actually pickle. This pickled red onions recipe heats the brine first, which speeds up how quickly the onion absorbs the tangy flavor.
👉 another easy make-ahead condiment here
- A balanced ratio of vinegar, sugar, and salt. Too much vinegar alone tastes harsh and one-note. This recipe balances acidity with a touch of sugar and salt, producing a rounder, more complex flavor.
- Thinly sliced onions, cut evenly. Here’s the truth: thick or uneven slices pickle unevenly, leaving some pieces still sharp and raw-tasting while others turn fully tangy.
- A brief rest before serving, not an extended cook. This recipe never actually cooks the onions, which is exactly what keeps them crisp instead of soft and limp.
- Using a jar with a tight lid for storage. This keeps the brine from oxidizing or picking up other smells in the refrigerator, preserving both color and flavor longer.
Understanding the Key Ingredient

The one step worth never skipping in this recipe, no matter how rushed the moment is, is the key technique in Step 2. Skipping it is the most common reason the onions pickle unevenly or stay too sharp. Followed properly, the result comes out right every time.
Why Red Onions Are the Right Choice
Red onions carry both a milder natural bite than yellow or white onions and a pigment that reacts with the acidic brine to turn the slices a vibrant pink, which is exactly what gives this recipe its signature color and balanced flavor. Yellow onions, by comparison, don’t develop the same visual transformation and can taste sharper even after pickling. Additionally, red onion’s slightly sweeter undertone complements the vinegar and sugar in the brine more naturally than a more pungent onion variety would.
Onion Comparison Guide
| Type | Color Change | Flavor After Pickling | Best For |
|---|---|---|---|
| Red onion | Turns vibrant pink | Balanced, mild bite | Best overall result |
| White onion | Minimal color change | Sharper, more pungent | Acceptable but less visually appealing |
| Yellow onion | Minimal color change | Sweeter but less tangy contrast | Works but less traditional |
| Shallots | Slight color change | Milder, more delicate | Good for a subtler version |
How to Choose the Best at the Store
- Look for firm onions with no soft spots. Soft onions can turn mushy more quickly once pickled.
- Choose a deep purple-red color. Paler red onions produce a less vivid pink once pickled.
- Avoid any with green sprouting. This can indicate the onion is past its ideal freshness.
- Buy slightly larger onions for easier slicing. A bigger onion is easier to slice thin and even than a very small one.
- Store unused onions in a cool, dark pantry. This extends their shelf life for future batches.
How Much Do You Need?
| Batch Size | Red Onions | Vinegar |
|---|---|---|
| Small (1 cup) | 1 medium | ½ cup |
| Standard (1½ cups) | 1 large | ¾ cup |
| Double (3 cups) | 2 large | 1½ cups |
| Large batch (4½ cups) | 3 large | 2¼ cups |
Double Batch — How to Scale This Pickled Red Onions Recipe
Doubling works cleanly as long as the jar is large enough to submerge all the onion slices fully in brine, since any slices poking above the liquid won’t pickle evenly. Make a full double batch of brine rather than trying to stretch a single batch across double the onions. The pickling time stays the same regardless of batch size.
Ingredients You’ll Need

This recipe uses just 5 main ingredients. Here is everything broken down.
Main Ingredients
- Red onion — 1 large, thinly sliced. The base of the recipe. Sliced evenly for consistent pickling.
- Apple cider vinegar — ¾ cup. The primary tangy base of the brine.
- Water — ¾ cup. Dilutes the vinegar slightly so the final flavor isn’t overwhelmingly sharp.
- Granulated sugar — 1 tablespoon. Balances the acidity with a touch of sweetness.
- Salt — 1 teaspoon. Rounds out the flavor and helps preserve the onions.
Supporting Ingredients
- Black peppercorns — ½ teaspoon (optional). Adds a subtle background spice.
- Bay leaf — 1 (optional). Adds a mild aromatic depth to the brine.
Optional Additions Table
| Add-In | Amount | Effect |
|---|---|---|
| Garlic clove, smashed | 1 | Adds a subtle savory depth |
| Jalapeño slices | 2-3 | Adds fresh heat throughout |
| Fresh oregano | 1 sprig | Adds an herbal note |
| Red pepper flakes | ¼ tsp | Adds mild background heat |
| Mustard seeds | ½ tsp | Adds a subtle tangy crunch |
Complete Substitutions Reference
| Original | Substitution | Notes |
|---|---|---|
| Apple cider vinegar | White vinegar | Sharper, slightly less complex flavor |
| Apple cider vinegar | Red wine vinegar | Slightly fruitier, still works well |
| Granulated sugar | Honey | Adds a different, slightly floral sweetness |
| Red onion | White onion | Less vibrant color, sharper flavor |
| Water | Omit for a stronger brine | Produces a more intensely tangy result |
What NOT to Add to This Pickled Red Onions Recipe
❌ Cold brine poured over the onions — takes significantly longer to pickle properly than a hot brine
❌ Thick, unevenly sliced onions — pickle inconsistently, leaving some pieces still raw-tasting
❌ Too much vinegar with no water or sugar to balance it — produces a harsh, one-note sourness
❌ A loosely sealed container — allows the brine to oxidize and the onions to pick up other fridge odors
❌ Skipping the resting time entirely — the onions won’t have had enough time to actually absorb the brine’s flavor
❌ Reusing the brine indefinitely for multiple batches — the flavor weakens and the brine becomes less effective each time
Equipment You’ll Need
Choosing the Right Equipment for Pickled Red Onions
| Tool | Purpose | Best For |
|---|---|---|
| Small saucepan | Heating the brine | Quick, even heating |
| Mason jar with lid | Pickling and storage | Airtight seal, easy to see contents |
| Sharp knife | Slicing onions | Even, thin slices |
| Mandoline (optional) | Slicing onions | Fastest, most uniform slices |
Other Tools That Actually Matter
A sharp knife makes a genuine difference in slicing the onion thin and even, which directly affects how evenly the pickled red onions end up flavored throughout the batch. A mandoline speeds this up even further and produces more consistent slices than most people can achieve by hand. A mason jar with a tight-fitting lid is worth having specifically for this recipe, since it keeps the brine sealed and prevents the onions from absorbing other smells in the fridge.
No Mandoline? Alternatives That Work for This Pickled Red Onions Recipe
- Sharp chef’s knife — slice by hand, taking care to keep the slices as thin and even as possible
- Food processor with a slicing attachment — works quickly for a larger batch
- Box grater’s slicing edge — some box graters include a flat slicing blade that works in a pinch
How to Make Pickled Red Onions — Step by Step
Three steps. The entire active process takes under 10 minutes.
Step 1 — Heat the Brine
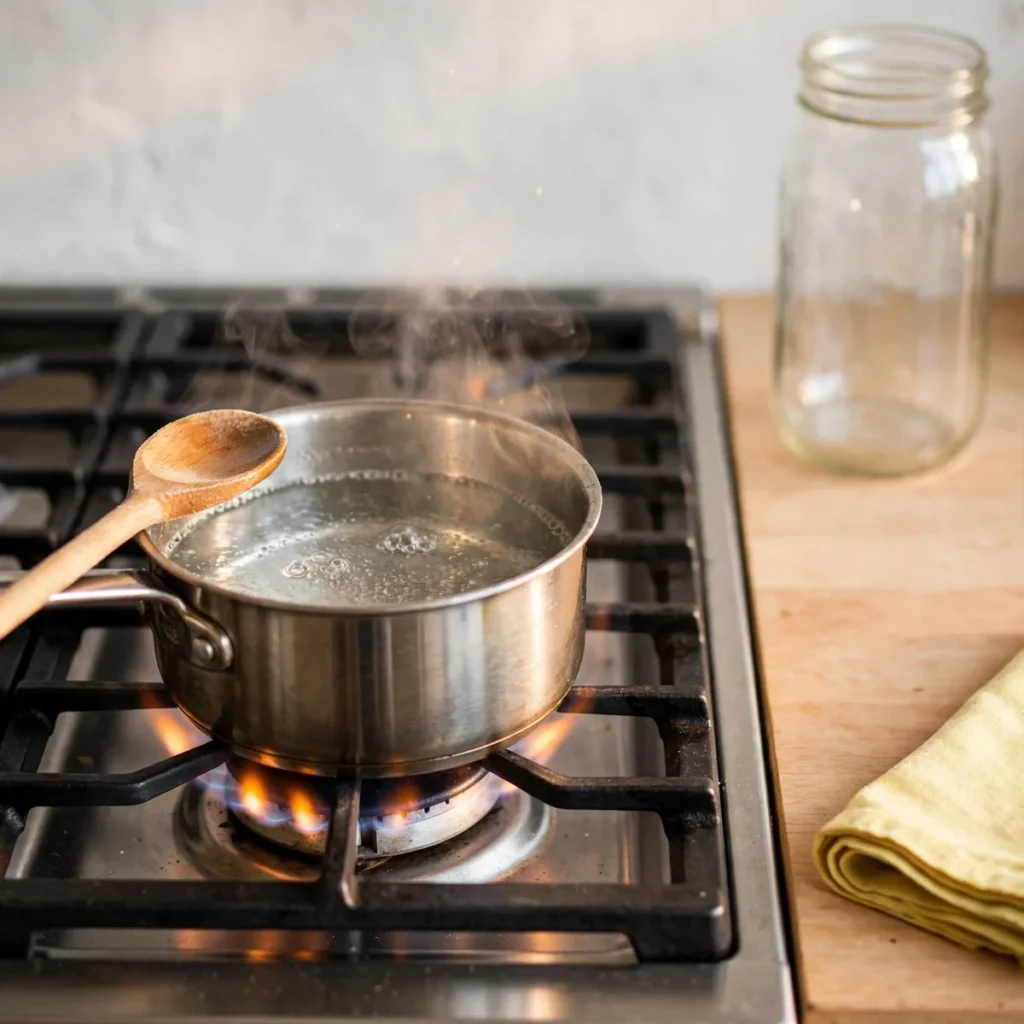
Combine the vinegar, water, sugar, and salt in a small saucepan. Heat over medium heat, stirring occasionally, just until the sugar and salt fully dissolve and the mixture is steaming, about 2–3 minutes. There’s no need to bring it to a full boil.
💡 Pro Tip: Stir the brine as it heats rather than waiting until it’s fully hot — this helps the sugar and salt dissolve more evenly before you’re ready to pour it over the onions.
Step 2 — Slice the Onion Thin and Even (The Key Step)

While the brine heats, thinly slice the red onion into even rounds or half-moons, aiming for slices no thicker than an eighth of an inch. Pack the sliced onion into a mason jar. Most people rush through slicing without much attention to thickness, but uneven slices are exactly why some pieces in a batch stay raw-tasting while others pickle fully. Every batch where the slices varied significantly in thickness came out with inconsistent flavor throughout.
💡 Pro Tip: A mandoline makes this step genuinely faster and more consistent than slicing by hand, especially for a larger batch.
Step 3 — Pour the Brine and Rest

Pour the hot brine over the sliced onions in the jar, making sure they’re fully submerged. Add the peppercorns and bay leaf if using. Let sit at room temperature for 30 minutes before using, or refrigerate for a more intense flavor over a few hours.
👉 another easy condiment recipe here
As a result, pouring the brine while it’s still hot is what allows the onions to start absorbing flavor almost immediately rather than waiting much longer with a cold brine.
💡 Pro Tip: Push down any onion slices poking above the brine’s surface with a spoon or fork — fully submerged slices pickle far more evenly than ones left exposed to air.
How to Tell When It’s Done
Every batch of onions can vary slightly in thickness and sharpness, so taste-test a slice 30 minutes in on the first attempt with this pickled red onions recipe. Once it’s been made once, the exact timing that suits personal taste becomes easy to predict.
Primary Doneness Test
The onions are ready to eat once they’ve turned a vibrant pink color throughout and taste tangy rather than sharply raw, while still offering a genuine crisp bite when chewed.
Doneness Guide
| Indicator | What It Means | What to Do |
|---|---|---|
| Onions still pale purple, sharp-tasting | Not pickled long enough | Let sit 15–30 more minutes |
| Onions vibrant pink, tangy, still crisp | Perfectly done | Ready to use or refrigerate |
| Onions soft, limp | Pickled too long or brine too hot when poured | Still edible; note for future batches |
| Brine cloudy, not clear | Sugar or salt wasn’t fully dissolved | Strain and reheat the brine briefly if needed |
| Color uneven across the batch | Slices weren’t evenly thin | Slice more evenly next time |
| Flavor tastes harsh, overly sour | Not enough sugar relative to vinegar | Add a touch more sugar and stir to dissolve |
Visual Signs It’s Done
- The onion slices have shifted from a pale purple color to a vibrant, even pink throughout
- The brine looks clear rather than cloudy, confirming the sugar and salt fully dissolved
- The slices still hold their shape and crisp texture rather than looking limp or translucent
- A taste test shows a balanced tang rather than a sharp, raw onion bite
- The aroma has shifted from a sharp, raw onion smell to a tangy, slightly sweet one
It’s Not Right — What to Do Now
- Onions stayed too sharp: Not enough resting time — let them sit longer, ideally a few hours in the fridge
- Onions turned mushy: Brine was likely boiling hot when poured, or they sat too many days past their best — use a hot but not boiling brine
- Flavor tastes too sour: Not enough sugar in the brine — add a touch more and stir until dissolved
- Color looks dull instead of vibrant pink: Onion wasn’t red variety, or slices were too thick — use a true red onion sliced thin
How to Get the Right Balance of Flavor
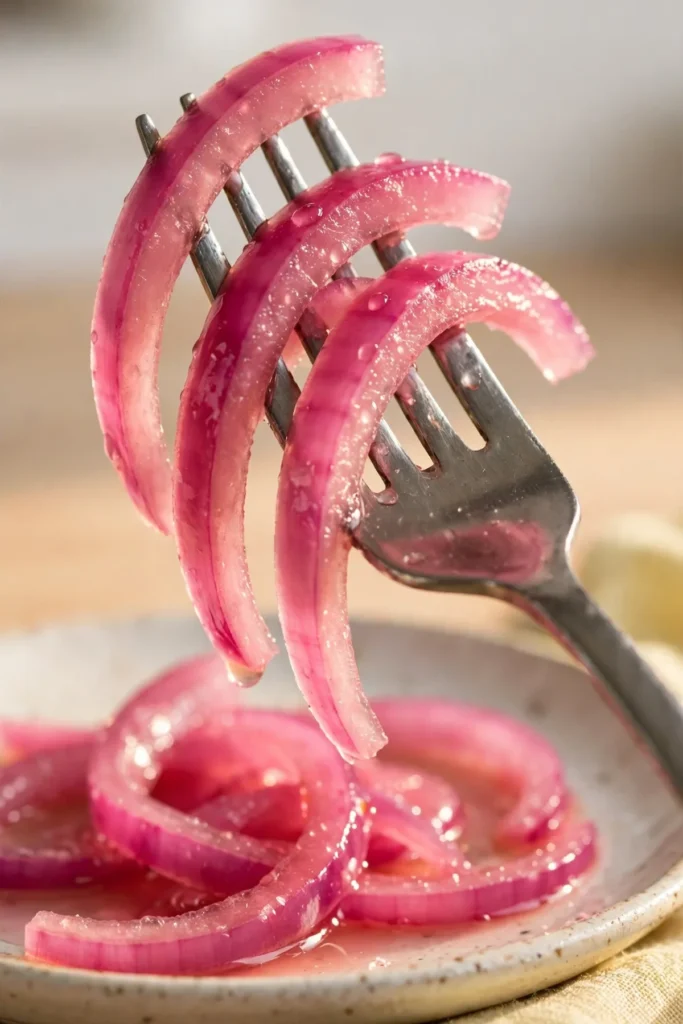
Getting the right balance of tang, sweetness, and salt comes down to the brine ratio more than any single ingredient. There are three approaches depending on your preference.
Method 1 — Standard Balanced Brine (Recipe as Written)
Equal parts vinegar and water with a modest amount of sugar and salt. This is the method used throughout this pickled red onions recipe and produces a well-rounded tang that works for most savory dishes.
Method 2 — Stronger, More Intense Brine
Use straight vinegar with no water dilution, keeping the sugar and salt the same. This produces a noticeably sharper, more intensely tangy result that stands up well against rich, fatty foods.
Method 3 — Sweeter, Milder Brine
Increase the sugar to 2 tablespoons while keeping everything else the same. This produces a milder, slightly sweeter pickle that works especially well for anyone who finds the standard version too sharp.
Troubleshooting Quick Reference
| Problem | Cause | Fix |
|---|---|---|
| Too sour | Not enough sugar relative to vinegar | Add a touch more sugar, stir to dissolve |
| Too sweet | Too much sugar added | Add a splash more vinegar to rebalance |
| Too salty | Too much salt measured | Add a bit more water to dilute slightly |
| Flat, underwhelming flavor | Brine wasn’t heated enough to fully dissolve sugar and salt | Reheat briefly and stir thoroughly |
What to Serve With It
Classic Pairings That Always Work
- Tacos — the single most classic pairing, adding brightness to any filling
- Pulled pork sandwiches — cuts through the richness of slow-cooked meat
- Grilled fish — a tangy contrast that complements a simple piece of fish
- Burgers — a sharper, brighter alternative to raw onion slices
- Avocado toast — adds acidity and color to a simple breakfast
Comfort Food Pairings
- Nachos — scattered over the top for a tangy contrast to rich cheese and toppings
- Grain bowls — brightens up a heavier bowl of rice, beans, and protein
- Hot dogs — a flavorful upgrade from standard raw onion
- Fried chicken sandwiches — the acidity balances the richness of the fried coating
Lighter Options
- Salads — adds a pop of color and tang without extra calories
- Hummus or dips — a bright garnish on top of a simple spread
- Grain or lettuce wraps — adds flavor without significantly changing the nutritional profile
6 Ways to Use Leftover Pickled Red Onions
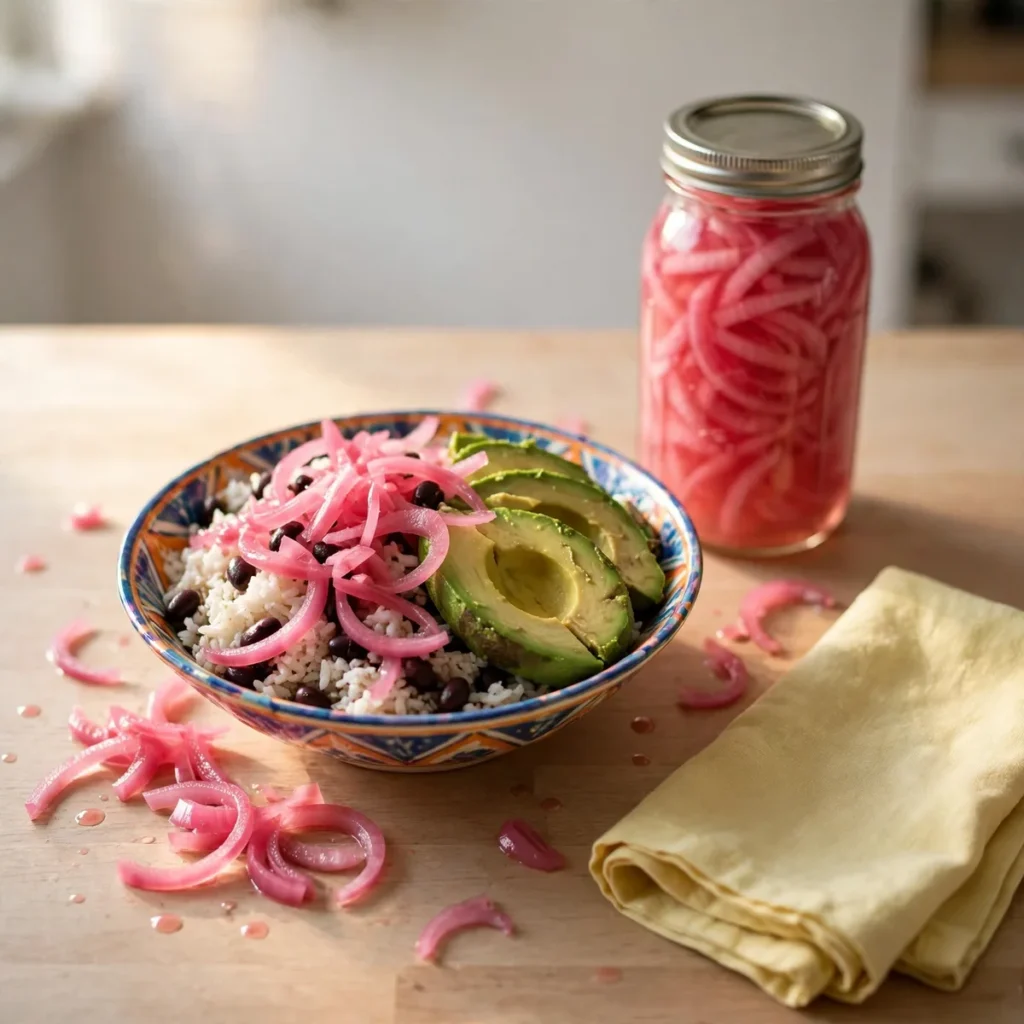
Leftover pickled red onions stay useful well past the first meal they’re made for. Here are 6 ways to use them.
Pickled Onion Grain Bowl
What you need: Leftover pickled onions, cooked rice or grains, beans, avocado.
How to assemble: Scatter leftover pickled onions generously over a grain bowl with beans and avocado.
One tip: Drain the onions slightly before adding them to avoid making the bowl’s other ingredients too wet.
Pickled Onion Egg Salad
What you need: Leftover pickled onions, chopped, hard-boiled eggs, mayonnaise.
How to assemble: Stir chopped leftover pickled onions into a standard egg salad mixture for extra tang.
One tip: Chop the onions finely so they distribute evenly throughout the egg salad.
Pickled Onion Pizza Topping
What you need: Leftover pickled onions, pizza with cheese.
How to assemble: Scatter leftover pickled onions over a finished, baked pizza right before serving.
👉 try another easy appetizer recipe here
One tip: Add them after baking, not before — the brine can make the pizza slightly soggy if baked on top.
Pickled Onion Potato Salad
What you need: Leftover pickled onions, chopped, potato salad.
How to assemble: Fold chopped leftover pickled onions into a classic potato salad for extra brightness.
One tip: This works especially well in a mayo-based potato salad, where the tang cuts through the richness.
Pickled Onion Deviled Eggs
What you need: Leftover pickled onions, minced, hard-boiled eggs.
How to assemble: Mix minced leftover pickled onions into the yolk filling before refilling the egg whites.
One tip: Save a few whole slices to garnish the top of each deviled egg for a decorative touch.
Pickled Onion Brine for a Second Quick Pickle
What you need: Leftover brine (once onions are gone), sliced cucumbers or radishes.
How to assemble: Use the leftover brine to quickly pickle another vegetable, letting it sit for 30 minutes to an hour.
One tip: The brine will be slightly weaker after the first batch, so expect a milder result the second time around.
Storage, Freezing and Reheating Guide
Refrigerator Storage (Up to 2 Weeks)
This pickled red onions recipe stores in the refrigerator for up to 2 weeks in a tightly sealed jar. The flavor actually deepens over the first few days as the onions continue absorbing the brine.
Can You Make This Ahead of Time?
Yes — this recipe is specifically designed to be made ahead, since the onions need at least 30 minutes to pickle anyway. Make a batch at the start of the week to have on hand for whatever meals come up, since the flavor only improves over the first several days.
Freezer Storage (Not Recommended)
Freezing isn’t recommended for this recipe, since the texture turns mushy and unpleasant once thawed. The crisp bite that makes these worth making in the first place doesn’t survive the freezing and thawing process.
This Recipe Works as a Make-Ahead Pantry Staple
Make a batch specifically to keep on hand for whenever a meal needs a quick, tangy topping. Having this pickled red onions recipe pre-made eliminates the need to slice and brine fresh onions every single time a dish could use one.
👉 see more make-ahead side dish ideas here
How to Freshen Up a Batch That’s Started to Fade
| Method | Setting | Time | Notes |
|---|---|---|---|
| Add fresh brine | N/A | — | Top off with a small fresh batch if the liquid runs low |
| Strain and re-brine | N/A | 10 min | If flavor has weakened significantly, make a fresh small batch of brine |
| Use within the first week | N/A | — | For the brightest flavor and crispest texture |
Weekly Prep Strategy
Make a batch every week or two and keep it in the fridge as a ready-to-go topping. This pickled red onions recipe stays useful across many different meals without needing to remake it from scratch each time.
Recipe Variations Worth Trying
Same technique. Completely different flavor profiles. Master this base recipe first — then try one of these.
Most Popular — Jalapeño Pickled Red Onions
Add 2–3 sliced jalapeños to the jar along with the onions before pouring in the brine. The added heat makes this one of the most requested variations of this pickled red onions recipe for anyone who wants a spicier topping.
International — Mexican-Style Pickled Onions (Cebollas Encurtidas)
Add a few slices of habanero and a pinch of dried Mexican oregano to the brine, following the traditional Yucatecan approach to pickled onions. This version leans spicier and more aromatic than the standard recipe, often served alongside cochinita pibil and other regional dishes.
Sweet — Honey Pickled Red Onions
Replace the granulated sugar with 2 tablespoons of honey, stirring until it fully dissolves into the warm brine. Therefore, you get a milder, slightly floral sweetness for this pickled red onions recipe that pairs especially well with cheese boards or sandwiches.
Quick Shortcut — No-Heat Brine Version
Skip heating the brine entirely and simply whisk the vinegar, water, sugar, and salt together cold, pouring directly over the onions. This saves a few minutes of active time, though the pickling process takes noticeably longer to reach the same flavor depth.
Fresh and Elevated — Citrus Pickled Red Onions
Add the juice and a few strips of zest from one orange or lime to the brine while it heats. The citrus adds a bright, fruity note that elevates this simple condiment into something more distinctive for a specific dish pairing.
Nutrition Information
Per Serving Breakdown (Based on 1/4 Cup Servings, 6 Total)
| Nutrient | Amount | % Daily Value |
|---|---|---|
| Calories | ~25 | — |
| Total Fat | 0g | 0% |
| Saturated Fat | 0g | 0% |
| Cholesterol | 0mg | 0% |
| Sodium | 130mg | 6% |
| Total Carbohydrates | 6g | 2% |
| Dietary Fiber | 0.5g | 2% |
| Total Sugars | 3g | — |
| Protein | 0.3g | 1% |
| Vitamin C | 4% DV | — |
According to USDA FoodData Central, red onions contain antioxidant compounds called anthocyanins, the same pigments responsible for the vibrant color this pickled red onions recipe develops once the acidic brine is added.
Dietary Compatibility
| Diet | Compatible | Notes |
|---|---|---|
| Gluten-Free | ✅ | Naturally gluten-free as written |
| Dairy-Free | ✅ | No dairy in this recipe |
| Paleo | ✅ | Fits naturally within Paleo guidelines, assuming sugar tolerance |
| Keto | ✅ | Naturally low-carb; the small amount of sugar is spread across the whole batch |
| Vegetarian | ✅ | No meat in this recipe |
| Vegan | ✅ | No animal products in the base recipe |
To reduce sodium in this recipe, cut the salt to ½ teaspoon — the vinegar and sugar still carry enough flavor to balance the result with less added salt.
🍽 PICKLED RED ONIONS
Ingredients
Equipment
Method
- Combine vinegar, water, sugar, and salt in a saucepan. Heat over medium, stirring, until dissolved and steaming, 2–3 minutes.
- Thinly slice the red onion into even rounds. Pack into a mason jar.
- Pour hot brine over the onions, fully submerging them. Add peppercorns and bay leaf if using. Let sit 30 minutes before using, or refrigerate for stronger flavor.
Notes
8 Mistakes That Ruin Pickled Red Onions
Every mistake with this pickled red onions recipe is fixable. Know them before you start — not after.
❌ Mistake 1: Using a Cold Brine
Why it happens: Not wanting to dirty an extra pot for heating. What goes wrong: Cold brine takes significantly longer to actually pickle the onions, leaving them tasting raw for much longer than necessary. The fix: Always heat the brine until the sugar and salt dissolve before pouring it over the onions.
❌ Mistake 2: Slicing the Onion Too Thick
Why it happens: Rushing through the slicing step. What goes wrong: Thick slices pickle unevenly, with some pieces staying sharp and raw-tasting while thinner ones overdo it. The fix: Slice as thin and evenly as possible, ideally with a mandoline.
❌ Mistake 3: Not Fully Submerging the Onions
Why it happens: Overfilling the jar with more onion than the brine can cover. What goes wrong: Any slices poking above the liquid won’t pickle properly and will taste noticeably different from the rest of the batch. The fix: Press the onions down with a spoon so they’re completely covered by brine.
❌ Mistake 4: Using Too Much Vinegar With No Balance
Why it happens: Assuming more vinegar means a stronger, better pickle. What goes wrong: Straight vinegar with no sugar or water produces a harsh, one-note sourness instead of a balanced tang. The fix: Stick to the recipe’s ratio of vinegar, water, sugar, and salt.
❌ Mistake 5: Not Fully Dissolving the Sugar and Salt
Why it happens: Pulling the brine off the heat too early. What goes wrong: Undissolved sugar and salt settle at the bottom of the jar instead of flavoring the brine evenly. The fix: Stir and heat until the mixture looks completely clear, with no visible granules.
❌ Mistake 6: Storing in a Loosely Sealed Container
Why it happens: Using whatever container happens to be on hand. What goes wrong: A loose lid lets the brine oxidize faster and allows the onions to pick up other smells from the fridge. The fix: Use a jar with a genuinely tight-fitting lid.
❌ Mistake 7: Letting the Batch Sit Too Many Days Past Peak
Why it happens: Forgetting about a batch tucked in the back of the fridge. What goes wrong: Even properly made pickled onions soften and lose some crispness the longer they sit, especially past the two-week mark. The fix: Use within 2 weeks for the best texture and flavor.
❌ Mistake 8: Using a Non-Red Onion Variety
Why it happens: Grabbing whatever onion is on hand. What goes wrong: White or yellow onions don’t develop the same vibrant pink color and can taste sharper even after pickling. The fix: Always use true red onions for the color and flavor this recipe is known for.
Frequently Asked Questions
Why are my pickled onions still crunchy and not pickled enough?
The most common cause is not letting them rest long enough, since even a properly made hot brine needs at least 30 minutes to fully penetrate the onion slices. Using a cold brine instead of a hot one is the second major cause, since cold liquid takes considerably longer to achieve the same tangy result. Heating the brine and allowing the full resting time solves this issue in nearly every batch of this pickled red onions recipe.
How long do you need to pickle red onions before eating them?
A minimum of 30 minutes at room temperature is enough for a noticeably tangy result, though refrigerating for a few hours or overnight develops even more depth of flavor. The onions remain genuinely crisp throughout this window, so there’s no real downside to waiting a bit longer beyond the minimum 30 minutes if time allows.
What vinegar is best for pickled red onions?
Apple cider vinegar is the best choice for this recipe, offering a balanced tang with a subtle fruity note that complements the onion’s natural sweetness. White vinegar works as a sharper, more neutral substitute, while red wine vinegar adds a slightly different, fruitier complexity. All three work well, so the choice often comes down to whatever vinegar is already on hand or personal preference.
Can you make pickled red onions ahead of time?
Yes — this recipe is specifically designed to be made ahead, since the onions need at least 30 minutes to pickle regardless of when they’ll actually be eaten. Making a batch at the start of the week means having a ready-to-go topping on hand for several days’ worth of meals, and the flavor only improves over the first few days in the fridge.
What do you serve with pickled red onions?
Tacos are the most classic pairing, adding brightness and acidity to nearly any filling. Pulled pork sandwiches and burgers both benefit from the tangy contrast against rich, fatty meat. For something lighter, salads, grain bowls, and avocado toast all work well with a scattering of this pickled red onions recipe on top.
Can you freeze pickled red onions?
Freezing isn’t recommended for this recipe, since the texture turns mushy and loses the crisp bite that makes pickled onions worth making in the first place once thawed. These are genuinely a refrigerator-only condiment, best used within the 2-week storage window rather than frozen for longer-term storage.
How long do pickled red onions last in the fridge?
This pickled red onions recipe lasts up to 2 weeks in the refrigerator stored in a tightly sealed jar. The flavor actually deepens over the first few days as the onions continue absorbing the brine, though the texture gradually softens somewhat the closer the batch gets to the two-week mark.
Why did my pickled onions turn an unappealing color?
This usually means a non-red onion variety was used, since white or yellow onions don’t contain the same pigments that react with the acidic brine to produce the characteristic vibrant pink. Using slices that are too thick can also result in a less even color throughout the batch, since the brine penetrates unevenly. Sticking with true red onions, sliced thin, produces the most consistently vibrant color.
Can you reuse the brine for a second batch?
Yes, though the flavor will be noticeably weaker the second time around, since much of the salt and sugar has already been absorbed by the first batch of onions. For the best results, treat a reused brine as a quicker, milder pickle rather than expecting the same intensity as a fresh batch, or simply make a fresh small batch of brine if a stronger result is needed.
Why do my pickled onions taste bland?
The most common cause is not using enough salt or sugar relative to the vinegar, which leaves the brine tasting flat and one-dimensional rather than properly balanced. Using a weak or reused brine without adjusting the ratio can also leave the final result underwhelming. Tasting the brine before pouring it over the onions, and adjusting the sugar or salt slightly if it tastes flat, usually catches a bland batch before it’s too late to fix.
You Might Also Like
Best Scones
