

Best Breakfast Casserole (Fluffy, Ready in 60 Minutes)
⭐⭐⭐⭐⭐ Rate this recipe
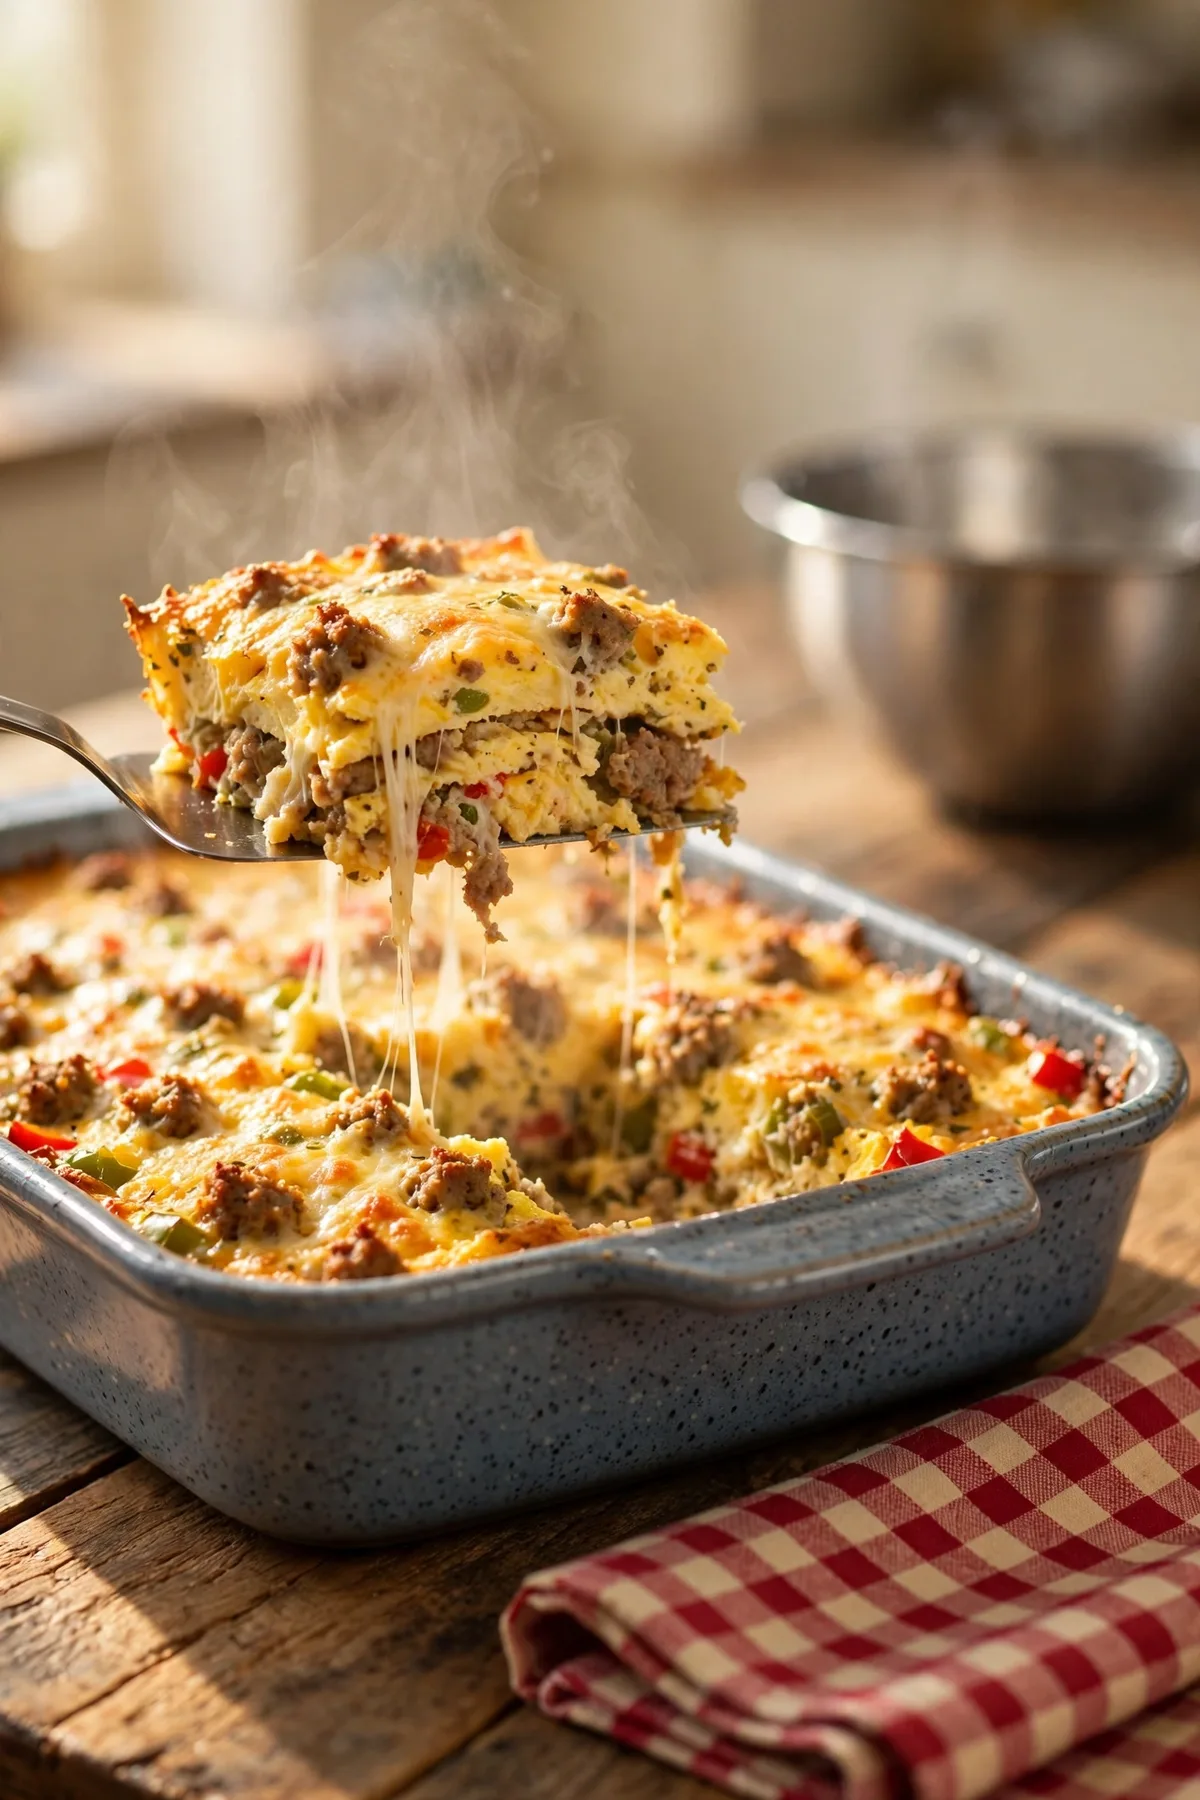
Breakfast casserole done right comes out of the oven genuinely fluffy, with crispy bits of sausage throughout and never a soggy, waterlogged bottom layer — not a dense, rubbery dish that tastes more like a wet sponge than baked eggs. This breakfast casserole recipe uses a specific bread-soaking ratio plus an overnight resting technique that lets every layer absorb flavor evenly without turning mushy. The dish comes together in about 60 minutes of active time, though it genuinely benefits from resting overnight in the fridge first.
This recipe is built for anyone who’s pulled a soggy, bland casserole from the oven and wants a version that turns out fluffy and flavorful every single time. If you’ve ever cut into a dish with a wet, undercooked center, or one that tasted like nothing more than scrambled eggs with bread mixed in — every one of those problems has a specific fix here. It works for a holiday morning spread, a weekend brunch with guests, or a make-ahead breakfast that feeds a crowd with minimal morning effort.
Made this already? Scroll down and leave a ⭐⭐⭐⭐⭐ rating below — it helps more than you know.
Once the overnight soak in this recipe clicks, the dry, bland version most people grew up eating stops being acceptable.
⏱ Prep Time: 20 minutes
🕐 Cook Time: 50 minutes
⏳ Total Time: 70 minutes (plus overnight refrigeration for best results)
🍽 Servings: 8
📊 Difficulty: Easy
💰 Estimated Cost: ~$12 total / ~$1.50 per serving
🍳 Main Item: Baked eggs, sausage, bread, and cheese casserole
Table of Contents
Why This Breakfast Casserole Recipe Works
- An overnight soak in the refrigerator. Most recipes bake the casserole immediately after assembling, which leaves the bread in the center still dry and undercooked by the time the eggs set. This recipe rests overnight, giving the bread time to fully absorb the egg mixture.
👉 another easy make-ahead breakfast here
- Browning the sausage separately and draining the fat. Here’s the truth: sausage fat left in the dish is the single biggest cause of a greasy, soggy casserole. Draining it thoroughly before assembling keeps the final texture properly fluffy.
- Day-old, slightly stale bread instead of fresh. Fresh bread turns to mush almost instantly once soaked in egg. Stale bread holds its structure while still absorbing plenty of flavor.
- A specific egg-to-milk ratio. Too much milk produces a watery, loose casserole, while too little leaves it dense. This recipe uses a tested ratio that bakes into a fluffy, set texture every time.
- Checking doneness with a knife in the center, not just the edges. The edges of a casserole always cook faster than the middle, so testing only the outer portion can lead to an undercooked center that looks deceptively done.
Understanding the Key Ingredient
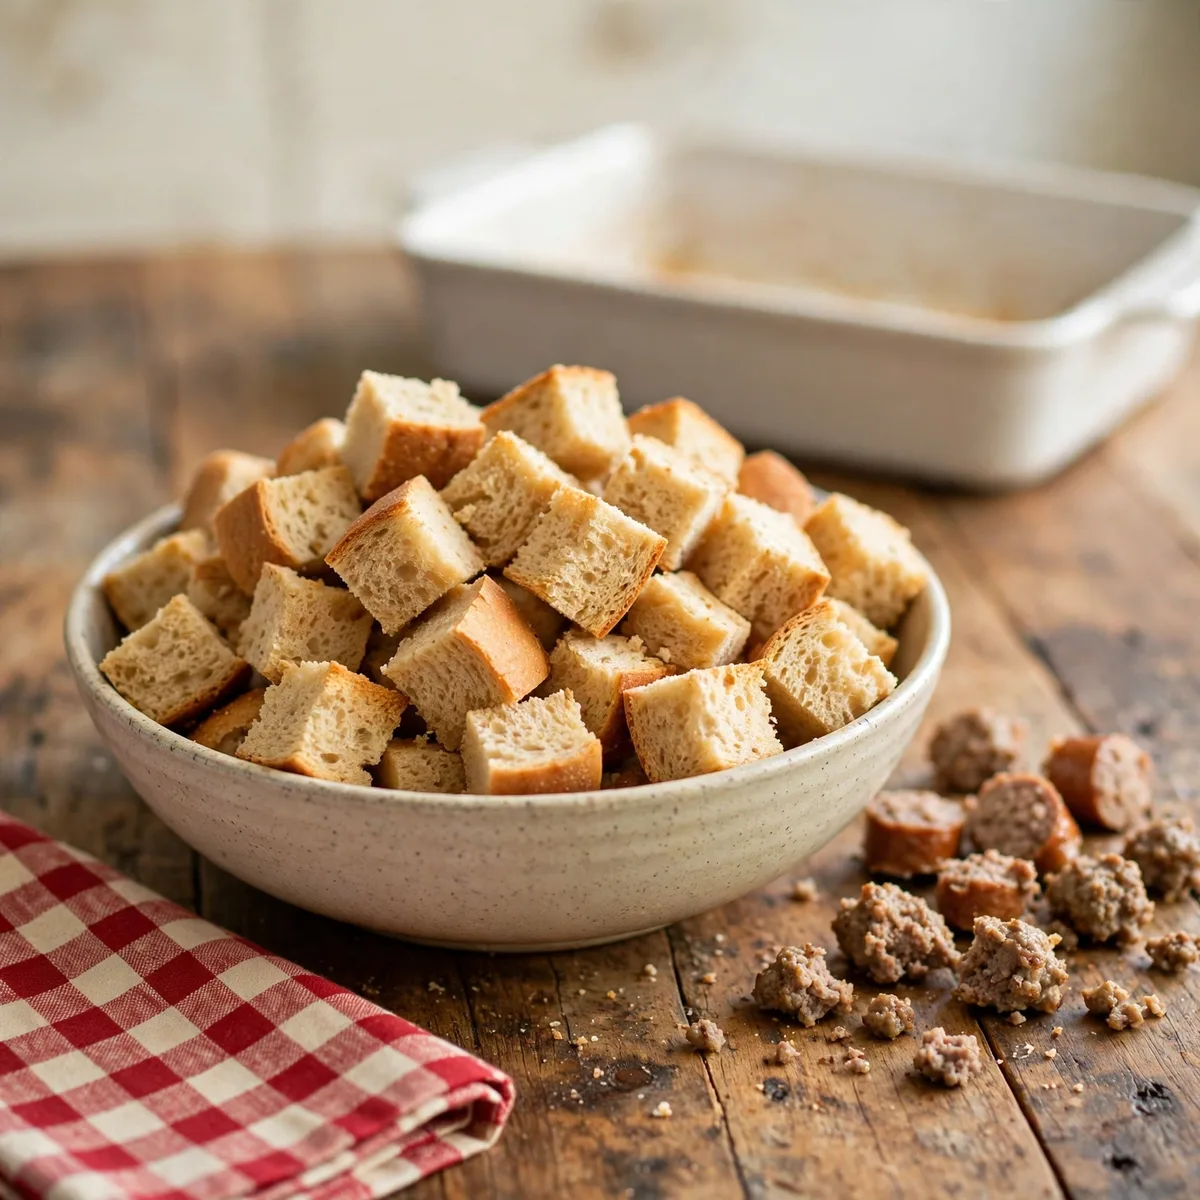
The one step worth never skipping in this recipe, no matter how busy the week is, is the key technique in Step 1. Skipping it is the most common reason the finished dish comes out soggy or unevenly cooked. Followed properly, the result comes out right every time.
Why Day-Old Bread Is the Right Choice
Day-old, slightly stale bread has already lost some of its surface moisture, which is exactly what allows it to absorb the egg mixture evenly without immediately breaking down into mush for this recipe. Fresh bread, by contrast, is already saturated with its own moisture, leaving far less room to soak up the custard-like egg mixture before it becomes oversaturated and soggy. Additionally, slightly firmer bread holds its cubed shape through the overnight soak and baking process, giving the finished casserole distinct layers rather than a uniformly mushy texture.
Bread Comparison Guide
| Type | Moisture Level | Texture Result | Best For |
|---|---|---|---|
| Day-old bread, cubed | Low | Holds shape, absorbs evenly | Best overall result |
| Fresh bread, cubed | High | Breaks down, turns mushy | Not recommended |
| Toasted bread cubes | Very low | Sturdy but can taste dry | Good alternative if no stale bread available |
| Store-bought hash browns | N/A | Different texture, still works | Good substitute for a bread-free version |
How to Choose the Best at the Store
- A sturdy sandwich bread or French bread both work well. Either holds up better than a very soft, enriched bread.
- Buy bread a day or two ahead specifically for this recipe. Letting it sit out, loosely covered, speeds up the staling process.
- Avoid very fresh, soft bread straight from the bakery. It breaks down too quickly once soaked.
- Toast slightly fresh bread if day-old isn’t available. A quick toast in the oven mimics the dried-out texture needed.
- Cut the bread into even cubes. Consistent sizing helps the casserole bake and absorb liquid uniformly.
How Much Do You Need?
| Servings | Bread Cubes | Sausage |
|---|---|---|
| 4 | 3 cups | ½ lb |
| 8 | 6 cups | 1 lb |
| 12 | 9 cups | 1½ lbs |
| 16 | 12 cups | 2 lbs |
Double Batch — How to Scale This Breakfast Casserole Recipe
Doubling works cleanly as long as you use two separate baking dishes rather than one oversized one, since an overcrowded dish bakes unevenly, with the center staying undercooked while the edges finish too quickly. Brown the sausage in batches if needed, draining each batch thoroughly before combining. The overnight soaking time stays the same regardless of batch size.
Ingredients You’ll Need

This recipe uses one main group of ingredients plus a few aromatics. Here is everything broken down.
Main Ingredients
- Day-old bread — 6 cups, cubed. The base layer. Slightly stale bread absorbs the egg mixture without turning mushy.
- Breakfast sausage — 1 lb. The protein base. Browned and drained before assembling.
- Eggs — 8 large. The custard-like binding layer that holds the casserole together.
- Whole milk — 2 cups. Combined with the eggs for the right fluffy, set texture.
- Shredded cheddar cheese — 2 cups, divided. Melts throughout and on top for a classic finish.
- Diced bell pepper — ½ cup. Adds color and a mild, sweet crunch.
- Diced yellow onion — ½ cup. Builds aromatic depth throughout.
Supporting Ingredients
- Salt and black pepper — to taste.
- Garlic powder — ½ teaspoon. Adds a subtle savory depth.
- Fresh chives — for garnish (optional).
Optional Additions Table
| Add-In | Amount | Effect |
|---|---|---|
| Diced ham | 1 cup | Adds a smokier, saltier protein option |
| Fresh spinach | 2 cups | Adds a vegetable component, wilts down during baking |
| Hot sauce | 1 tsp | Adds mild heat throughout |
| Diced tomato | ½ cup | Adds fresh color and juiciness |
| Hash browns, frozen | 2 cups | Adds a heartier, potato-forward layer |
Complete Substitutions Reference
| Original | Substitution | Notes |
|---|---|---|
| Breakfast sausage | Bacon, crumbled | Smokier flavor, similar protein role |
| Whole milk | Half-and-half | Richer, slightly more decadent result |
| Day-old bread | Frozen hash browns, thawed | A bread-free alternative |
| Cheddar cheese | Monterey Jack or a Mexican blend | Similar meltability, milder flavor |
| Bell pepper | Zucchini, diced | Different flavor but similar texture role |
What NOT to Add to This Breakfast Casserole Recipe
❌ Fresh, soft bread straight from the bakery — breaks down too quickly and produces a mushy result
❌ Sausage fat left undrained — the single most common cause of a greasy, soggy finished dish
❌ Skipping the overnight soak — leaves the center of the bread dry and undercooked even after a full bake
❌ Too much milk relative to eggs — produces a watery, loose texture instead of a properly set casserole
❌ Checking doneness only at the edges — the center always cooks slower and can look deceptively done from the outside
❌ Baking straight from the fridge with no adjustment — a cold dish needs a few extra minutes compared to one closer to room temperature
Equipment You’ll Need
Choosing the Right Equipment for Breakfast Casserole
| Tool | Purpose | Best For |
|---|---|---|
| 9×13 ceramic or glass baking dish | Assembling and baking | Standard batch, even heat |
| Large mixing bowl | Whisking eggs and milk | Easy to combine without spilling |
| Large skillet | Browning sausage | Standard sausage prep |
| Whisk | Combining eggs and milk | Smooth, evenly combined custard |
Other Tools That Actually Matter
A 9×13 ceramic or glass baking dish distributes heat more evenly than a metal pan, which matters for this recipe since uneven heat can leave the edges overcooked while the center lags behind. A whisk combines the eggs and milk far more smoothly than a fork, producing a more uniform custard texture throughout. A large skillet with enough surface area lets the sausage brown properly instead of steaming in a crowded pan.
No 9×13 Dish? Alternatives That Work for This Breakfast Casserole Recipe
- Two smaller baking dishes — split the mixture evenly between two dishes if a single large one isn’t available
- A deep casserole dish of similar volume — any oven-safe dish holding roughly the same amount works fine
- A cast iron skillet — works for a slightly different presentation, though bake time may need slight adjustment
How to Make Breakfast Casserole — Step by Step
Five steps, plus an overnight rest for the best texture.
Step 1 — Brown the Sausage and Prep the Bread
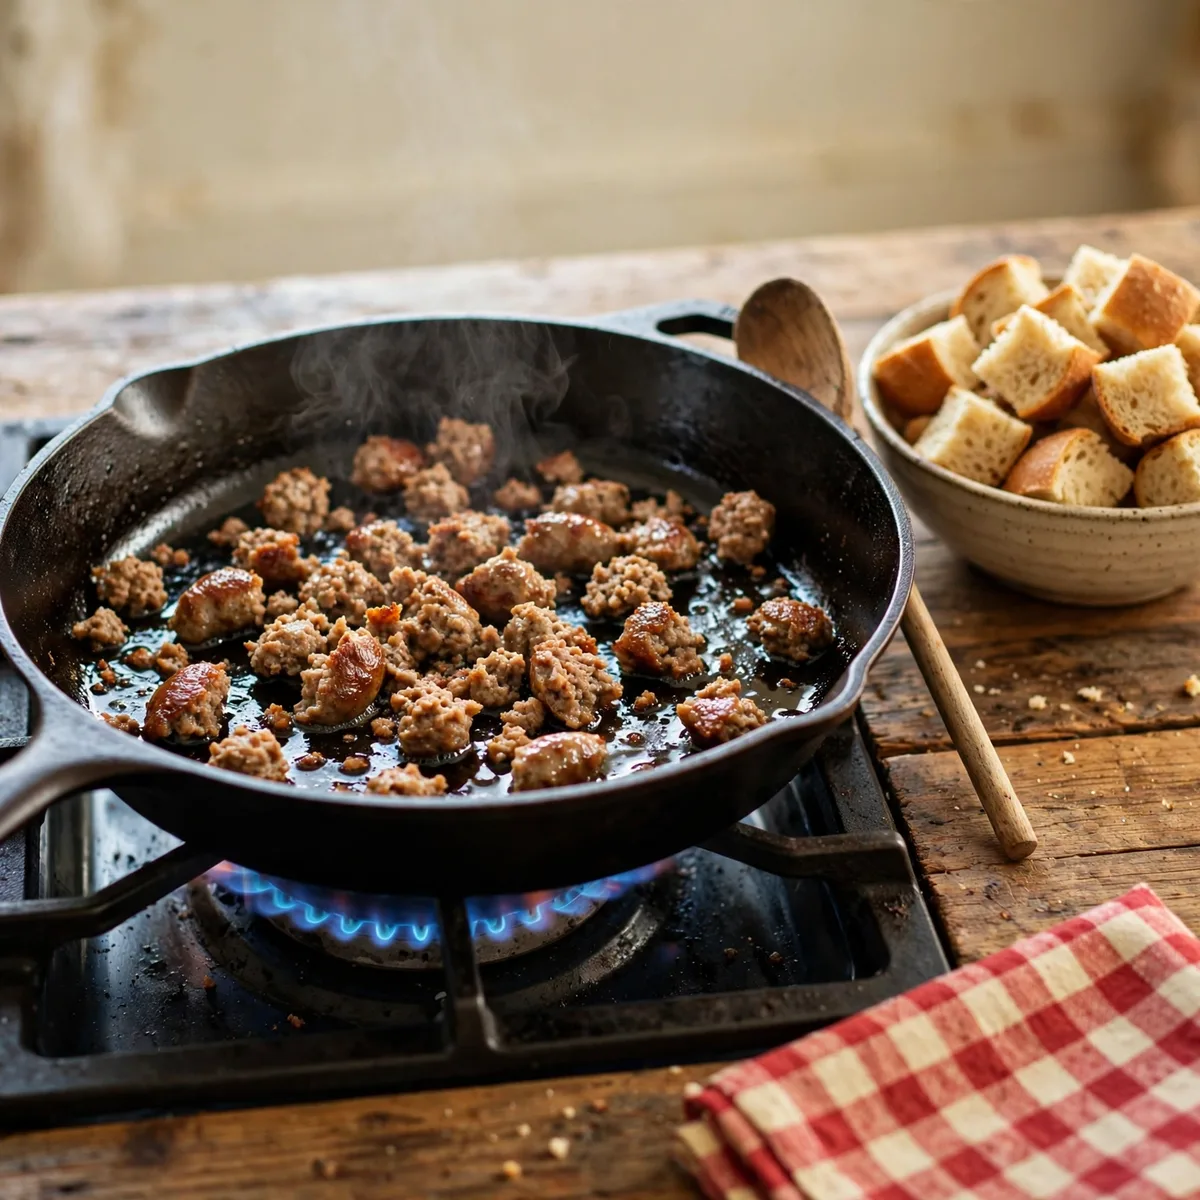
Brown the sausage in a skillet over medium heat, breaking it into crumbles, for 6–8 minutes until no pink remains. Drain thoroughly on paper towels to remove excess fat. Cube the day-old bread into roughly 1-inch pieces. Draining the sausage completely, rather than leaving even a bit of fat behind, is what keeps this recipe from turning greasy and soggy once baked. Every batch where the sausage wasn’t drained well enough came out noticeably heavier and less fluffy.
💡 Pro Tip: Press the browned sausage against paper towels with another paper towel on top, rather than just letting it sit — actively pressing removes more fat than passive draining alone.
Step 2 — Layer the Casserole
Spread the cubed bread evenly in a greased 9×13 baking dish. Scatter the drained sausage, diced bell pepper, diced onion, and half of the shredded cheese evenly over the bread.
💡 Pro Tip: Distribute the sausage and vegetables evenly across the whole dish rather than concentrating them in the center — this ensures every slice gets a fair share of flavor.
Step 3 — Whisk and Pour the Egg Mixture

Whisk together the eggs, milk, salt, pepper, and garlic powder in a large bowl until fully combined. Pour evenly over the layered ingredients in the baking dish, making sure every piece of bread gets some coverage.
👉 another great holiday brunch recipe here
As a result, pouring slowly and evenly, rather than dumping it all in one spot, helps the egg mixture reach every corner of the dish instead of pooling unevenly.
💡 Pro Tip: Gently press down on the bread with a spatula after pouring to help submerge any pieces still poking above the liquid.
Step 4 — Refrigerate Overnight (The Key Step)
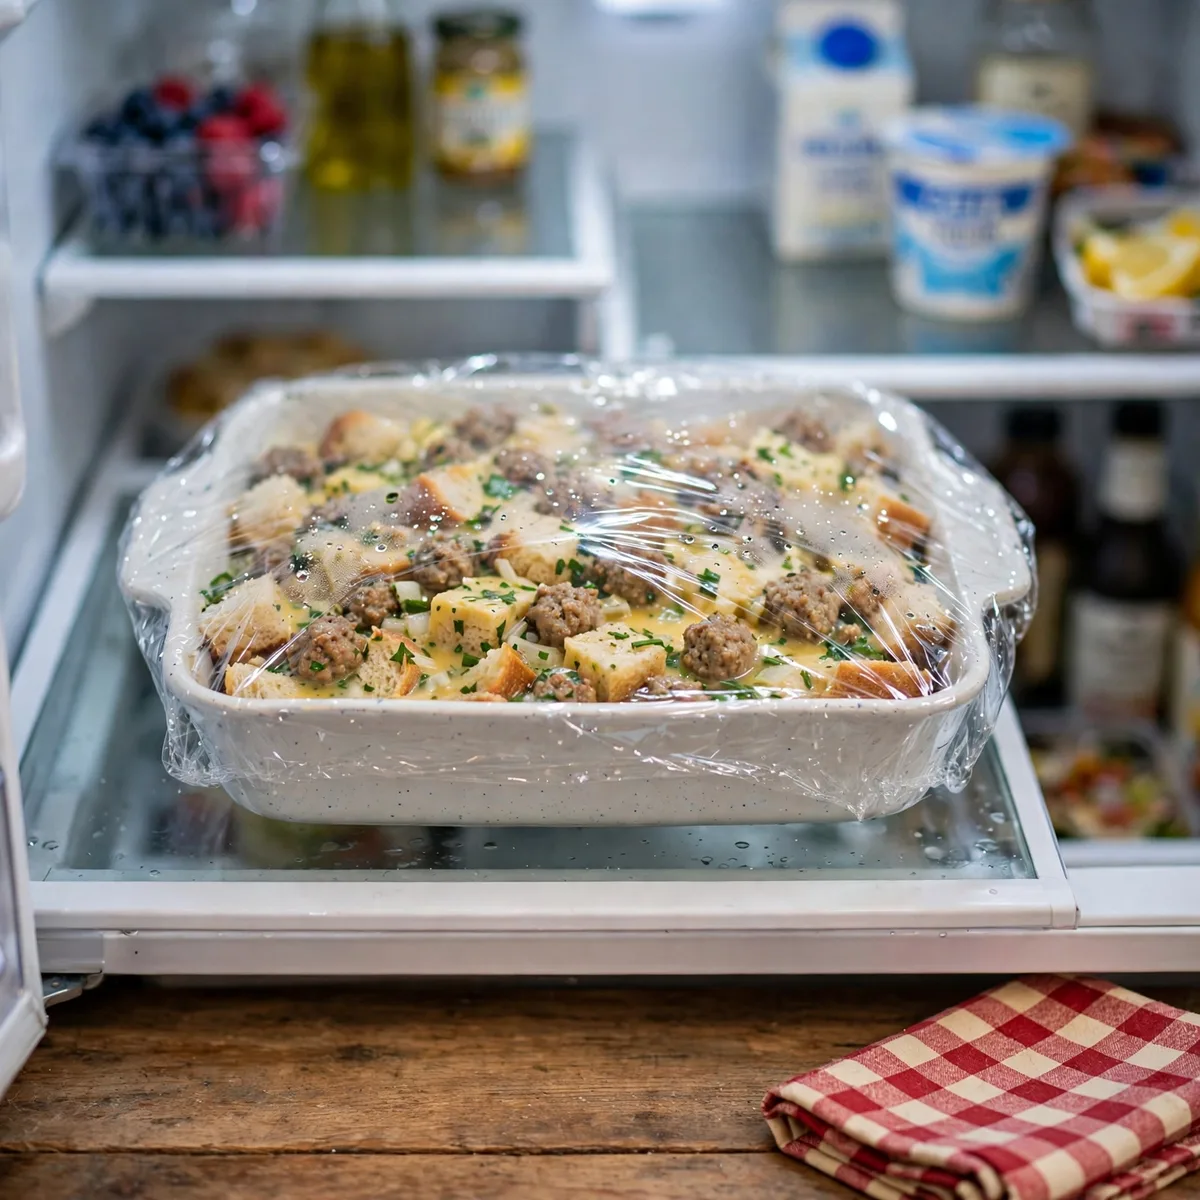
Cover the dish tightly and refrigerate for at least 4 hours, though overnight is genuinely ideal. Most recipes skip this resting period entirely, but it’s exactly what allows the bread to fully absorb the egg mixture, producing a tender, evenly set texture rather than a dry center surrounded by soggy edges.
💡 Pro Tip: If short on time, a minimum of 2 hours still helps noticeably, though overnight remains the most reliable way to guarantee even texture throughout.
Step 5 — Bake

Remove the casserole from the refrigerator about 20 minutes before baking. Preheat the oven to 350°F. Top with the remaining shredded cheese and bake uncovered for 45–50 minutes, until the center is set and a knife inserted comes out clean. Let rest for 5 minutes before slicing.
How to Tell When It’s Done
Every oven runs a little differently, so start checking the center a few minutes early on the first attempt with this breakfast casserole. Once it’s been made once, the exact timing for that specific oven becomes easy to predict.
Primary Doneness Test
The casserole is done when a knife inserted into the very center comes out clean, with no wet egg mixture clinging to it, and the top looks golden and set rather than glossy and jiggly.
Doneness Guide
| Indicator | What It Means | What to Do |
|---|---|---|
| Center jiggly, knife comes out wet | Under-baked | Continue baking 5–10 more minutes |
| Center set, knife comes out clean | Perfectly done | Remove and rest 5 minutes |
| Top very dark, edges dry | Over-baked | Reduce bake time next round |
| Edges set but center still loose | Needs more time | Tent loosely with foil and continue baking |
| Bottom feels soggy after baking | Bread wasn’t dry enough or overnight soak skipped | Still edible; use staler bread next time |
| Cheese on top burnt | Oven too hot or left in too long | Check a few minutes earlier next time |
Visual Signs It’s Done
- The top has turned from pale and glossy to a deep golden-brown color
- The center looks set and slightly puffed rather than wet and jiggly
- A knife inserted into the middle comes out completely clean
- The cheese on top has melted and developed light golden spots in places
- The aroma has shifted from raw egg and dairy to a warm, savory, toasted smell
It’s Not Right — What to Do Now
- Casserole turned out soggy: Sausage fat wasn’t drained enough, or fresh bread was used instead of day-old — drain thoroughly and use properly stale bread
- Center stayed undercooked while edges finished: Didn’t check the true center with a knife — always test the middle specifically, not just the outer portion
- Dish tastes bland: Not enough salt or garlic powder, or vegetables weren’t distributed evenly — taste the egg mixture before pouring and season generously
- Casserole turned rubbery: Overbaked past the point of a clean knife test — pull it as soon as the center sets, rather than baking further “to be safe”
How to Get the Right Texture

Getting a genuinely fluffy, evenly set texture comes down to a few key techniques. There are three approaches depending on your timeline.
Method 1 — Overnight Soak Method (Standard Recipe)
Assemble the casserole the night before, refrigerate overnight, then bake fresh in the morning. This is the method used throughout this recipe and produces the most evenly textured, tender result.
Method 2 — Same-Day Method (Shorter Rest)
Assemble and bake the same day, allowing a minimum 2-hour rest in the refrigerator rather than a full overnight soak. This works in a pinch, though the texture won’t be quite as evenly absorbed as the standard method.
Method 3 — No-Rest Method (Fastest, Less Ideal)
Assemble and bake immediately with no resting time at all, though this is the least reliable approach and more likely to produce an unevenly textured result with a drier center. This method works best only with pre-toasted bread cubes that have already dried out significantly.
Troubleshooting Quick Reference
| Problem | Cause | Fix |
|---|---|---|
| Soggy bottom | Sausage fat not drained enough | Press sausage firmly against paper towels |
| Dry, undercooked center | Skipped the overnight soak | Always allow at least a few hours of resting time |
| Rubbery texture | Overbaked | Pull as soon as a knife comes out clean |
| Uneven texture throughout | Fresh bread used instead of stale | Use properly day-old or toasted bread |
What to Serve With It
Classic Pairings That Always Work
- Fresh fruit salad — adds a light, refreshing contrast to the rich casserole
- Orange juice or coffee — the standard breakfast beverage pairing
- Buttermilk biscuits — a heartier addition for a bigger brunch spread
- Hash brown patties on the side — for anyone wanting even more breakfast potato
- Hot sauce on the table — lets everyone adjust the heat to their own preference
Comfort Food Pairings
- Cinnamon rolls — a sweet pairing that balances the savory casserole
- Grits — a Southern-inspired addition to round out the plate
- Bacon on the side — for extra protein alongside the sausage already in the dish
- Gravy — a rich, indulgent topping for a biscuit served alongside the casserole
Lighter Options
- A simple green salad — adds freshness without heaviness
- Sliced avocado — a creamy, lighter addition alongside a smaller portion
- Smaller portions with extra fruit — balances the richness of the dish
6 Ways to Use Leftover Breakfast Casserole

Leftover casserole can become several completely different dishes. Here are 6 ways to use it.
Breakfast Casserole Hash
What you need: Leftover casserole, cubed, butter.
How to assemble: Cube leftover casserole and pan-fry in butter over medium heat until crispy on the outside and heated through.
One tip: Press the cubes down with a spatula while frying to encourage more even crisping.
Breakfast Casserole Burrito
What you need: Leftover casserole, large flour tortillas, salsa.
How to assemble: Warm leftover casserole, spoon into tortillas with a bit of salsa, and roll into a burrito.
One tip: This works especially well as a portable breakfast for busy mornings during the week.
Breakfast Casserole Sandwich
What you need: Leftover casserole, a slice, English muffin or bread.
How to assemble: Reheat a slice of leftover casserole and tuck it between a toasted English muffin or bread slices.
👉 try another cozy breakfast drink here
One tip: A drizzle of hot sauce inside the sandwich brightens up the leftovers nicely.
Breakfast Casserole Soup
What you need: Leftover casserole, crumbled, 3 cups chicken broth.
How to assemble: Crumble leftover casserole into warm chicken broth and simmer for 5 minutes for a quick, savory soup.
One tip: This stretches a small amount of leftovers into a full second meal almost effortlessly.
Breakfast Casserole Stuffed Peppers
What you need: Leftover casserole, bell peppers, halved and seeded.
How to assemble: Fill pepper halves with crumbled leftover casserole and bake at 375°F for 15 minutes until warmed through.
One tip: Top with a little extra cheese for the last 5 minutes if you want a melty finish.
Breakfast Casserole Quesadilla
What you need: Leftover casserole, tortillas, extra shredded cheese.
How to assemble: Spread leftover casserole inside a folded tortilla with extra cheese and cook in a dry skillet until golden on both sides.
One tip: A thin layer works better than a thick one here — too much filling leaks out during cooking.
Storage, Freezing and Reheating Guide
Refrigerator Storage (Up to 5 Days)
This breakfast casserole stores in the refrigerator for up to 5 days in an airtight container. The flavor actually holds up remarkably well throughout that window, making it a genuinely practical dish for multiple breakfasts.
Can You Make This Ahead of Time?
Yes — this recipe is specifically designed to be made ahead, since the overnight soak is a built-in part of the process rather than an optional step. Assemble it the night before, refrigerate, and bake fresh the next morning for the best possible texture.
Freezer Storage (Up to 2 Months)
This recipe freezes reasonably well for up to 2 months, either baked or unbaked. If freezing unbaked, thaw completely in the refrigerator before baking as directed. If freezing already-baked portions, thaw overnight before reheating.
This Recipe Works as a Freezer Meal
Assemble a double batch specifically for the freezer, baking one fresh and freezing the second unbaked. This means a completely homemade breakfast casserole is ready for a future holiday morning or gathering without any extra work on the day itself.
👉 see more easy freezer breakfast ideas here
How to Reheat Without Ruining It
| Method | Setting | Time | Notes |
|---|---|---|---|
| Oven | 325°F | 15–20 min | Best method; covered with foil to prevent drying out |
| Microwave | 70% power | 1–2 min | Good for individual portions |
| Air fryer | 325°F | 6–8 min | Good for crisping individual slices |
Weekly Prep Strategy
Assemble the casserole over the weekend, bake it once, and portion it for reheating throughout the week. This recipe makes weekday mornings significantly easier when breakfast is already prepped and waiting.
Recipe Variations Worth Trying
Same technique. Completely different flavor profiles. Master this base breakfast casserole first — then try one of these.
Most Popular — Southwest Breakfast Casserole
Add a 4 oz can of diced green chiles and ½ teaspoon of cumin to the egg mixture, and swap the cheddar for a Mexican cheese blend. The warm spice and added heat make this one of the most requested variations of this recipe for anyone who wants a bolder flavor.
International — French-Inspired Quiche Style Casserole
Reduce the bread slightly and add ¼ cup of heavy cream to the egg mixture, following a lighter, more custard-forward French approach. This produces a silkier, less bread-forward texture that leans closer to a crustless quiche than a traditional American casserole.
Lighter — Egg White Version
Replace half the whole eggs with egg whites, using roughly 1½ cups of egg whites in place of 4 whole eggs, and use turkey sausage instead of regular pork sausage. Therefore, you get a noticeably lighter version of this recipe without sacrificing much of the overall texture or flavor.
Quick Shortcut — No-Rest Version with Pre-Toasted Bread
Toast the bread cubes in the oven at 350°F for 10 minutes until dried out before layering, which allows the casserole to be assembled and baked the same day without the usual overnight rest. This cuts the total timeline down significantly for anyone needing it ready faster.
Fresh and Elevated — Breakfast Casserole with Caramelized Onions
Caramelize the diced onion slowly over low heat for 15–20 minutes before adding it to the layers, rather than using it raw. The deeply caramelized onion adds a rich, sweet complexity that elevates this everyday dish into something more special for a holiday morning.
Nutrition Information
Per Serving Breakdown (Based on 8 Servings)
| Nutrient | Amount | % Daily Value |
|---|---|---|
| Calories | ~380 | — |
| Total Fat | 24g | 31% |
| Saturated Fat | 10g | 50% |
| Cholesterol | 240mg | 80% |
| Sodium | 620mg | 27% |
| Total Carbohydrates | 18g | 7% |
| Dietary Fiber | 1g | 4% |
| Total Sugars | 3g | — |
| Protein | 22g | 44% |
| Vitamin A | 15% DV | — |
According to USDA FoodData Central, eggs provide a meaningful source of complete protein and essential vitamins — meaning this recipe delivers substantial nutritional value alongside its rich, savory flavor.
Dietary Compatibility
| Diet | Compatible | Notes |
|---|---|---|
| Gluten-Free | ❌ | Use gluten-free bread or the hash brown variation to adapt |
| Dairy-Free | ❌ | Replace milk and cheese with dairy-free alternatives |
| Paleo | ❌ | Bread and dairy both excluded |
| Keto | ❌ | Omit the bread and use the hash brown or crustless version to adapt |
| Vegetarian | ❌ | Replace sausage with a plant-based breakfast sausage substitute |
| Vegan | ❌ | Same sausage substitution plus egg and dairy replacements needed |
To reduce sodium in this recipe, use a lower-sodium sausage and reduce the added salt — the cheese and garlic powder already carry meaningful flavor on their own.
8 Mistakes That Ruin Breakfast Casserole
Every mistake with this recipe is fixable. Know them before you start — not after.
❌ Mistake 1: Using Fresh Bread Instead of Day-Old
Why it happens: Not planning ahead for stale bread. What goes wrong: Fresh bread is already saturated with moisture and breaks down into mush once soaked in the egg mixture. The fix: Use genuinely day-old bread, or toast fresh bread briefly to dry it out first.
❌ Mistake 2: Not Draining the Sausage Thoroughly
Why it happens: Rushing through the browning step. What goes wrong: Leftover sausage fat is the single biggest cause of a greasy, soggy finished casserole. The fix: Press browned sausage firmly against paper towels to remove as much fat as possible.
❌ Mistake 3: Skipping the Overnight Soak
Why it happens: Wanting to bake immediately without waiting. What goes wrong: The bread doesn’t have enough time to absorb the egg mixture evenly, leaving a dry center even after a full bake. The fix: Always allow at least a few hours, ideally overnight, before baking.
❌ Mistake 4: Checking Doneness Only at the Edges
Why it happens: Assuming the whole dish cooks at the same rate. What goes wrong: The center of a casserole always cooks slower than the edges, so checking only the outer portion can miss an undercooked middle. The fix: Always test with a knife specifically in the center of the dish.
❌ Mistake 5: Using Too Much Milk
Why it happens: Assuming more liquid produces a creamier result. What goes wrong: Excess milk relative to eggs produces a watery, loose texture that never sets properly. The fix: Stick to the recipe’s tested egg-to-milk ratio.
❌ Mistake 6: Overbaking Past a Clean Knife Test
Why it happens: Baking longer “just to be safe.” What goes wrong: Extended baking past the point of doneness dries out the eggs and produces a rubbery texture. The fix: Pull the casserole as soon as a knife inserted into the center comes out clean.
❌ Mistake 7: Not Distributing Ingredients Evenly
Why it happens: Layering quickly without spreading things out. What goes wrong: Uneven distribution means some slices end up with plenty of sausage and cheese while others are mostly bread and egg. The fix: Spread the sausage, vegetables, and cheese evenly across the entire dish.
❌ Mistake 8: Baking Straight From the Fridge With No Adjustment
Why it happens: Forgetting the dish has been chilling overnight. What goes wrong: A cold dish straight into the oven can need noticeably longer to bake through than the recipe’s stated time. The fix: Let the dish sit out for about 20 minutes before baking, or add a few extra minutes to the bake time.
Frequently Asked Questions
Why is my breakfast casserole soggy?
The most common cause is leftover sausage fat that wasn’t drained thoroughly before layering, since that fat pools at the bottom and makes the finished dish taste greasy and wet. Using fresh bread instead of properly day-old bread is the second major cause, since fresh bread can’t absorb the egg mixture as cleanly and tends to break down into a mushy texture. Draining the sausage thoroughly and using stale bread solves this issue in nearly every batch of this recipe.
Should you make breakfast casserole the night before?
Yes, genuinely — this is one of the few dishes where making it ahead actually produces a better result than baking it immediately. The overnight rest allows the bread to fully absorb the egg mixture, which is what creates the evenly tender, fluffy texture this recipe is known for, rather than a dry center surrounded by soggy edges.
What bread works best for breakfast casserole?
A sturdy sandwich bread or French bread, cut into cubes and left to go slightly stale for a day, works best for this recipe. Very soft, enriched breads like brioche can work in a pinch but tend to break down more easily than a firmer loaf. The key factor is moisture level rather than any specific type, so any bread that’s had a chance to dry out slightly will perform well.
Can you freeze breakfast casserole?
Yes — this recipe freezes reasonably well for up to 2 months, whether baked or unbaked. For the best texture, freezing it unbaked and thawing completely before baking as directed tends to produce a slightly better result than freezing and reheating an already-baked portion.
What do you serve with breakfast casserole?
Fresh fruit salad adds a light, refreshing contrast to the rich, savory casserole. Orange juice or coffee rounds out a standard breakfast pairing, while buttermilk biscuits or hash brown patties work well for a heartier brunch spread. For a lighter option, a simple green salad or sliced avocado both pair nicely alongside a smaller portion.
How long does breakfast casserole last in the fridge?
This recipe lasts up to 5 days in the refrigerator stored in an airtight container. The flavor holds up remarkably well throughout that window, making it a genuinely practical dish for multiple mornings without needing to remake it from scratch.
Why is my breakfast casserole rubbery?
This almost always means the casserole was overbaked past the point where a knife test would have shown it was already done, since extended baking time continues to dry out and firm up the eggs well beyond a tender, fluffy texture. Pulling the dish from the oven as soon as a knife inserted into the center comes out clean, rather than baking further out of caution, solves this issue in nearly every case.
Can you make breakfast casserole without bread?
Yes — frozen hash browns, thawed, work as a direct substitute for the bread in this recipe, producing a heartier, potato-forward version instead. This swap also makes the dish naturally gluten-free, since bread is typically the only gluten-containing ingredient in an otherwise simple combination of eggs, sausage, cheese, and vegetables.
How do you know when breakfast casserole is fully cooked?
The most reliable test is inserting a knife directly into the center of the dish, not just the edges, and confirming it comes out completely clean with no wet egg mixture clinging to it. Visually, the top should look set and slightly puffed rather than glossy and jiggly, and the cheese on top should have melted with light golden spots developing in places.
Why does my breakfast casserole taste bland?
The most common cause is under-seasoning the egg mixture itself, since salt and pepper whisked directly into the eggs distribute far more evenly than seasoning added only on top after baking. Uneven distribution of the sausage and vegetables throughout the dish can also leave some slices tasting flatter than others. Tasting the egg mixture before pouring it over the layers, and distributing the other ingredients evenly, usually catches whatever a bland batch is missing.
You Might Also Like
Best Salmon Recipes

🍽 BREAKFAST CASSEROLE
Ingredients
Equipment
Method
- Brown sausage in a skillet, 6–8 minutes, until no pink remains. Drain thoroughly. Cube bread into 1-inch pieces.
- Spread bread in a greased 9×13 dish. Scatter sausage, bell pepper, onion, and half the cheese over the bread.
- Whisk eggs, milk, salt, pepper, and garlic powder. Pour evenly over the layered ingredients.
- Cover and refrigerate at least 4 hours, ideally overnight.
- Let sit 20 minutes at room temperature. Preheat oven to 350°F. Top with remaining cheese and bake uncovered 45–50 minutes until set and a knife comes out clean. Rest 5 minutes before slicing.




One Comment