

Best Scones (Flaky, Tender, Ready in Just 30 Minutes)
⭐⭐⭐⭐⭐ Rate this recipe

Scones done right are tender and flaky with real visible layers, golden on the outside without ever turning dense, dry, or hard — not the hockey-puck version that’s unfortunately common at both bakeries and home kitchens. This scones recipe uses a specific cold-butter technique plus a minimal-handling approach that keeps the dough from overworking, which is exactly what builds those distinct flaky layers. The entire batch comes together in 30 minutes using just 7 ingredients.
This recipe is built for anyone who’s pulled a batch of dense, dry ones from the oven and wants a version that turns out tender every single time. If you’ve ever ended up with one that spread flat instead of rising, or one that crumbled into dust the moment you bit into it — every one of those problems has a specific fix here. It works for a weekend brunch spread, an afternoon tea gathering, or a quick homemade breakfast that beats anything from a coffee shop case.
Made this already? Scroll down and leave a ⭐⭐⭐⭐⭐ rating below — it helps more than you know.
Once the cold-butter technique in this recipe clicks, the dry, crumbly bakery version stops being acceptable.
⏱ Prep Time: 15 minutes
🕐 Cook Time: 15 minutes
⏳ Total Time: 30 minutes
🍽 Servings: 8 scones
📊 Difficulty: Easy
💰 Estimated Cost: ~$4 total / ~$0.50 per scone
🥐 Main Item: Tender, flaky buttermilk wedges with golden tops
Table of Contents
Why This Scones Recipe Works
- Frozen, grated butter instead of cubed and cut in. Most recipes cut cold butter into small cubes, which still melts unevenly once handled. This recipe grates frozen butter directly into the flour, distributing tiny, even pieces that create distinct flaky layers once baked.
👉 another easy brunch recipe here
- Minimal handling once the liquid is added. Overworking the dough develops gluten, which is exactly what turns the dough tough and dense instead of tender. This recipe mixes just until the dough barely comes together.
- A high oven temperature from the start. Here’s the truth: a hot oven creates a burst of steam from the cold butter almost immediately, which is what pushes the layers apart and creates height.
- Chilling the shaped dough briefly before baking. A short rest in the freezer firms the butter back up after handling, which helps them hold their shape and rise properly instead of spreading flat.
- An egg wash brushed on right before baking. This simple step is what gives the tops their genuine golden-brown color and slight shine, rather than a pale, dull crust.
Understanding the Key Ingredient
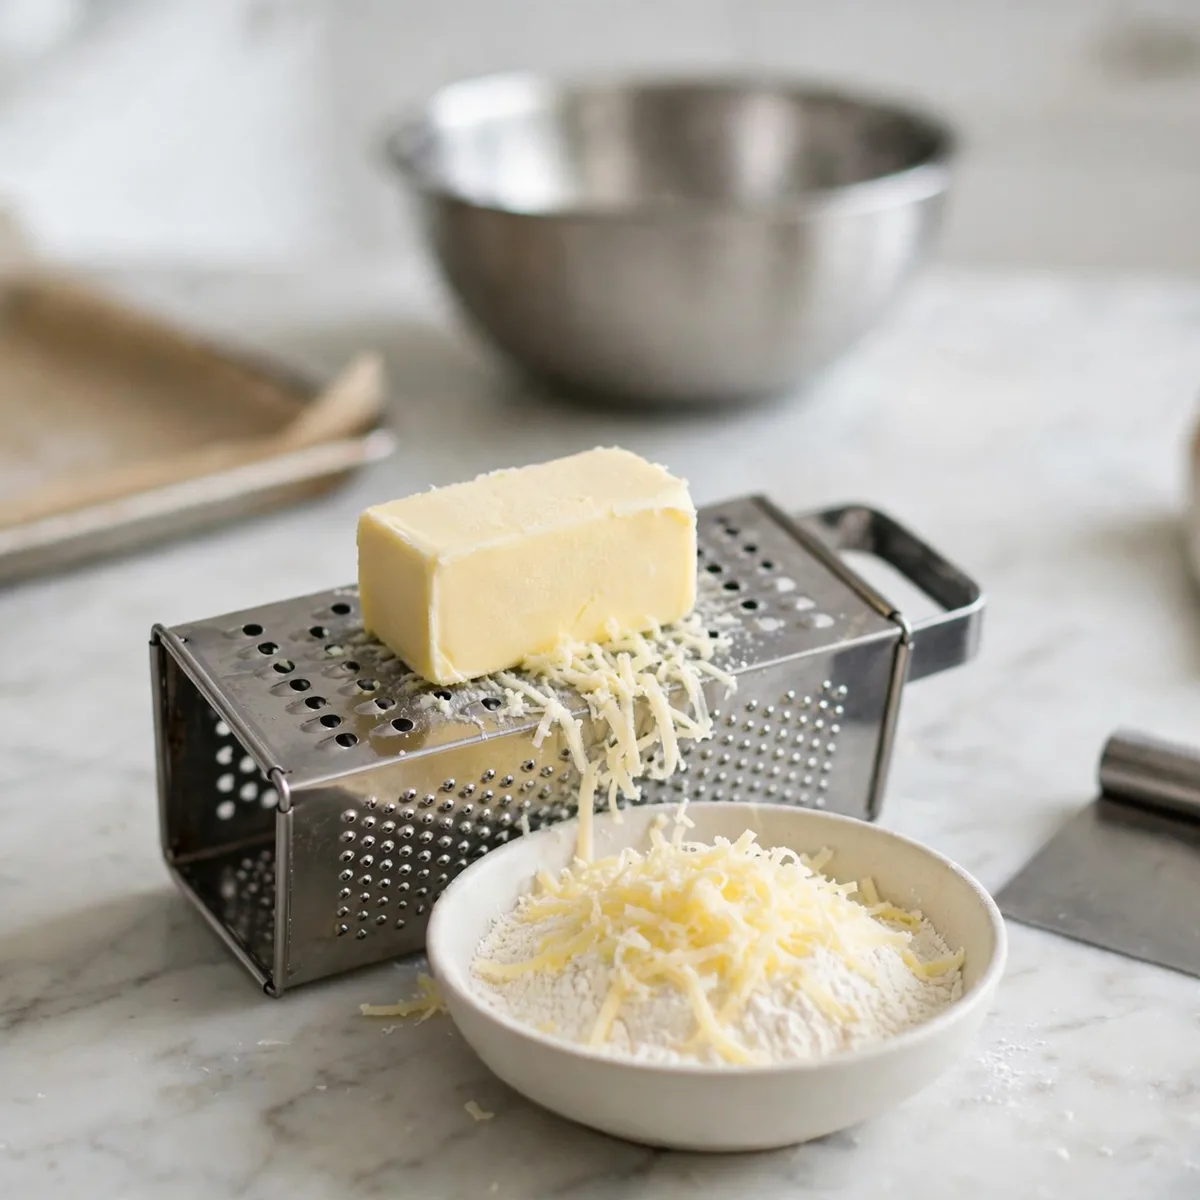
The one step worth never skipping in this recipe, no matter how rushed the morning is, is the key technique in Step 1. Skipping it is the most common reason homemade batches come out dense instead of flaky. Followed properly, the result comes out right every time.
Why Frozen, Grated Butter Is the Right Choice
Frozen butter grated on a box grater distributes into small, even shreds that coat the flour far more uniformly than cubed butter cut in with a pastry cutter, and that even distribution is exactly what produces the consistent, flaky layers this recipe depends on. Because the butter is frozen rather than merely cold, it also resists melting into the dough during the brief mixing time, staying intact as distinct solid pieces until the oven’s heat causes them to release steam. Additionally, grating is faster and less fussy than cutting butter into cubes by hand, which matters since minimizing handling time throughout this recipe is a consistent theme.
Butter Temperature Comparison Guide
| Butter State | Distribution | Texture Result | Best For |
|---|---|---|---|
| Frozen, grated | Even, fine pieces | Flaky, distinct layers | Best overall result |
| Cold, cubed | Uneven, larger pieces | Good but less consistent | Acceptable alternative |
| Softened | Fully blended | Dense, cake-like | Not recommended for scones |
| Melted | Fully incorporated | Flat, dense | Avoid entirely |
How to Choose the Best at the Store
- Buy unsalted butter specifically. This lets you control the exact salt level in the finished batch.
- Freeze the butter well ahead of time. At least 30 minutes in the freezer ensures it’s genuinely hard enough to grate cleanly.
- A stick of butter grates more easily than a block. The shape fits a standard box grater more naturally.
- European-style butter with higher fat content works especially well. The extra fat contributes to a richer, flakier result.
- Avoid butter that’s been sitting out even briefly. It softens faster than expected and grates into a paste instead of clean shreds.
How Much Do You Need?
| Servings | Flour | Frozen Butter |
|---|---|---|
| 4 scones | 1 cup | 4 tbsp |
| 8 scones | 2 cups | 8 tbsp |
| 12 scones | 3 cups | 12 tbsp |
| 16 scones | 4 cups | 16 tbsp |
Double Batch — How to Scale This Scones Recipe
Doubling works cleanly as long as you have a large enough bowl to mix without spilling, since the dry, crumbly texture before the liquid is added can be awkward to manage in a crowded bowl. Grate the butter in two separate batches rather than trying to grate double the amount at once, since a larger piece of frozen butter takes longer to grate evenly. Chilling time before baking stays the same regardless of batch size.
Ingredients You’ll Need

This recipe uses just 7 main ingredients. Here is everything broken down.
Main Ingredients
- All-purpose flour — 2 cups. The base of the dough. Measured carefully to avoid a dense result.
- Unsalted butter — 8 tablespoons (1 stick), frozen. Grated into the flour for distinct, flaky layers.
- Buttermilk — ¾ cup, cold. Adds tang and moisture while helping activate the baking powder.
- Granulated sugar — ¼ cup. A modest amount of sweetness that keeps these versatile for both sweet and savory toppings.
- Baking powder — 1 tablespoon. The primary leavener responsible for rise.
- Salt — ½ teaspoon. Balances the sweetness and enhances the overall flavor.
- Egg — 1 large, for egg wash. Brushed on top for a golden, glossy finish.
Supporting Ingredients
- Heavy cream — 1 tablespoon, for the egg wash. Mixed with the egg for extra shine.
- Coarse sugar — for sprinkling on top (optional).
Optional Additions Table
| Add-In | Amount | Effect |
|---|---|---|
| Dried cranberries | ½ cup | Adds tart bursts throughout |
| Lemon zest | 1 tbsp | Adds bright, citrusy flavor |
| Chocolate chips | ½ cup | Adds sweetness and richness |
| Fresh blueberries | ¾ cup | Adds juicy bursts, best when kept cold |
| Grated cheddar and chives | ½ cup + 2 tbsp | Turns these into a savory version |
Complete Substitutions Reference
| Original | Substitution | Notes |
|---|---|---|
| Buttermilk | Heavy cream + 1 tsp lemon juice | Mimics buttermilk’s tang reasonably well |
| All-purpose flour | Self-rising flour | Omit the baking powder and reduce salt slightly |
| Granulated sugar | Brown sugar | Adds a subtle caramel note |
| Unsalted butter | Salted butter | Reduce the added salt slightly |
| Egg wash | Milk or cream alone | Less golden, still works for a lighter sheen |
What NOT to Add to This Scones Recipe
❌ Softened or melted butter — produces a dense, cake-like texture instead of flaky layers
❌ Overmixing once the buttermilk is added — develops gluten and turns the texture tough
❌ Warm buttermilk straight from the counter — speeds up butter melting before it ever reaches the oven
❌ Skipping the chill before baking — allows the butter to soften too much, causing them to spread flat
❌ Twisting the biscuit cutter while cutting — seals the edges and prevents proper rising
❌ Too much flour added during shaping — toughens the dough and dries out the final texture
Equipment You’ll Need
Choosing the Right Equipment for Scones
| Tool | Purpose | Best For |
|---|---|---|
| Box grater | Grating frozen butter | Even, fine distribution |
| Large mixing bowl | Combining ingredients | Standard mixing |
| Bench scraper | Shaping and cutting dough | Clean cuts without twisting |
| Baking sheet | Baking | Even heat distribution |
Other Tools That Actually Matter
A box grater is genuinely the easiest way to incorporate frozen butter evenly, far faster and more consistent than cutting it into cubes by hand. A bench scraper helps shape and cut the dough cleanly without the twisting motion a round cutter can sometimes cause. Parchment paper on the baking sheet prevents sticking and makes cleanup significantly easier.
No Box Grater? Alternatives That Work for This Scones Recipe
- Pastry cutter — cut cold, cubed butter into the flour using a cutting motion rather than grating
- Two knives — crisscross two knives through the flour and cubed butter to break it into small pieces
- Food processor — pulse cold, cubed butter with the flour in short bursts until the pieces are pea-sized
How to Make Scones — Step by Step
Five steps. Most take under five minutes each.
Step 1 — Grate the Butter and Combine Dry Ingredients (The Key Step)

Whisk together the flour, sugar, baking powder, and salt in a large bowl. Grate the frozen butter directly into the dry mixture using a box grater, tossing occasionally with your fingers to coat the shreds in flour and keep them separate. Most recipes skip this grating technique entirely, but it’s exactly what produces the even distribution of butter this recipe depends on for real flaky layers. Every batch where the butter was cubed instead of grated came out with noticeably less distinct layering.
💡 Pro Tip: Work quickly during this step — the warmth from your hands can start softening the grated butter if you linger too long tossing it through the flour.
Step 2 — Add the Buttermilk
Make a well in the center of the flour mixture and pour in the cold buttermilk. Stir gently with a fork just until the dough starts to come together, with some dry, shaggy bits still visible. Overmixing at this stage develops gluten, which is exactly what toughens the final texture.
💡 Pro Tip: Stop stirring the moment the dough looks mostly combined but still a little shaggy — it will finish coming together naturally during the next step of shaping.
Step 3 — Shape and Cut the Dough

Turn the dough out onto a lightly floured surface and gently press it into a 1-inch-thick disc, patching any cracks with your hands rather than kneading. Cut into 8 wedges using a bench scraper, pressing straight down without twisting.
👉 another easy baking recipe here
As a result, cutting straight down rather than twisting the blade through the dough is what keeps the layered edges open and able to rise properly in the oven.
💡 Pro Tip: If the dough feels too warm or sticky to work with, a quick 5 minutes in the refrigerator firms it back up without any real delay to the process.
Step 4 — Chill and Brush with Egg Wash
Arrange the wedges on a parchment-lined baking sheet, spacing them a couple inches apart. Place in the freezer for 10 minutes while the oven preheats to 425°F. Whisk together the egg and heavy cream, then brush generously over the tops of the chilled scones.
💡 Pro Tip: This brief chill firms the butter back up after handling, which genuinely helps them hold their shape and rise tall instead of spreading flat in the oven.
Step 5 — Bake

Bake at 425°F for 15–17 minutes, until the tops are deeply golden brown and a toothpick inserted into the center comes out clean. Let cool slightly on the baking sheet before transferring to a wire rack.
How to Tell When It’s Done
Every oven runs a little differently, so start checking 1–2 minutes early on the first attempt with this recipe. Once it’s been made once, the exact timing for that specific oven becomes easy to predict.
Primary Doneness Test
They are done when the tops are deeply golden brown, not pale, and a toothpick inserted into the thickest part comes out clean with no wet dough clinging to it.
Doneness Guide
| Indicator | What It Means | What to Do |
|---|---|---|
| Tops pale, toothpick comes out wet | Under-baked | Continue baking 2–3 more minutes |
| Tops deep golden, toothpick clean | Perfectly done | Remove and cool slightly |
| Tops very dark, almost burnt | Over-baked or oven too hot | Reduce temperature slightly next time |
| Scones spread flat, didn’t rise | Butter too warm before baking | Chill dough longer before baking next batch |
| Interior looks dense, no layers visible | Dough was overworked | Handle more gently next time |
| Interior crumbly and dry | Too much flour added during shaping | Use a lighter hand with flour next batch |
Visual Signs It’s Done
- The tops have turned from pale and glossy to a deep, even golden brown
- They have risen noticeably taller than their original shaped height
- A toothpick inserted into the center comes out clean with no raw dough
- The edges show visible, slightly separated flaky layers when broken open
- The aroma has shifted from raw dough to a warm, buttery, toasted smell
It’s Not Right — What to Do Now
- If they turned out dense: Butter was too warm when mixed in, or the dough was overworked — always use frozen, grated butter and handle gently
- If they spread instead of rising: Dough wasn’t chilled before baking, or the oven wasn’t fully preheated — always chill and bake at full temperature
- Interior tastes dry: Too much flour was used, either in the mix or during shaping — measure flour carefully and use a light hand
- Tops stayed pale: Egg wash was skipped or applied too thin — brush generously right before baking
How to Get the Flakiest Layers

Getting genuinely flaky, distinct layers comes down to technique more than any single ingredient. There are three approaches depending on your preference.
Method 1 — Grated Butter Method (Standard Recipe)
Grate frozen butter directly into the dry ingredients, then handle the dough minimally once liquid is added. This is the method used throughout this recipe and produces the most consistently flaky, even layers.
Method 2 — Laminated Fold Method (Extra Flaky)
After shaping the dough into a disc, fold it in thirds like a letter, then press back into a disc and repeat once more before cutting into wedges. This additional folding step creates even more distinct layers, similar to a laminated pastry technique, though it takes a few extra minutes.
Method 3 — Pastry Cutter Method (No Grater Needed)
Cut cold, cubed butter into the dry ingredients using a pastry cutter until the pieces are roughly pea-sized. This produces a slightly less uniform distribution than grating, but still achieves a good flaky result without needing a box grater.
Troubleshooting Quick Reference
| Problem | Cause | Fix |
|---|---|---|
| No visible layers | Butter was too warm or dough overworked | Use frozen butter and handle gently |
| Dense, cake-like texture | Butter was softened instead of frozen | Always start with properly frozen butter |
| Layers collapsed during baking | Oven wasn’t hot enough | Preheat fully to 425°F before baking |
| Dry, crumbly texture | Too much flour added during shaping | Use a light hand and minimal extra flour |
What to Serve With Them
Classic Pairings That Always Work
- Clotted cream and jam — the traditional English tea pairing that highlights the texture
- Softened butter — a simple, classic addition that melts into the warm scone
- Hot tea — the quintessential pairing for an afternoon tea spread
- Fresh berries on the side — adds a bright, fresh contrast to the buttery flavor
- Lemon curd — a tangy spread that pairs especially well with a plain one
Comfort Food Pairings
- A full English breakfast spread — served alongside eggs, bacon, and the usual morning staples
- Coffee with cream — a simple, satisfying pairing for a weekend morning
- Whipped cream and fresh fruit — turns a simple scone into a light dessert
- Honey butter — a sweet, rich spread that complements the flaky texture
Lighter Options
- A thin scraping of jam instead of clotted cream — keeps the overall richness in check
- Fresh fruit salad on the side — adds lightness alongside the richer pastry
- Herbal tea instead of a heavier coffee drink — a lighter beverage pairing
6 Ways to Use Leftover Scones
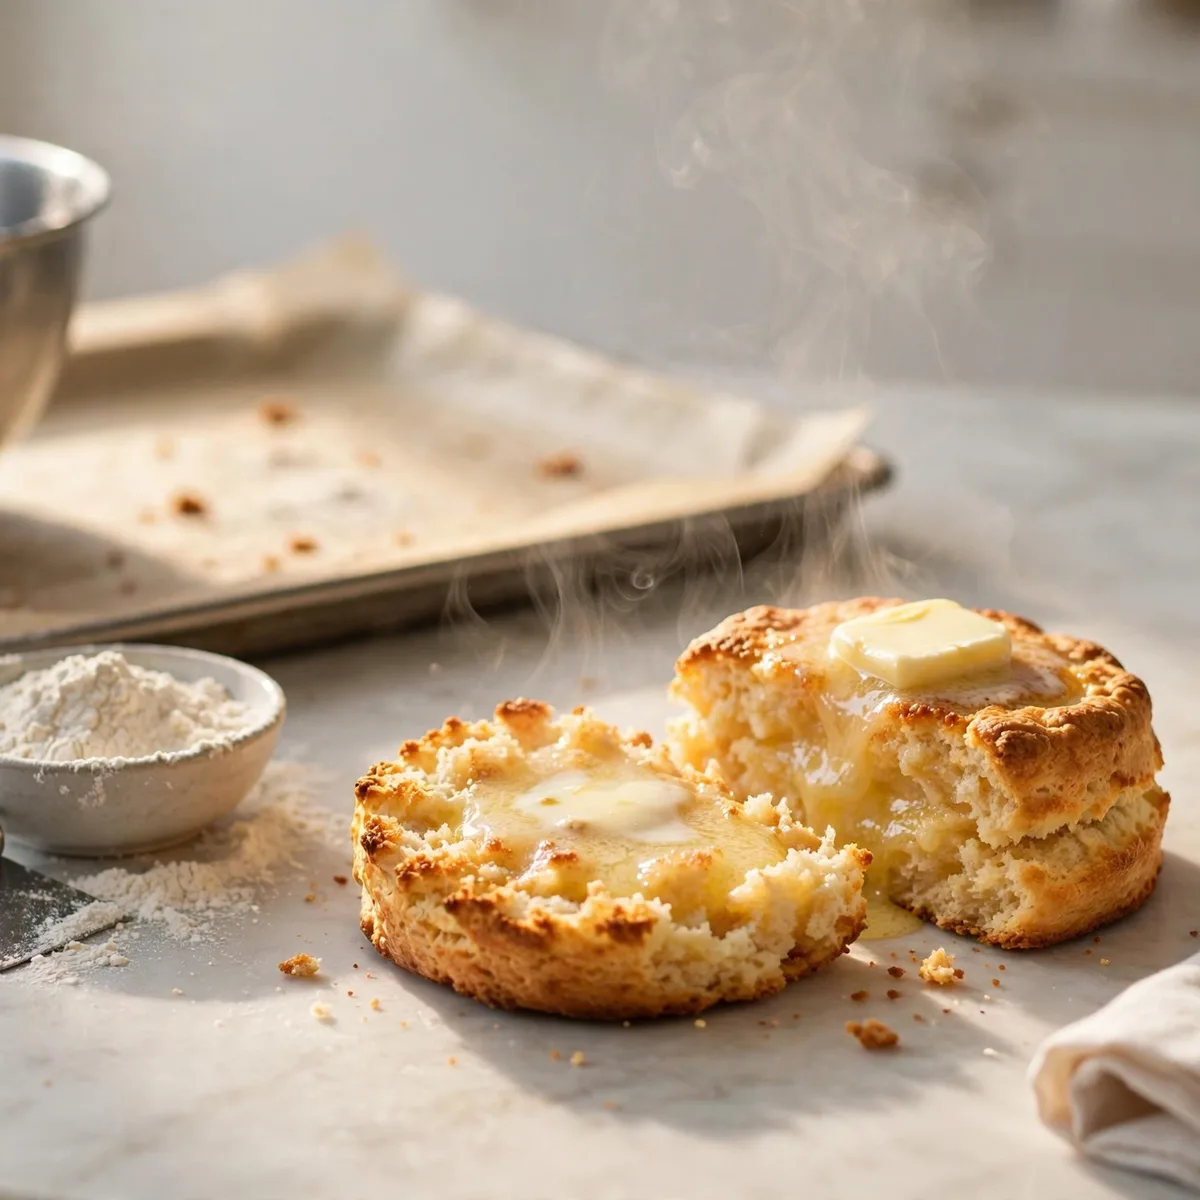
Leftovers can be used in several completely different ways. Here are 6 ideas.
Toasted Scone with Butter
What you need: A leftover wedge, butter.
How to assemble: Slice it in half and toast lightly in a dry skillet or toaster oven, then spread with butter while warm.
One tip: Toasting a slightly stale one genuinely revives its texture better than simply reheating it whole.
Scone Bread Pudding
What you need: 4 leftover wedges, torn into pieces, 2 eggs, 1 cup milk.
How to assemble: Whisk eggs and milk together, pour over torn scone pieces in a baking dish, and bake at 350°F for 25–30 minutes until set.
One tip: This works especially well with slightly stale ones, since they absorb the custard mixture more evenly than fresh ones.
Scone Trifle
What you need: Leftovers, crumbled, whipped cream, fresh berries.
👉 try another easy dessert recipe here
How to assemble: Layer crumbled leftovers with whipped cream and fresh berries in a glass for a quick trifle-style dessert.
One tip: This is one of the fastest ways to use up a few without any extra baking.
Scone Crumble Topping
What you need: Leftovers, crumbled.
How to assemble: Crumble leftovers over a dish of baked fruit before a final short bake to crisp the topping slightly.
One tip: This works especially well over warm stewed apples or berries for a quick, improvised crumble dessert.
Savory Scone Croutons
What you need: Leftovers, cubed, olive oil.
How to assemble: Toss cubed leftovers in a little olive oil and bake at 375°F for 10 minutes until crisp, then scatter over a salad.
One tip: This works best with a plain or savory version rather than a sweet one.
Scone French Toast
What you need: A leftover wedge, sliced, 1 egg, splash of milk.
How to assemble: Dip thick slices in a beaten egg and milk mixture, then pan-fry in butter until golden on both sides.
One tip: A slightly stale one holds up better to the egg mixture than a very fresh, soft one.
Storage, Freezing and Reheating Guide
Room Temperature Storage (Up to 2 Days)
This recipe stores at room temperature for up to 2 days in an airtight container. The texture is genuinely best within the first day, since they naturally firm up and dry out a bit the longer they sit.
Can You Make This Ahead of Time?
Yes — the shaped, unbaked dough can be prepared up to a day ahead and refrigerated, or frozen for longer storage, then baked straight from cold with a few extra minutes added to the bake time. This is actually the best way to serve genuinely fresh ones for a morning gathering without needing to be up at dawn.
Freezer Storage (Up to 3 Months)
This recipe freezes exceptionally well, both baked and unbaked. Freeze shaped, unbaked wedges on a baking sheet until solid, then transfer to a freezer bag for up to 3 months, baking straight from frozen with a few extra minutes added. Already-baked ones also freeze well for the same duration.
This Recipe Works as a Make-Ahead Breakfast Staple
Shape a full batch of dough and freeze the unbaked wedges individually. This means fresh, warm ones are only ever 15–20 minutes away, straight from the freezer to the oven, whenever the craving hits.
👉 see more make-ahead breakfast ideas here
How to Reheat Without Ruining It
| Method | Setting | Time | Notes |
|---|---|---|---|
| Oven | 300°F | 8–10 min | Best method; restores some crispness to the exterior |
| Toaster oven | Medium | 3–4 min | Good for a single scone |
| Microwave | 50% power | 20–30 sec | Fastest but can make the texture slightly tougher |
Weekly Prep Strategy
Freeze a full batch of unbaked, shaped wedges at the start of the week. This recipe becomes a genuinely fast breakfast option, since baking straight from frozen takes only a few extra minutes compared to fresh dough.
Recipe Variations Worth Trying
Same technique. Completely different flavor profiles. Master this base recipe first — then try one of these.
Most Popular — Lemon Blueberry Scones
Add 1 tablespoon of lemon zest to the dry ingredients and fold in ¾ cup of fresh blueberries right before shaping. The bright citrus and juicy berries make this one of the most requested variations of this recipe for a weekend brunch spread.
International — British Cream Tea Scones
Reduce the sugar slightly to 2 tablespoons and shape the dough into a traditional round, following the classic British approach meant specifically for pairing with clotted cream and jam. This version leans less sweet than the standard recipe, letting the accompaniments carry more of the flavor.
Savory — Cheddar and Chive Scones
Omit the sugar entirely and fold in ½ cup of shredded sharp cheddar and 2 tablespoons of chopped chives along with the buttermilk. Therefore, you get a savory version of this recipe that pairs beautifully with soup or as a side for a savory brunch spread.
Quick Shortcut — Drop Scone Version
Skip shaping the dough into a disc and cutting wedges, instead dropping rounded scoops of dough directly onto the baking sheet with a large spoon. This cuts the shaping time down significantly, though the batch will look more rustic and less uniform than the wedge-shaped version.
Fresh and Elevated — Brown Butter Scones
Brown 4 tablespoons of the butter first, let it solidify again in the refrigerator until firm, then grate it the same way as the standard recipe. The browned butter adds a deep, nutty complexity that elevates this everyday pastry into something more sophisticated.
Nutrition Information
Per Serving Breakdown (Based on 8 Scones)
| Nutrient | Amount | % Daily Value |
|---|---|---|
| Calories | ~245 | — |
| Total Fat | 12g | 15% |
| Saturated Fat | 7g | 35% |
| Cholesterol | 50mg | 17% |
| Sodium | 310mg | 13% |
| Total Carbohydrates | 30g | 11% |
| Dietary Fiber | 1g | 4% |
| Total Sugars | 7g | — |
| Protein | 4g | 8% |
| Calcium | 10% DV | — |
According to USDA FoodData Central, buttermilk provides a meaningful source of calcium and protein compared to regular milk — meaning this recipe contributes a bit of nutritional value alongside its tender, buttery flavor.
Dietary Compatibility
| Diet | Compatible | Notes |
|---|---|---|
| Gluten-Free | ❌ | Use a 1:1 gluten-free flour blend to adapt |
| Dairy-Free | ❌ | Replace butter and buttermilk with dairy-free alternatives |
| Paleo | ❌ | Flour, sugar, and dairy all excluded |
| Keto | ❌ | High in carbohydrates from the flour and sugar |
| Vegetarian | ✅ | No meat in this recipe |
| Vegan | ❌ | Requires dairy-free butter, buttermilk, and an egg wash substitute |
To reduce sugar in this recipe, cut the granulated sugar to 2 tablespoons and rely more on a sweet topping like jam or honey butter to add sweetness at serving time instead.
8 Mistakes That Ruin Scones
Every mistake with this recipe is fixable. Know them before you start — not after.
❌ Mistake 1: Using Softened Instead of Frozen Butter
Why it happens: Forgetting to plan ahead for the butter to freeze. What goes wrong: Softened butter blends fully into the flour instead of staying in distinct pieces, producing a dense, cake-like texture. The fix: Always freeze the butter for at least 30 minutes before grating.
❌ Mistake 2: Overmixing the Dough
Why it happens: Wanting to make sure everything is fully combined. What goes wrong: Excessive mixing develops gluten, which toughens the final texture instead of keeping it tender. The fix: Stir just until the dough comes together, leaving some shaggy bits visible.
❌ Mistake 3: Twisting the Cutter
Why it happens: Habit from cutting other dough shapes. What goes wrong: Twisting seals the cut edges, which prevents the layers from separating and rising properly in the oven. The fix: Press straight down through the dough without any twisting motion.
❌ Mistake 4: Skipping the Chill Before Baking
Why it happens: Being eager to get the scones into the oven. What goes wrong: Butter that’s softened from handling causes the scones to spread flat instead of rising tall. The fix: Always chill the shaped dough for at least 10 minutes before baking.
❌ Mistake 5: Using an Oven That Isn’t Fully Preheated
Why it happens: Starting the bake before the oven reaches temperature. What goes wrong: A cooler oven doesn’t create the quick burst of steam needed to push the layers apart properly. The fix: Always wait until the oven has fully preheated to 425°F before baking.
❌ Mistake 6: Adding Too Much Extra Flour While Shaping
Why it happens: The dough feels sticky, so more flour gets added. What goes wrong: Excess flour dries out the final texture and can make the scones taste bland. The fix: Use only a light dusting on the work surface, not extra flour mixed into the dough itself.
❌ Mistake 7: Skipping the Egg Wash
Why it happens: Assuming it’s an optional, purely decorative step. What goes wrong: Without it, the tops stay pale and lack the characteristic golden color and slight shine. The fix: Always brush with an egg wash right before baking.
❌ Mistake 8: Opening the Oven Door Repeatedly
Why it happens: Checking on progress out of curiosity. What goes wrong: Each time the door opens, heat escapes, which can slow the rise and affect the final texture. The fix: Resist checking until close to the end of the bake time.
Frequently Asked Questions
Why are my scones dense and hard instead of flaky?
The most common cause is using butter that’s too warm, whether softened or simply not frozen enough before grating, since warm butter blends into the flour instead of staying in distinct pieces. Overmixing the dough once the buttermilk is added is the second major cause, since this develops gluten and toughens the texture. Using properly frozen butter and handling the dough minimally solves this issue in nearly every batch of this recipe.
Should scone dough be cold or room temperature before baking?
Cold, without question. This recipe specifically calls for a brief chill in the freezer after shaping, since cold butter is what creates the burst of steam in the hot oven that pushes the layers apart and helps them rise tall instead of spreading flat. Room-temperature dough loses this crucial advantage almost entirely.
What is the difference between scones and biscuits?
They typically contain a bit more sugar and often an egg, giving them a slightly sweeter flavor and richer texture than a classic American biscuit, which tends to be more purely savory and flaky. They are also commonly cut into wedges from a single round of dough, while biscuits are more often cut into individual rounds. That said, the techniques for achieving a tender, flaky texture — cold butter, minimal handling — are nearly identical between the two.
Can you make scone dough ahead of time?
Yes — the shaped, unbaked wedges can be refrigerated for up to a day or frozen for much longer, then baked straight from cold with a few extra minutes added to the bake time. This is actually the preferred method for serving genuinely fresh, warm ones for a morning gathering without needing to prepare everything at the last minute.
What do you serve with scones?
Clotted cream and jam are the traditional English tea pairing that highlights the texture best. Softened butter is a simpler, equally classic addition. For a lighter spread, fresh berries or a light scraping of jam work well, and hot tea remains the quintessential beverage pairing for an afternoon tea gathering.
Can you freeze scones?
Yes — this recipe freezes exceptionally well both baked and unbaked. For the best results, freeze shaped, unbaked wedges and bake them straight from frozen with a few extra minutes added, which produces a fresher result than freezing already-baked ones and reheating them.
How long do scones last at room temperature?
This recipe stores at room temperature for up to 2 days in an airtight container, though the texture is genuinely best within the first day. They naturally begin to dry out and firm up the longer they sit, so eating them fresh or reheating briefly in the oven makes a noticeable difference after the first day.
Why are my scones spreading flat instead of rising?
This almost always means the butter had softened too much by the time they went into the oven, either because the dough wasn’t chilled before baking or because it sat out too long during shaping. Chilling the shaped wedges for at least 10 minutes in the freezer and working quickly during the shaping step both help keep the butter cold enough to create proper rise once it hits the hot oven.
Can you make scones without buttermilk?
Yes — combine 1 tablespoon of lemon juice with ¾ cup of heavy cream or whole milk and let it sit for 5 minutes to approximate buttermilk’s tang and acidity. This substitute works nearly identically in this recipe, since the goal is both the slight acidity and the extra richness that regular milk alone doesn’t provide.
Why do my scones taste bland?
The most common cause is skipping the salt or using too little relative to the amount of flour, which leaves the overall flavor tasting flat even with enough sugar. Stale or low-quality butter can also mute the flavor noticeably, since butter contributes much of the base richness in this recipe. Using fresh butter and not skipping the salt usually resolves a bland batch.
You Might Also Like
Best Orange Chicken Recipe

🍽 SCONES
Ingredients
Equipment
Method
- Whisk flour, sugar, baking powder, and salt. Grate frozen butter into the mixture, tossing to coat.
- Make a well and pour in buttermilk. Stir gently just until combined, with some shaggy bits remaining.
- Press dough into a 1-inch-thick disc on a floured surface. Cut into 8 wedges, pressing straight down without twisting.
- Arrange on a parchment-lined baking sheet. Freeze 10 minutes while oven preheats to 425°F. Brush with egg wash.
- Bake 15–17 minutes until deeply golden and a toothpick comes out clean. Cool slightly before serving.

2 Comments